Are you stuck fixing the “failed to connect to server” message on Studio One?
I’m honestly not surprised! You wouldn’t believe how many people experience this issue daily and are left scratching their heads.
I know this can be really annoying. After all, few things are as time-sensitive as inspiration, so having your DAW malfunction is the last thing you want in these situations.
But don’t worry, you’ve come to the right place for answers.
Below, you’ll find a list of several steps you can follow to get rid of this problem. I’m sure one of them will do the trick.
The 6 steps you need to take to fix the “failed to connect to server” message on Studio One are:
Keep reading to return your studio to its former glory!
Let’s start off by checking your connection.
Granted, Internet service drops have decreased dramatically over the last decade, but they still happen now and then.
Whenever you launch Studio One, the program connects to the Internet to verify the status of your license and check for any available updates. This process is normally done effortlessly; however, sometimes a bad connection can get in the way.
When this happens the DAW is unable to communicate with PreSonus’ servers, thus prompting you with the annoying message.
The chances of this being your problem are really high if everything worked normally and then suddenly, it didn’t. You’d be surprised at how many people have this happen to them, only to realize a couple of hours later that their internet is to blame.
Solution: I’d advise giving your provider a call and asking if they’re having coverage issues in your area. If they tell you everything’s fine on their end, you could try resetting your modem and see if that works.
If you’ve never done this before, don’t worry! It’s really simple:
Sometimes all you need to do to stop this annoying message from appearing is close and relaunch Studio One.
Why should that work? Because it acts as a forced restart.
You see, whenever we use our favorite programs, there are thousands of background processes running simultaneously. Normally, they work as you’d expect and provide you with the functions you value on them.
However, sometimes a corrupted file or bug can start acting up and affect several of the DAW’s features, such as its ability to connect to its servers.
By closing and relaunching Studio One, you’ll get rid of anything that might be causing trouble, restarting important configurations and processes from scratch.
And the best part is that this fix works for about 90% of technical difficulties out there, so don’t be afraid to try it out.
Just make sure you save any masterpieces you’re working on first!
If closing and relaunching the program did not work, we might need to start being a little more aggressive.
Sometimes corrupted files or bugs are too stubborn, and the only way to get rid of them is by completely uninstalling Studio One from your computer.
A lot of people put this off out of fear of losing their song projects or favorite plugins, but let me assure you that this won’t happen. Worst case scenario, you’ll have to wait while your plugins are rescanned after reinstalling the DAW, but that’s about it.
Solution: Here’s how you can uninstall Studio One on your PC.
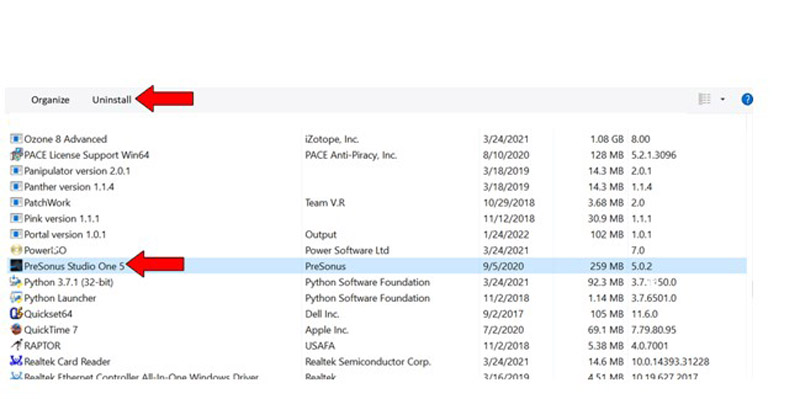
Once the uninstallation process has been completed, follow the same steps you took the first time you got Studio One to reinstall it.
If nothing has worked so far, you might want to try restarting your PC.
It’s clear that there are no more corrupted files or bugs left on Studio One after all we’ve done, so the next logical thing to do is address what might be wrong with your operating system.
Sometimes a network adapter on your computer can fail to start, thus making it very difficult to establish a strong, steady connection to your home network. A couple of years ago, I would have recommended trying the Windows problem solver, but let’s face it, that tool has never fixed anything.
And besides, most operating systems are configured to restart all network adapters after shutdown, so there’s a good chance that, by the time you turn your system back on, everything will be as good as new.
There’s no denying the antivirus software is really useful.
Most providers these days offer a wide range of options for their users, and the ability to customize permissions grows by the day. I’ve lost count of how many times my antivirus has saved me from phishing, ransomware, and computer-killing viruses.
That being said, as wonderful as antiviruses are, they’re still far from perfect.
Sometimes, the reason why you’re having trouble fixing the “failed to connect to server” message on Studio One is that your antivirus is preventing the DAW from sending or receiving information through your network.
If this doesn’t ring any bells, chances are you didn’t set this up yourself and likely have no idea how to fix it.
But don’t worry, that’s what I’m here for! Read below to see how to lift restrictions on Studio One.
Solution: There are hundreds of different antivirus products out there, so if I were to guide you through the process of lifting restrictions on each one, we’d be here all day.
And while I don’t mind it, I’m sure you’ve got enough on your plate already.
Instead, I’d advise going to Google and searching for “How to create rule exceptions for a program on <Your Antivirus’ Name Goes Here>”. You should be able to find several resources with detailed instructions for your specific case.
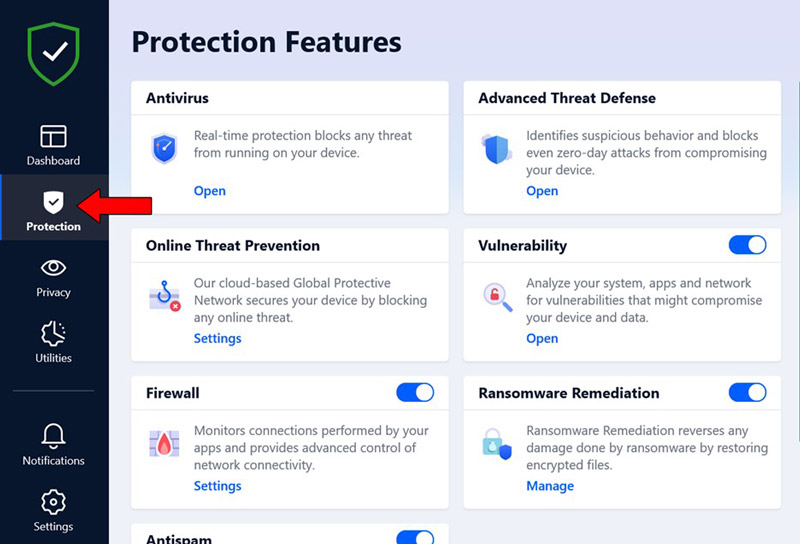
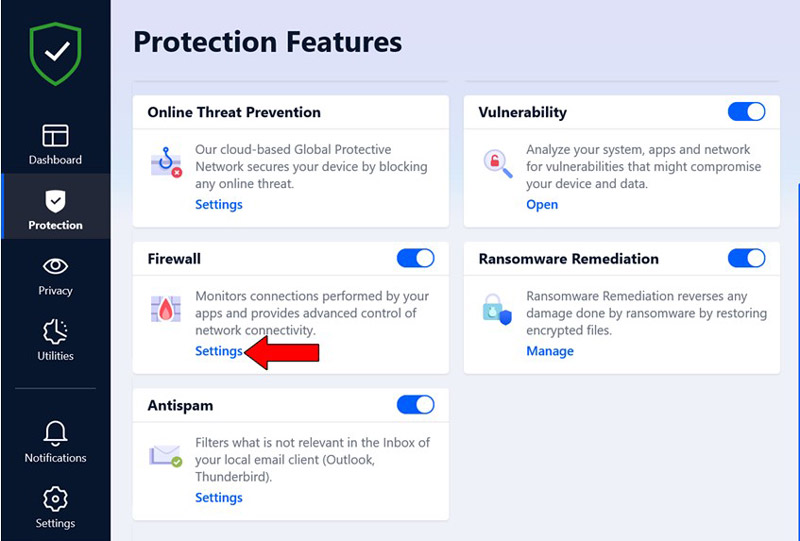
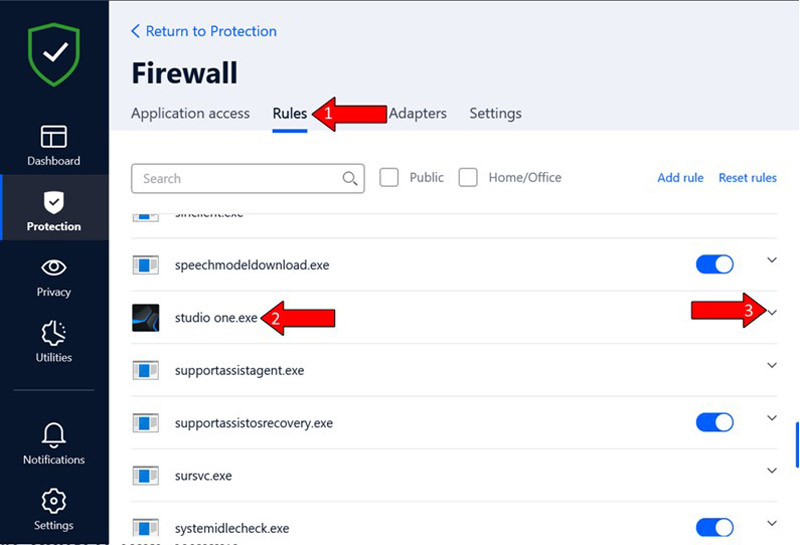
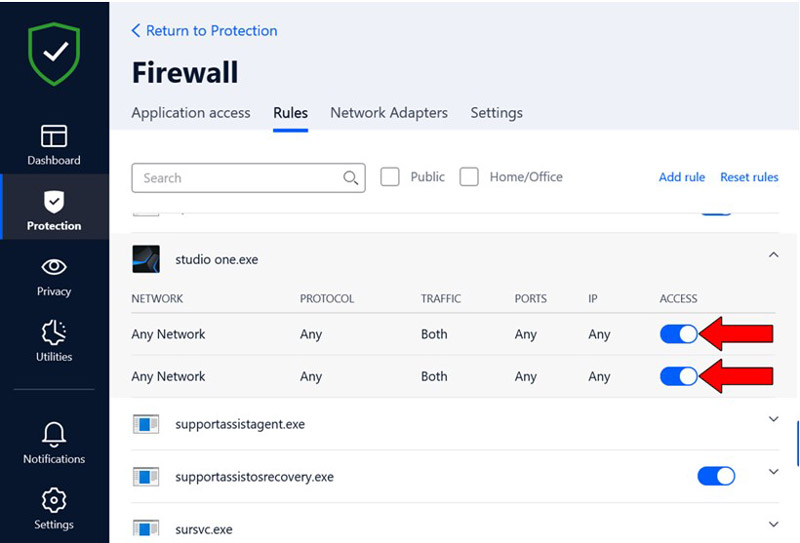
That being said, since I don’t want you to leave this section empty-handed, here’s how to do it on Bitdefender:
Assuming creating an exception didn’t work, the last thing I’d like you to try is disabling your antivirus.
This should only be done as a last resort as it will temporarily leave your PC vulnerable to viruses, but if done right, there’s nothing to worry about.
You wouldn’t believe how many times I’ve had my antivirus delete a file I needed or block a program it didn’t have to out of precaution. It’s one of those things you have to give up in exchange for staying safe.
By temporarily disabling your protection software, you’ll be eliminating any chances of Studio One being blocked from connecting to the internet.
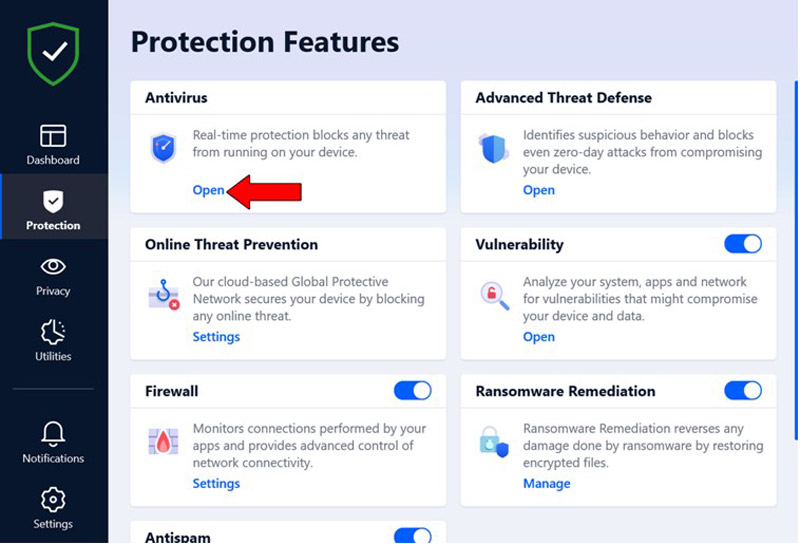
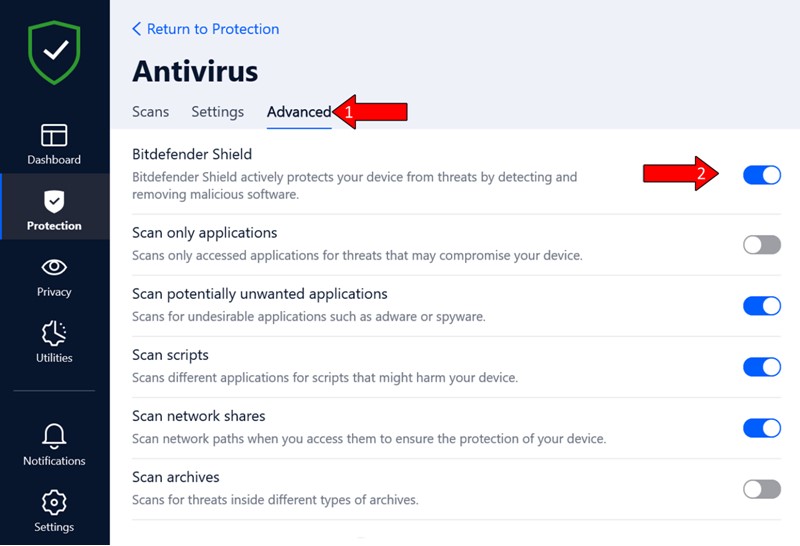
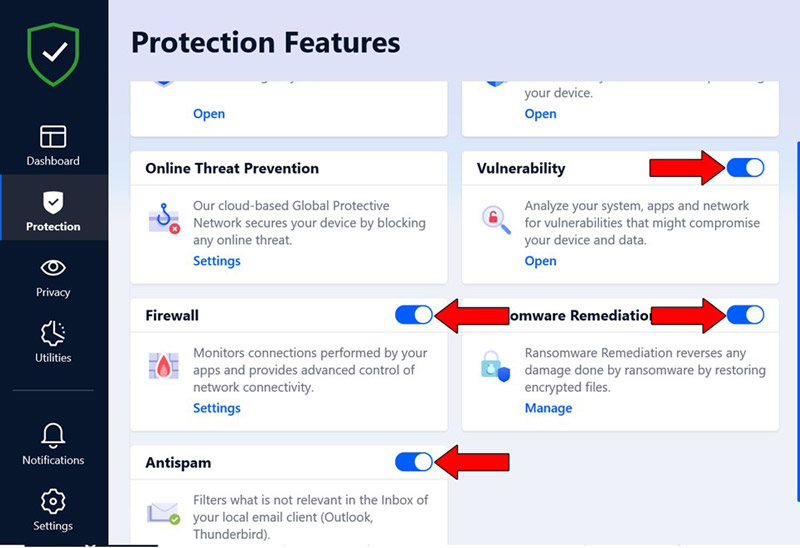
Solution: Here’s how I do it on Bitdefender to paint you a picture:
If this works, you might have to repeat this process every time you launch the DAW. I know it’s annoying, but hey! It’s better than getting the irritating message.
Make sure to enable your antivirus right after successfully launching Studio One to guarantee your PC will be protected.
Fixing the “failed to connect to server” message on Studio One can be a difficult task. Especially if you have no idea what’s causing it or where to start looking for a solution.
Luckily, as I hope you’ve learned in this piece, addressing most of the causes behind this issue is fairly simple and rarely ever time-consuming.
In most cases, simple actions, like double-checking that your internet connection is not having trouble, and creating a special network rule for Studio One on your antivirus, should do the trick.
Thank you for sticking with me all the way to the end. If you found this article helpful, you’ll be glad to know that we upload new content every week. Make sure to check out all our other incredible resources below to become a Tech Detective yourself!
Best of luck to you.
Detective Anderson is a grizzled veteran of policing the internet’s cyber-streets. After decades of experience busting illegal floppy disk rings and underground dial-up connections, Anderson has now been placed in charge of the more modern Tech Detective team.