Are you desperately trying to figure out why you can’t verify your Waze account email?
That has got to be super annoying! Having this issue is not fun at all, and it can quickly turn an everyday process, into a tedious waste of time.
There are many reasons why this might be happening, and believe it or not, some of them are not even the platform’s fault. However, even when that’s the case, it’s only natural that you’re looking for answers.
Below, I’ve listed 6 simple fixes you can try to forget all about this problem permanently, so you can focus on driving safely, and nothing else.
When you can’t verify your Waze account email, you can always try logging in with an alternative method, relaunching/updating the app, or clearing the cache. If that doesn’t work, you can also try double-checking your email and checking your Spam folder.
Read on to become an official Waze member!
Let’s start off by using a different login method.
There are two possible scenarios you might find yourself in when you can’t verify your Waze account email. The first one is when you have not even had a chance to view Waze’s email, and the second is when you already clicked on the verification link, but the platform keeps saying you haven’t.
If your case is the latter, then trying to log in with an alternative method might make your life a lot easier.
Normally, when you’re about to log into Waze for the first time, you’re given a series of verification options. One of them is via email, but you can also enter your newly created account by using your Facebook or Google credentials.
If you’ve already received Waze’s verification email and clicked on the link provided in it but are still having trouble, I’d recommend using either one of the alternative methods mentioned above. Chances are, you’ll be able to log in and leave this inconvenience in the past.
Next, let’s try something extremely simple, yet super effective – relaunching the platform. This fix might not sound much like one, but trust me, it’s one of the easiest ways to solve everyday Tech issues.
How so? Great question!
The best way to answer it is by noting that, in order to work as expected, our favorite apps and devices need thousands of background processes to be running at the same time. More often than not, this happens without us even noticing. But occasionally, a bug or a corrupted file can make these processes crash.
If you’ve already clicked on the verification link provided by Waze, but the platform says you still need to verify your account, chances are closing and relaunching it will do the trick. This could also fix other issues, such as constant crashes on iPhone and Android, as the process allows both Waze and your devices to reload important resources and patch up any corrupted files.
Yet another possible reason why you can’t verify your Waze account is that you’re using an outdated version of the platform. I know keeping an eye on this doesn’t sound like the most exciting thing in the world, but it’s the easiest way to ensure everything runs like clockwork.
It’s in your best interest to install updates as soon as they become available, as they’re typically packed with new and improved features, as well as patches for annoying bugs. Moreover, although not set in stone, it’s a common practice in the Tech industry to stop supporting older versions of an app when more recent ones are released to the public.
And while the automatic updating feature on your devices should normally take care of this whole process, sometimes corrupted files or bugs can keep you working with outdated software.
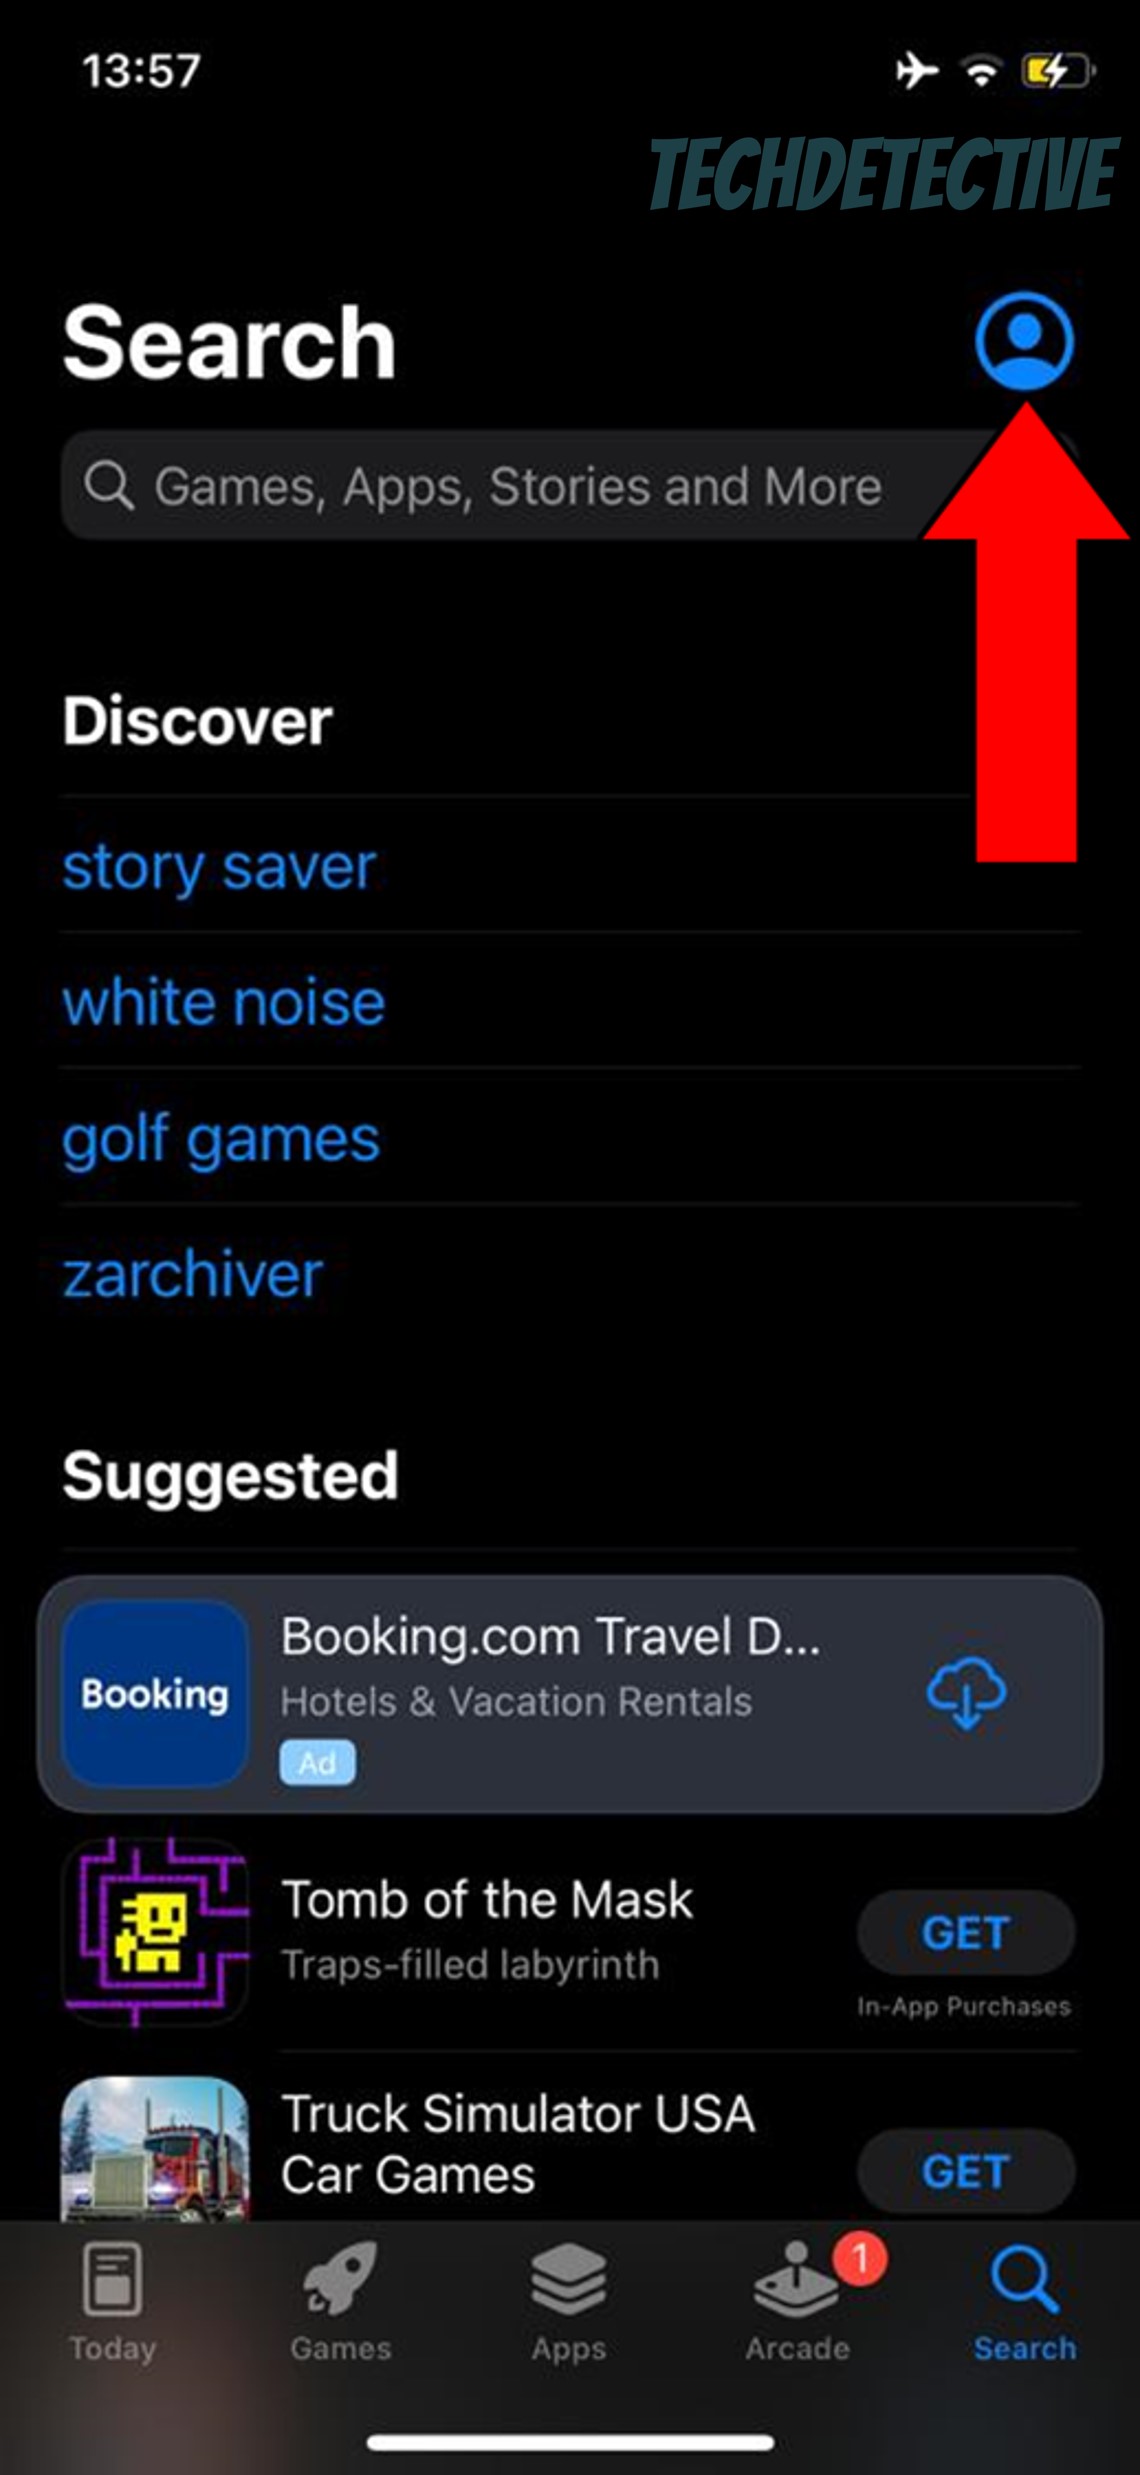
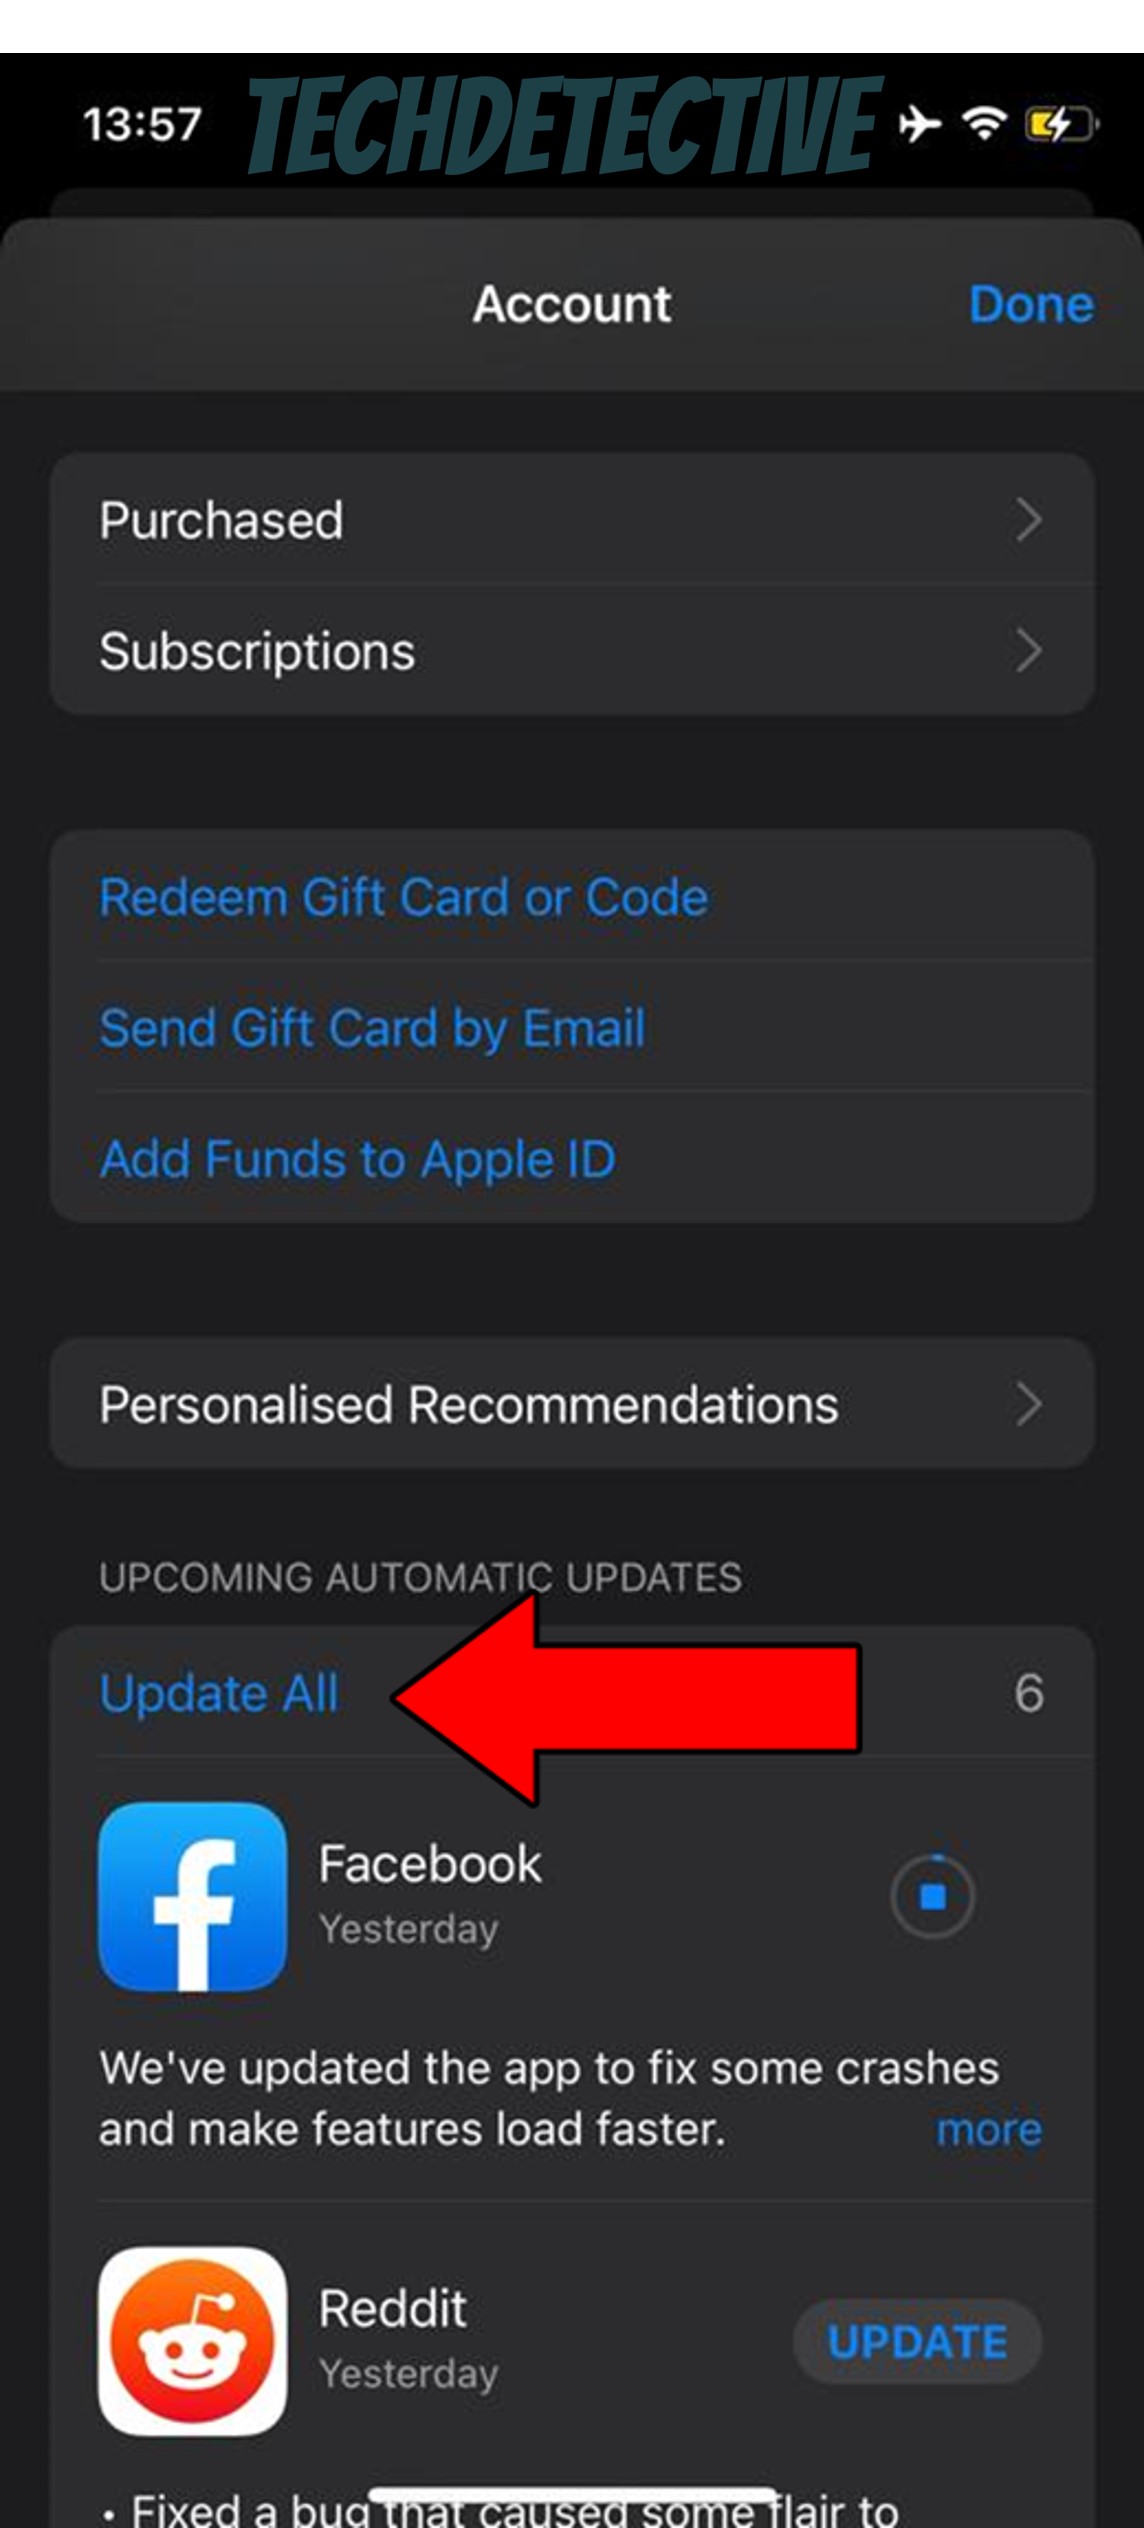
Solution: If you suspect this to be the case, here’s how you can look for updates manually and install them if any are found:
For iOS:
For Android:
Moving on, let’s take a look at Waze’s cache to make sure it’s not to blame for all this trouble.
If you’re already familiar with the concept, feel free to move on to the solution, but if not, please read on, as you’re about to acquire some useful information.
Boiling it down to the basics, an app’s cache is like a treasure chest. In it, you can find user preferences, login credentials, and in the case of GPS navigation platforms like this one, routes and maps. Keeping this data handy lets your apps load much quicker when launched, which is a great way to save time and be more efficient daily.
However, sometimes a corrupted file can get accidentally stored in your cache, turning everything upside down. In fact, a situation like that could explain why you can’t verify your Waze account email, as well as many other problems you might be having.
Solution: If you suspect a corrupted cache to be to blame, your best bet will be to clear it. Here are some easy steps to do it:
For Android:
Clearing the cache on iOS devices is a little more complex, so you’re better off uninstalling and reinstalling the app. This should refresh many important resources, solving most, if not all your issues.
I know, I know, this sounds super obvious and like something you’d never miss. But let’s face it, life gets more complicated by the day, and after long hours at work or school, our eyes get tired, which makes for the perfect environment for a typing mistake to happen.
If you can’t verify your Waze account email and have been waiting for ages, it’s not too crazy to entertain this possibility. There are, of course, other factors at play that we’ll look into in the next section, but for now, let’s focus on this one.
Solution:
Once you have successfully done this, you should receive Waze’s verification link soon. If you want to spot it quickly, you can search for “[email protected]”. This is the email address the service typically uses to send these, so unless it went somewhere else, that search criteria should locate it immediately.
Last, but definitely not least, let’s try checking your Spam folder.
A couple of decades ago, having one of these was not necessary, as marketing efforts via email were scarce, and online scammers were not even a thing.
However, these days your Spam folder removes a lot of junk from your inbox. From potentially unwanted miracle product advertisements, to the famous loan request from a Nigerian prince (if you didn’t get that reference, bless your youth!).
And while these folders keep getting smarter by the day, they can still make mistakes and mislabel legitimate email senders as dangerous.
If you’re sure you typed in the right email when creating your Waze account, and it’s been a couple of hours or days since you registered, you’ll want to check your Spam folder, as the verification link was likely sent there.
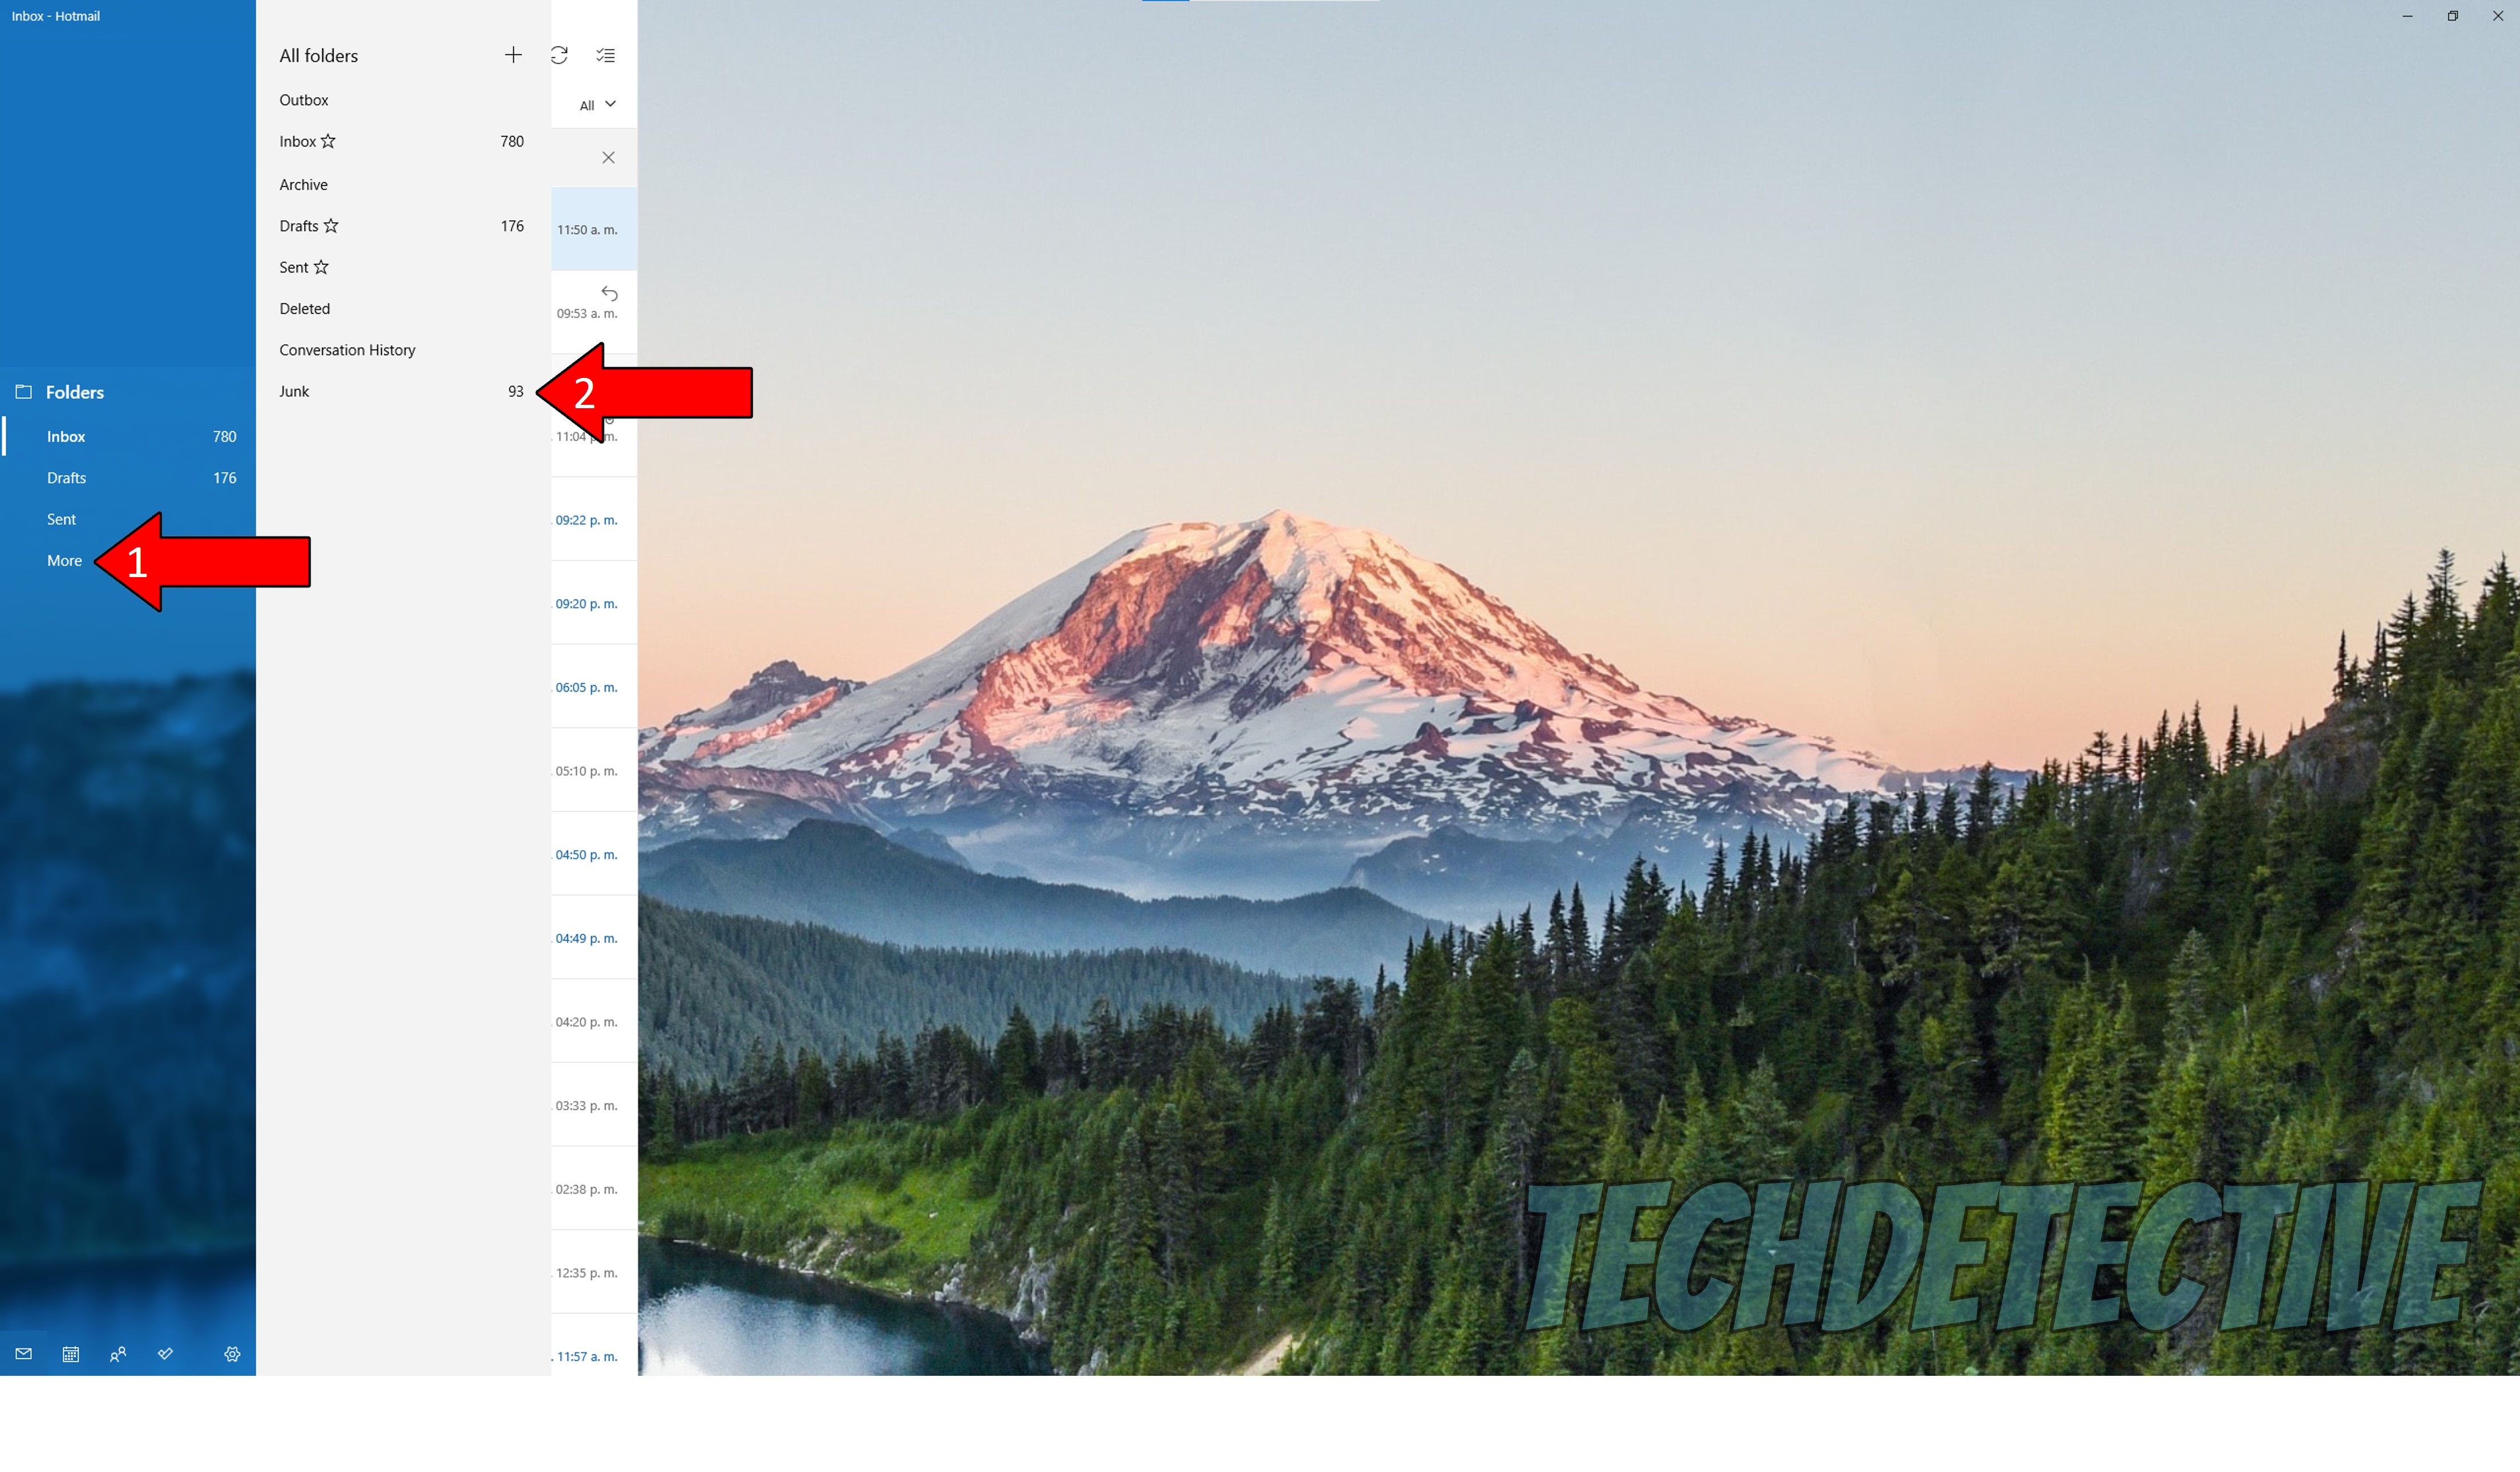
Solution: Here’s how to do that:
That about covers it!
When Waze can’t verify your account email, your navigation plans can be frustrated, forcing you to either go for an alternative app or get your directions from someone, which is not very convenient.
Luckily, I hope this piece has helped you see that more often than not, addressing the most common causes behind this issue is easy and quick. Simple actions, like keeping the app updated, double-checking your email address, and taking a closer look at your Spam or Junk folder, should do the trick.
Thank you so much for sticking with me all the way to the end. If this article piqued your interest and proved helpful, you’ll be pleased to know that we upload new content every week. While we finish working on our latest resource, please check out those already available below to become a Tech Detective yourself!
Have a great week.


Detective ‘Gerry’ Molina is one of the most prolific detectives on our TechDetective team. He’s known for his ability to crack down on multitudes of tech crimes on behalf of you – the citizens of the internet. Molina is often the first point of contact for many cases, working to help free victims from the tyranny of tech issues.