
Stuck trying to create a class on Duolingo?
Duolingo is one of the best platforms out there. It allows students to keep practicing a new language outside the classroom in a fun and easy way.
Sometimes creating a new class can be challenging without proper guidance. But, the good news is that you’ve come to the right place to learn how to do it.
Follow these simple steps to start and host a class on Duolingo:
Keep reading to start using Duolingo for Schools!
Duolingo for Schools offers incredible features that allow you to customize assignments and see your students’ progress.
I know, starting and hosting a classroom may sound like a difficult thing to do. But, don’t worry. With the help of this article, you’ll notice that it’s really simple.
To get started, you’ll need to create an account on Duolingo for Schools. Follow this quick guide to do it:
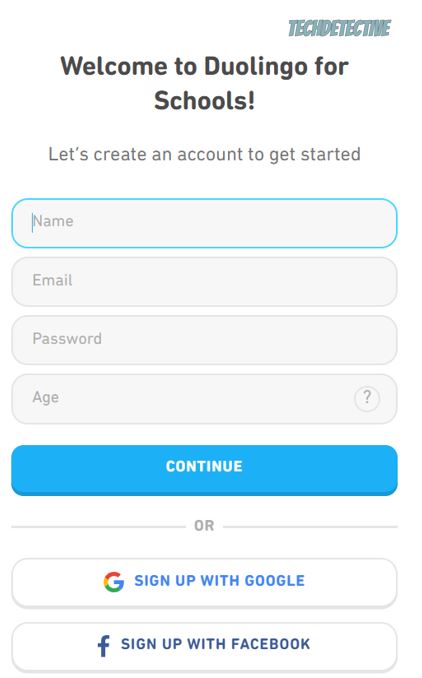
Once you’ve entered your information, you’ll receive an email. Please click on it to verify your email address.
If you didn’t receive an email, please check your spam or junk folder. If it’s there, please mark it as “Not Spam” and add [email protected] to your “safe senders and domains” list.
Follow these quick steps to do it:
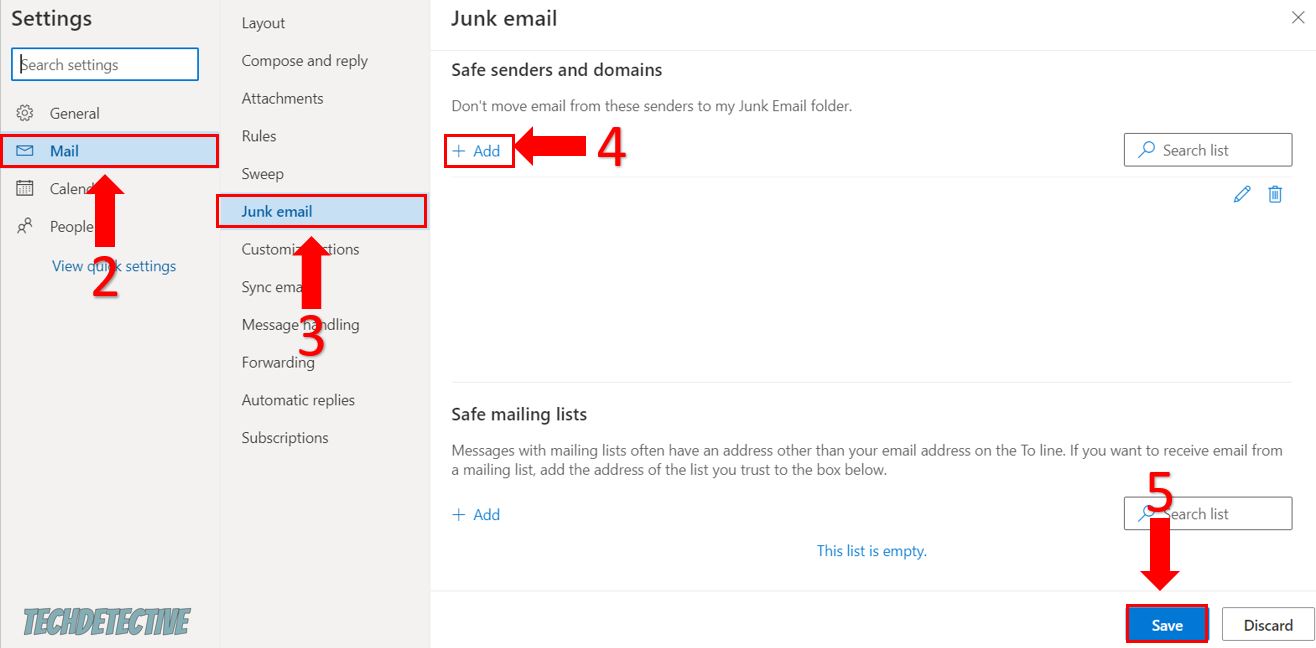
If you’re using a different email company, please search on Google for “How to edit safe senders and domains list on <your email goes here>”
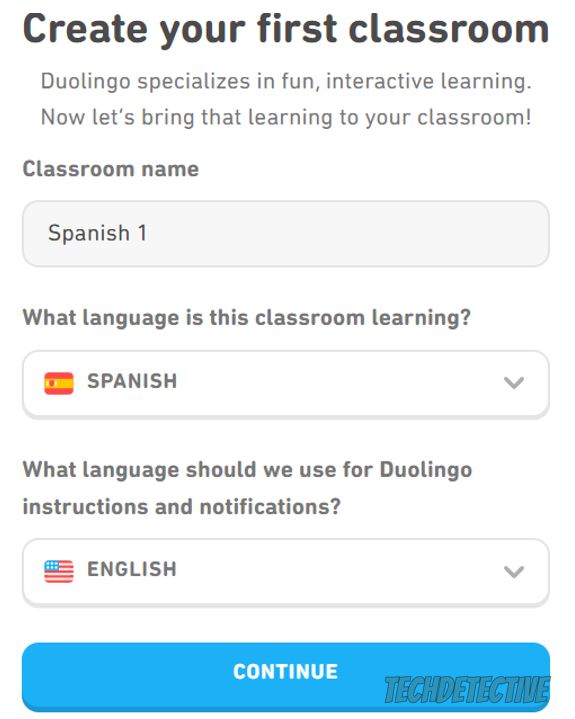
Once you’ve created your account on Duolingo for Schools, you’ll be asked to add your first classroom.
To do it, you’ll need to enter the classroom name, the language that you’re teaching and the language that Duolingo should use to send instructions and notifications to your students.
Then, click on “Continue”.
Moving on, select how did you hear about Duolingo for Schools. The platform asks this question to measure their marketing campaign performance.
Once you’ve answered the question, please click on “Create Classroom”. You’ll be redirected to your classroom.
Tip: If you already have a class and want to add a new one, you’ll need to go to your teacher dashboard and select “New Class” from the sidebar menu.
Now, it’s time for us to invite your students.
Doing this may sound like a tedious thing to do, but it’s really quick and simple. With Duolingo, you can send invitations or manually add students to the classroom.
To send an invite:
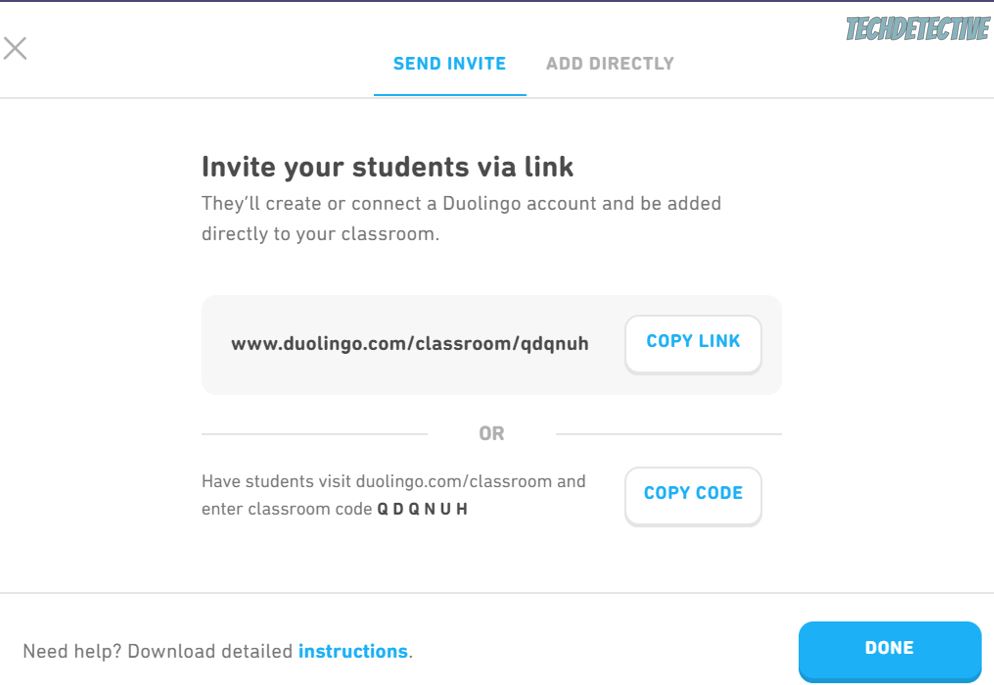
Please note that your students will need to create an account on Duolingo or if they already have one, they’ll need to log in to join the class.
To manually add your students:
Bear in mind that you won’t be able to have more than 100 students in one class.
Finally, it’s time for us to create assignments and review your student’s progress.
Duolingo was designed like a video game, so students can stay motivated and have fun while learning a new language.
This is why, by creating new assignments, your students will earn experience points (XP).
Sounds good, huh?
Follow this quick guide to create an assignment:
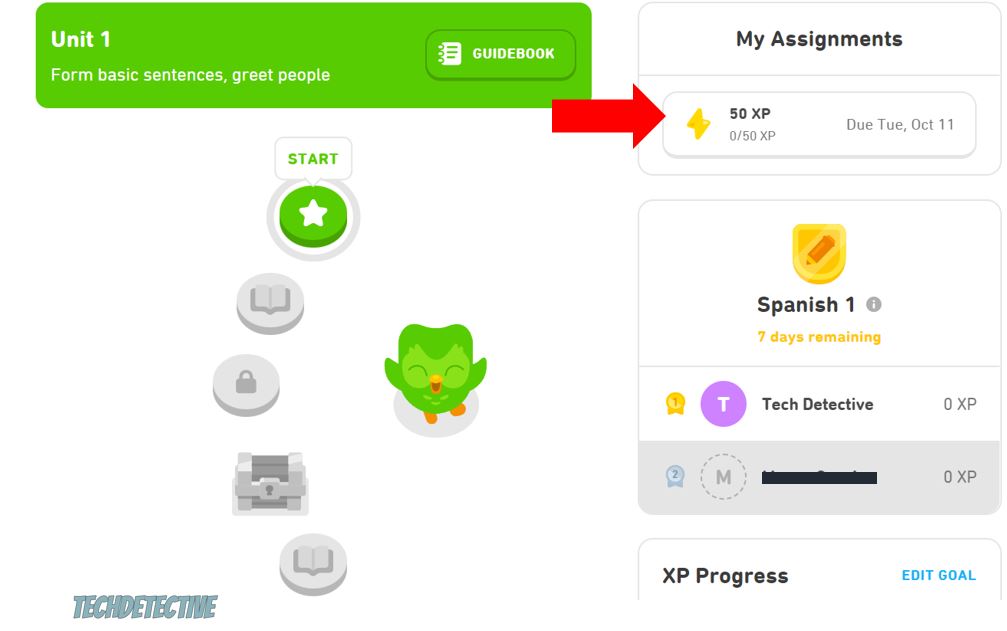
Once you’ve created the assignment, your students will receive an email with the details. They can also start their homework by accessing their account on Duolingo and checking the “My Assignments” section on the right-hand side of their screens.
Your students will receive an email once they’ve completed the assignment.
If you’d like to check their assignment’s performance, you’ll just need to:
If you’d like to download the student progress report, you’ll need to click on “Export” next to “Student Progress”.
That about covers it! I hope that this article has helped give you some more confidence in starting and hosting a class on Duolingo for Schools.
Remember, you’ll need to create an account and enter the details of your class (name and language). Then, you’ll need to invite your students via link or code and create a new assignment.
Thank you so much for taking the time to read this quick article. If you ever experience an issue while teaching or learning a new language on Duolingo, don’t forget to check out our site. You’ll be able to solve it in no time.
Here at Tech Detective, we love fixing all sorts of tech issues.
Have a wonderful day!


Detective ‘Monse’ Cancino has been cracking down on tech issues for years. Starting out as a local cop, she’s quickly risen to the full rank of Tech Detective.
Cancino is our resident iPhone specialist. She’s often cracking cases related to iOS errors, streaming malfunctions, and locking up buffering bandits.