Do you want to check your voicemail in Microsoft Teams but have no idea how?
I’m not surprised! This may be hard to believe, but several people find themselves confused when using this service, making it a challenge to set up and check their voicemail.
I know how annoying it can be to have this experience, as this is a feature that should be super simple and quick to access.
But don’t worry, you’ve come to the right place for answers. Below, you’ll find a list including a few simple steps you can follow to do this successfully.
The 2 easy steps to take in order to check your voicemail in Microsoft Teams are:
Read on to let the messages come in!
Let’s start off by configuring your voicemail. After all, how are you going to check something that does not yet exist?
If you’ve already gone ahead and done this before, please feel free to move on to the next step. But if this is your first time activating this feature in Microsoft Teams, then read on, as this definitely interests you. Setting up your Microsoft Teams voicemail is very easy and quick, all you have to do is follow a couple of simple steps.
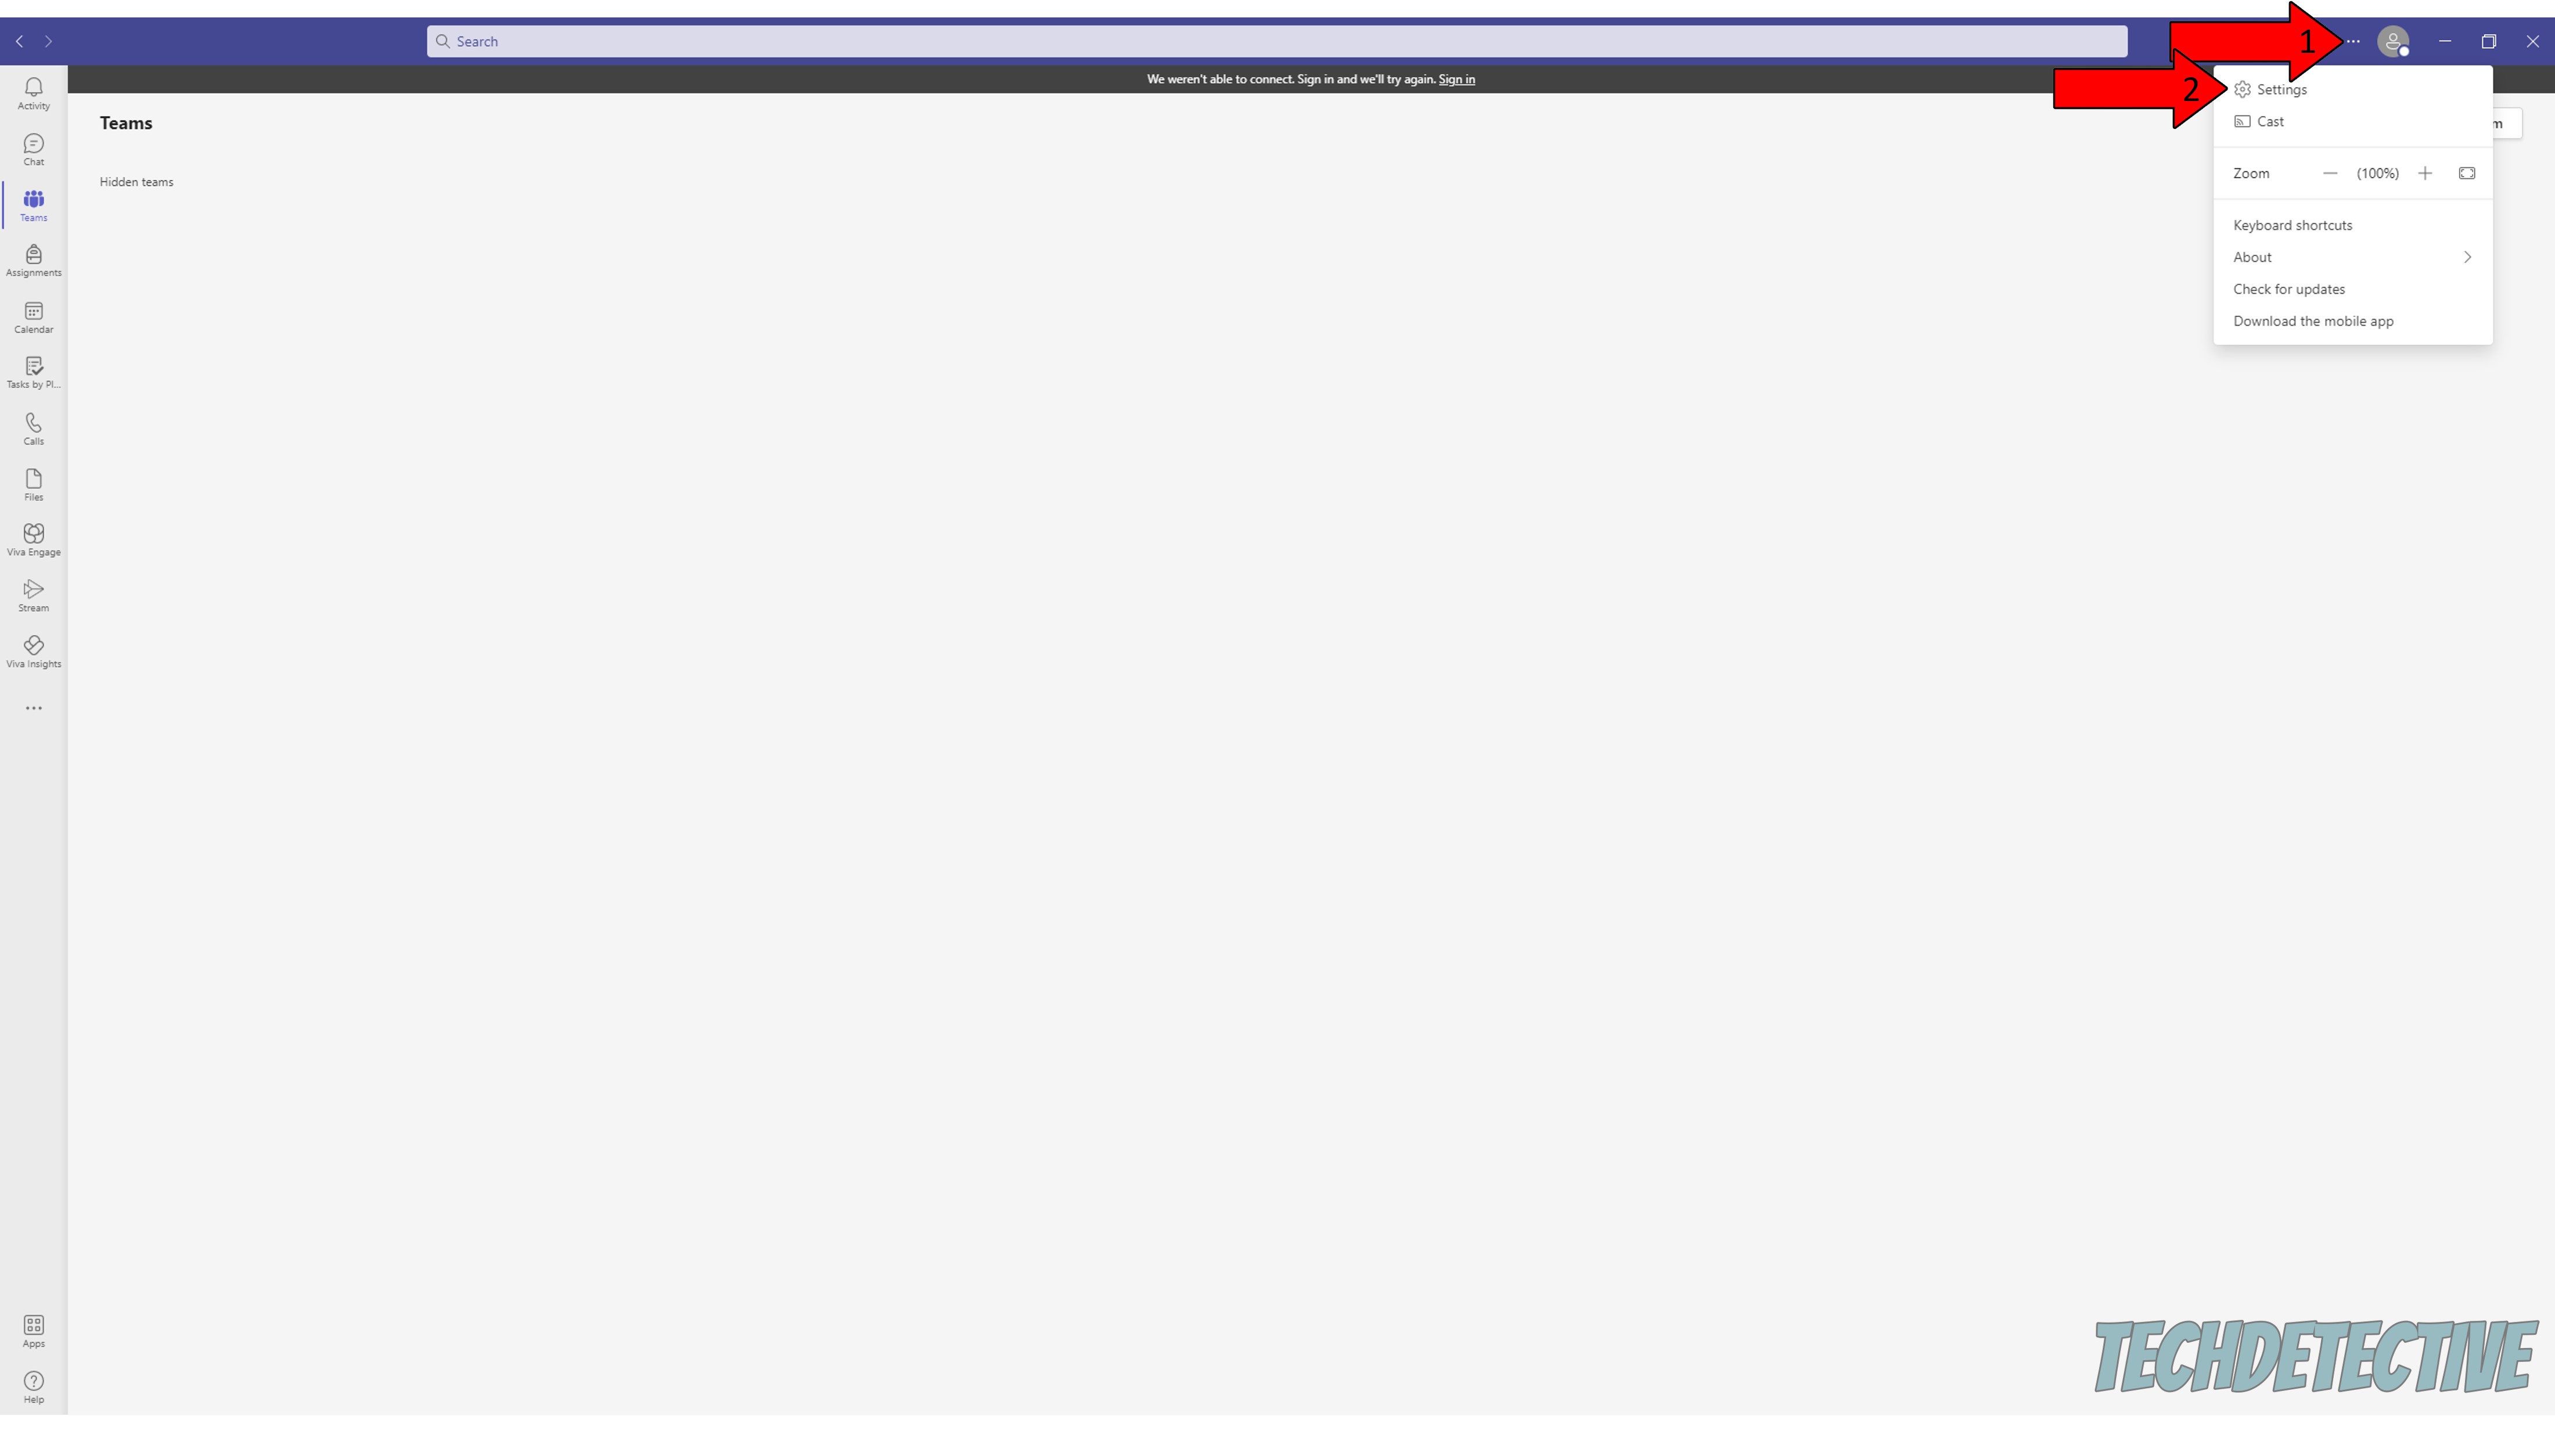
Solution:
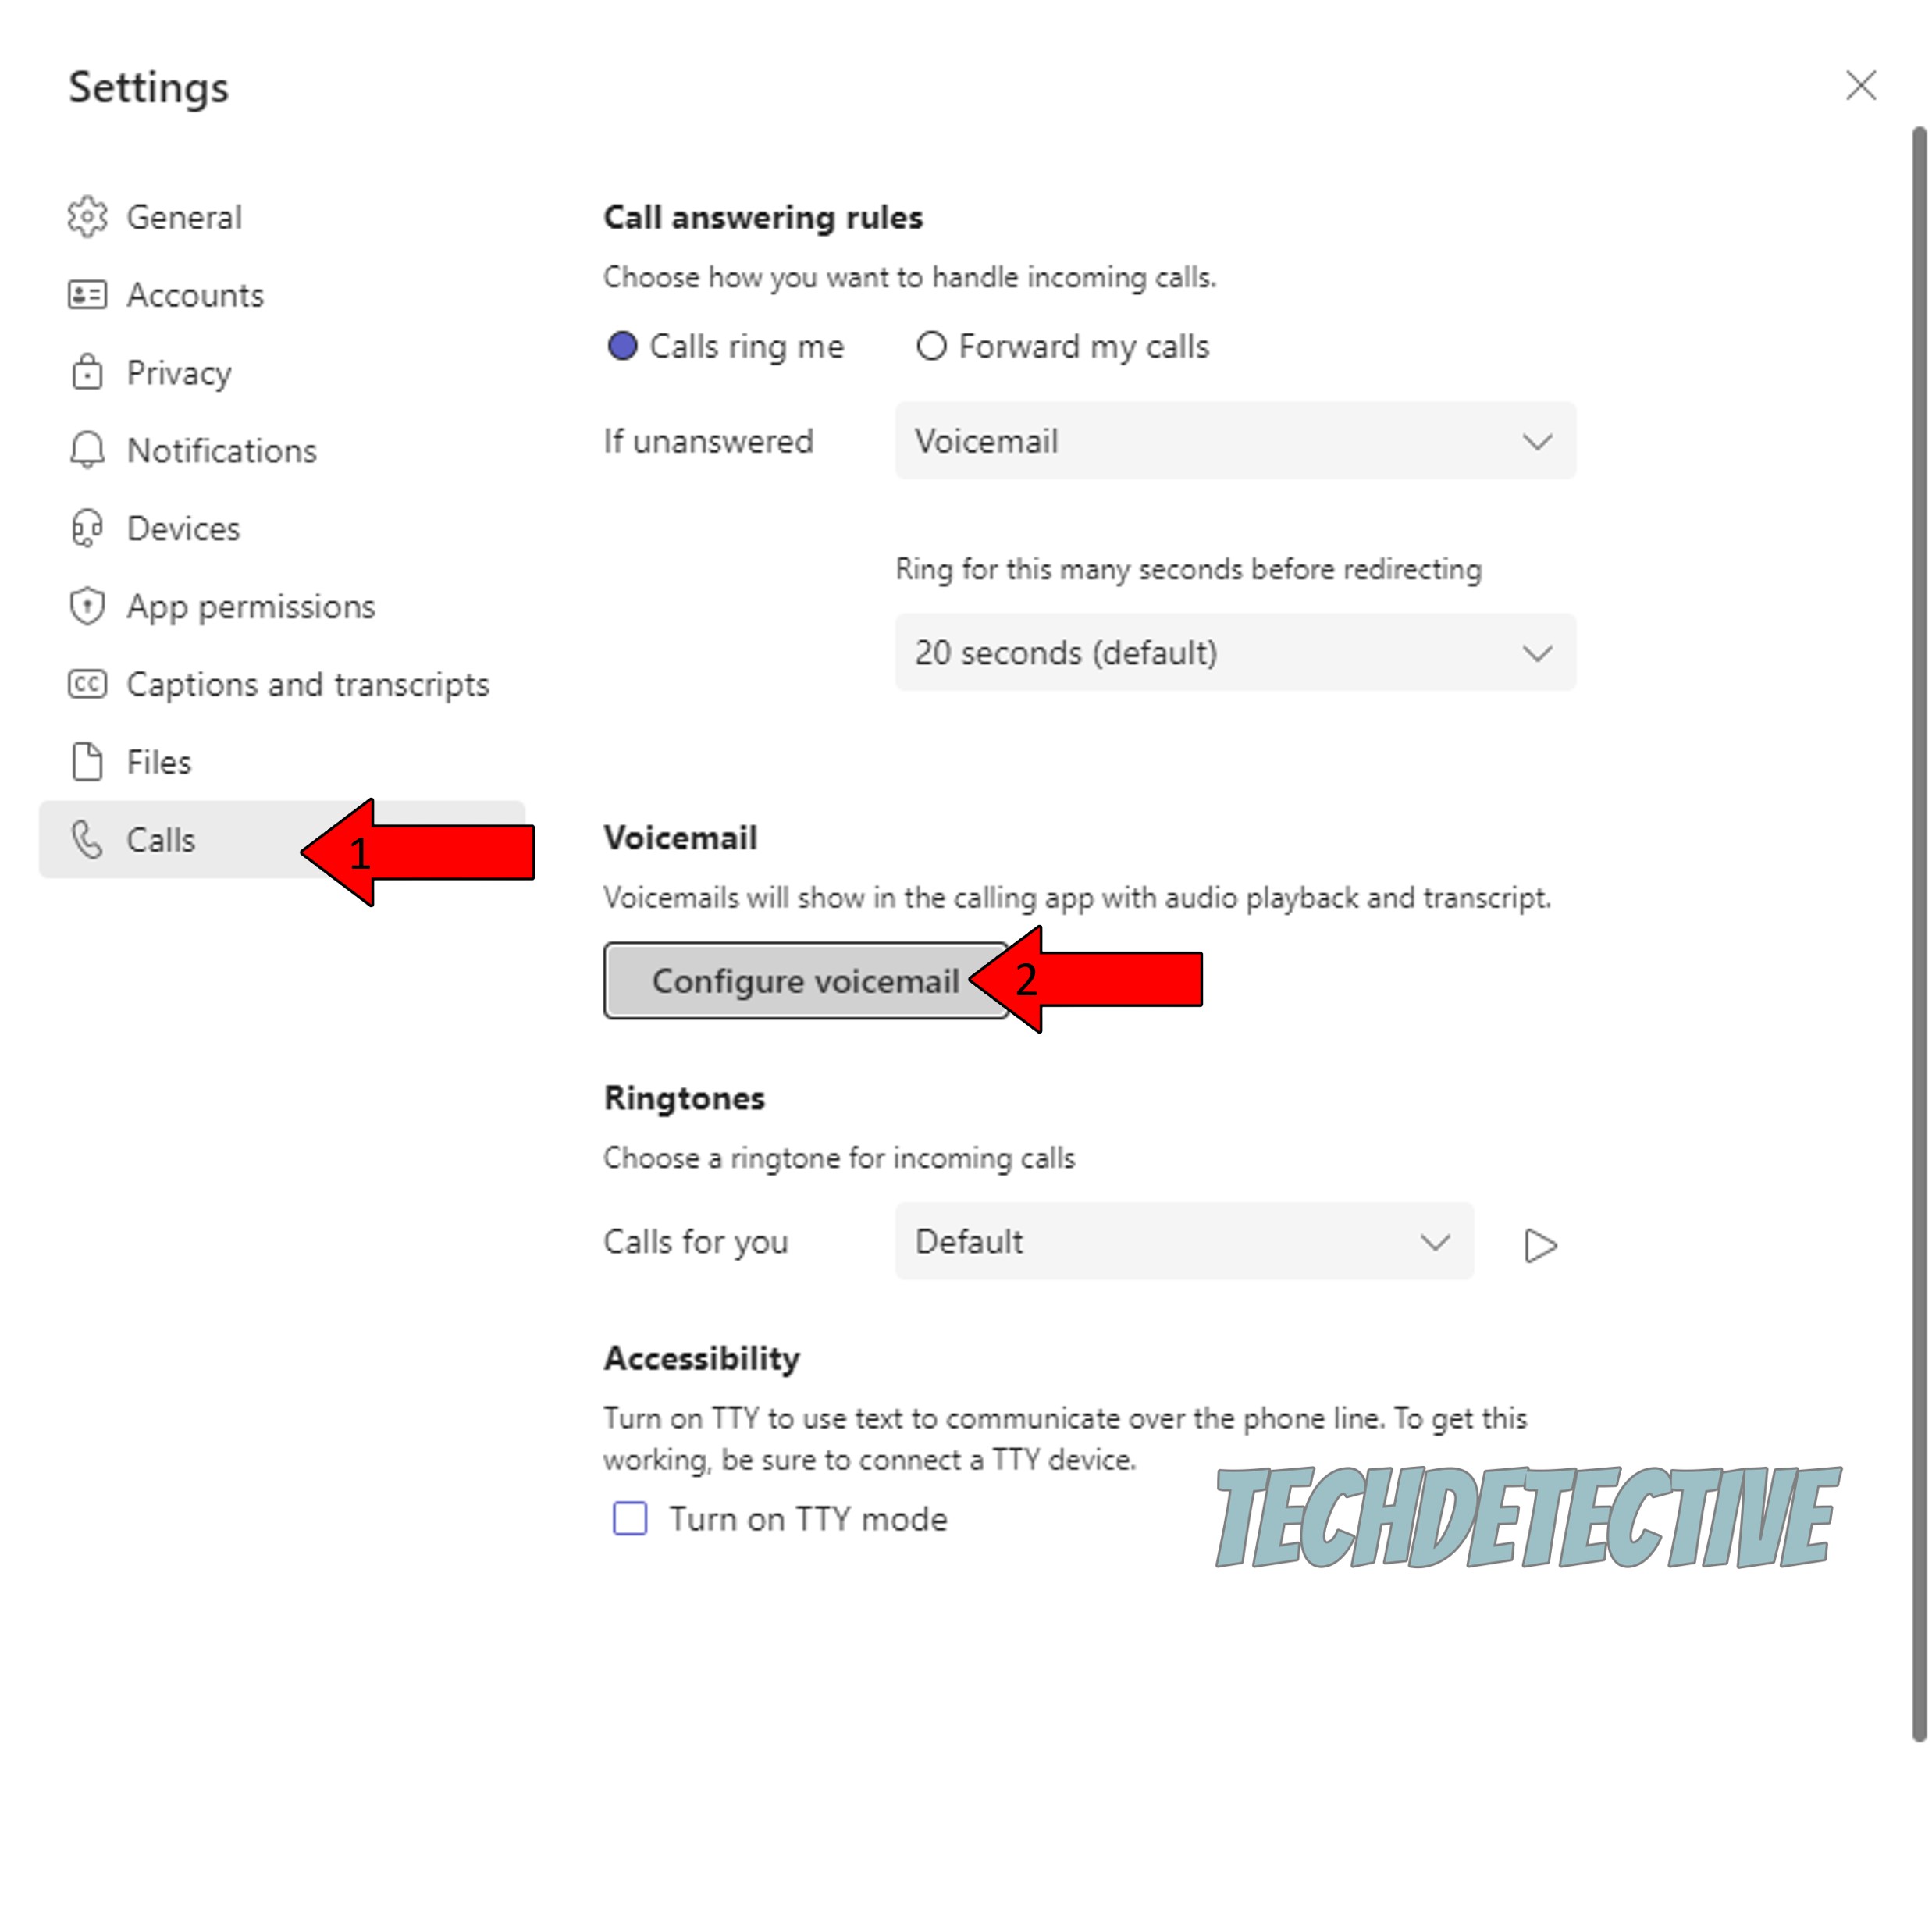
4. Click on the “Calls” tab in the left section of the window. Then, click on “Configure Voicemail”
5. You’ll see a button that says “Record a greeting”. Click on it and record your message for incoming voicemails
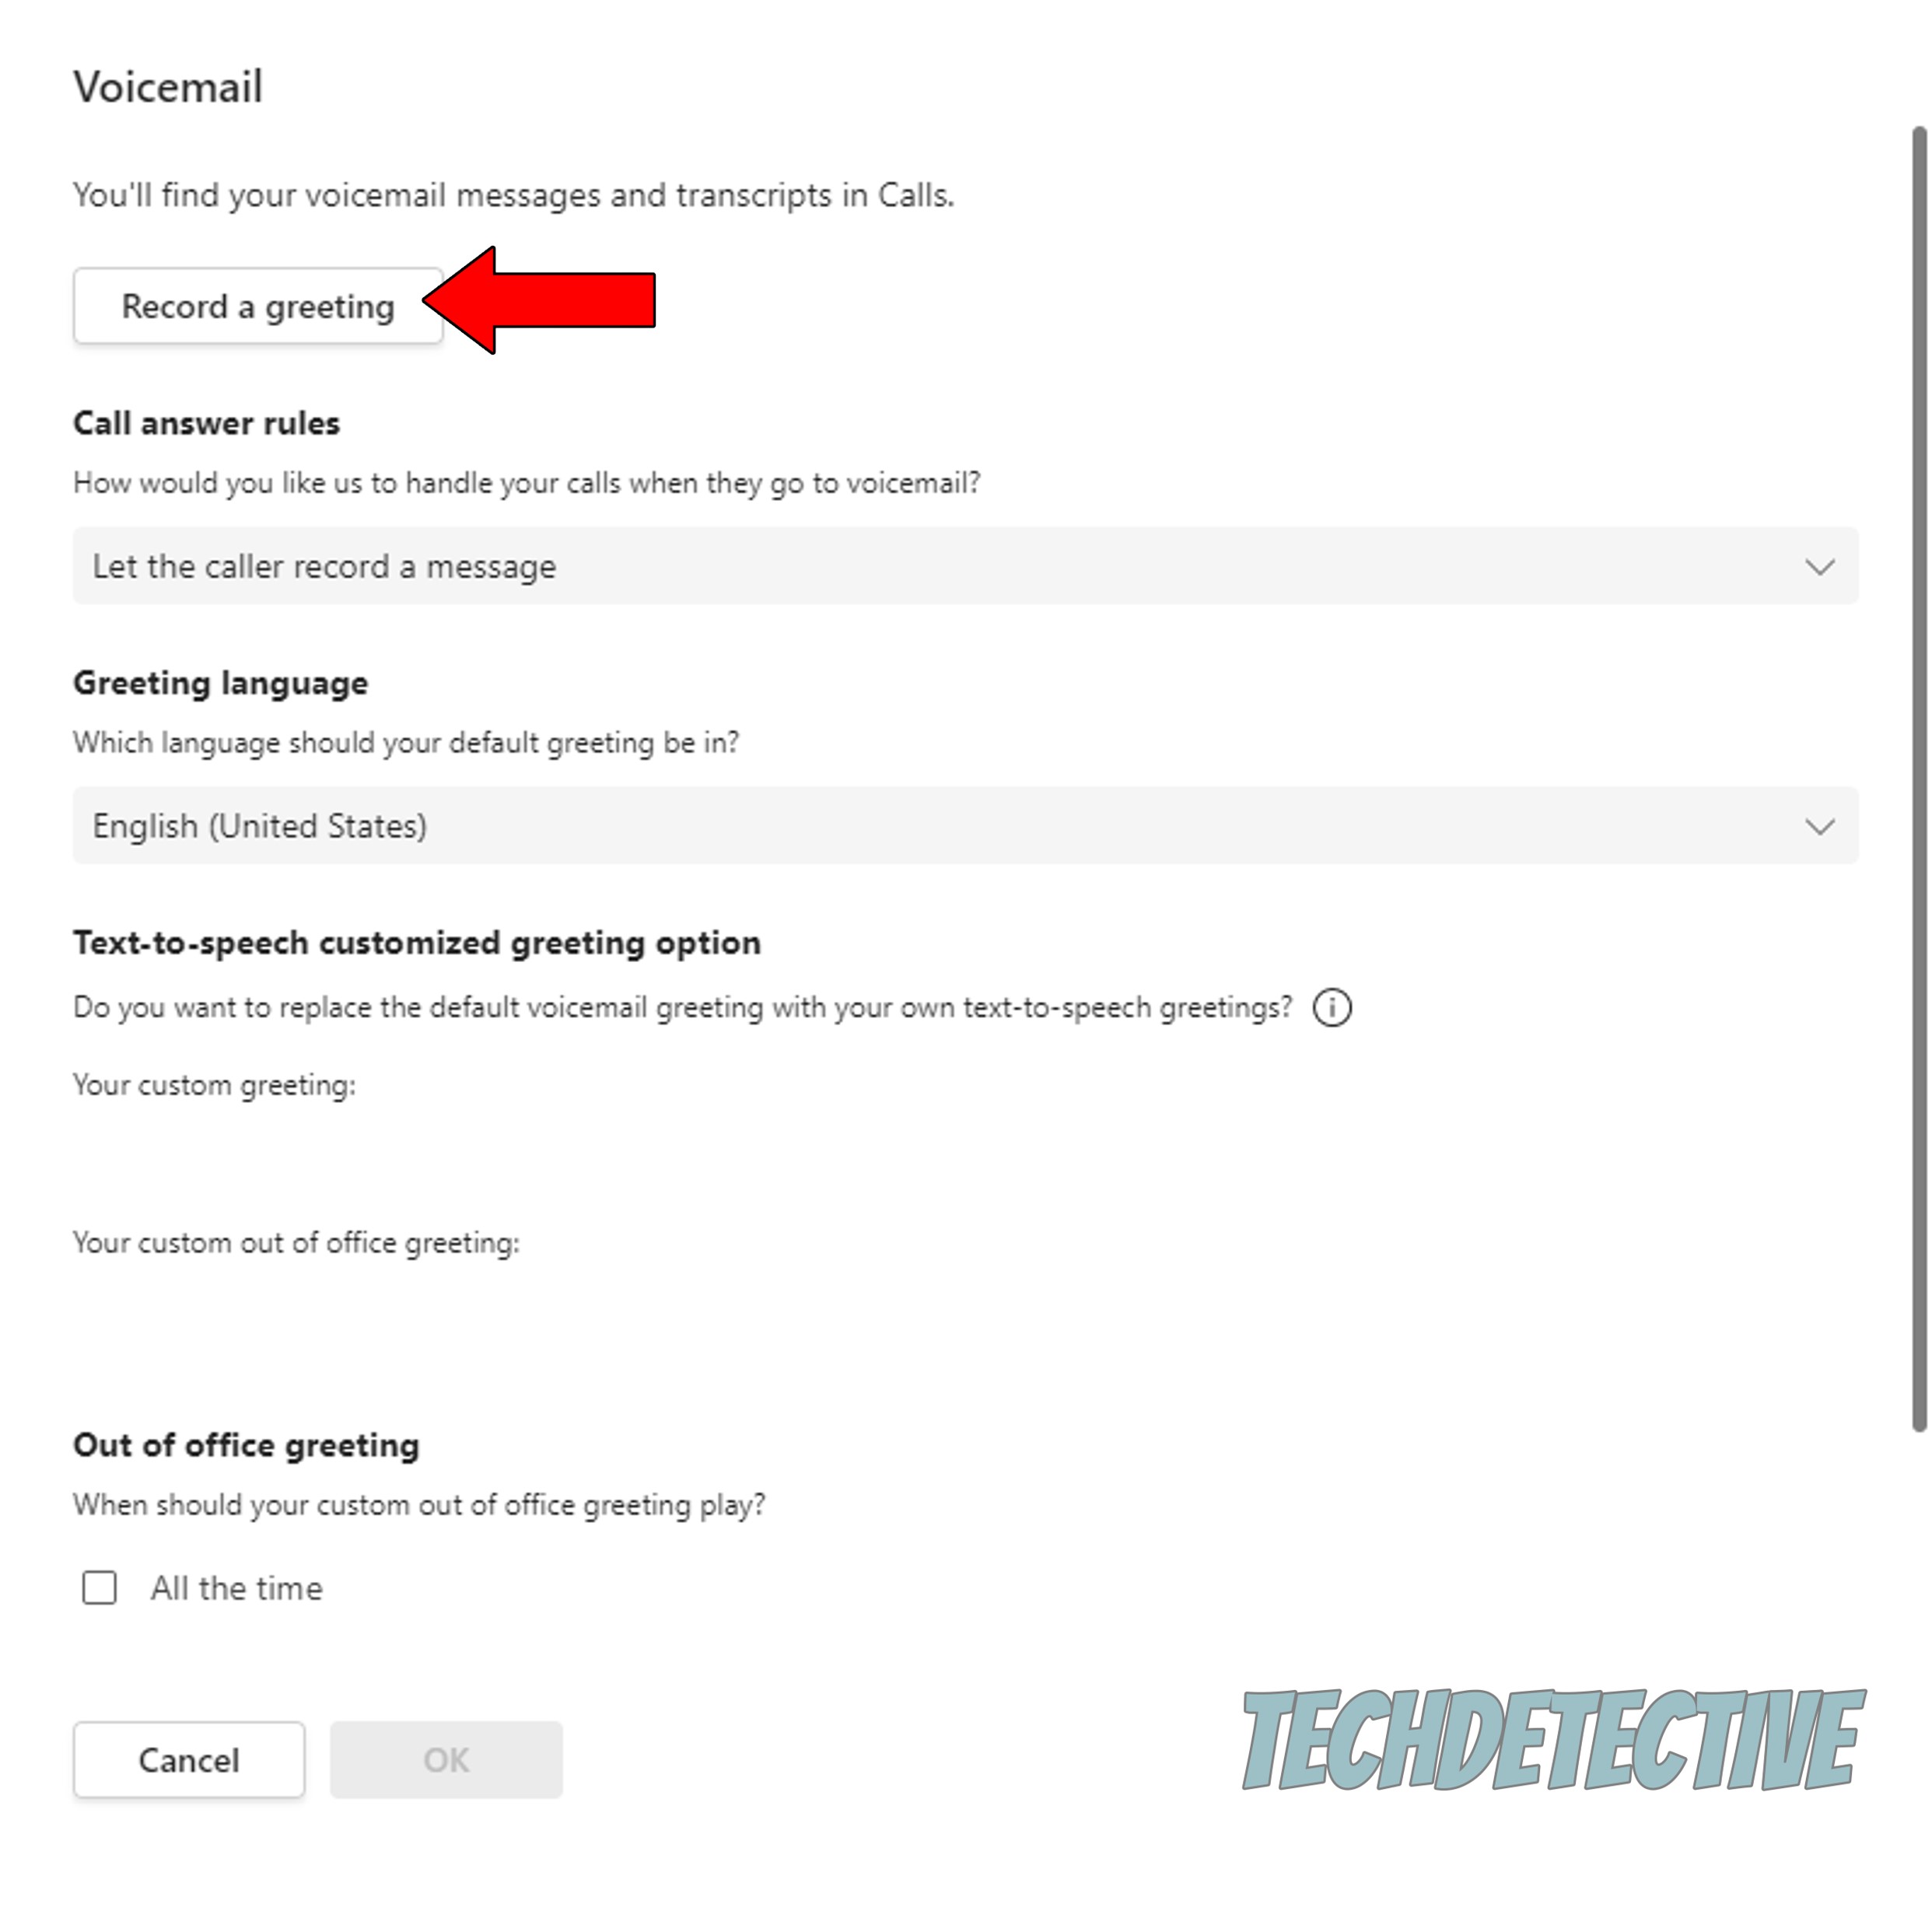
Once you have recorded your greeting, your voicemail will have been successfully configured. Now it’s time to see how you can check your messages when you start getting them.
Having your voicemail all set up, let’s move on to accessing it to check your messages.
As I said before, this process is very simple, but sadly, not as simple as it is on other similar platforms. You wouldn’t believe how many people spend countless minutes trying to find this section. And while at first, that might not sound like much of a problem, during a busy day, tens of messages can be left for you.
Being able to listen to them as they come in is essential for productivity.
Solution: Here’s how you can access your voicemail:
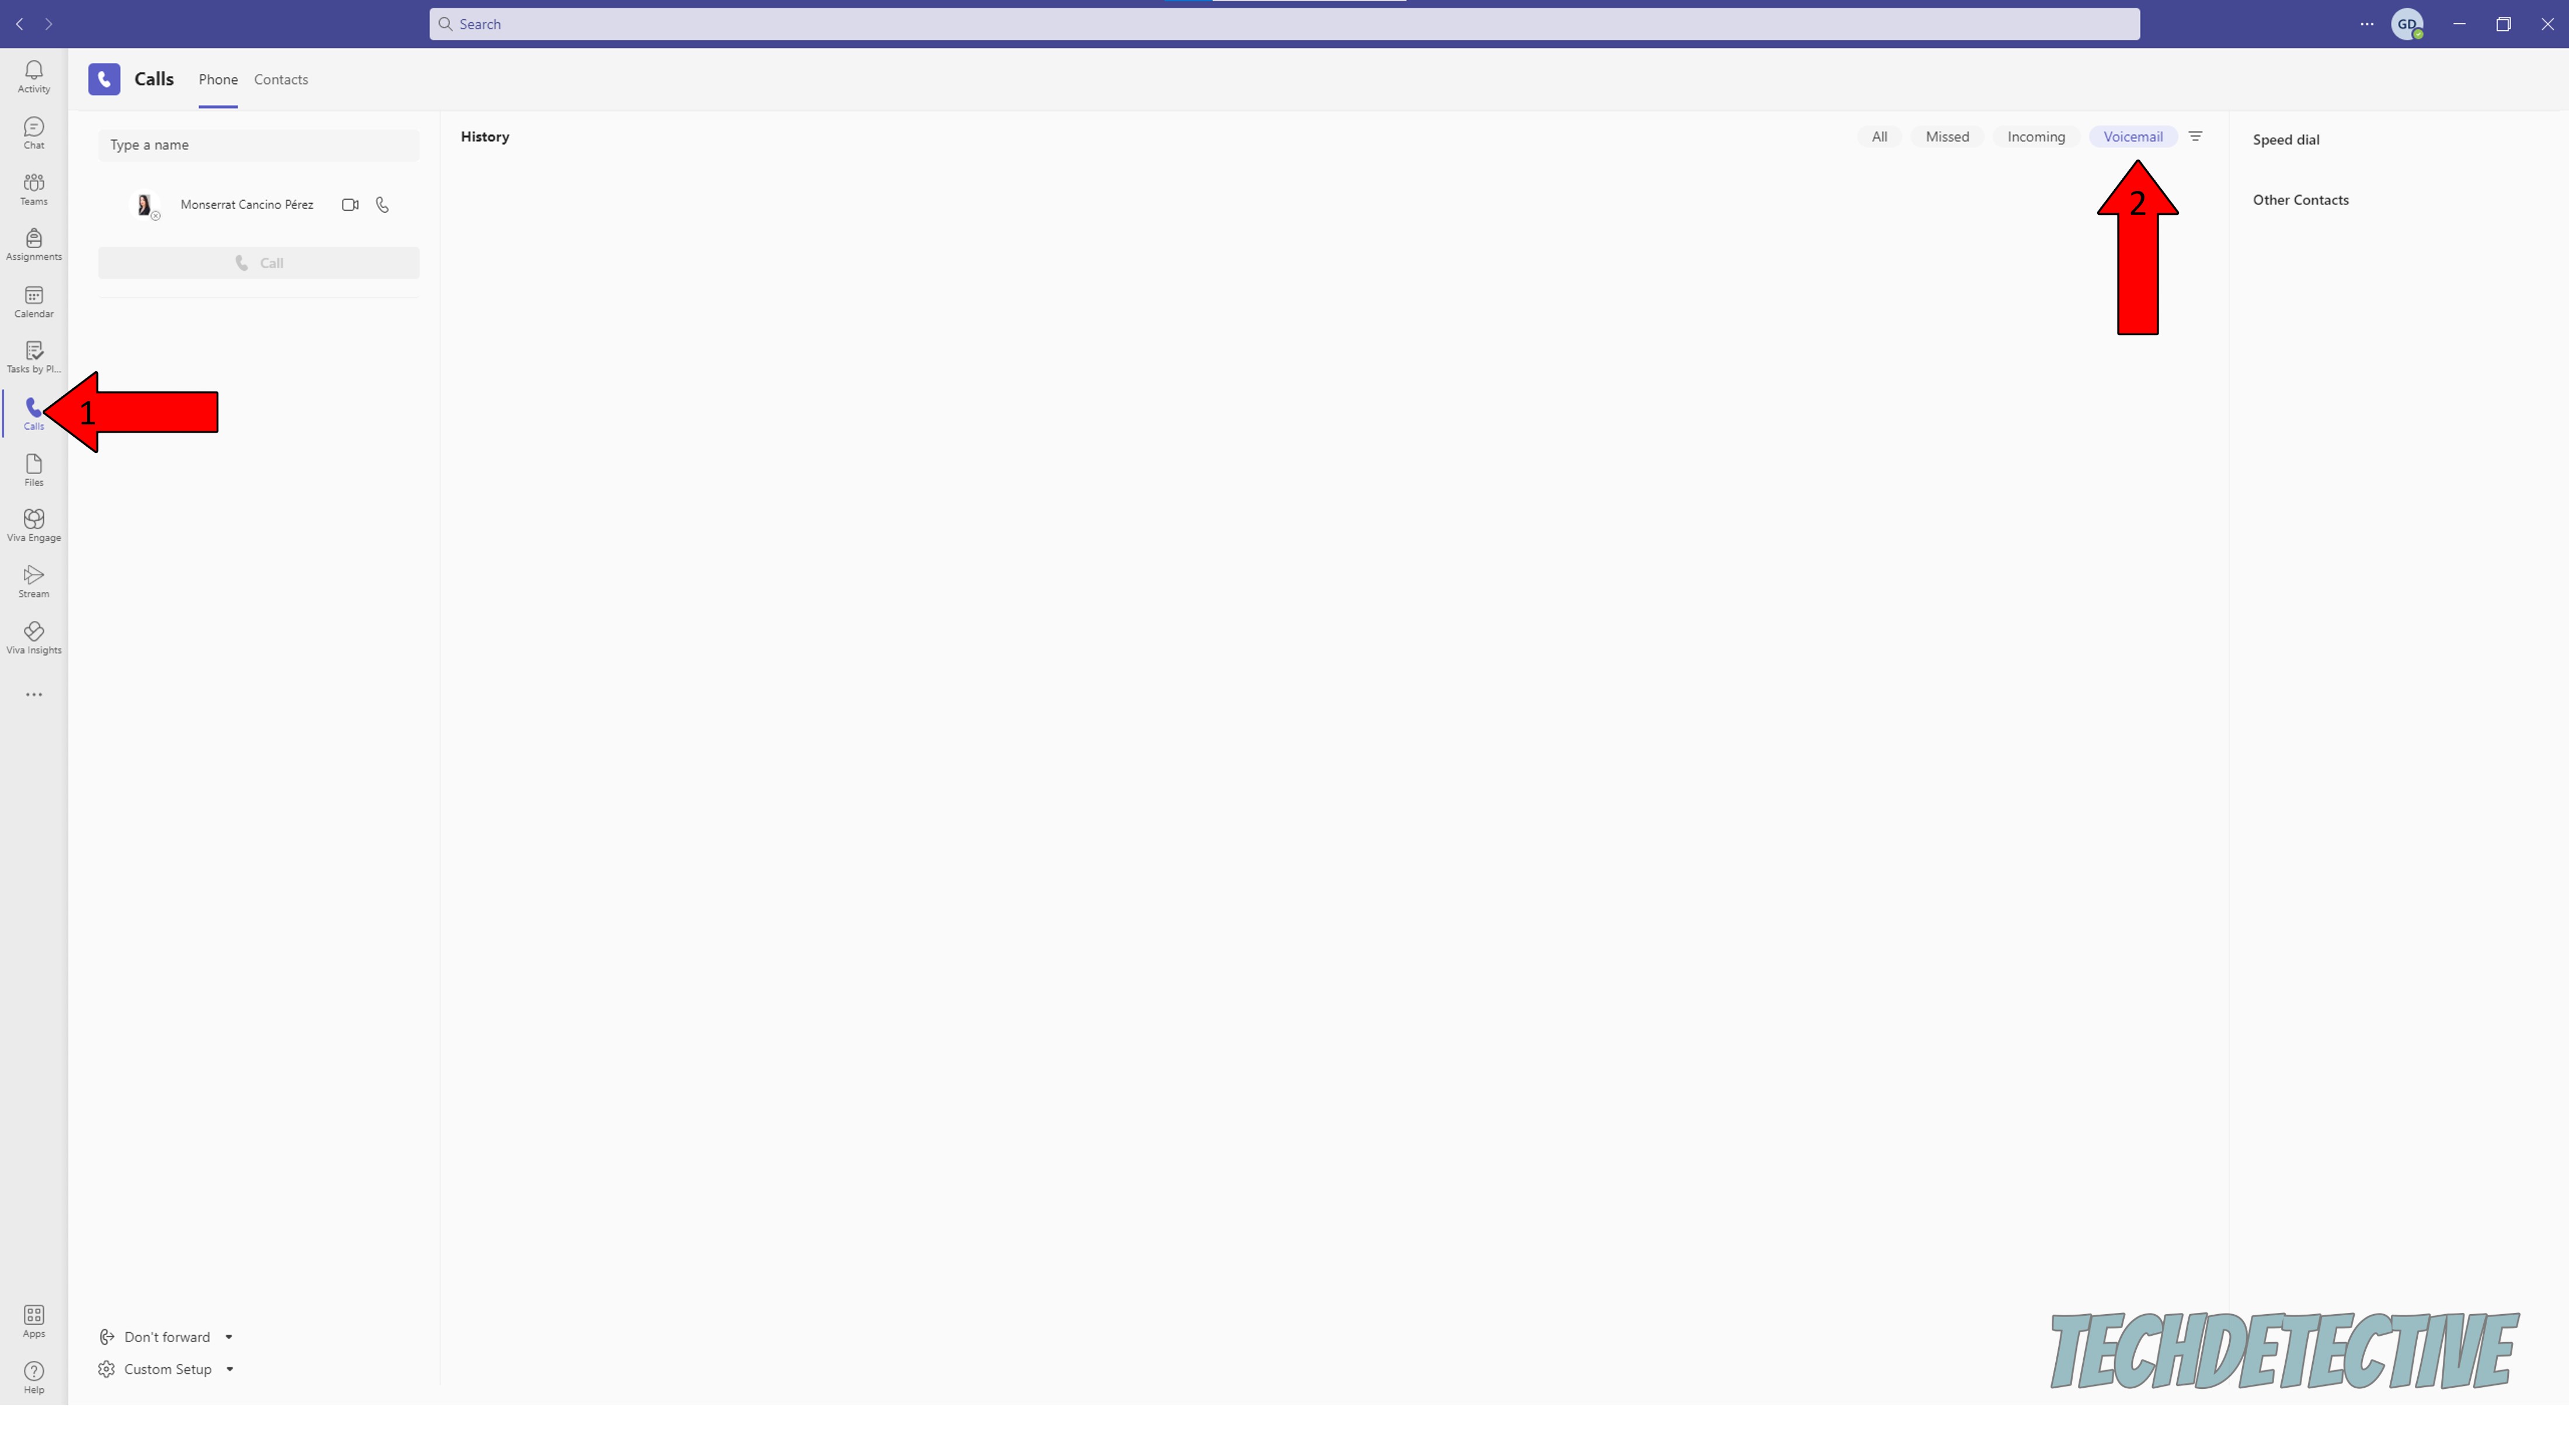
Sadly, I don’t have any voicemails right now to show you, but if you have any pending messages, they should appear here. Click on them and press the Play button that will appear, so you can listen to them.
That’s it, you made it to the end!
I know how it can sometimes be intimidating to think about addressing your own technical difficulties or coming up with solutions. But I hope this piece has helped you see that, more often than not, doing so is very easy and quick.
Microsoft Teams is sadly not the most user-friendly communications platform out there, but with some useful information and a little dedication, you can master it in no time. Remember that, if you’re having any problems with the platform, such as a missing “Join” button, or a hidden dial pad, we have plenty of answers for you right here.
Thank you so much for sticking with me all the way to the end. If this article proved helpful to you, it’ll make you very happy to learn that we upload new content weekly. While we work on our latest masterpiece, why don’t you check out our other wonderful resources below to become a Tech Detective yourself?
I wish you nothing but the best.


Detective ‘Gerry’ Molina is one of the most prolific detectives on our TechDetective team. He’s known for his ability to crack down on multitudes of tech crimes on behalf of you – the citizens of the internet. Molina is often the first point of contact for many cases, working to help free victims from the tyranny of tech issues.