Are you experiencing constant colour changes when you’re watching Netflix?
That sucks! One of the simplest ways to lose immersion when watching an action-packed scene or an emotional development in your favorite stories is a lack of consistency.
Having the colour of your TV’s picture keep changing is no fun. Especially when all you want to do after a long day at work is sit back and relax.
But don’t worry, you’ve come to the right place for answers. Below, you’ll find a list including the 5 most common causes behind this, as well as some ways to address them.
When there are colour changes while you’re watching Netflix, you’ll want to try relaunching the app, clearing your cache & cookies, or disabling Dolby Vision/HDR. If that fails, you can also try updating the platform/your devices, and uninstalling the service.
Keep reading to make streaming enjoyable again!
Let’s start off by trying something super simple, yet quite effective. I know relaunching Netflix hardly sounds like a fix, but trust me, it can make a night and day difference.
How so? Glad you asked!
To work, all devices and apps need thousands of background processes to be running at the same time, all the time. More often than not, this happens automatically, and we don’t even realize it. But occasionally, a bug or a corrupted file can make said processes crash.
An event like this could explain why your TV’s colour changes when you’re watching Netflix, as a problem with the app’s internal coding could be affecting features like Dolby Vision, or HDR.
By closing and relaunching the platform, you’ll be giving it a chance to reload critical resources from scratch and patch up anything that’s not in the best shape.
Next, let’s make sure your cache & cookies are not to blame for this situation.
If you’re already an expert in both concepts, you can safely move on to the solution. But if not, please read on, as you’re about to acquire some very useful information.
Let me start by explaining the cache.
Boiling it down to the basics, it’s where your apps store important elements, such as login credentials, user preferences, and in cases of streaming platforms like Netflix, video previews and thumbnails as well. Sometimes, you can also find several resources that features like Dolby Vision need to work properly.
Ideally, your cache is supposed to make your platforms launch faster by having a lot of data preloaded. But if there are any corrupted files stored within it, it could explain why there are colour changes when you’re watching Netflix, or why you keep being logged out.
Now, the cache is not the only potential culprit. Cookies might also be to blame for creating this mess, as they act similarly. They collect information about you, including browsing habits, watched shows, and favorite episodes. All this in order to make Netflix’s suggestions much more accurate.
And while that sounds great, it can occasionally create more problems than it solves.
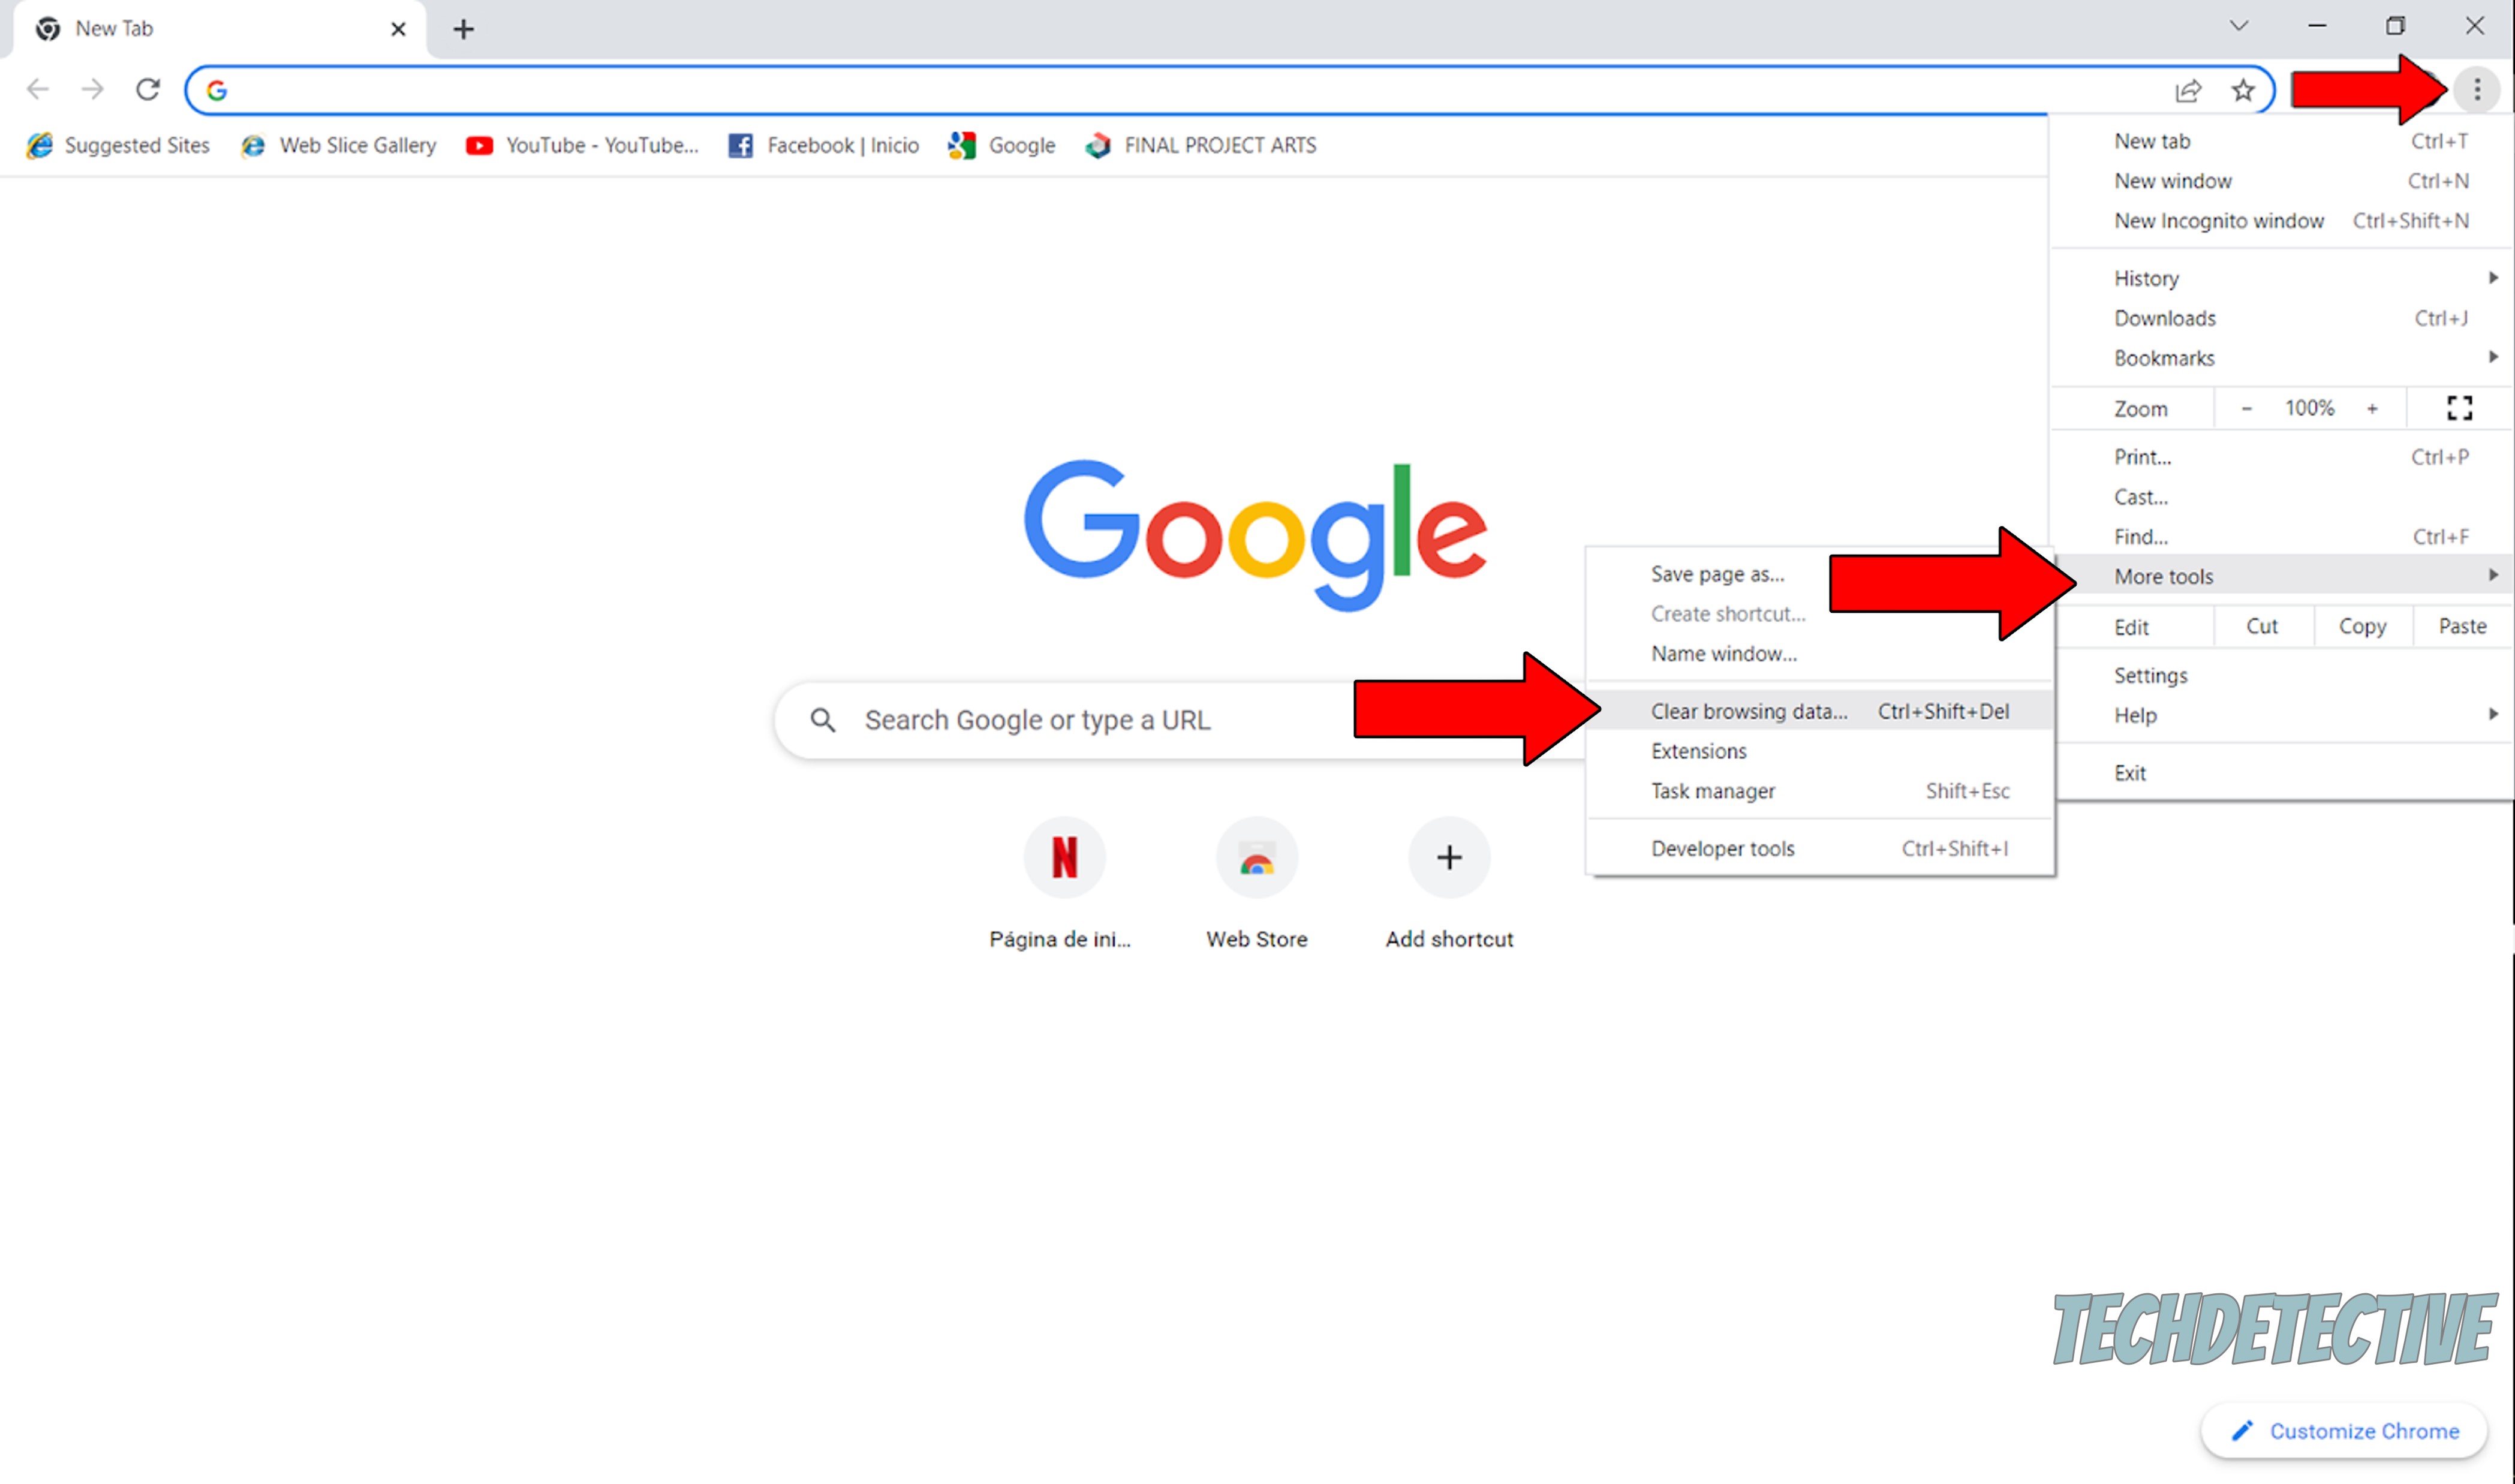
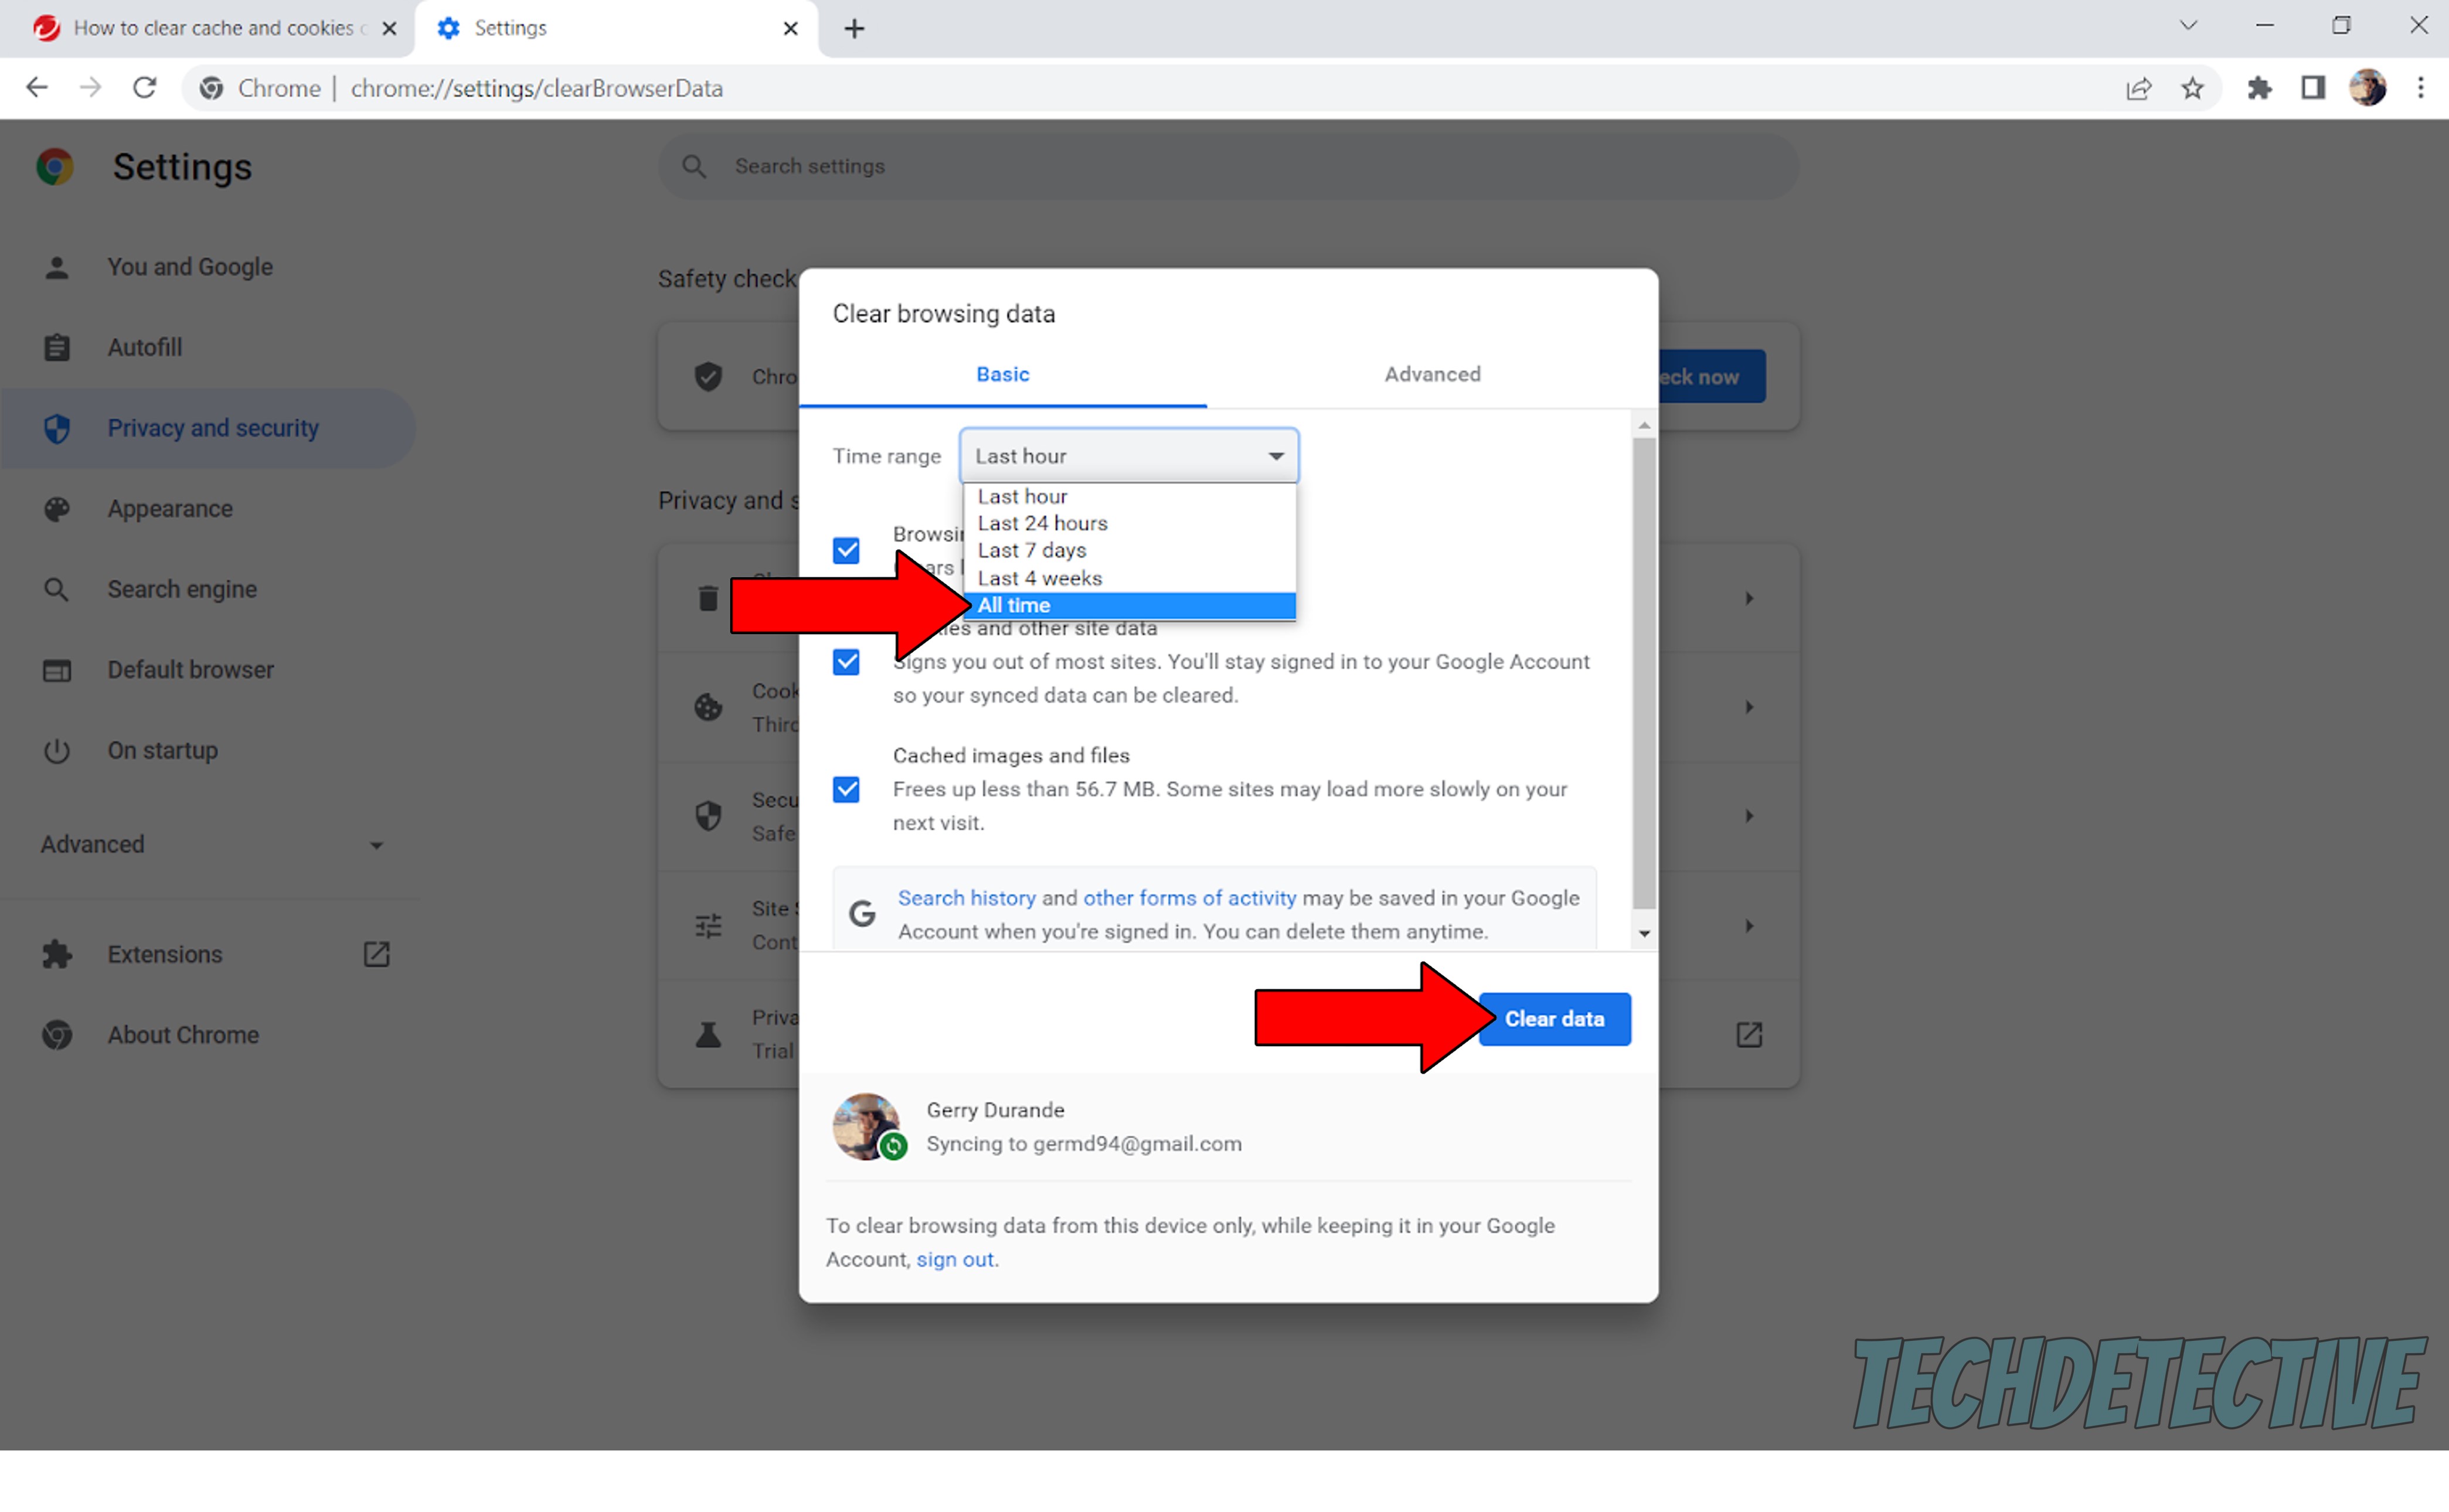
Solution: If you suspect your cache & cookies to be “contaminated”, you’ll be better off clearing them. There are many ways to do this depending on the device you own. To give you a general idea of the broad strokes, here’s how this goes on Google Chrome:
If you need specific instructions for another device, I’d recommend going to Google and searching for: “How to clear cache & cookies on <Your Device’s Make And Model Go Here>”.
Now that we’ve ruled out a couple of common culprits, let’s get into the specifics. There’s a good chance that colour changes while watching Netflix are due to a failure of the platform’s Dolby Vision feature, or your TV’s HDR technology.
As you might know, HDR stands for “High Dynamic Range”, which is a fancy name for a technology that makes bright colors look brighter, and dark tones rich and deep, creating a visually-appealing contrast.
Believe it or not, Dolby Vision is basically the same thing, but with a licensed name by a famous company. It works very similarly to HDR, creating beautiful contrasts in the picture you’re watching. Some people say Dolby Vision looks better, whereas others claim that the generic feature works just as well.
Whatever the case may be, one thing’s for sure – you’re likely struggling because of a failure on either one. In that case, you’ll want to disable HDR on your TV, as this will also keep Dolby Vision from being activated on Netflix.
Solution: Depending on the device you own, this process might vary slightly. Since I want to be respectful of your time, I’d recommend going to Google and searching for: “How to disable HDR on <Your Device’s Make And Model Go Here>”. This should bring up detailed instructions for your specific case.
To give you a general idea, here’s how this goes on a PC that’s sending video to a TV via HDMI:

If HDR was to blame, you should no longer be experiencing color changes when you’re watching Netflix.
Next, let’s make sure you’re using the latest version of your operating system and the app. I know this might sound unnecessary and unimportant, but it’s actually one of the easiest ways to prevent technical difficulties down the line.
You see, every time an update is released, it comes packed with new and improved features, optimized settings, and patches for bugs. Moreover, it’s common for Tech companies to stop supporting older versions of their products and focus only on the most recent ones.
It sucks, I know, but it’s mainly done for security and storage reasons.
If you’re accidentally using an outdated operating system with a fully updated app or vice versa, it would explain why you’re seeing colour changes on Netflix, or constant flickering and blinking.
Now, in most cases, this is not something you have to worry about, as there’s an automatic updating feature within most modern devices that takes care of keeping you updated. But sometimes, a bug, a weak network, or a corrupted file can get in the way.
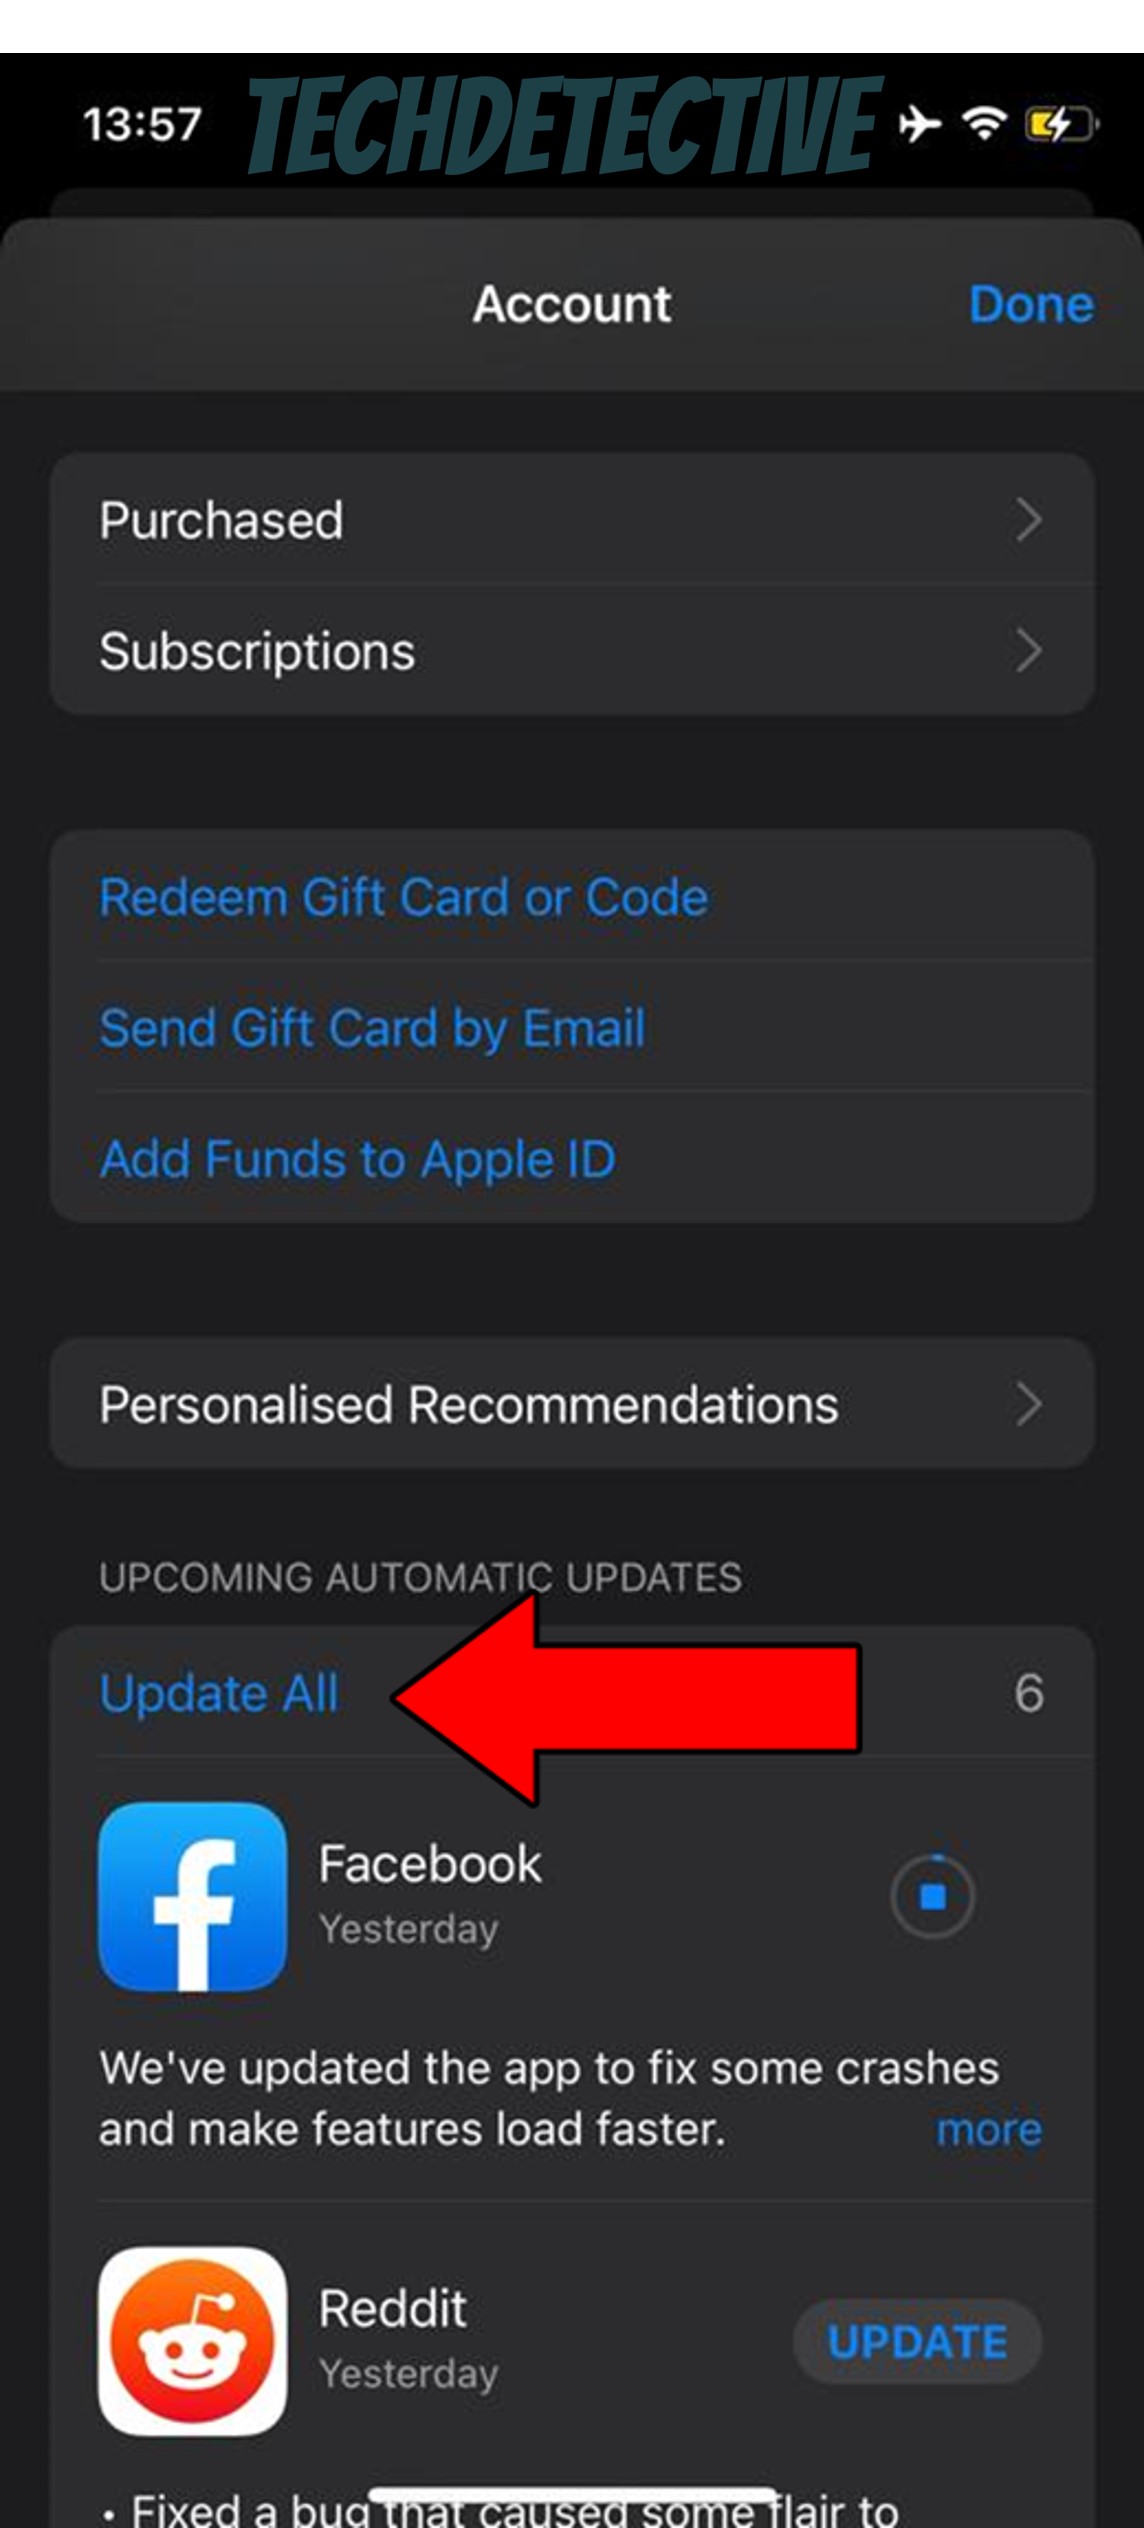
Solution: If you suspect you’re not running on the latest available software, try manually looking for updates and installing them if found. Again, the process might vary depending on your devices, but here’s a couple of examples to give you an idea:
To update Hisense TV software:
To update Samsung TV software:
To update Netflix on a Hisense TV:
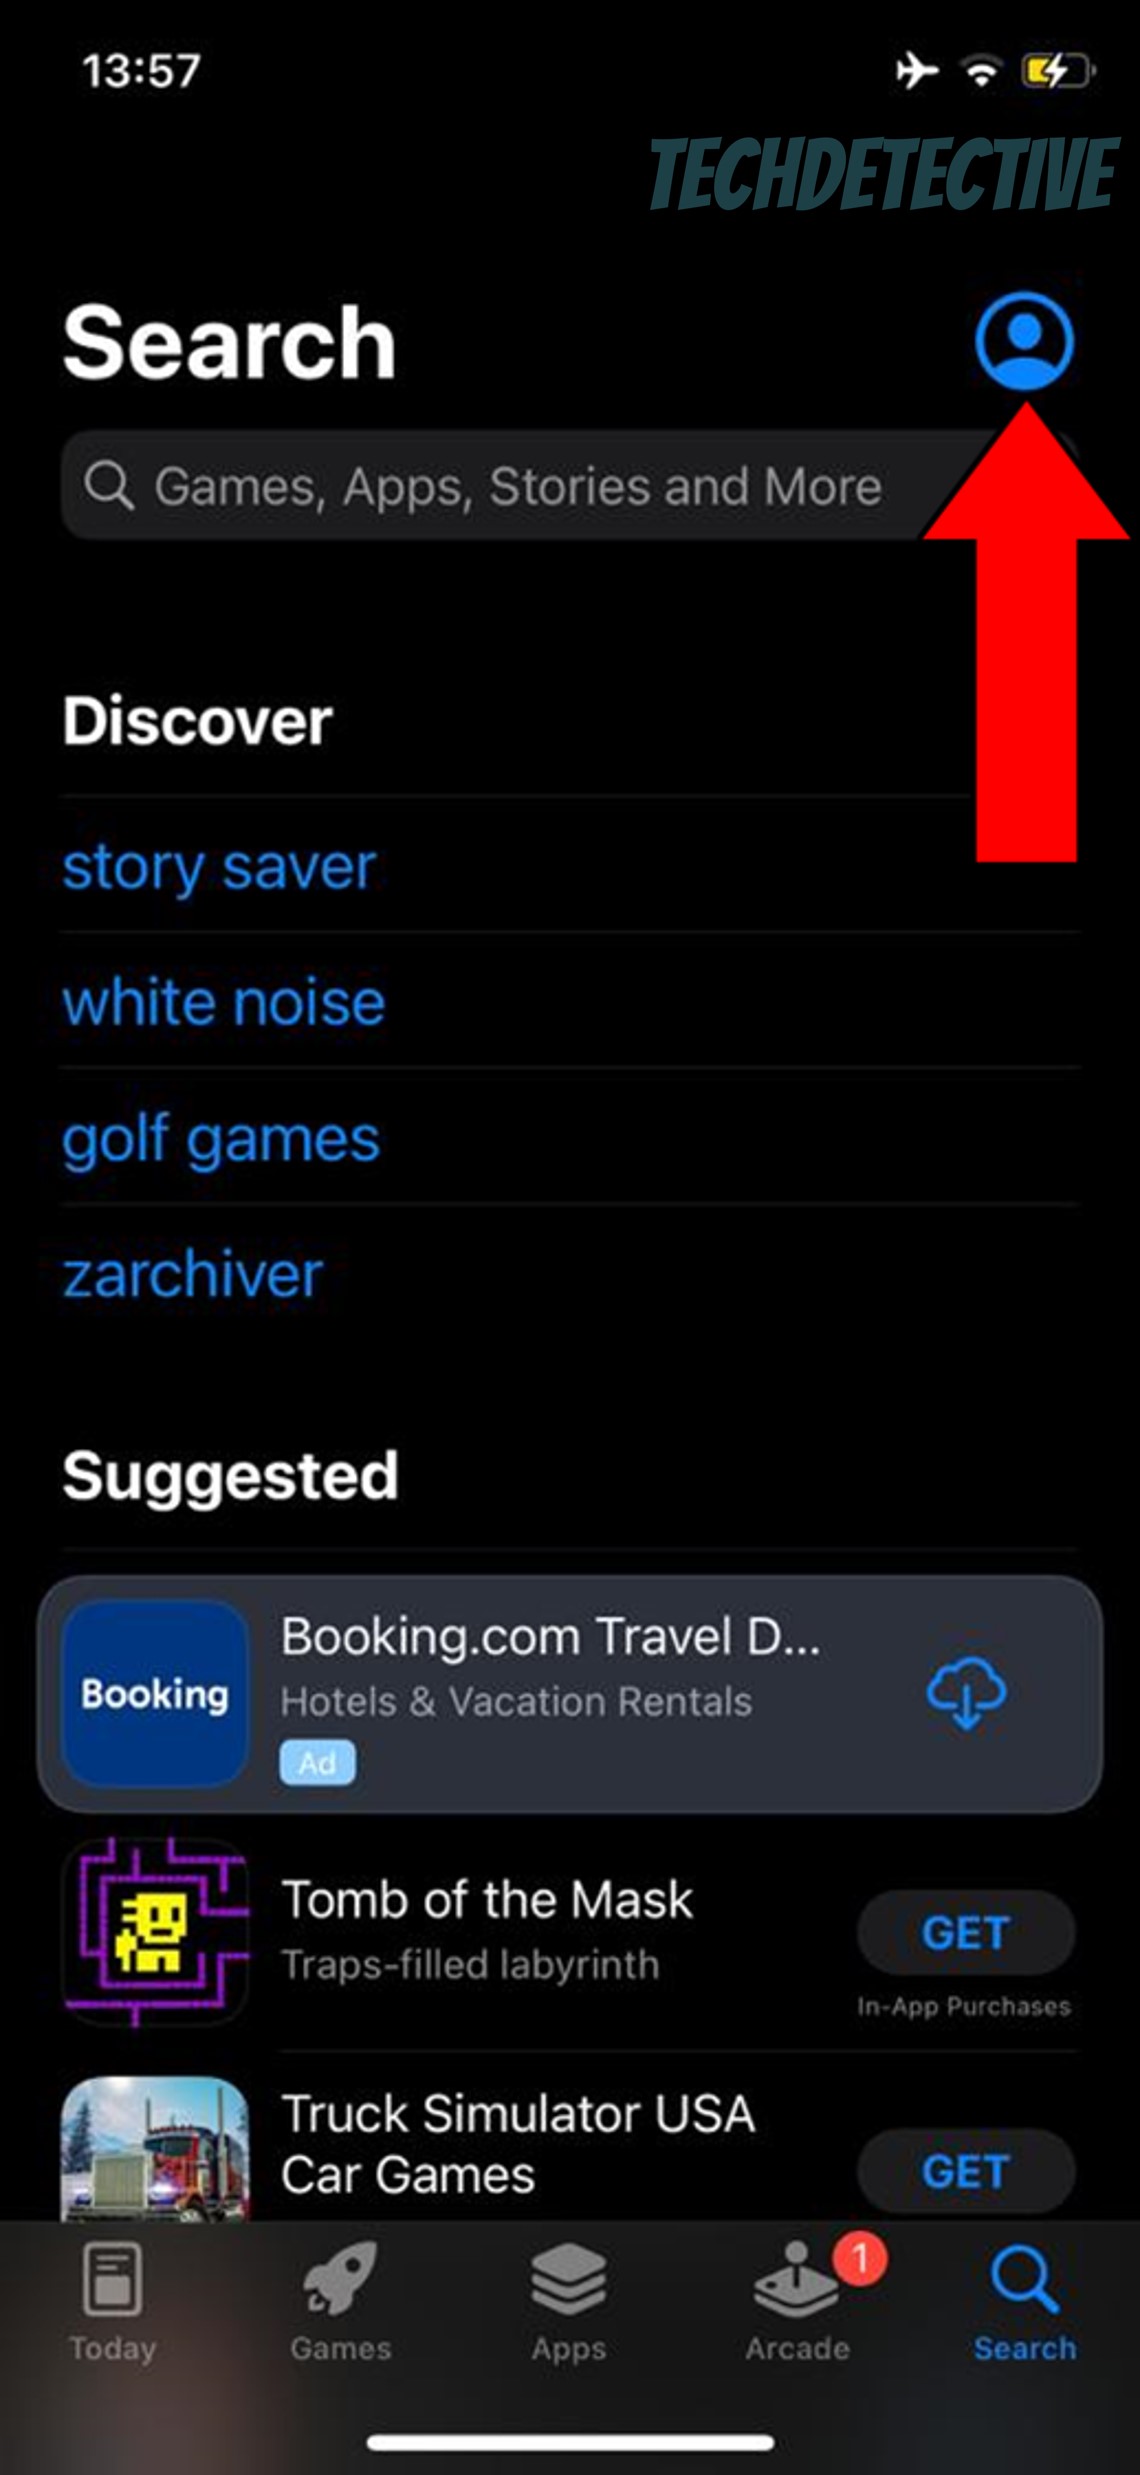
If you like watching Netflix on your mobile devices, please try this instead:
For iOS:
For Android:
Lastly, let’s try something a little more permanent.
Sometimes, the corrupted files or bugs that are causing colour changes when you’re watching Netflix might be too deep-rooted. In cases like these, the only way to get rid of them is by wiping all traces of the platform from your device’s memory.
This acts as an effective way of refreshing any essential resources and patching up coding lines or other aspects that might not be in the best shape.
A lot of people put this off out of fear of losing their accounts, “Continue Watching” list, and user preferences, but don’t worry, this is all backed up in the cloud. Your data should be waiting for you after reinstalling and logging back in.
Solution: Your devices might need different instructions, but to illustrate the process better, here are some examples of how to uninstall this service:
For Roku:
Once you have done this, reinstall the app by following the same steps as the first time you got it.
For Hisense TVs:
That about covers it.
When you’re seeing colour changes while watching Netflix, an enjoyable streaming experience can quickly become a source of frustration.
I hope this piece has helped you see that, in most cases, addressing the most common causes behind this is very easy. More often than not, keeping the app and your devices updated, as well as clearing your cache & cookies, should do the trick.
Thank you very much for sticking with me all the way to the end. If this article was useful and interesting, please make sure to check out our other incredible resources below to become a Tech Detective yourself!
Best of luck to you.


Detective ‘Gerry’ Molina is one of the most prolific detectives on our TechDetective team. He’s known for his ability to crack down on multitudes of tech crimes on behalf of you – the citizens of the internet. Molina is often the first point of contact for many cases, working to help free victims from the tyranny of tech issues.