Is Waze’s not there button giving you a hard time?
That sucks! Modern navigation apps are all about functionality, and having one of the critical features fail to do its job can be super annoying.
I know having this happen is no fun, and can even make you feel like you’re falling your fellow Wazers by not notifying them about a false report.
But don’t worry, I’m really glad you came here for answers. Below, you’ll find a list including 5 easy fixes to the most common manifestations of the issue.
When the “Not There” button on Waze is giving you issues by either disappearing or not working, you can try considering your report’s lifespan, or updating the platform/your devices. If that fails, you can also try clearing the app’s cache or uninstalling it altogether.
Read on to get back to reporting!
The first thing I’d like us to take a look at is how long reports are usually visible on the platform. You might be thinking that your “Not There” report has been ignored or that there’s something wrong with the feature when you can’t find your vote while navigating.
But what if I told you that the button might be working normally, and you’re just looking for it after too long?
You see, Waze reports have a limited duration, which means that, unless other people interact with them, they’ll be removed from the live map after a while. This could easily seem like the “Not There” button is giving you issues, as it would appear like your report wasn’t registered.
There’s also the possibility that you’ve reported something’s not there way too many times within a short period. If you’re 100% accurate, there’s no reason for the platform to regulate your ability to report, but hey… we all make mistakes sometimes!
If you accidentally reported something was not there when in fact, it was, perhaps the app’s developers have restricted your account temporarily. I know this sounds concerning, but worry not, the restriction usually doesn’t last long.
Moving on, let’s make sure you’re using the latest available version of Waze. I know it’s counterintuitive to think there’s a relation between the “Not There” button and updates, but trust me, they go hand in hand.
How so? Great question.
Long story short, app updates typically come packed with new and improved features, optimized settings, and patches for bugs. Using an outdated Waze version on a fully updated device could be causing the “Not There” button on the platform to start giving you issues by not doing what it’s supposed to.
And to make matters worse, this can also be the source of other technical difficulties, such as a scoreboard that’s not working.
Now, in most cases, there’s nothing to worry about, as both your devices and Waze are configured to update themselves automatically. However, occasionally a corrupted file, a weak network, or a coding bug can get in the way.
Solution: If you suspect this to be what’s causing your current situation, try looking for updates and installing them manually.
Here’s how you can go about it:
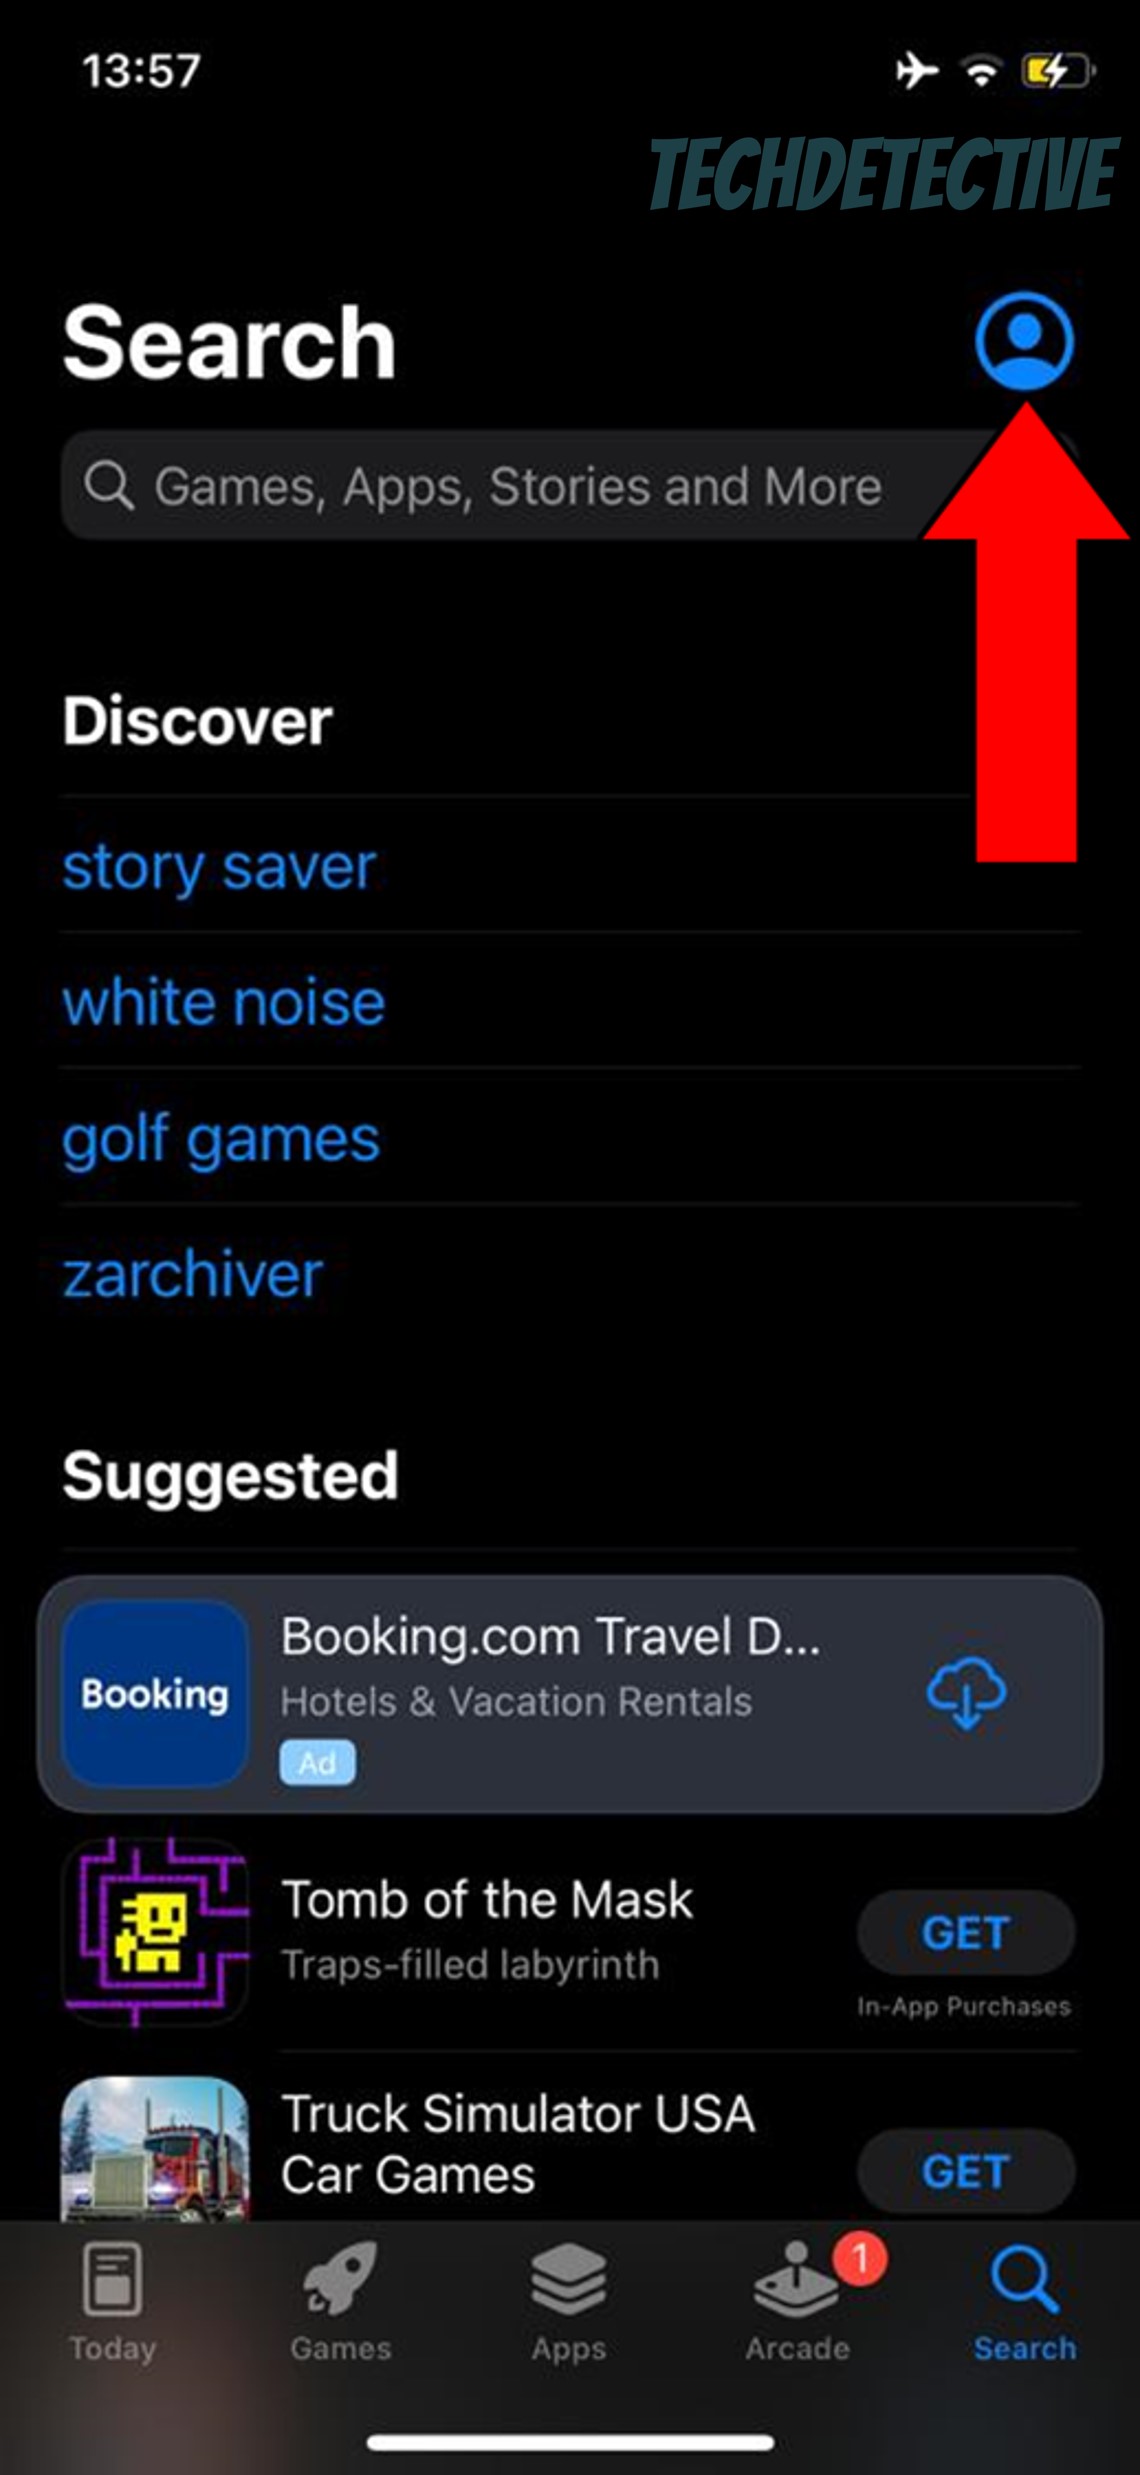
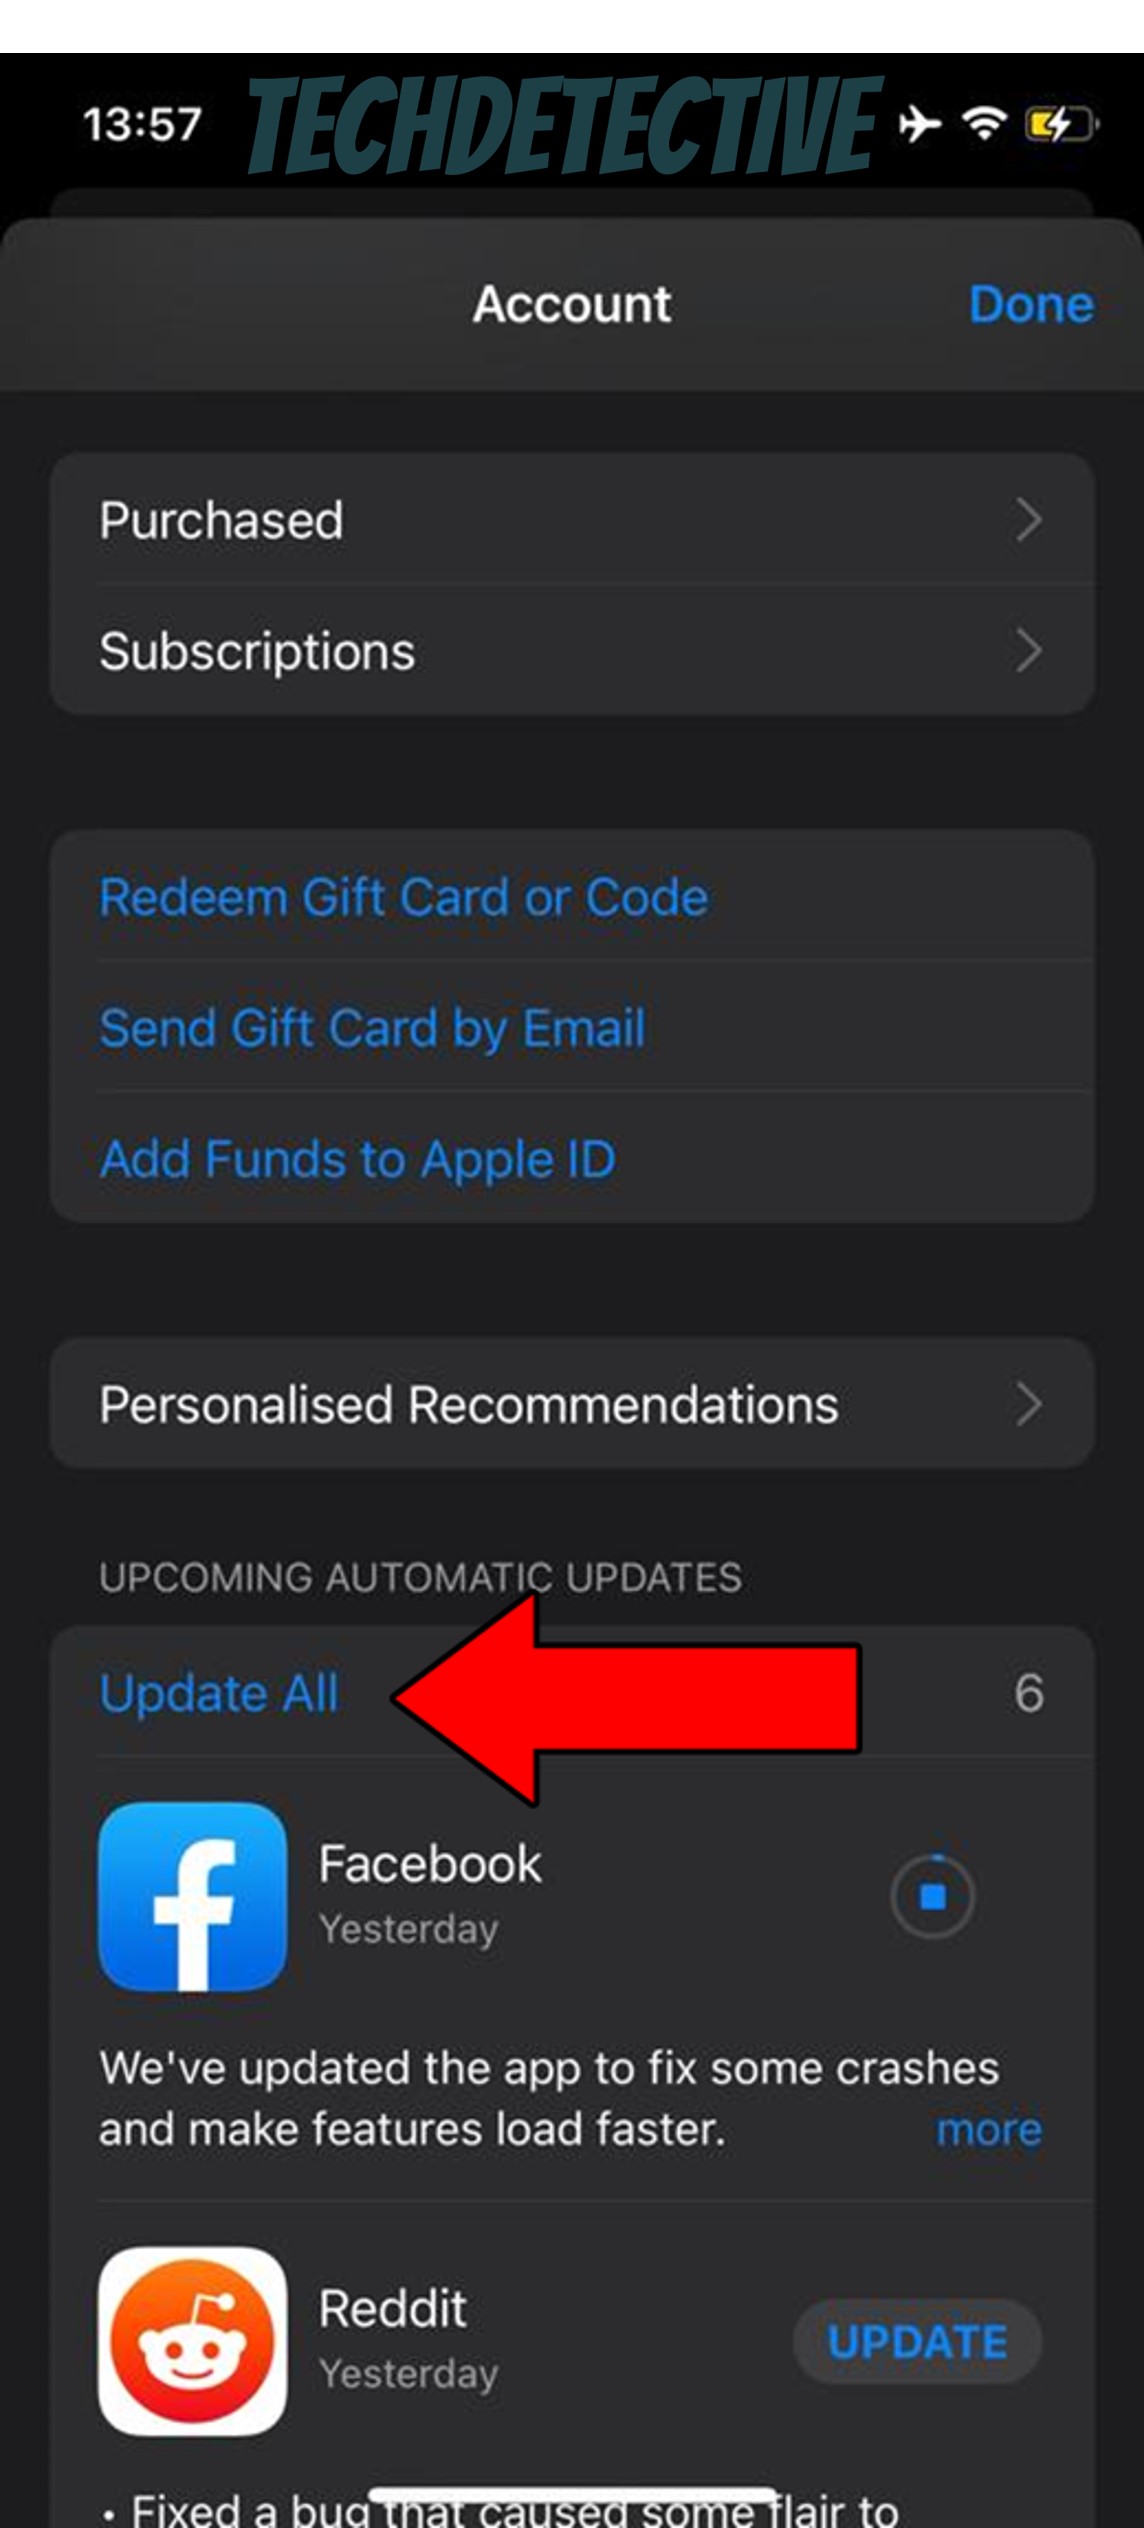
For iOS:
For Android:
Now that we’ve established the importance of looking out for Waze updates, it’s time to discuss the other piece of the puzzle – your device’s operating system. Believe it or not, even if you fully update Waze, you’ll fail to see the full benefits of this unless your devices are also kept in tip-top shape.
The good news is that, as I mentioned earlier, this is typically done automatically, so you don’t have to worry about it. But sadly, as you’ve learned thus far, things don’t always go according to plan.
Solution: If you think an outdated operating system version is the reason the “Not There” button on Waze is giving you issues by not triggering any actions, try manually updating your devices. It’s super simple and quick:
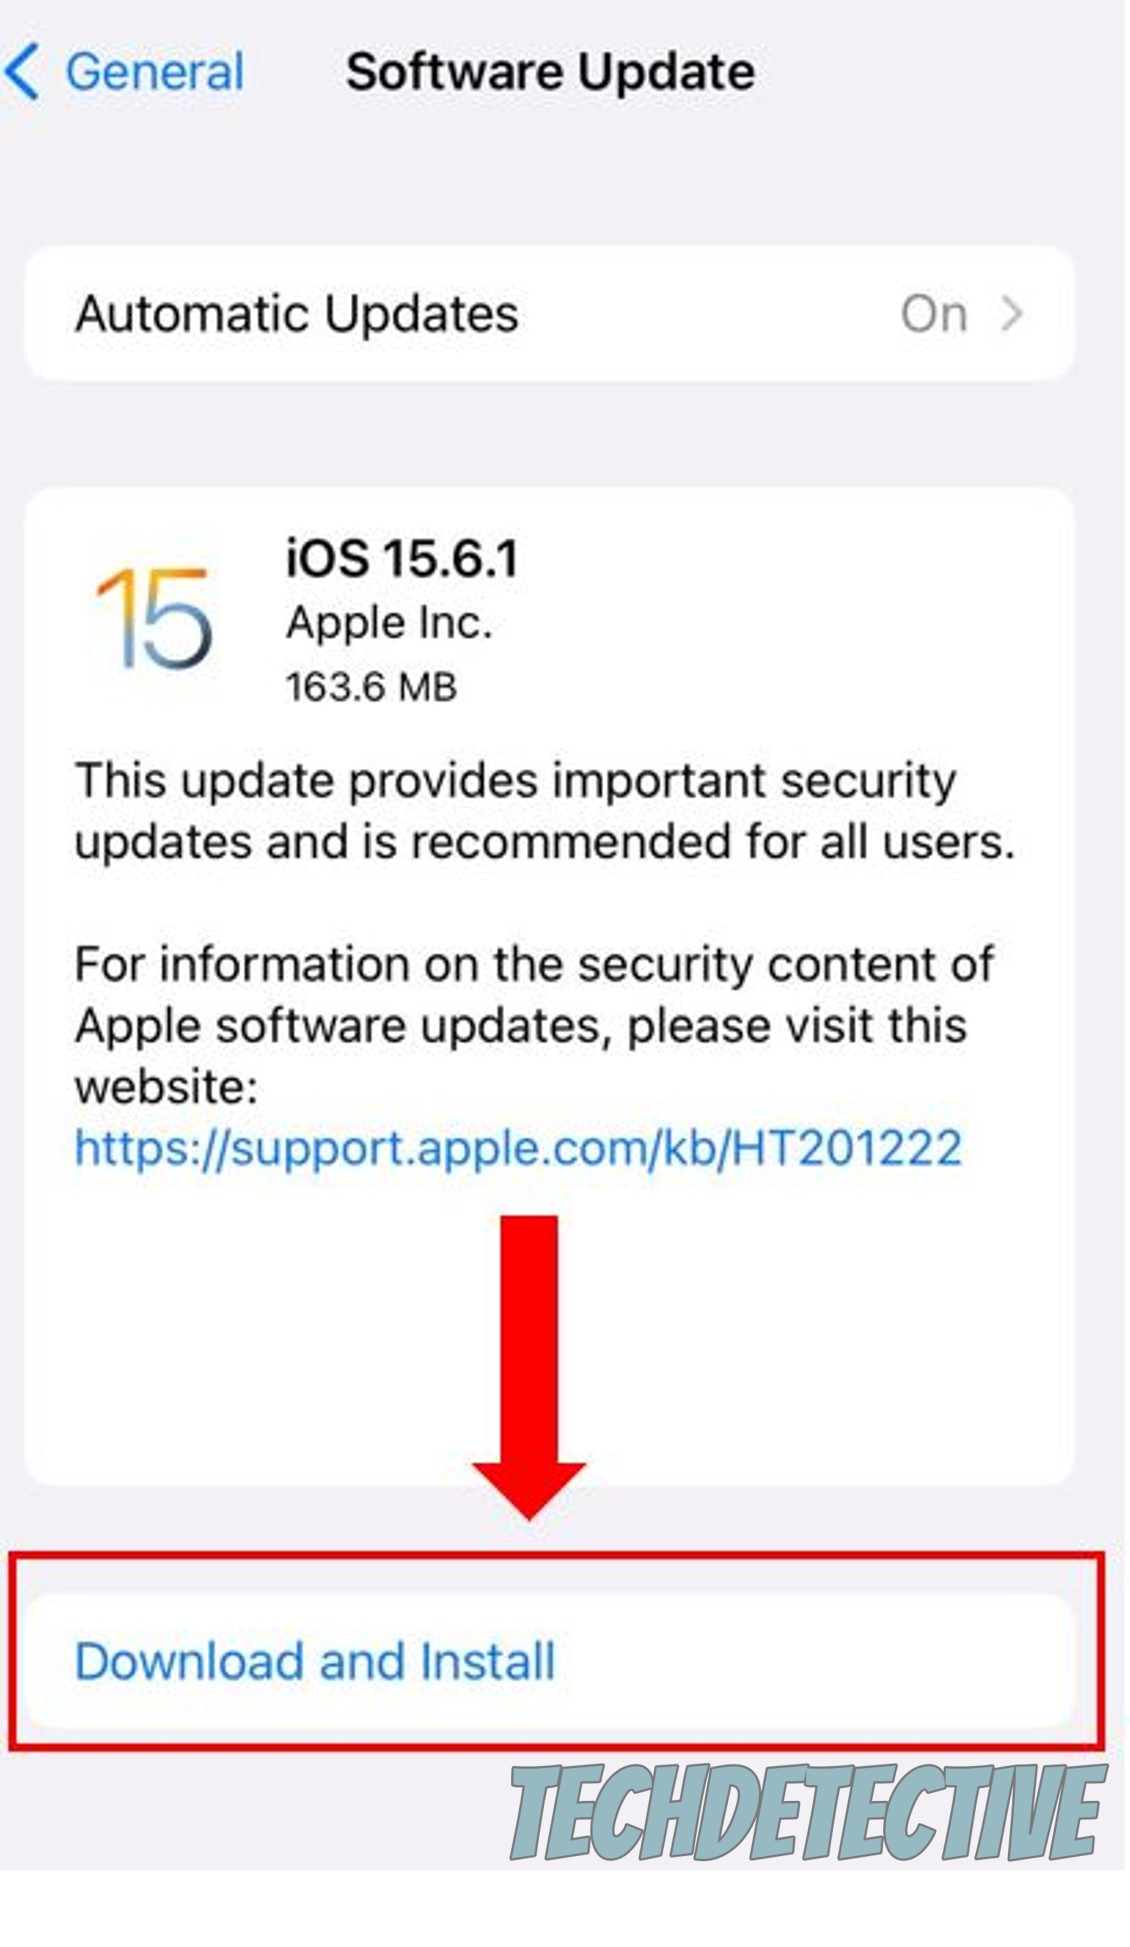
For Android:
Yet another reason the “Not There” button on Waze is giving you issues, is that the app’s cache is acting up.
Depending on how well-versed you are in Tech terms, you might already know every nook and cranny of this. If so, feel free to move on to the solution, but if you’re new to all this, please read on.
Boiling it down to the basics, an app’s cache is where crucial information is stored. In there, you can typically find login credentials, user preferences, as well as routes and street names in the case of Waze and other GPS navigation platforms.
The main purpose of having a cache is efficiency. By keeping all the previously mentioned elements handy, the app can load quicker when launched, which can save your day several minutes and keep you from missing an exit on the road.
That being said, while leaving your cache alone is almost always a good thing, there are some exceptions. Sometimes, a bug or a corrupted file can be accidentally stored within it, causing a world of trouble, including issues such as this one, and others, like constant crashing.
Solution: In the event that you suspect your cache is corrupted, try clearing it by following the easy steps below:
For Android:
The process for clearing Waze’s cache on iOS is a little more complex, so you’re much more likely to do this successfully by uninstalling the app altogether. Please read on to find out how to do this.
Last, but not least, let’s try something a little more permanent – uninstalling the platform.
Sometimes, corrupted files and bugs can be too ingrained within Waze’s central files. In cases like that, no amount of updating, restarting, or relaunching will do the trick. The only thing that will work will be to wipe all traces of the navigation app from your device’s memory.
You might be putting this off out of fear of losing your rank on the scoreboard or the points you have collected, but rest assured that it won’t happen. That information is typically stored in the cloud, so it should be waiting for you once you reinstall Waze and log back into your account.
Solution: Here’s how to properly uninstall Waze from the most popular operating systems out there:
For Android:
That about sums it up!
When the “Not There” button on Waze is giving you issues, convenience can quickly turn into a nuisance.
I hope this piece has helped you better understand why this happens and how easily you can address the most common causes behind the situation. In most cases, updating the platform or clearing the cache, should work wonders and get things back to normal.
I really appreciate you sticking with me all the way to the end. If this article piqued your interest and answered your most burning questions, it’ll please you to know that there’s new content to learn from every week. While our latest work comes out of the oven, I encourage you to check out our other wonderful resources below to become a Tech Detective yourself!
I wish you all the best.


Detective ‘Gerry’ Molina is one of the most prolific detectives on our TechDetective team. He’s known for his ability to crack down on multitudes of tech crimes on behalf of you – the citizens of the internet. Molina is often the first point of contact for many cases, working to help free victims from the tyranny of tech issues.