Looking to automatically mute yourself and others to avoid revealing secrets in Microsoft Teams?
I totally understand! Meetings are virtual places of professionalism where deals are struck, and multimillion-dollar partnerships are born. As such, I bet the last thing you want is to have someone’s pet or baby make a weird noise as they join in.
This raises the question, is it possible to automatically mute yourself & others within the platform? Well… yes and no. I’ll explain this a little deeper below, so you can have a clearer idea regarding your options.
Ready? Let’s dive in!
Sadly, no. There are some buttons and settings you can enable to mute every participant quicker, but unfortunately, you can’t automatically mute people after they’ve joined the meeting.
What you can do, though, is set up Teams to mute people as they enter, which allows for greater unwanted noise control. By enabling this option, participants’ microphones will only be unmuted if they do it themselves later on.
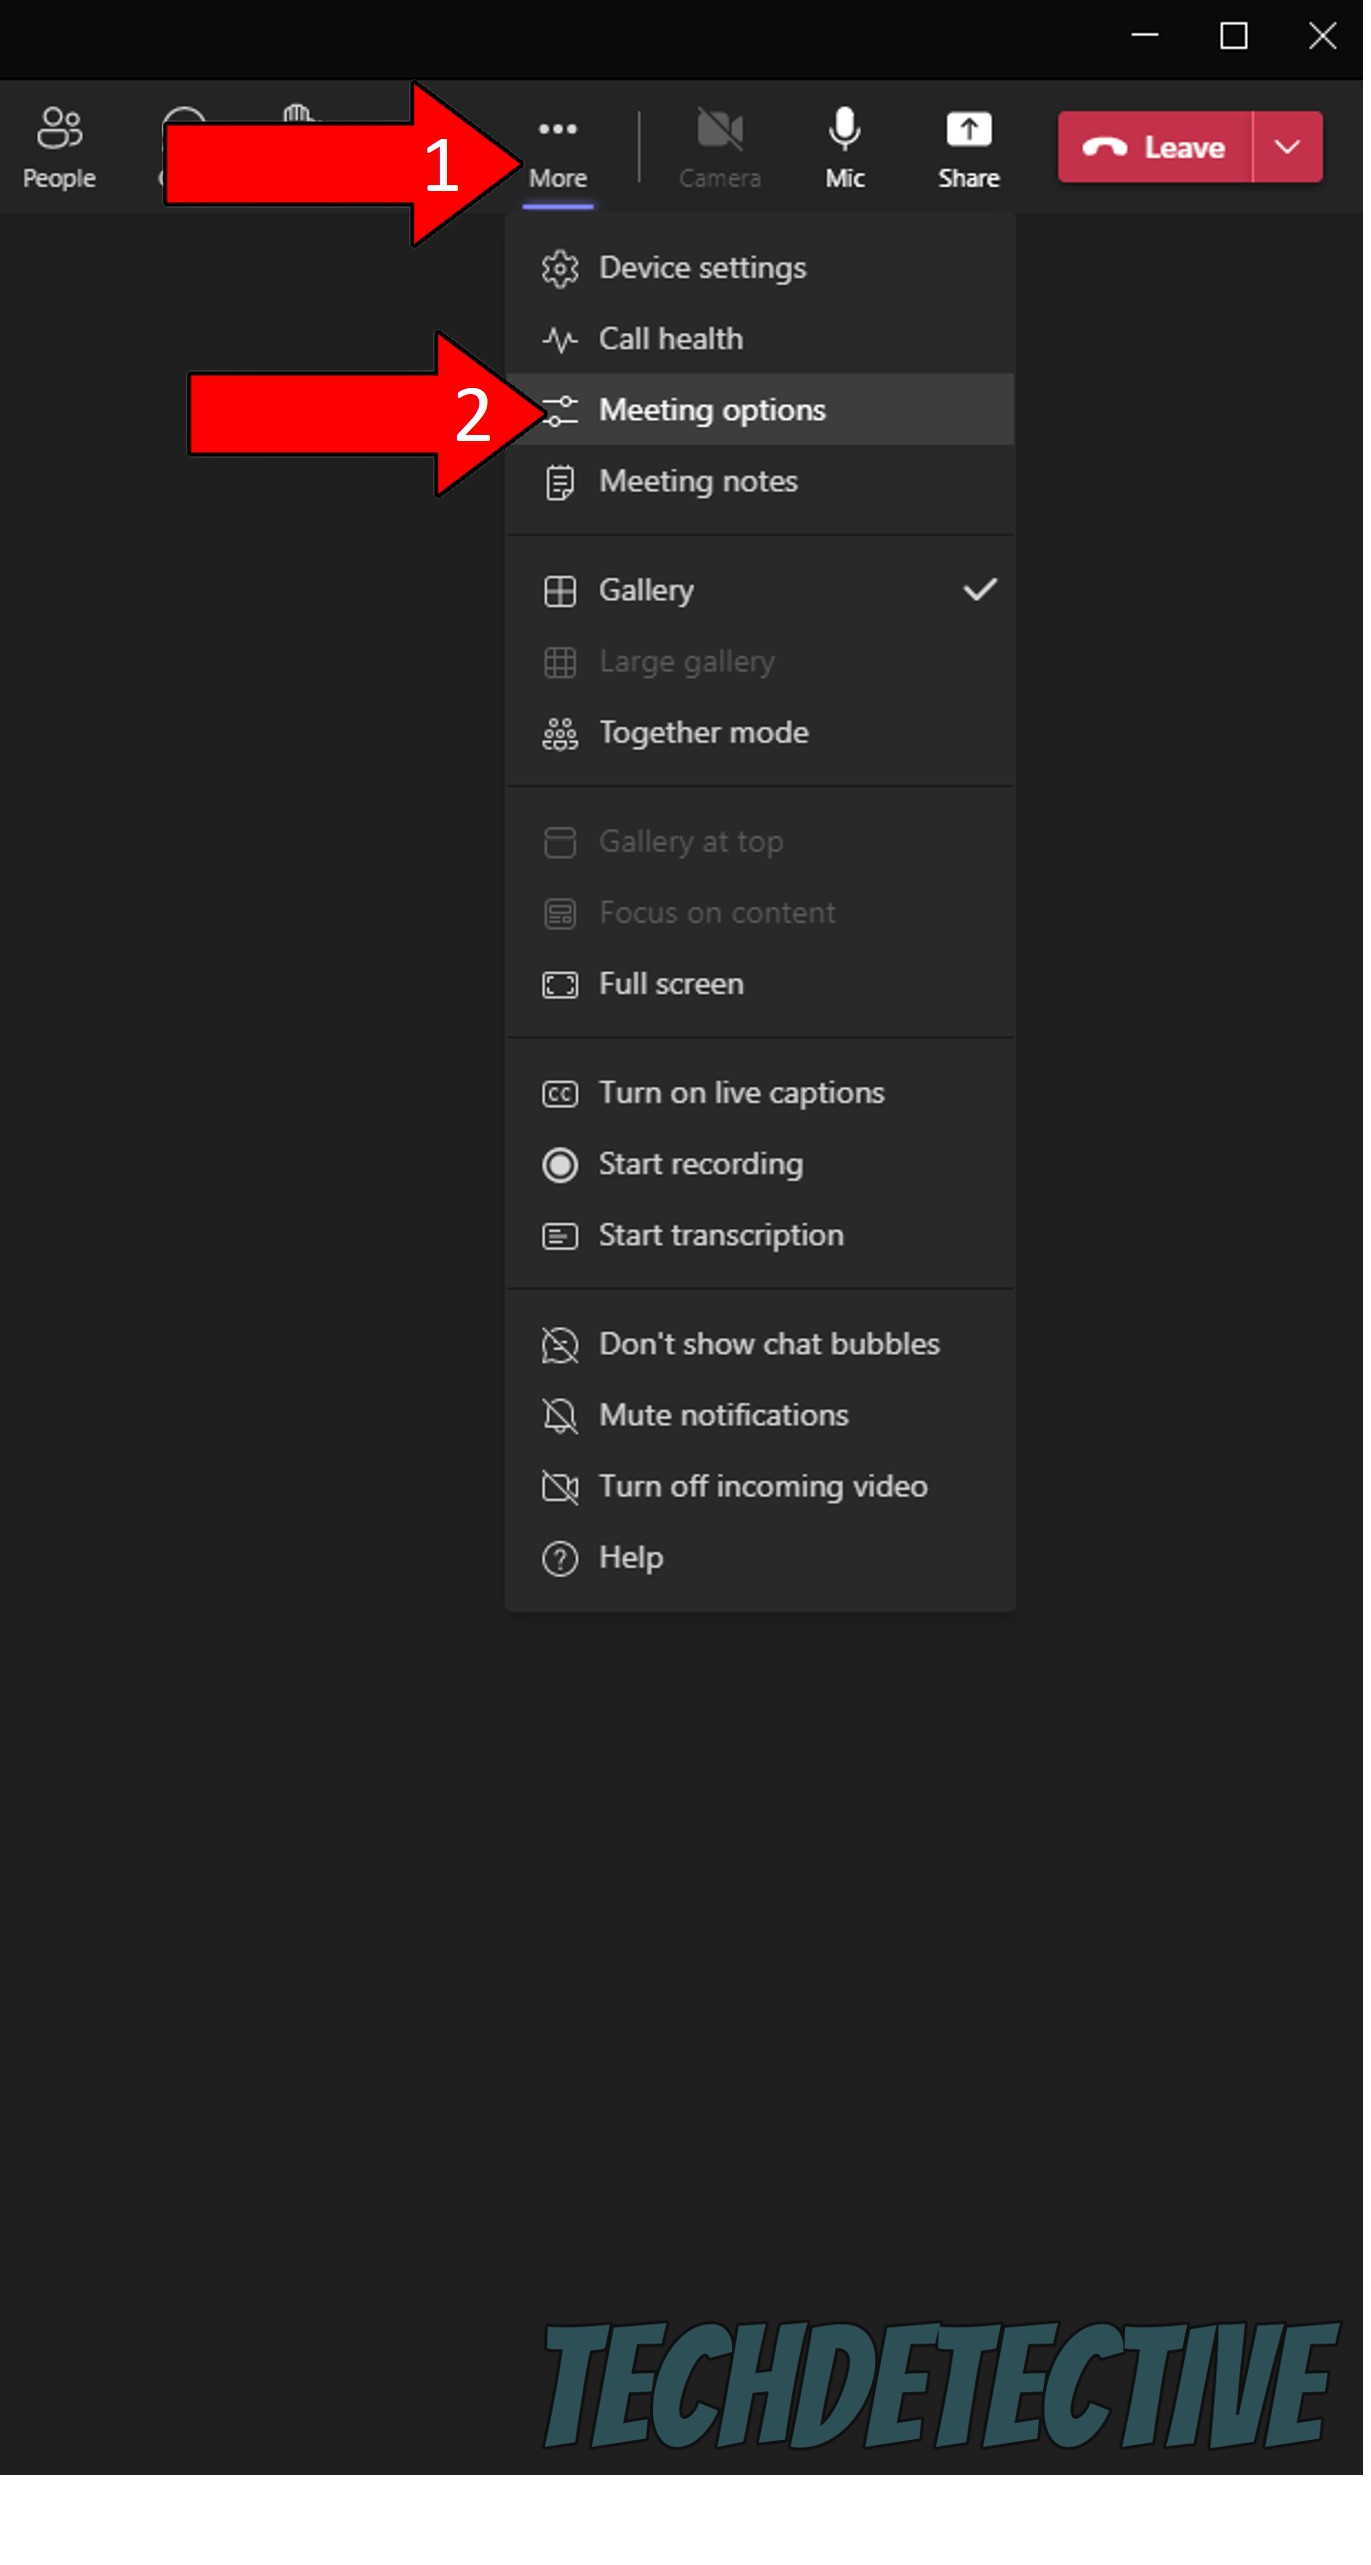
This might seem like a complicated thing to enable, but it’s actually one of the simplest features within the platform. As you can imagine, though, you can only do this if you’re the meeting’s host.
Solution: Here’s what you have to do:
4. On the new window that appears, toggle off “Allow mic for all attendees?”
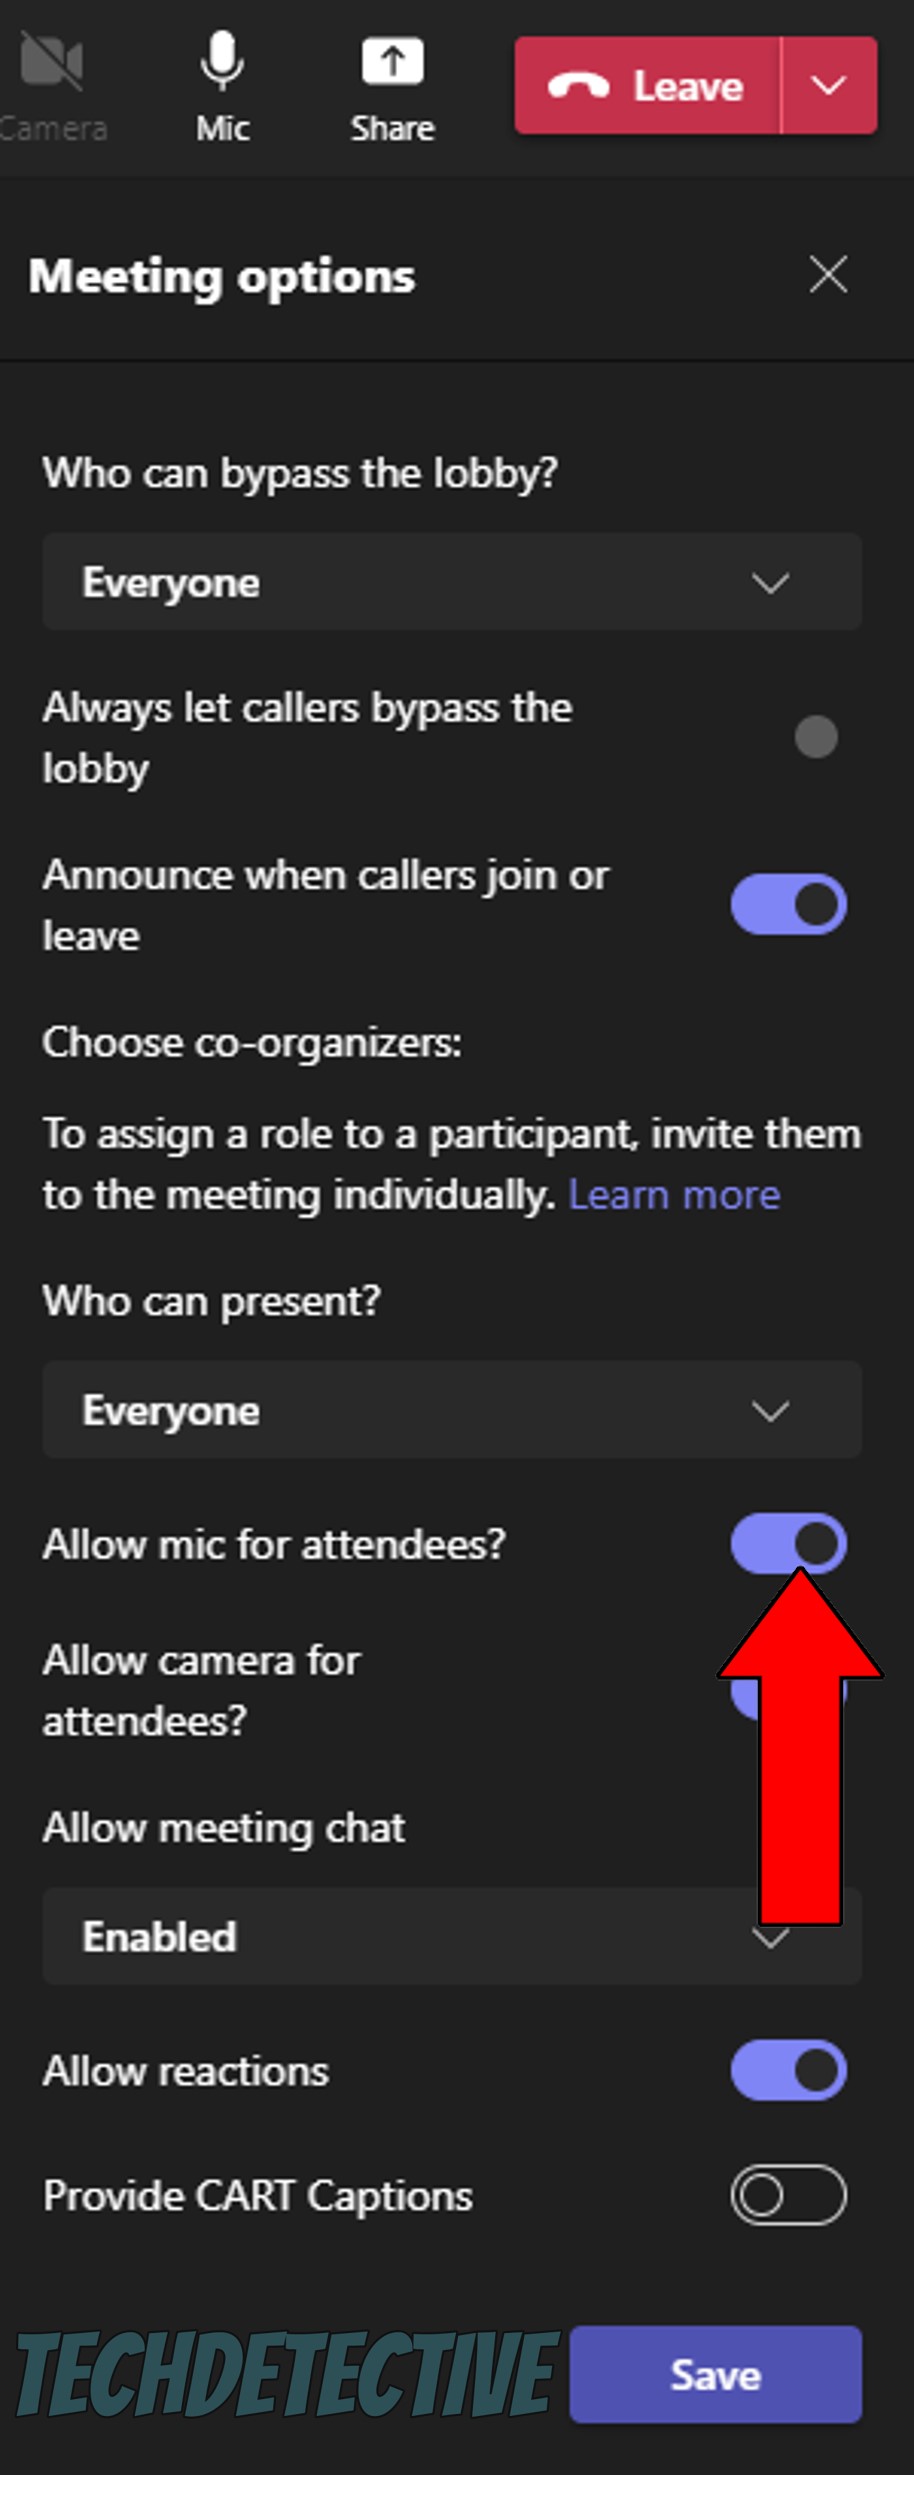
Now, everyone who joins your meeting will be automatically muted until you toggle this option back on. It’s important that you explain to your team that you’ll be doing this, as they might think there’s something wrong with their platform.
If there is, we have some solutions for you. But if you or the admin are controlling others’ mic access, then all is well.
Well, this is also possible and can be useful in many scenarios. Let’s assume you don’t want to go about this by using the method above. If you want to leave everyone’s mic enabled, but you need to be able to silence every participant in seconds, here’s another option you can try.
Bear in mind, that just like the previous method, you need to be the meeting’s host or admin, as you won’t have this option otherwise.
Solution: The process is very simple:

4. You should see a button that reads “Mute all” located right above the list of participants. Click on it as needed to control everyone’s mic access.
That about covers it!
Most of the time, communications platforms streamline our processes and make our lives simpler. But in some cases, we might expect them to have features they don’t, and that’s when things get complicated.
I hope this piece has helped you learn that, although there’s no way to automatically mute people after they’re done talking, enabling and disabling every participant’s microphone is as simple as clicking on a button.
Thank you so much for sticking with me all the way to the end. If you found this article helpful, you’ll be very glad to know that we upload new content every week. In the meantime, why don’t you check out our other resources below to become a Tech Detective yourself?
Best of luck in all your meetings!


Detective ‘Gerry’ Molina is one of the most prolific detectives on our TechDetective team. He’s known for his ability to crack down on multitudes of tech crimes on behalf of you – the citizens of the internet. Molina is often the first point of contact for many cases, working to help free victims from the tyranny of tech issues.