Are you desperately trying to understand why you can’t unmute your mic in Microsoft Teams?
You’re not alone! If I told you how many people I’ve seen struggle with this same issue, you probably wouldn’t believe me.
I get how annoying it can be to try to speak your mind during a meeting, only to be silenced by a malfunction on your end.
But don’t worry, you came to the right place for solutions. Below, you’ll find a list of many fixes you can check to solve this issue once and for all.
The 5 main things to check when you can’t unmute your mic in Microsoft Teams are your Firewall permissions, your microphone settings, and your software version. If that doesn’t work, you can also try uninstalling Teams, and clearing the program’s cache.
Read on to make your voice heard!
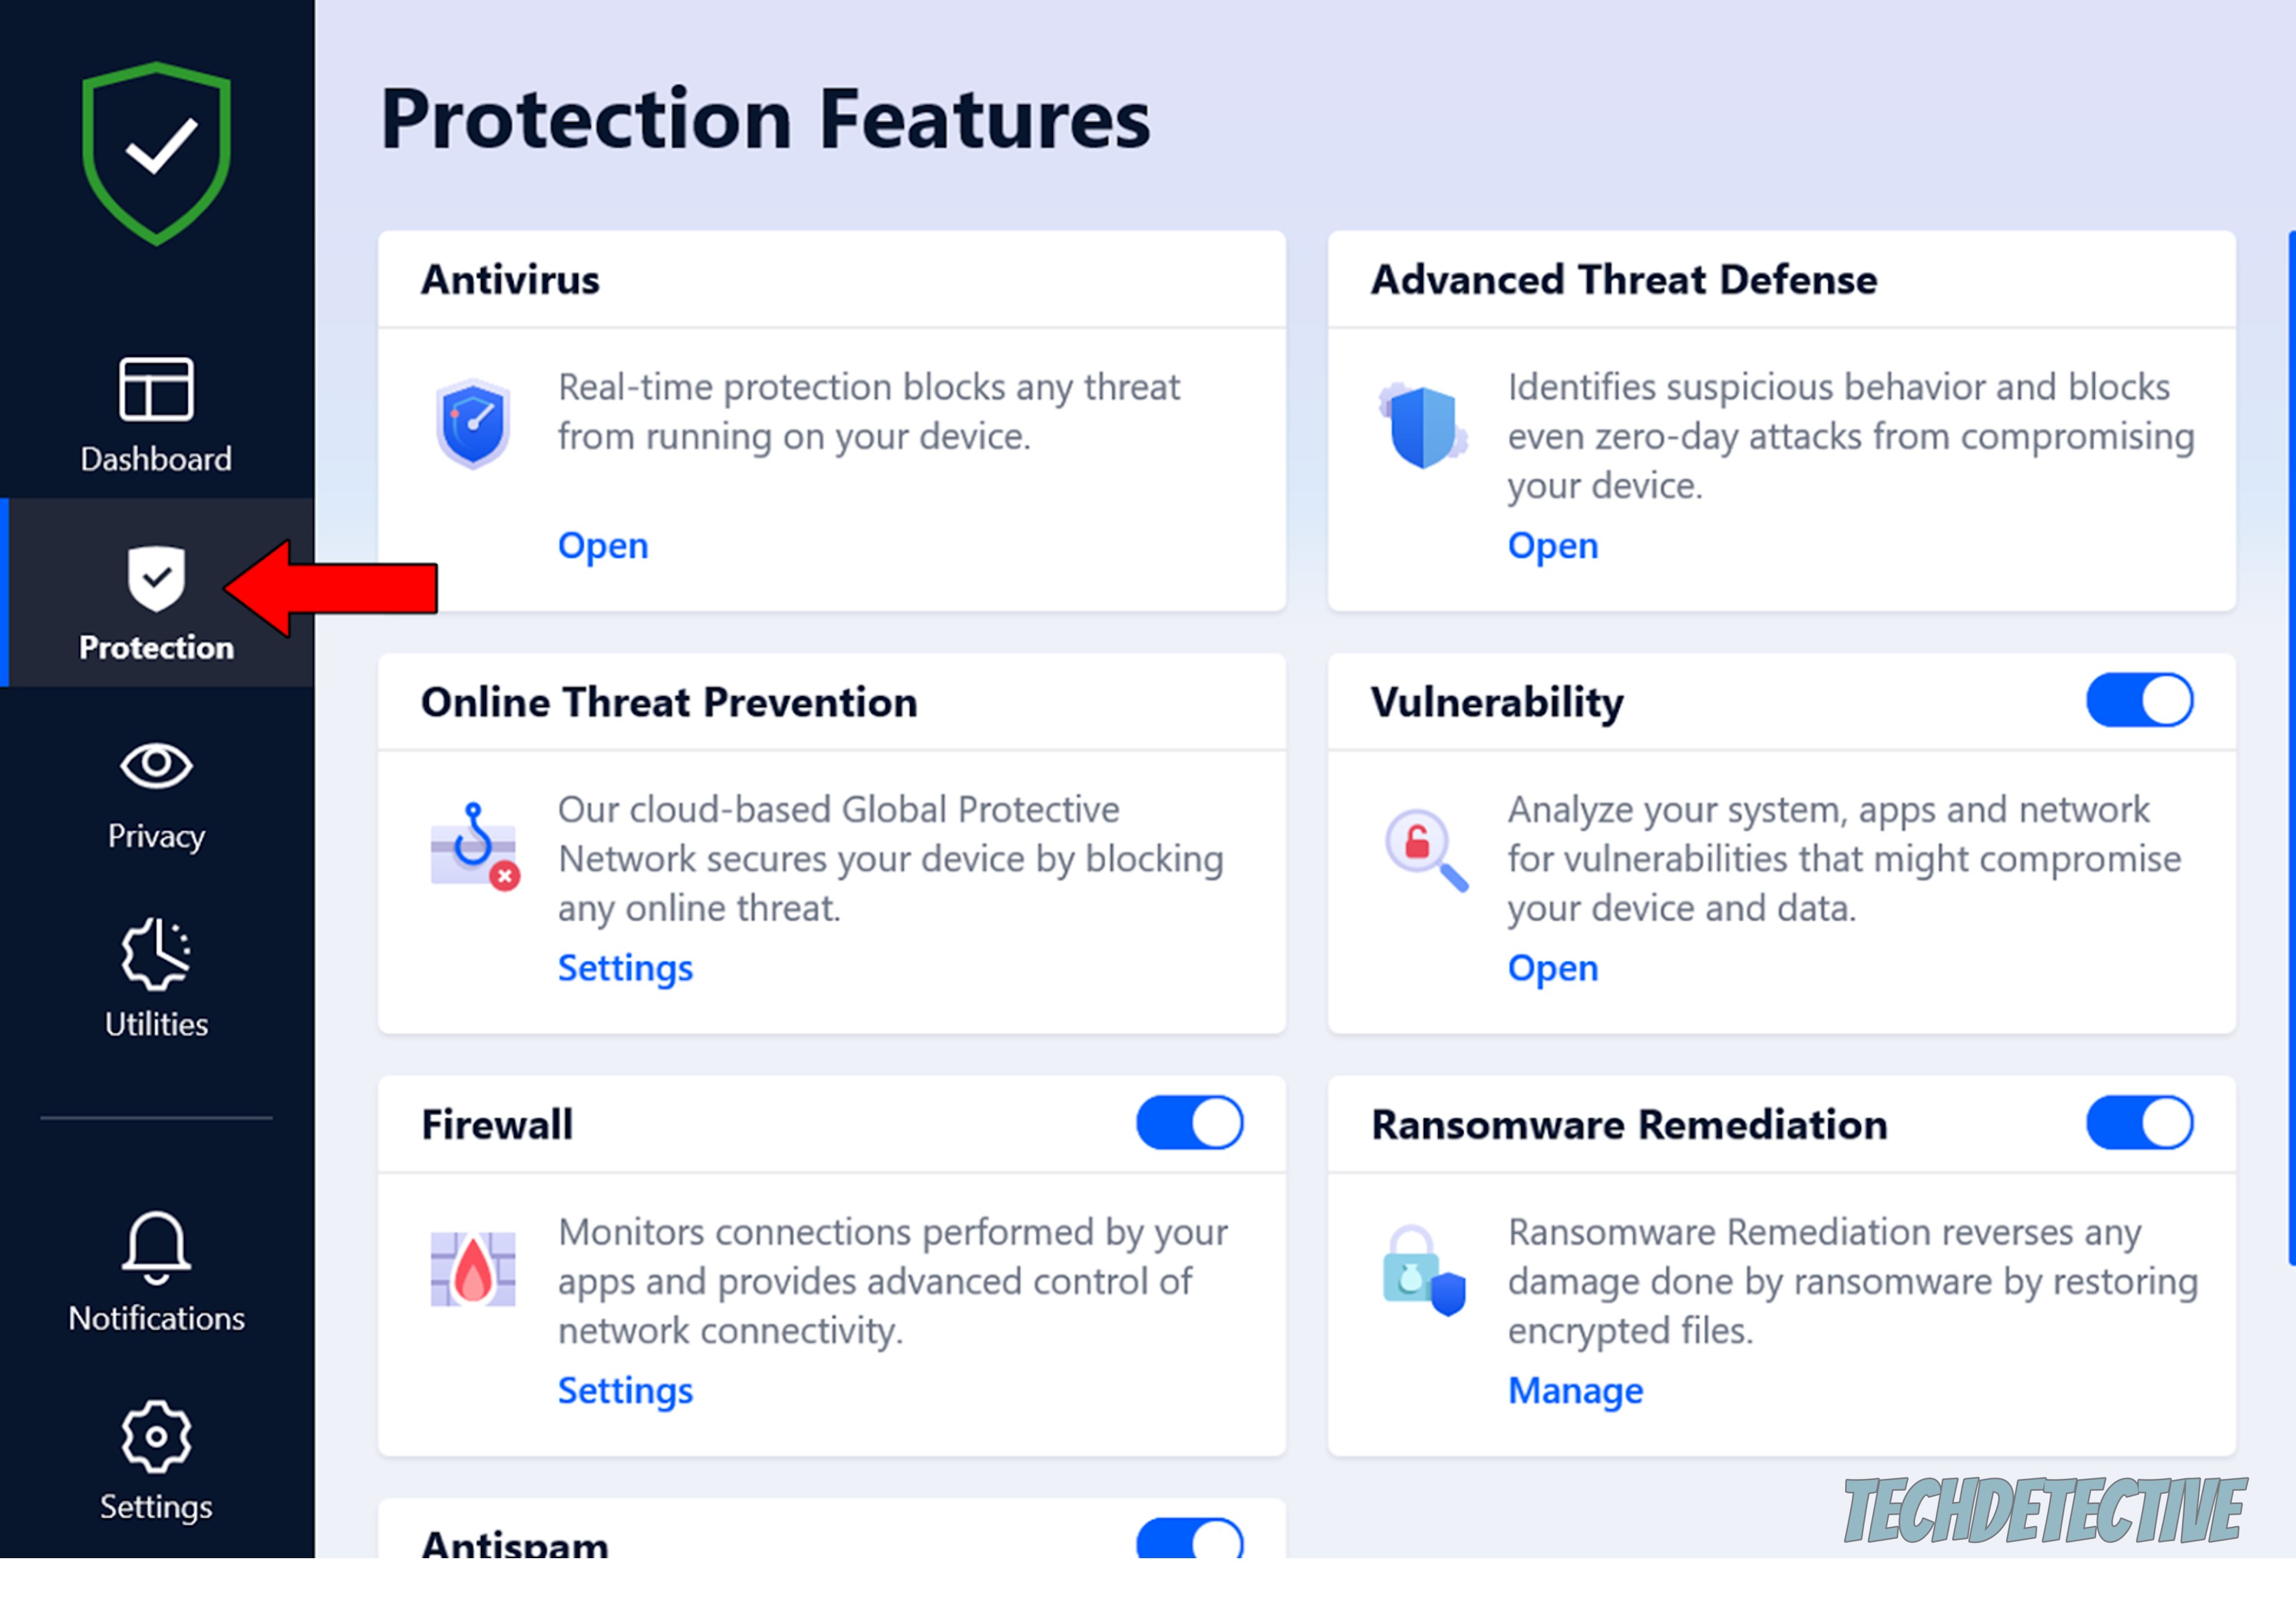
I’d like us to start off by checking how strict your Firewall permissions are.
These days, getting viruses and malware is very easy, as even the most innocent of downloads could be carrying a dangerous file. Cybercriminals are constantly trying to steal information from unwary internet users, and sometimes we may notice something’s wrong when it’s already too late.
This is why security software developers are constantly creating and improving Antivirus programs to stay two steps ahead of those who mean the average person harm. And while these tools are great for staying protected, they could also explain why you can’t unmute your mic in Microsoft Teams.
Why? Simple.
Teams is a communications platform, and while it’s licensed and managed by Microsoft (which is as safe as it can get), most Antivirus software errs on the side of caution, blocking most incoming and outgoing features.
Now, does this mean you’re stuck having to choose between safe browsing and unmuting your mic? Absolutely not. All you have to do is create an exception for Microsoft Teams on your favorite Firewall.
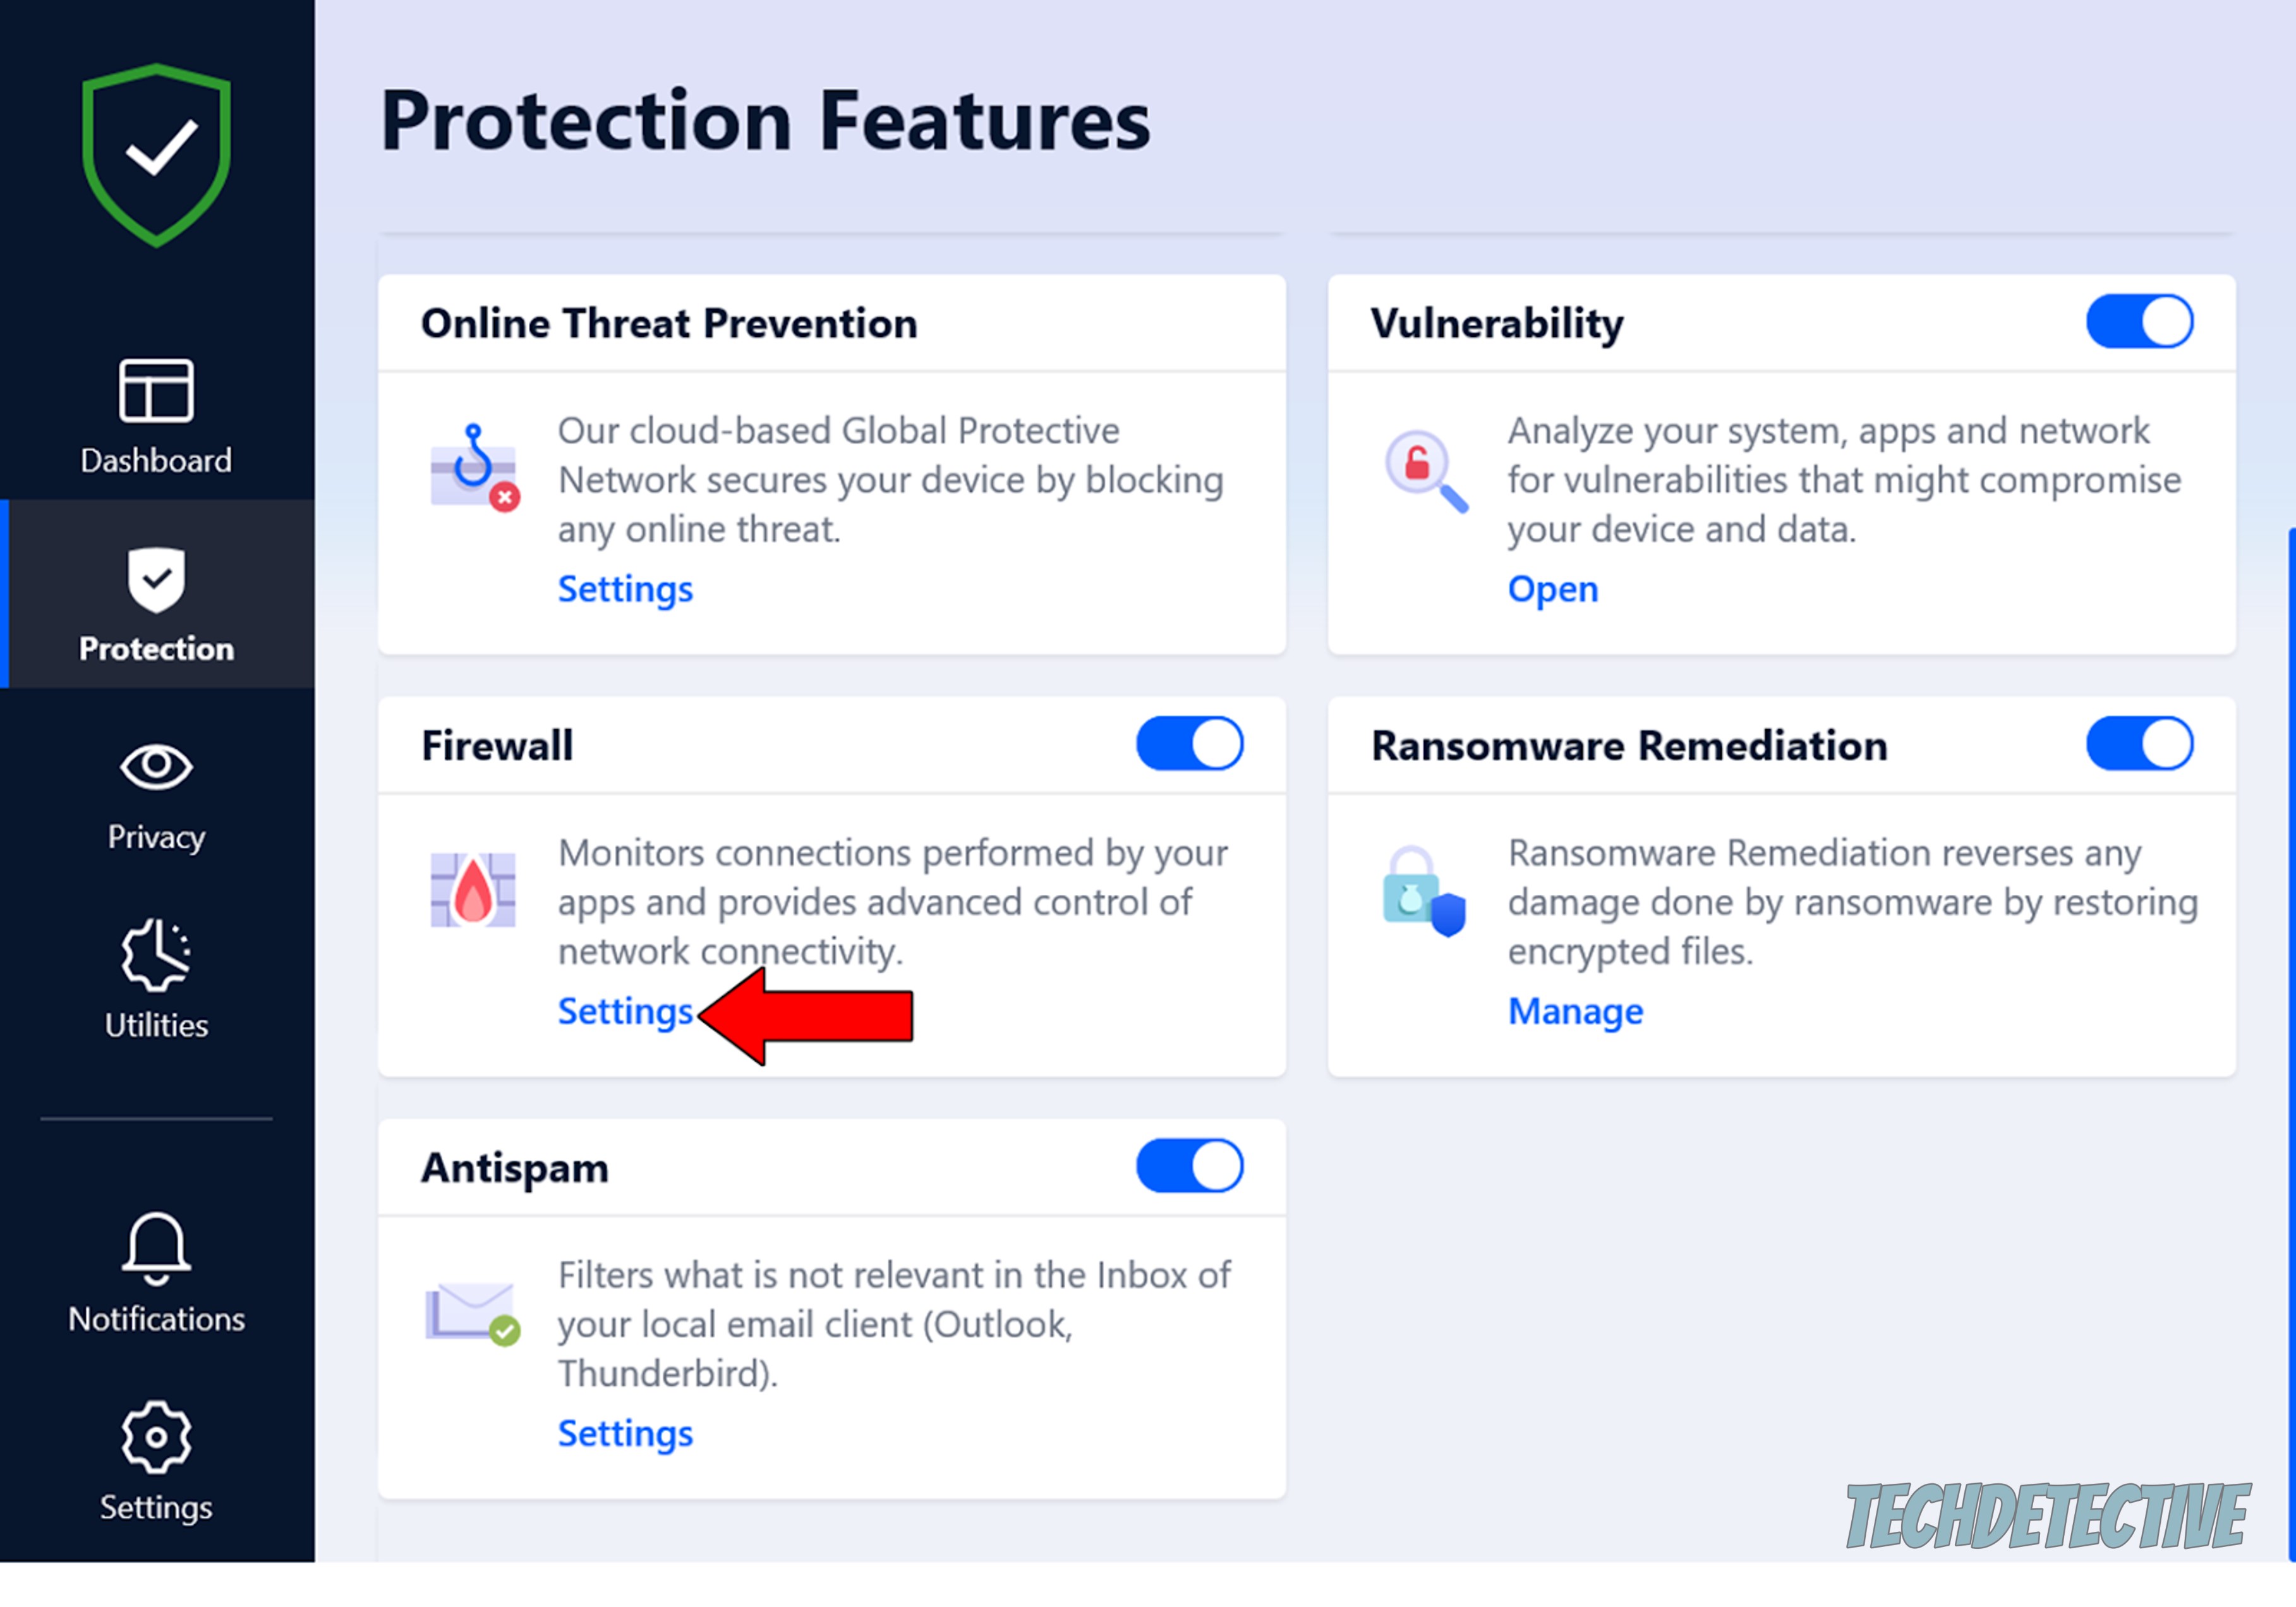
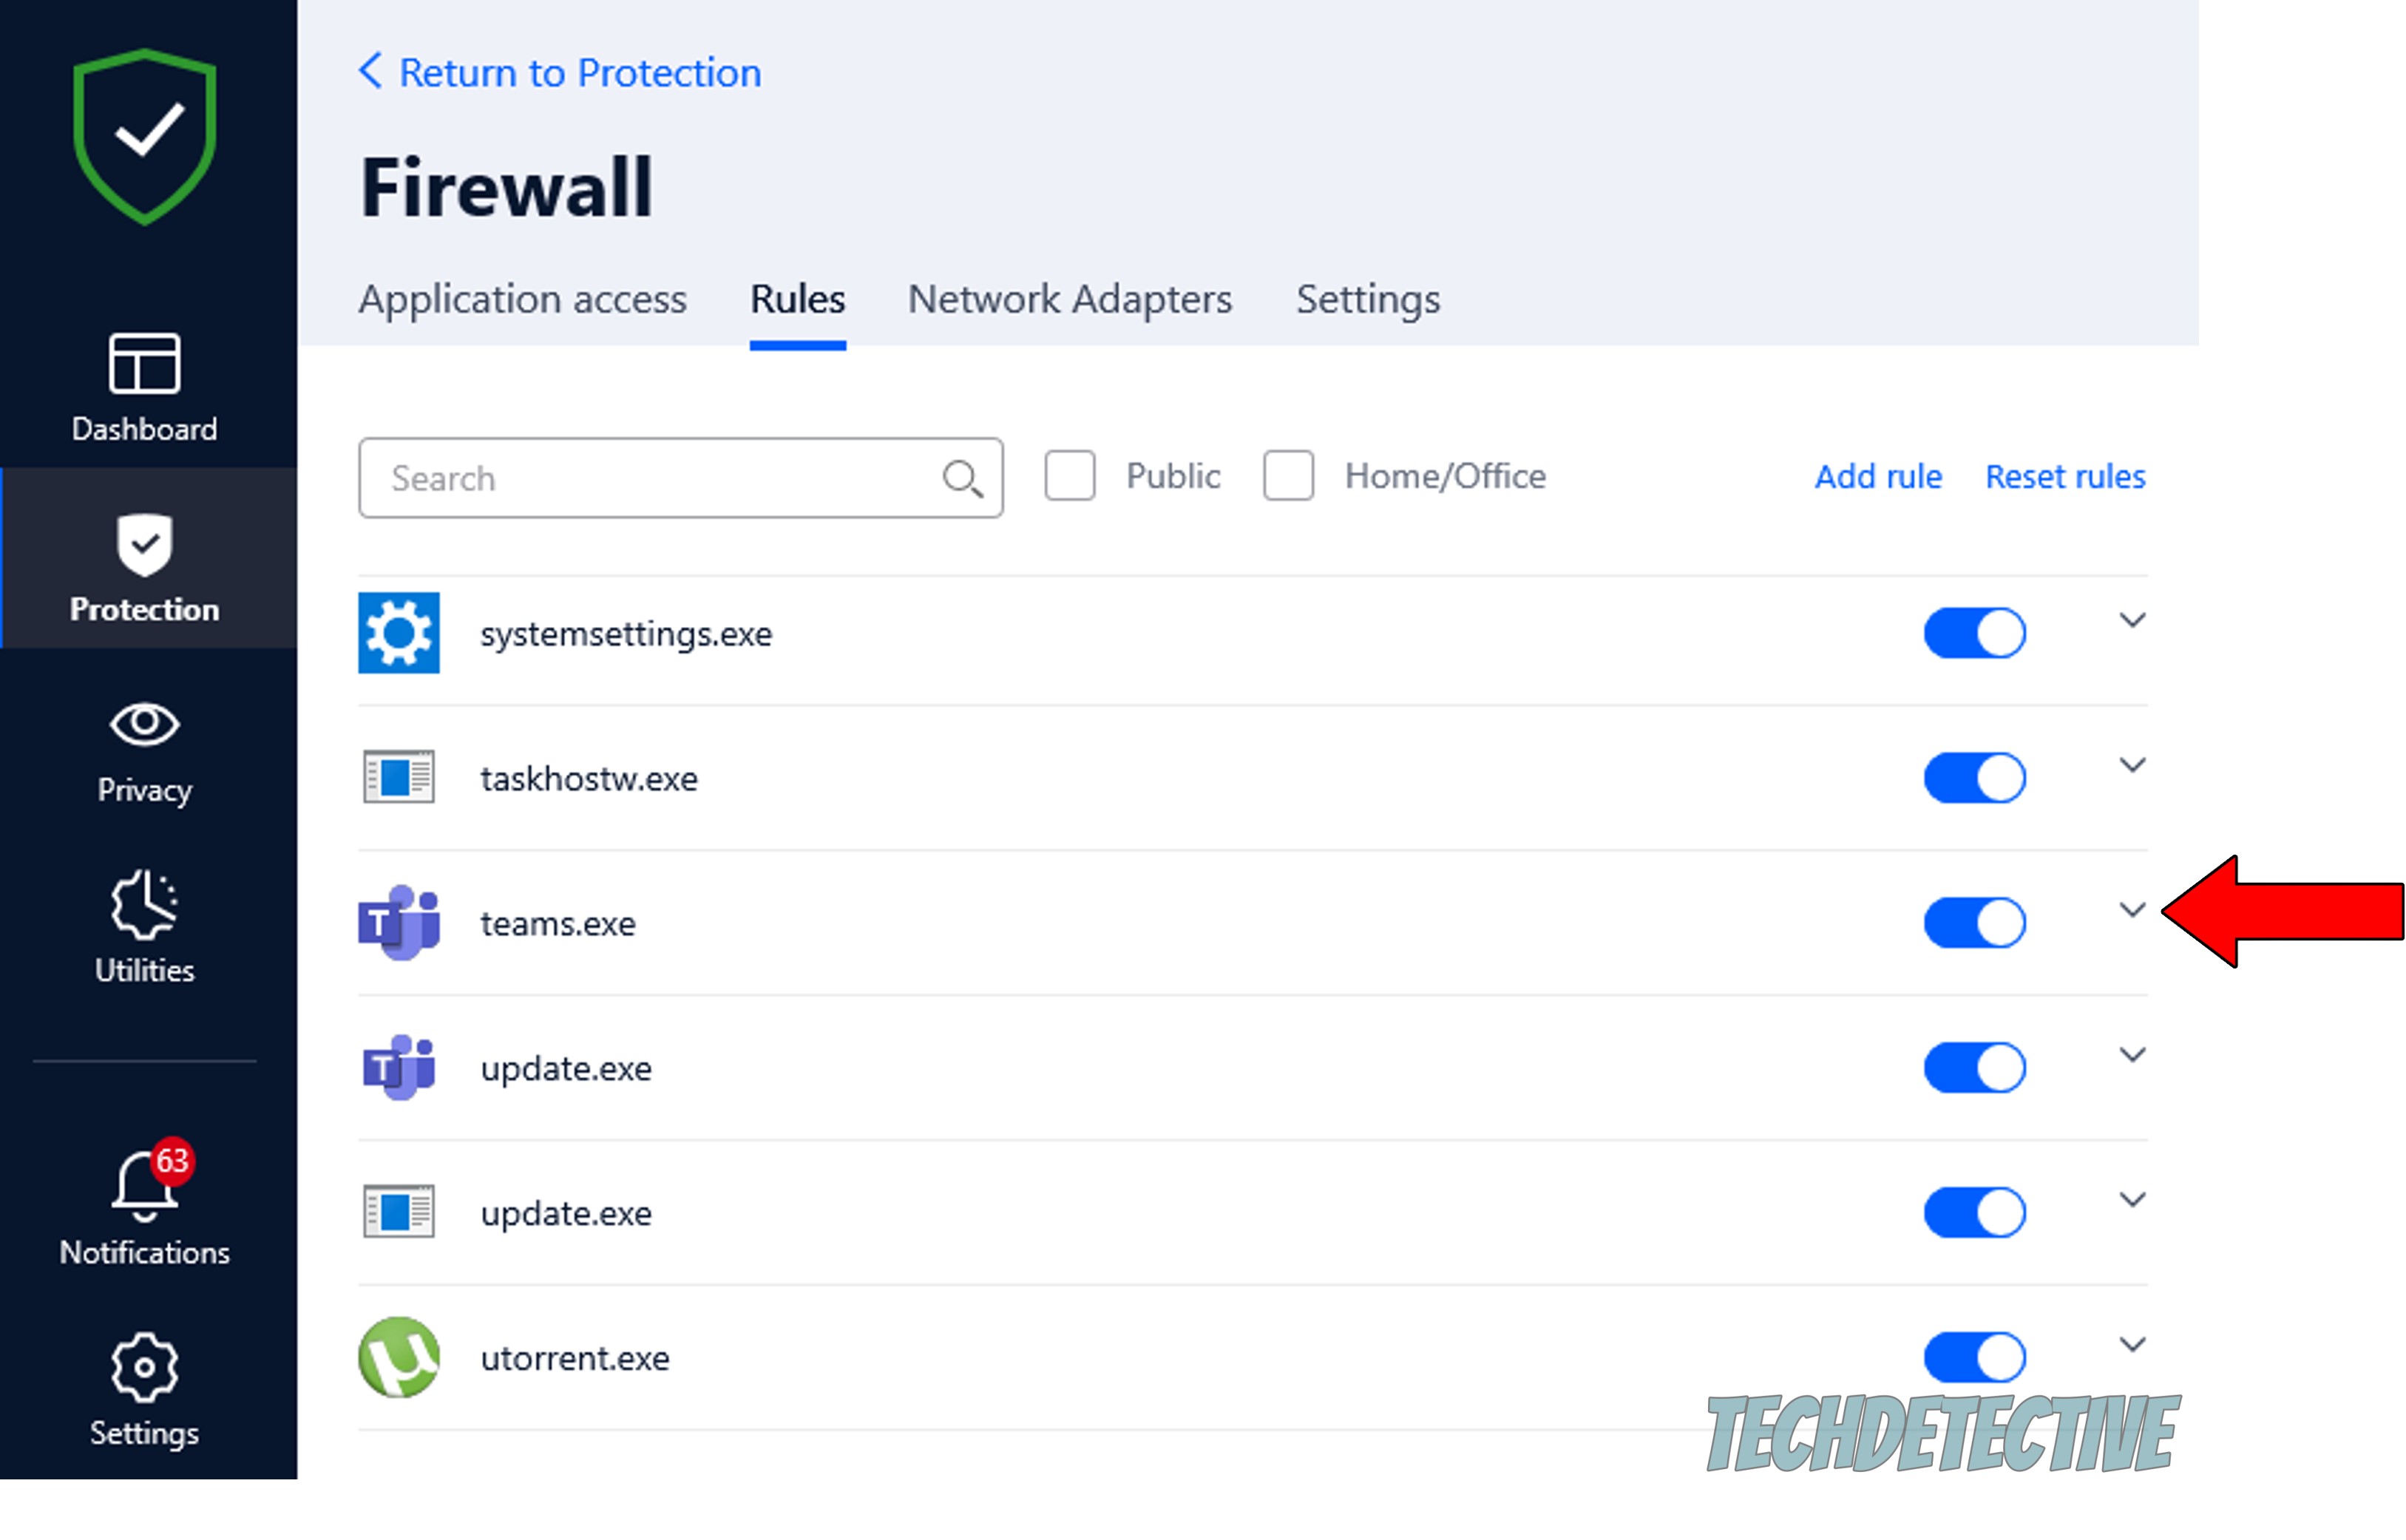
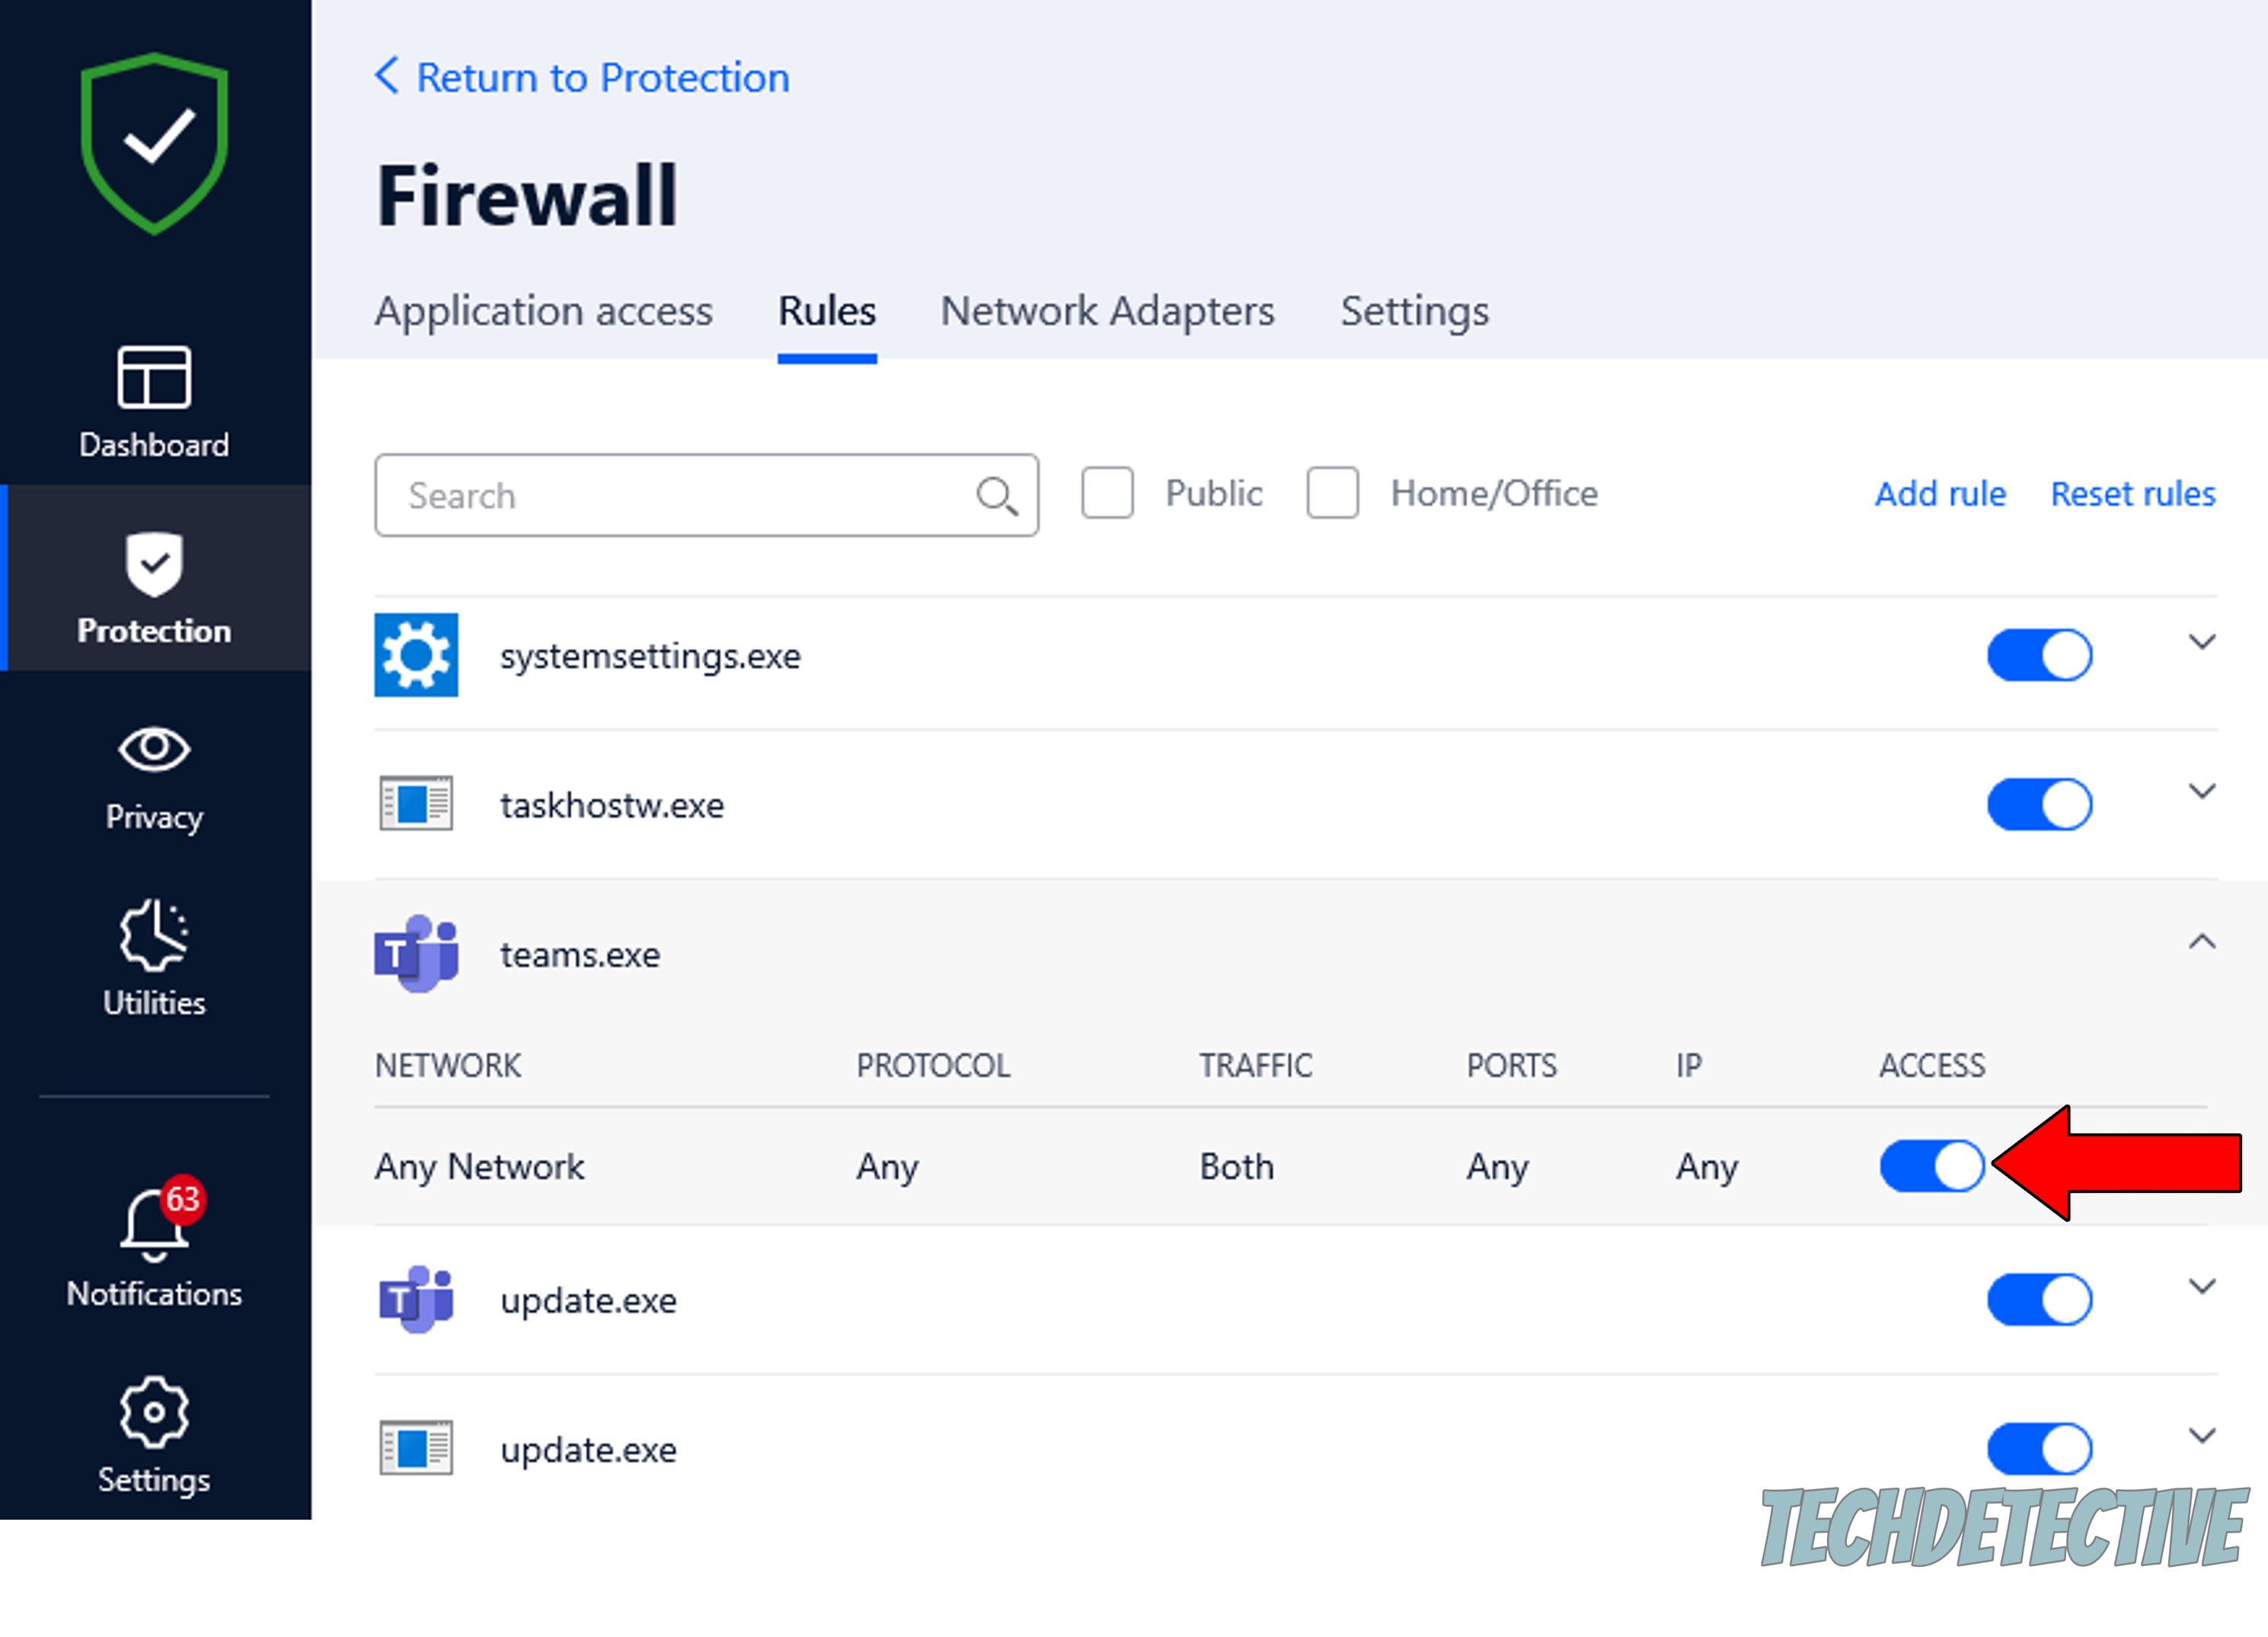
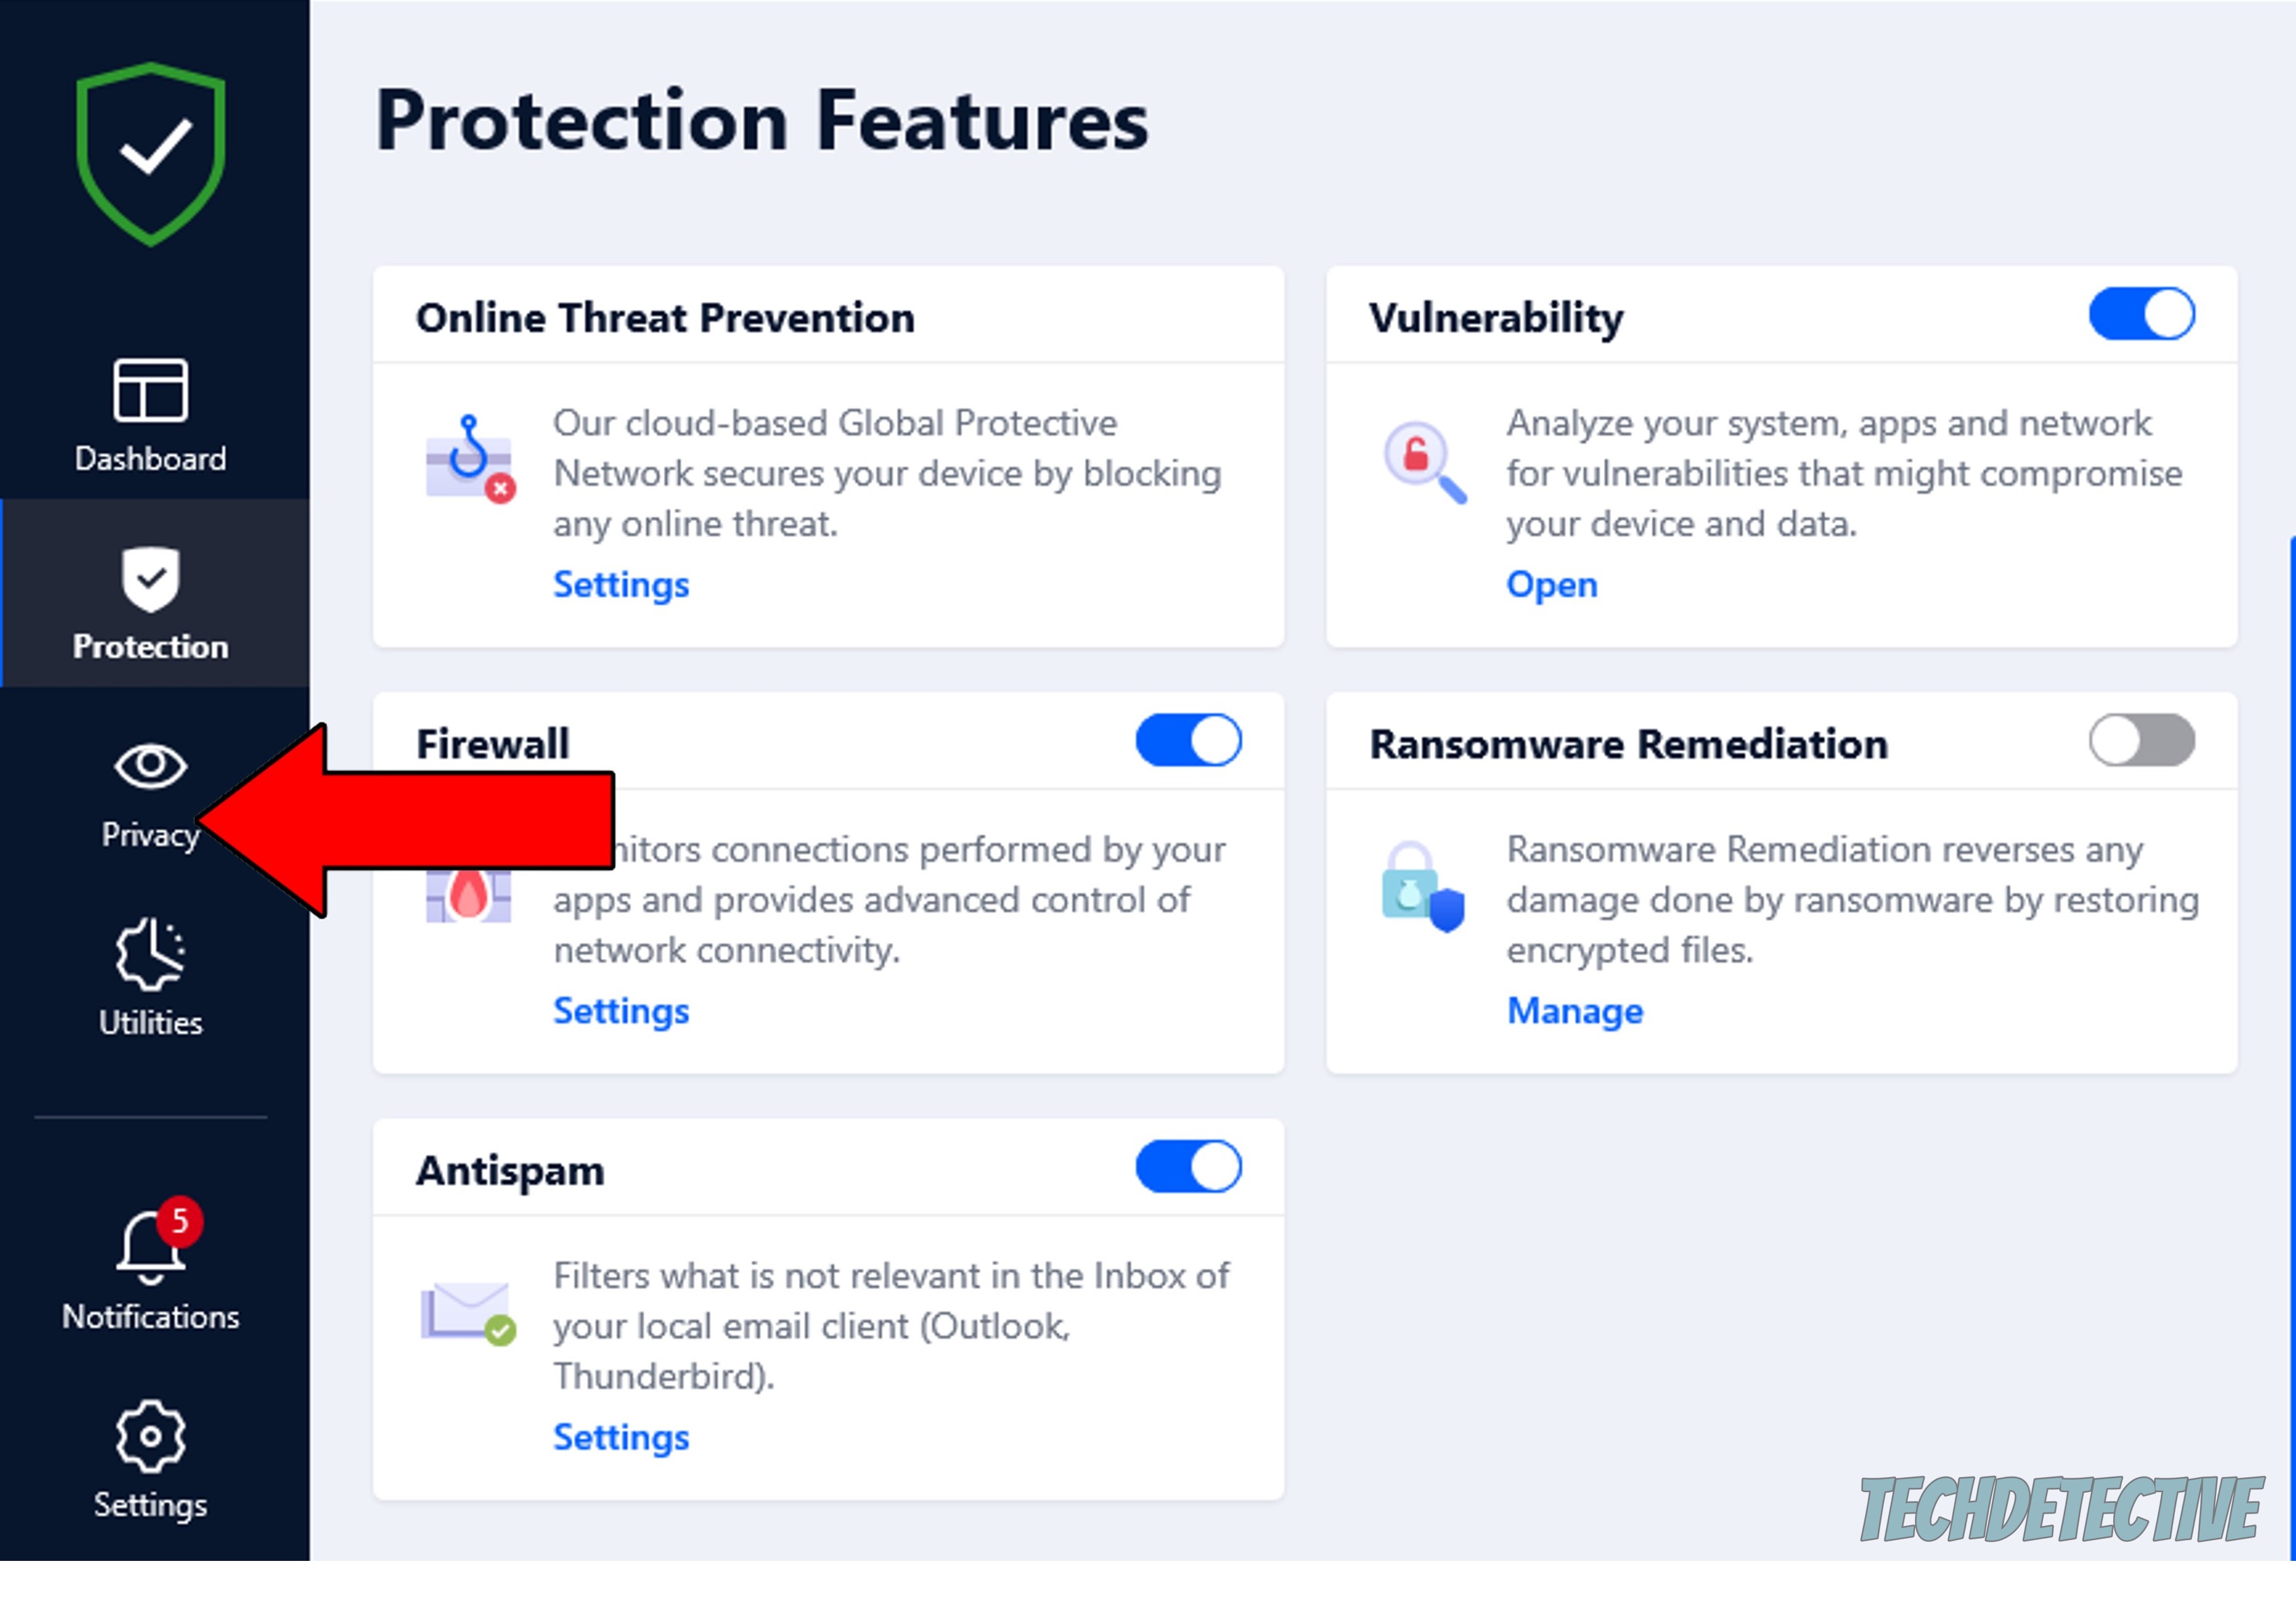
Solution: This process should look very similar across different developers. For this example’s purposes, I’ll show you how I do it on Bitdefender. First, we’ll create an exception for Microsoft Teams, and then we’ll allow microphone and webcam access.
To create Firewall exceptions:
To allow mic & webcam access:
5. On Bitdefender, click on the “Privacy” tab
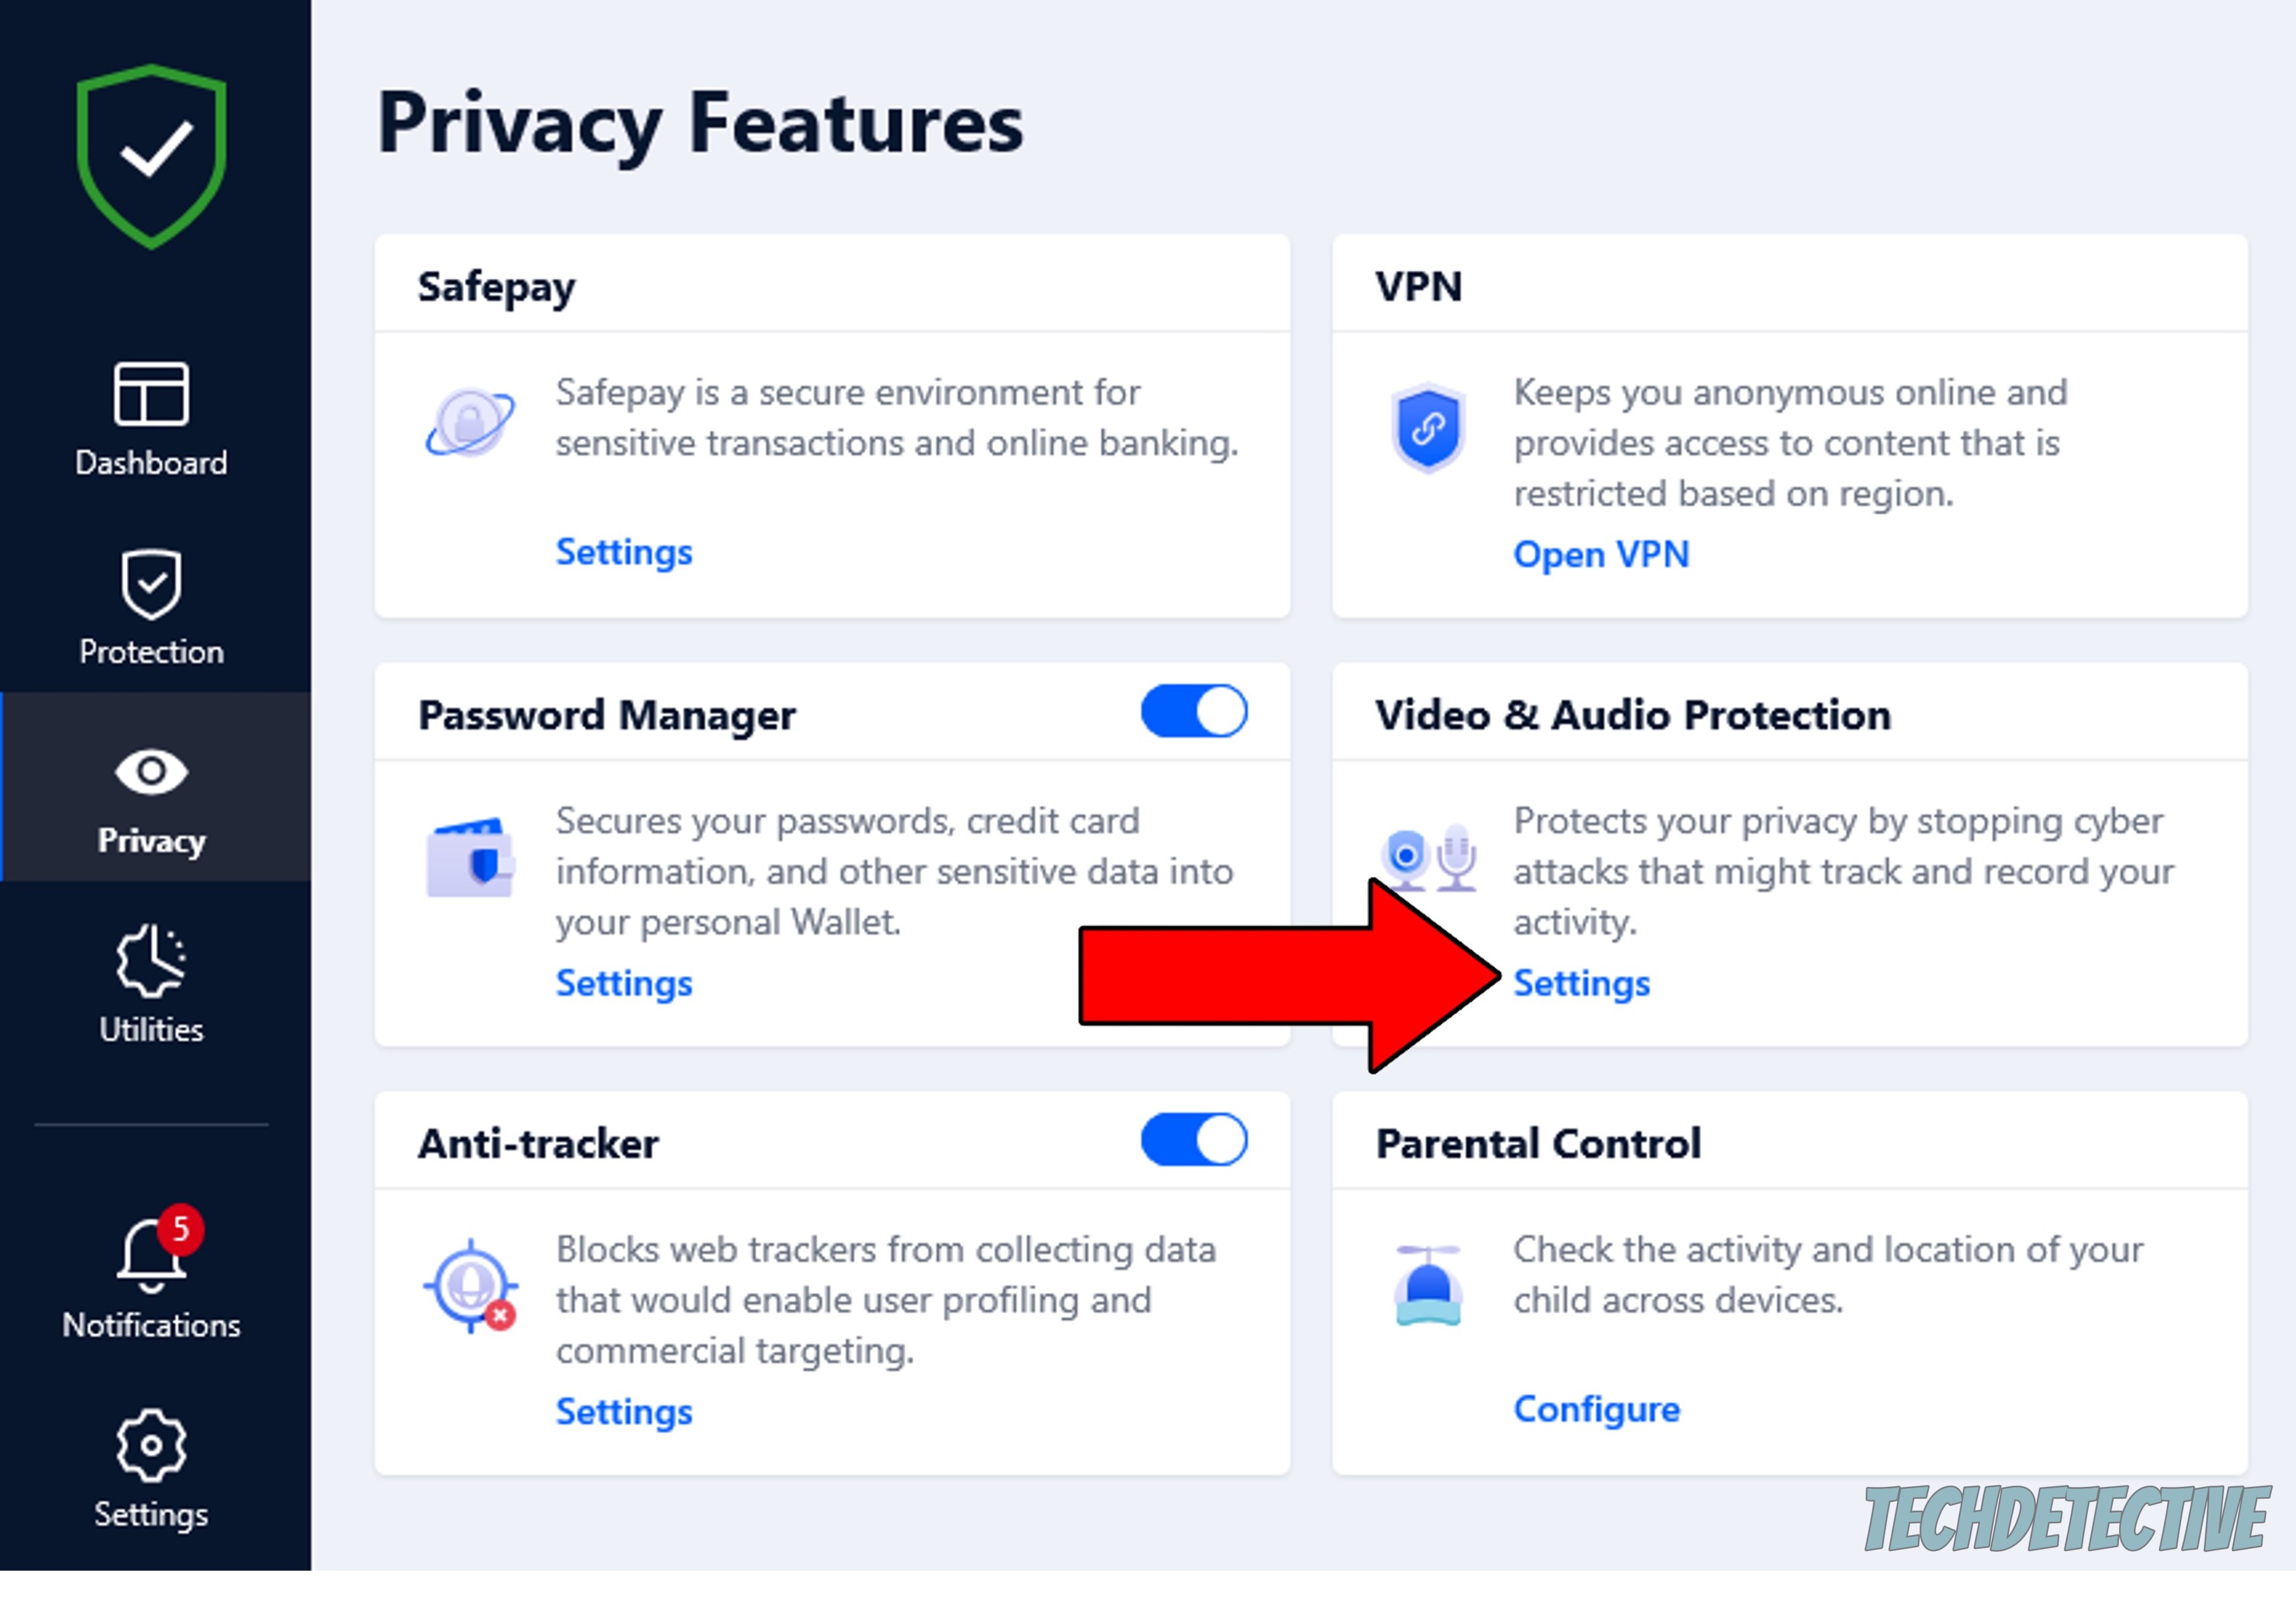
6. On the new window, select Settings on “Video & Audio Protection”
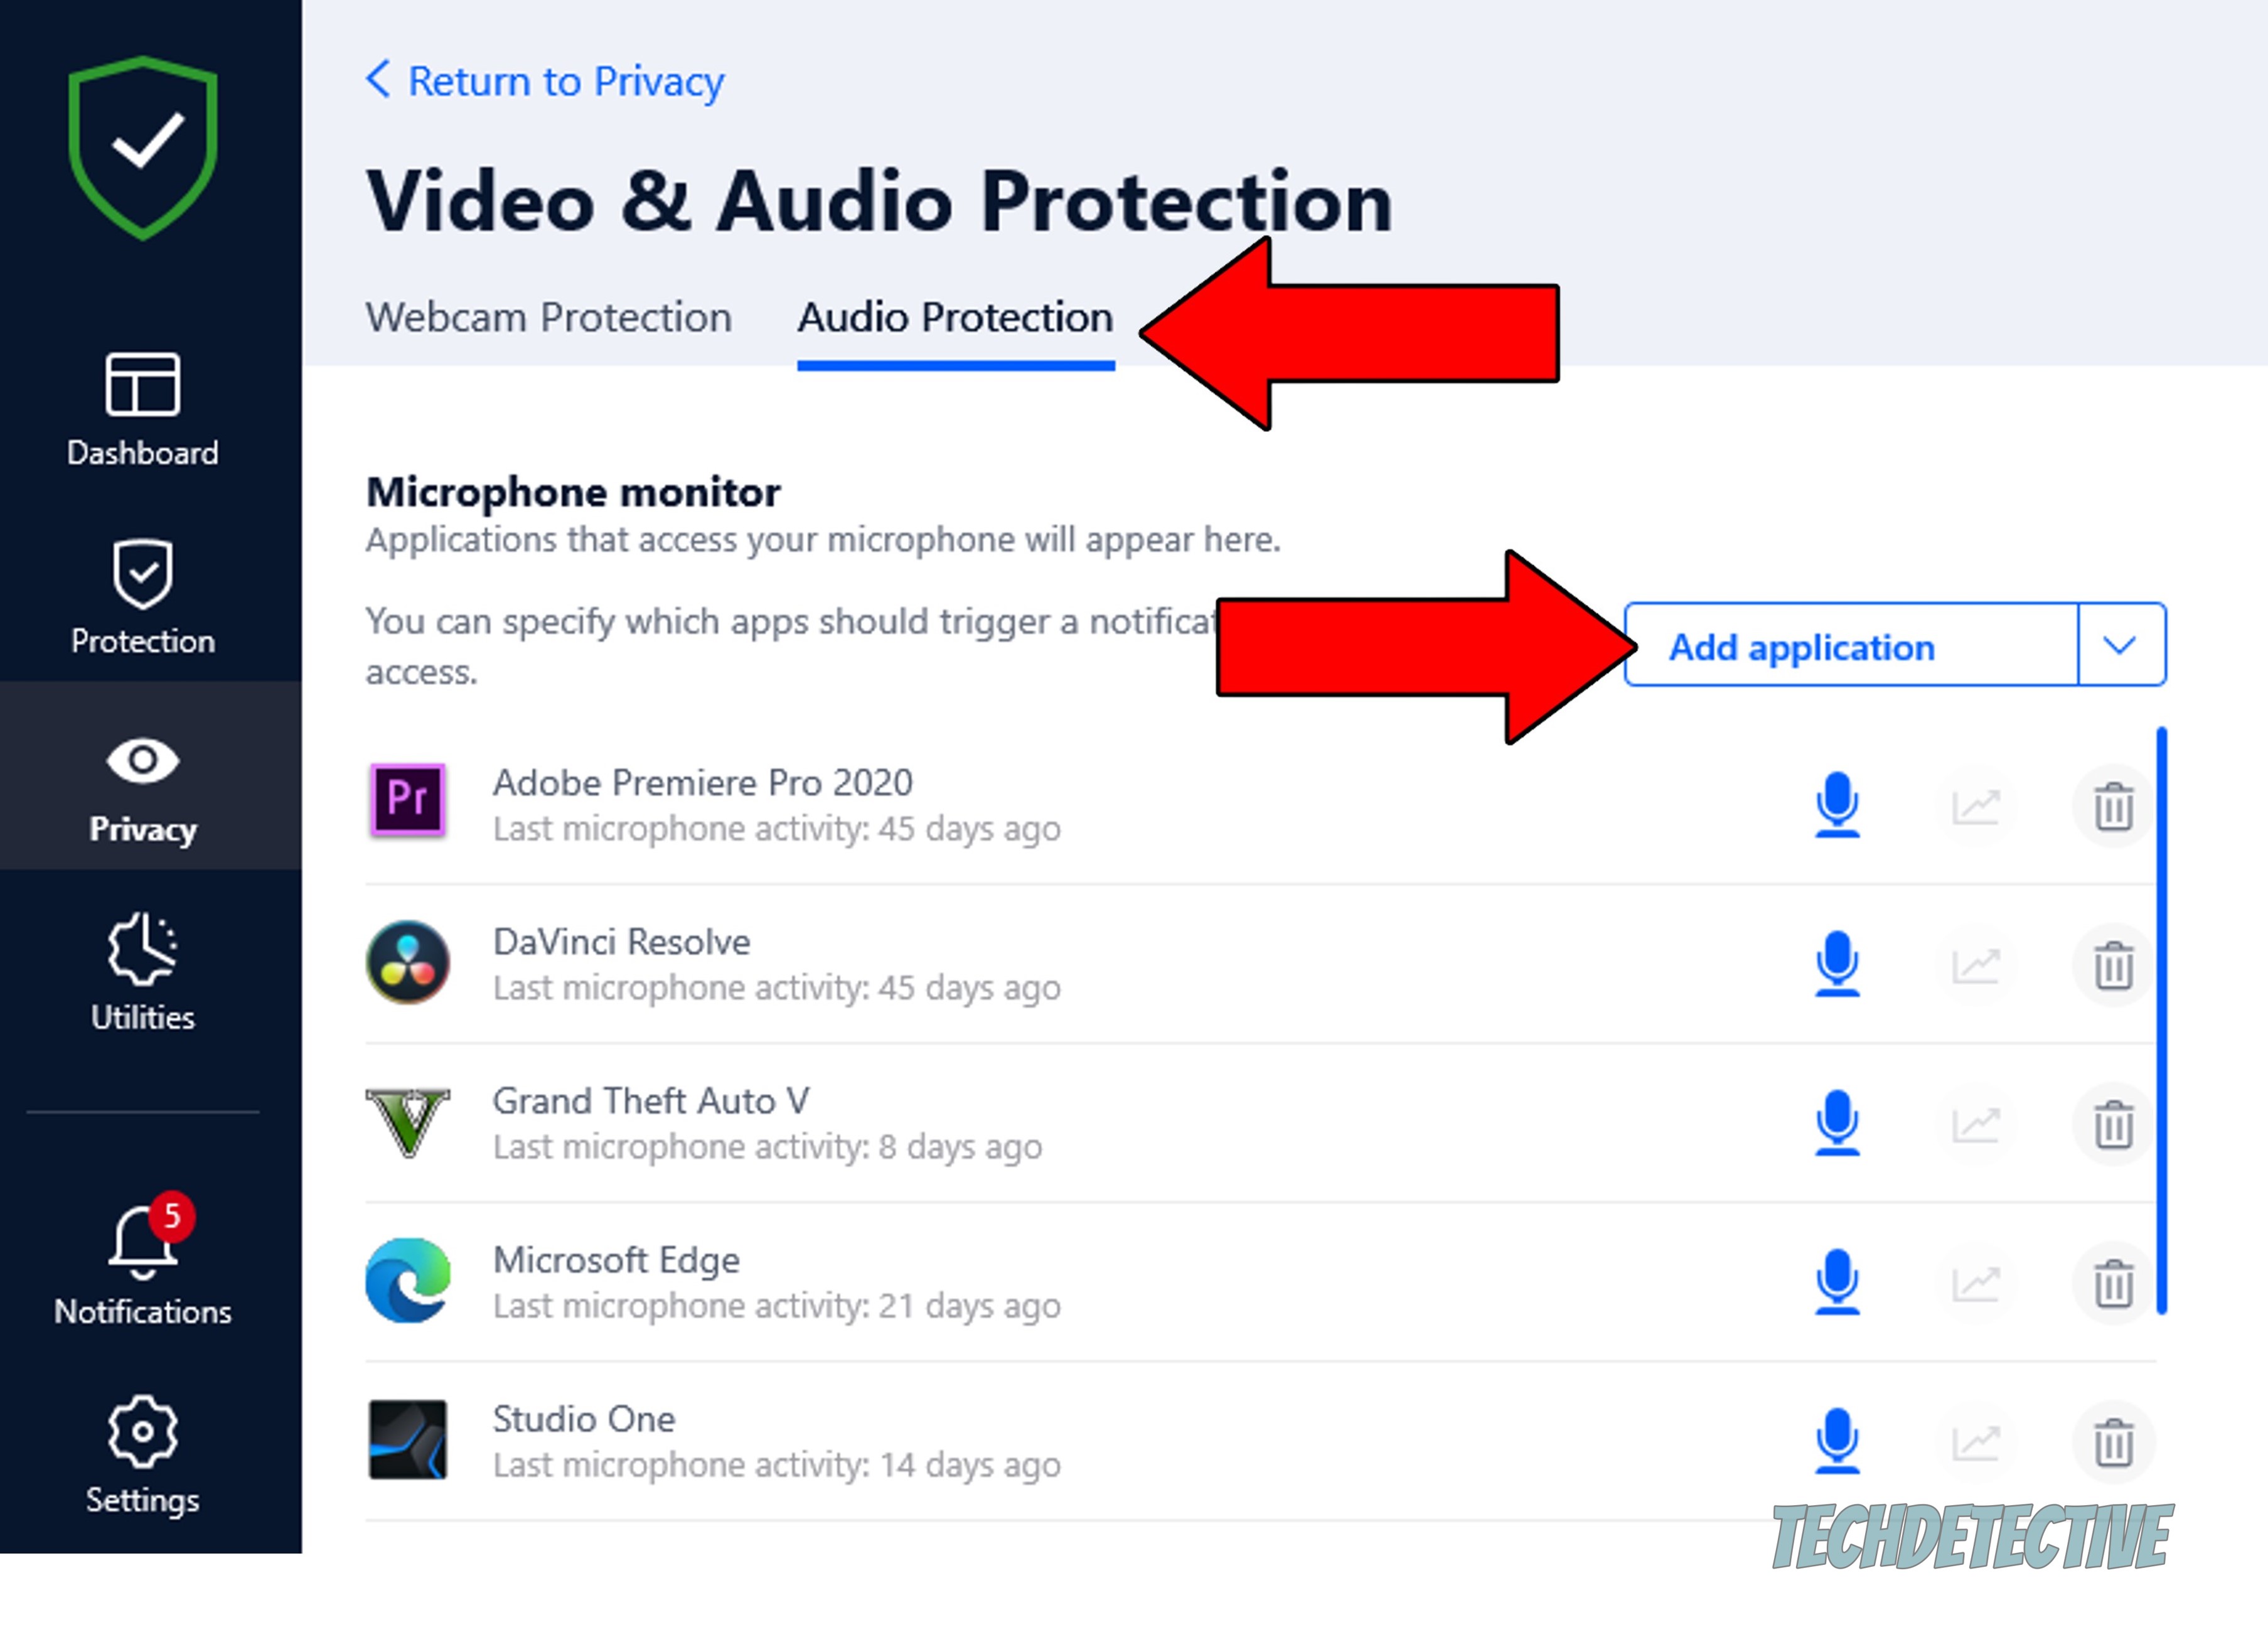
7. Go to the “Audio Protection” tab, and select “Add application”. Once the pop-up window opens, find Microsoft Teams on your files and select it
If your Firewall was not the issue, we can safely move on to taking a look at your microphone settings.
No matter how many times you try to unmute your mic, if you have not selected the right one, you’ll never be able to do it successfully. I know this might sound like something obvious, but you wouldn’t believe how many times I’ve seen people struggle with it.
This is much more likely to be a problem when you have multiple devices with microphones connected to your PC, as some might be automatically disabled. The good news is that changing your preferred microphone on the Teams app is super easy.
Solution: Here’s what you have to do:
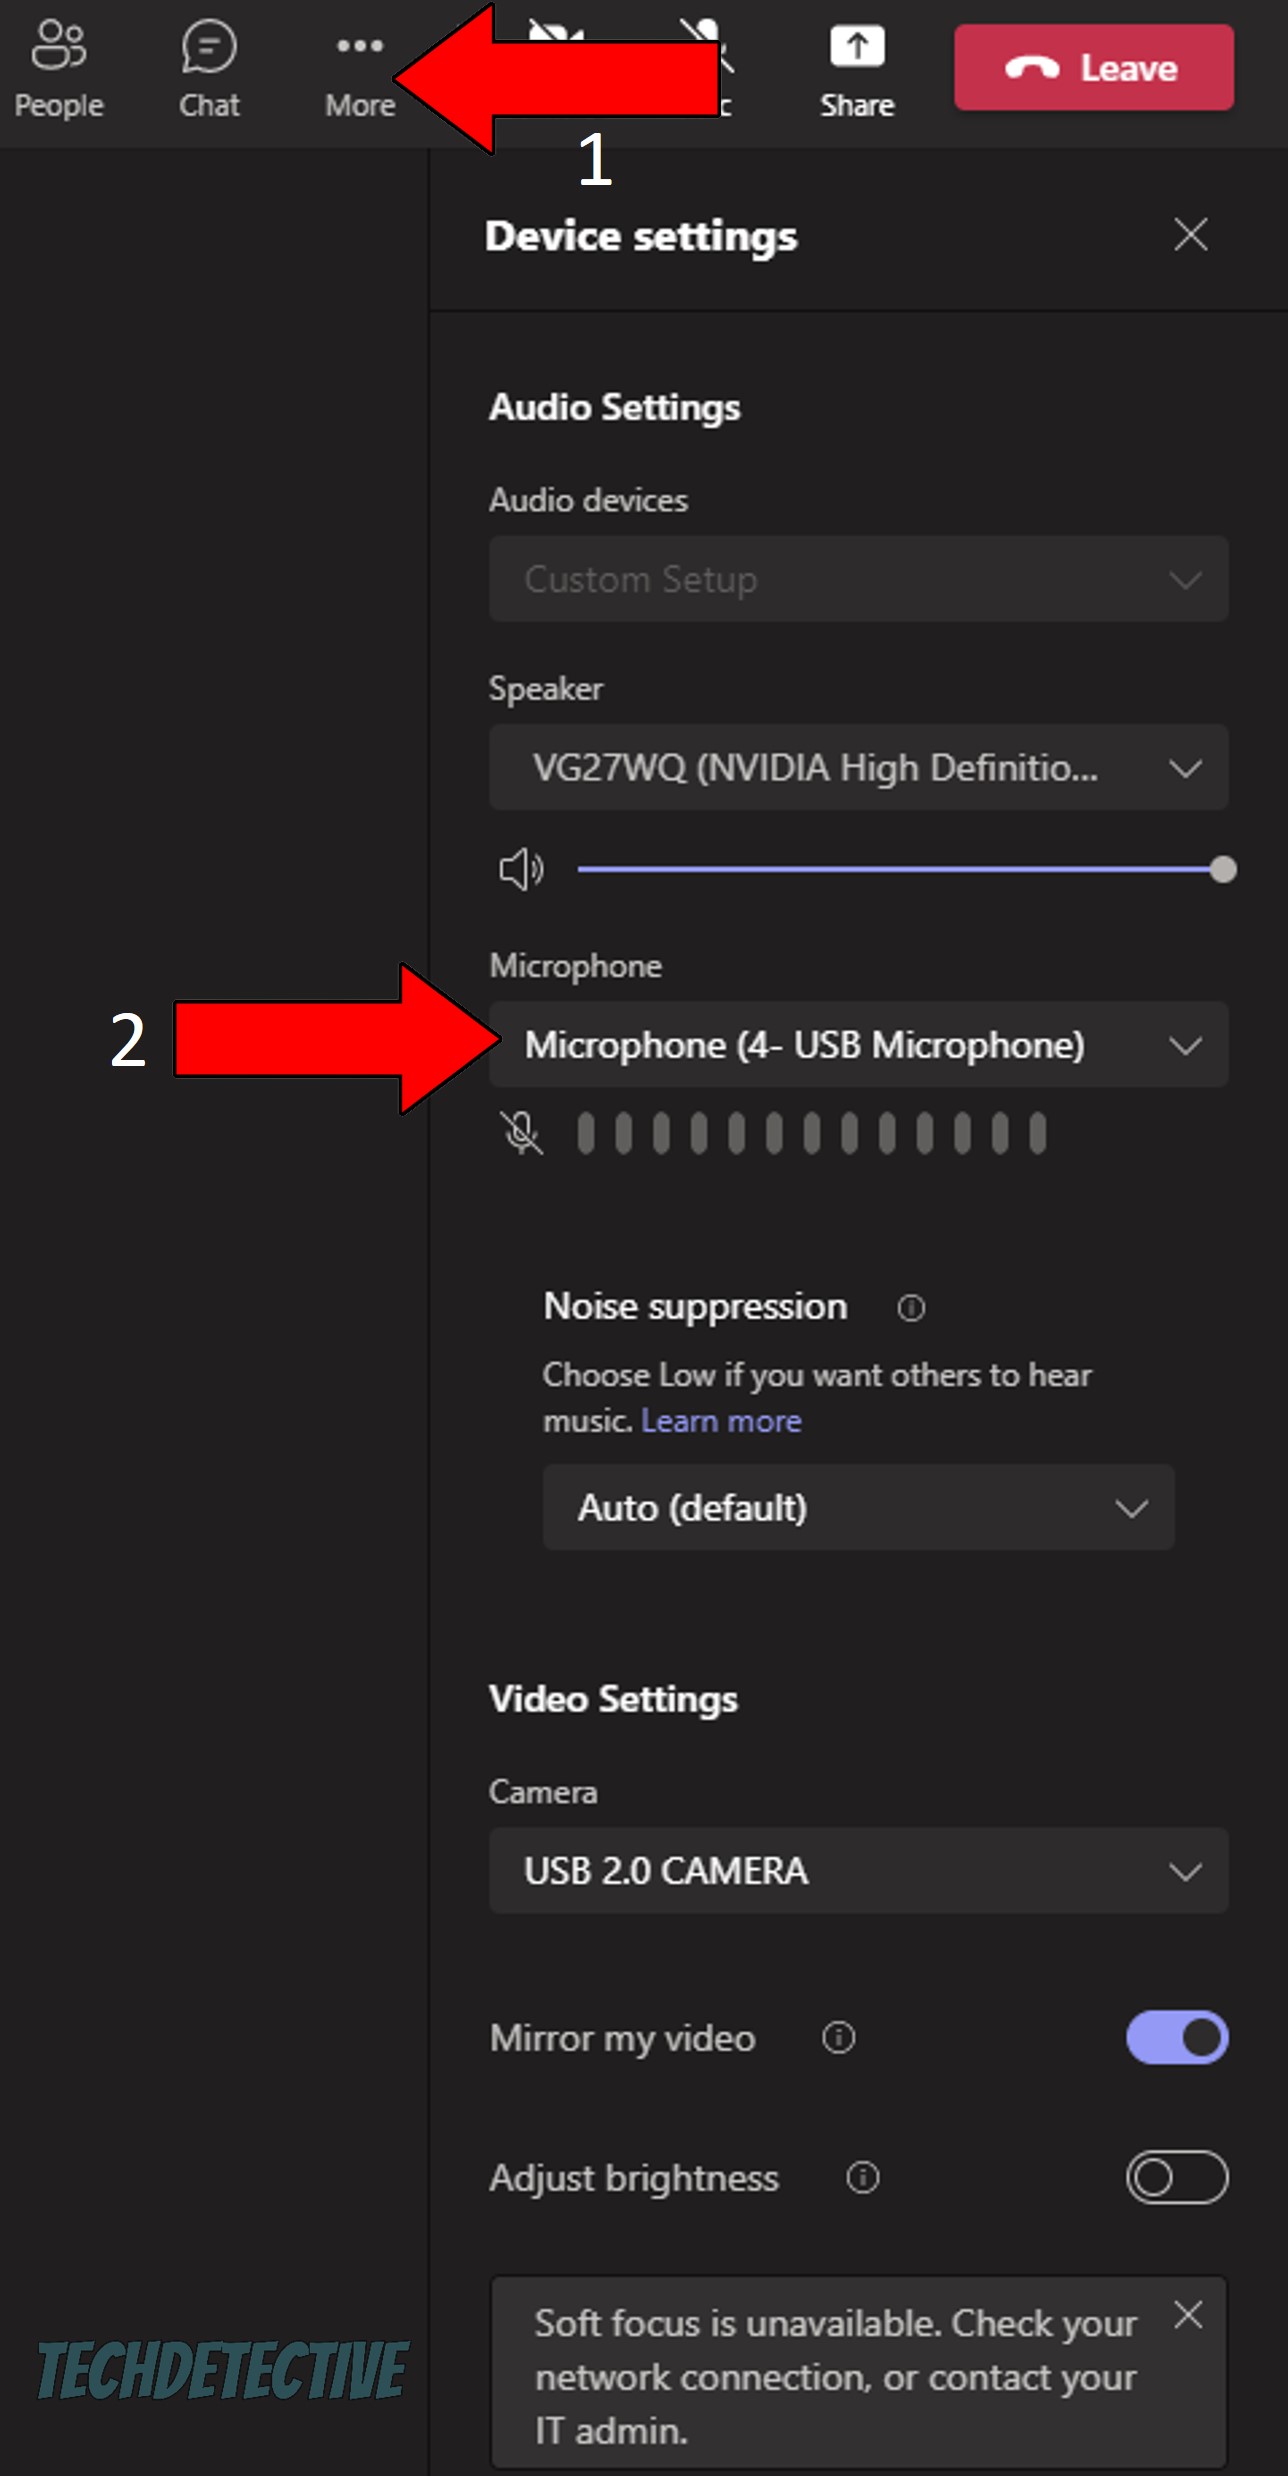
By selecting the right microphone, you should no longer be having unmuting issues.
Next, let’s make sure you’re running the latest Teams version available.
Believe it or not, keeping your favorite apps updated is essential to preventing a cascade of technical issues as time passes. The reasoning behind this is very simple. Newer app versions are always designed with the latest device software in mind.
Moreover, since housing several versions of a platform is expensive and pointless, most companies stop supporting the oldest one when a new one is released to the market.
Accidentally using an older version of the program could explain why you can’t unmute your mic in Microsoft Teams, as well as other issues, such as having the platform keep going offline.
And while normally this isn’t something you’d have to worry about, sometimes bugs and weak networks can get in the way of automatic updating.
Solution: To fix this, you’ll want to manually install the latest version of Microsoft Teams. Since PCs are much more reliable when it comes to being consistent with their updates, here’s how to go about it on iOS and Android mobile devices instead:
For iOS:


For Android:
Moving on, let’s try something a little more permanent.
Sometimes, no matter what you do, certain troublemakers are too deep-rooted to be corrected. In cases like that, you’ll want to wipe all traces of the platform from your devices’ memory. This can help patch up anything that needs attention and reload several essential resources from scratch.
A lot of people tend to avoid doing this out of fear of losing their files and conversations, but more often than not, these are backed up in the cloud, so they should be waiting for you when you re-download.
Solution: Here’s how you can go about this on PC and Mac:
Windows PC:

Mac:
Last, but definitely not least, let’s check your cache.
Whether you’re new to the term or simply need to refresh your memory, I’m glad to shed some light on the concept.
In a nutshell, your cache is where critical information is stored. In it, you’ll find resources, login credentials, downloaded files, and much more. By keeping this data available at all times, Teams and all your other apps can launch much quicker and offer you a smoother experience.
As you can imagine, in 99% of cases leaving your cache alone is for the best. But now and then, a corrupted file can be stored within it accidentally, causing a world of trouble.
In that scenario, clearing your cache is the way to go, and luckily, it’s very easy.
Solution: Here’s what you have to do:
Windows PC:
Mac:
All done!
I know how intimidating it can be to think about tackling your own technical difficulties, but aren’t you glad you did?
I hope this piece has helped you realize your true potential, and can encourage you to keep improving your troubleshooting skills every day.
Thank you so much for sticking with me all the way to the end. If this article was valuable to you, it’ll make you very happy to know that we upload new content every week. While we work on our latest release, why don’t you become a Tech Detective by checking out our other resources below?
Best of luck to you.


Detective ‘Gerry’ Molina is one of the most prolific detectives on our TechDetective team. He’s known for his ability to crack down on multitudes of tech crimes on behalf of you – the citizens of the internet. Molina is often the first point of contact for many cases, working to help free victims from the tyranny of tech issues.