
Are you stuck trying to figure out why your Apple TV keeps going black?
You’re not alone! Believe it or not, this issue affects thousands of people every day, leaving them scratching their heads in confusion.
I know how annoying it can be not to be able to take full advantage of a service you’re paying for. After all, streaming should be relaxing, not stressful.
But don’t worry, you’ve come to the right place for answers. Below, you’ll find a list of several steps you can follow to solve this problem for good.
The 6 main steps you can take to stop your Apple TV from going black are checking your HDMI ports/cable, restarting/resetting your device, and checking your internet connection. If that doesn’t work, you can also try updating the device, and checking your power sources.
Keep reading to fall back in love with your Apple TV!

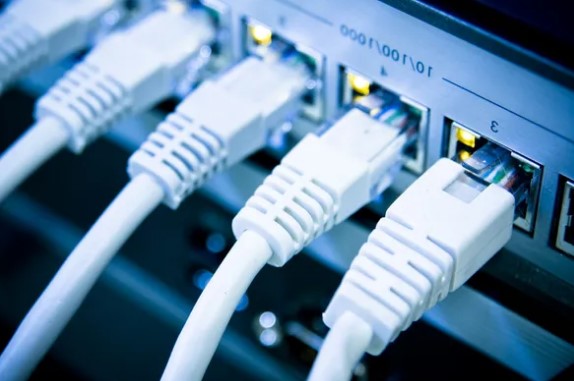
First, I want us to make sure your HDMI ports or cable are not to blame.
This is a little-known fact, but there are different HDMI cable versions that go with different HDMI ports. This is not to say that if you plug the wrong cable into the wrong port, your Apple TV won’t work, but your experience can be affected.
As technology has advanced, so have video resolutions. As you may know, 4K has 4 times more pixels than Full HD (1920×1080p), and 9 times more than standard HD (1280×720p). This naturally translates into larger file sizes and the need for higher data transfer speeds.
The first 4k-capable HDMI cable was version 1.4, which came out in 2009. These days, most modern 4K TVs are equipped with up to four 4K-ready HDMI ports, but some models still have Full HD inputs as well. If you’re using an Apple TV 4K and accidentally plugging it into a Full HD-capable HDMI port, it would explain why the device keeps going black.
It’s like trying to make a river flow down a straw.
And to make matters worse, there’s always the possibility that you’re using the right cables and port, but either one or both have sustained damage. This can happen for many reasons, from normal wear and tear to bad storage habits.
When any of these conditions are met, you’ll likely encounter constant flickering, blurry video, and several other technical difficulties.
Solution: Let’s start with the first scenario. If you suspect you might be using the wrong HDMI port/cable, disconnect your Apple TV and reconnect it to the right port. Most TVs have labels on their HDMI inputs that indicate the accepted resolution and refresh rate.
There’s sadly no way to tell what HDMI cable version you have, as they’re not usually labeled. The only way to tell would be to check the package it came in. That being said, if your cable is older than 5 years, there’s a very good chance that it can’t handle today’s 4K standards.
The good news is that you can find great options for as little as $20 on online marketplaces.
Assuming that the issue is damage, troubleshooting can be beneficial. If you have another HDMI cable you can use for testing, go right ahead. Connect your device to a different HDMI input on your TV with the new cable and see what happens. If your Apple TV is no longer going black, there’s your answer.
Once you’ve made sure that your HDMI cable/ports are not to blame, let’s take a look at the software.
Whenever we use your favorite apps, there are thousands of background processes running at the same time. More often than not, they work as you’d expect, and that’s the end of it. But sometimes, a corrupted file or bug can make them crash, causing your Apple TV to act weird.
By restarting your device, you’re giving it a chance to get rid of any troublemakers and start its processes from scratch.
And the best part is that this works for about 90% of all technical difficulties out there. Don’t be afraid to try it out!
Solution: Restarting your Apple TV is very easy. Any of the options below should work perfectly:
Once you’ve restarted your Apple TV successfully, try to use it for a while and see if it keeps going black.
If a simple restart does not work, we might need to be a little more aggressive. Sometimes corrupted files, bugs, and glitches can be very stubborn and won’t go down without a fight. In this case, considering a Factory Reset is not a bad idea.
As its name suggests, this will revert your Apple TV to brand-new condition, deleting your downloaded apps, user preferences, and favorite settings.
I know this is far from ideal, but sometimes it’s the only way to get things back up and running.
This likely won’t be the last time you’ll have to Factory Reset your Apple TV, so here’s a useful tip for you. Keep a list of all your downloaded apps and their respective login credentials written down somewhere. This way, you’ll save yourself the trouble of having to remember what to re-download after all’s been said and done.
Solution: If you’re sure there’s nothing else you need to try or save, here’s what you have to do. It’s a very straightforward process:
This process can take some time, so be patient and keep your Apple TV plugged in at all times.
Moving on, let’s make sure your connection is not to blame.
Granted, when your Apple TV keeps going black, it’s almost always due to a hardware error. But sometimes, a struggling home network could also play a part in this.
Let me explain.
In order to load its files and settings properly and validate your login credentials, your Apple TV needs a stable connection to the internet. When this is not possible, the device can start acting weird and fail to load some features.
This manifests itself much more often on online platforms, as you’ll encounter endless spinning wheels, out-of-sync subtitles, and blurry playback. However, having your Apple TV keep going black is also a symptom of this.
Depending on your specific situation, there are a couple of roads you can take to address this.
Solution: For larger households with many family members, I’d recommend having a plan that offers at least 150 Mbps. This allows everyone in your home to go about their activities uninterrupted and should keep your Apple TV from going black.
If you live alone, you might be able to get away with something slower.
Assuming that your current plan is already fast enough, try giving your provider a call and asking if they’re having issues. If they tell you everything’s fine on their end, try resetting your modem and see what happens.
Never done it before? That’s ok, it’s really easy:
If this didn’t work, don’t worry. We still have a lot of ground to cover. Keep reading to discover more fixes to this issue!

Most people don’t give enough importance to keeping their streaming devices updated. And while failing to do so won’t earn them any jail time, it can be the source of several technical difficulties as time passes.
With every release, software developers try to install as many features and fix as many bugs as they possibly can. Moreover, newer app versions are designed with the latest streaming device software in mind.
Using an outdated streaming device with fully updated apps could explain why your Apple TV keeps going black.
Now, automatic updating should make this no concern of yours. But sometimes a bug or a weak network can get in the way.
In such a case, you’ll have to manually download and install the latest software version of your Apple TV.
Solution: It may sound challenging, but it’s actually very easy:
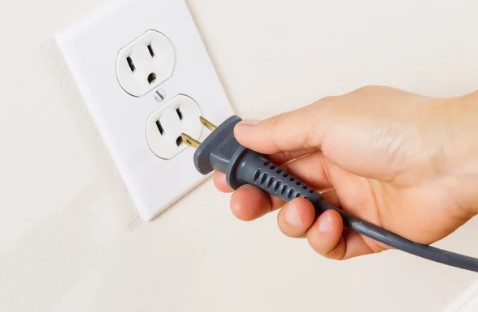
Finally, let’s check your power sources.
As sophisticated as your Apple TV may be, it still needs a steady power supply to work as intended and give you hours of endless fun.
Most of the time, you should not struggle with your device’s power source and all should be well. But in some cases, your wall outlet or power cable might start to fail and cause your Apple TV to underperform.
This could quickly cause several issues, such as slow loading times, stuttering navigation, and of course, a screen that keeps going black.
You should unplug your Apple TV from your wall outlet as soon as you suspect this to be the issue, as a failing power source could cause short-circuiting and damage your device permanently.
Solution: Take your Apple TV to another room with a TV and plug it into a different wall outlet. If it no longer keeps going black, avoid the original outlet entirely from now on.
Assuming that you keep having issues, the power cable might be to blame. If you know someone else who owns the same Apple TV model you have, ask them if you can borrow theirs for testing. If you stop having issues with the borrowed cable, the answer’s clear. Your cable’s damaged, and you’ll have to look for a replacement.
Sadly, as you know, Apple products are not cheap, so you might need to spend more than you’d like on a new cable. If you don’t feel like breaking the bank, you can take your chances and try buying a second-hand replacement on eBay.
When your Apple TV keeps going black, things can get annoying very quickly. Streaming should be a relaxing experience, and things like these can make everything feel quite the opposite.
What a disaster!
Luckily, as I hope you’ve learned in this piece, fixing most of the causes behind this is very easy. More often than not, double-checking that your power sources and HDMI cable/ports are undamaged, should do the trick.
Thank you for sticking with me all the way to the end. If you found this article helpful, you’ll be happy to know that we upload new content every week. Check out our other incredible resources below to become a Tech Detective yourself!
I wish you nothing but the best.


Detective ‘Gerry’ Molina is one of the most prolific detectives on our TechDetective team. He’s known for his ability to crack down on multitudes of tech crimes on behalf of you – the citizens of the internet. Molina is often the first point of contact for many cases, working to help free victims from the tyranny of tech issues.