Are you losing your mind because you can’t see the shared screen on Microsoft Teams?
I’m really sorry to hear that! To be completely honest, I’m not at all surprised that you’re struggling with this issue, as it’s much more common than you might think.
I know it must be really annoying to try to take notes from a presentation one of your co-workers or classmates has prepared, only to have your plans frustrated by a pitch-black display.
But don’t worry, you came to the right place for answers. Below, you’ll find a list of several things that might be causing this, and how you can address them.
The 6 main reasons why you can’t see the shared screen on Microsoft Teams are:
Read on to jump back into your meetings!
Before looking at anything else, I’d like us to make sure your connection is not struggling.
You might think that, since you’re able to be here reading this, you can safely rule out a network problem, right? Well… guess again.
Granted, when you have total connection failure, you’ll be completely cut off from the internet. But when the issue is not general, you might still be able to browse lightly or chat via text, while also noticing you can’t see the shared screen on Microsoft Teams.
Why? I’m glad you asked.
The answer is really simple. Videoconferences and voice calls via Teams are much tougher on your network than looking up solutions for this issue online. A failing network might explain why you can’t see the shared screen on Microsoft Teams, and other issues, such as having the platform keep going offline.
In cases like these, you’ll want to estimate your internet needs and go from there.
Solution: If you’re working in-site, you probably have nothing to worry about, as corporate internet plans are quite reliable and stable. But if you work from home like many of us, then taking your family’s network usage into consideration is vital.
A good starting point would be to have a plan that can give everyone at least 15-20 Mbps to go about their business without interrupting others’ activities. So, if there’s 5 people in your home (including you), your speed should be 125 Mbps.
If your plan already meets your needs, try giving your provider a call and asking if they’re having coverage issues in your area. Assuming that their answer’s no, then resetting your modem would be the next logical step to take.
Don’t know where to start? That’s ok. The process is super easy:
You might be asking yourself, “What on Earth is that?”, and I don’t blame you. Hardware Acceleration is one of those things that few people care to learn about before they’re having trouble with it.
In a nutshell, this feature is designed for older devices which have components that struggle with the requirements of modern communications platforms. By activating it, you’ll be taking some load off your CPU and redistributing all over your other components, such as your Graphics Card (GPU), your RAM, etc.
On paper, Hardware Acceleration sounds great, and most of the time, it is. But sometimes, it can start acting up for a wide number of reasons. This would explain why you can’t see the shared screen on Microsoft Teams, as well as why your screen flickers sometimes.
Luckily, addressing this issue is very simple. All you have to do is disable the feature.
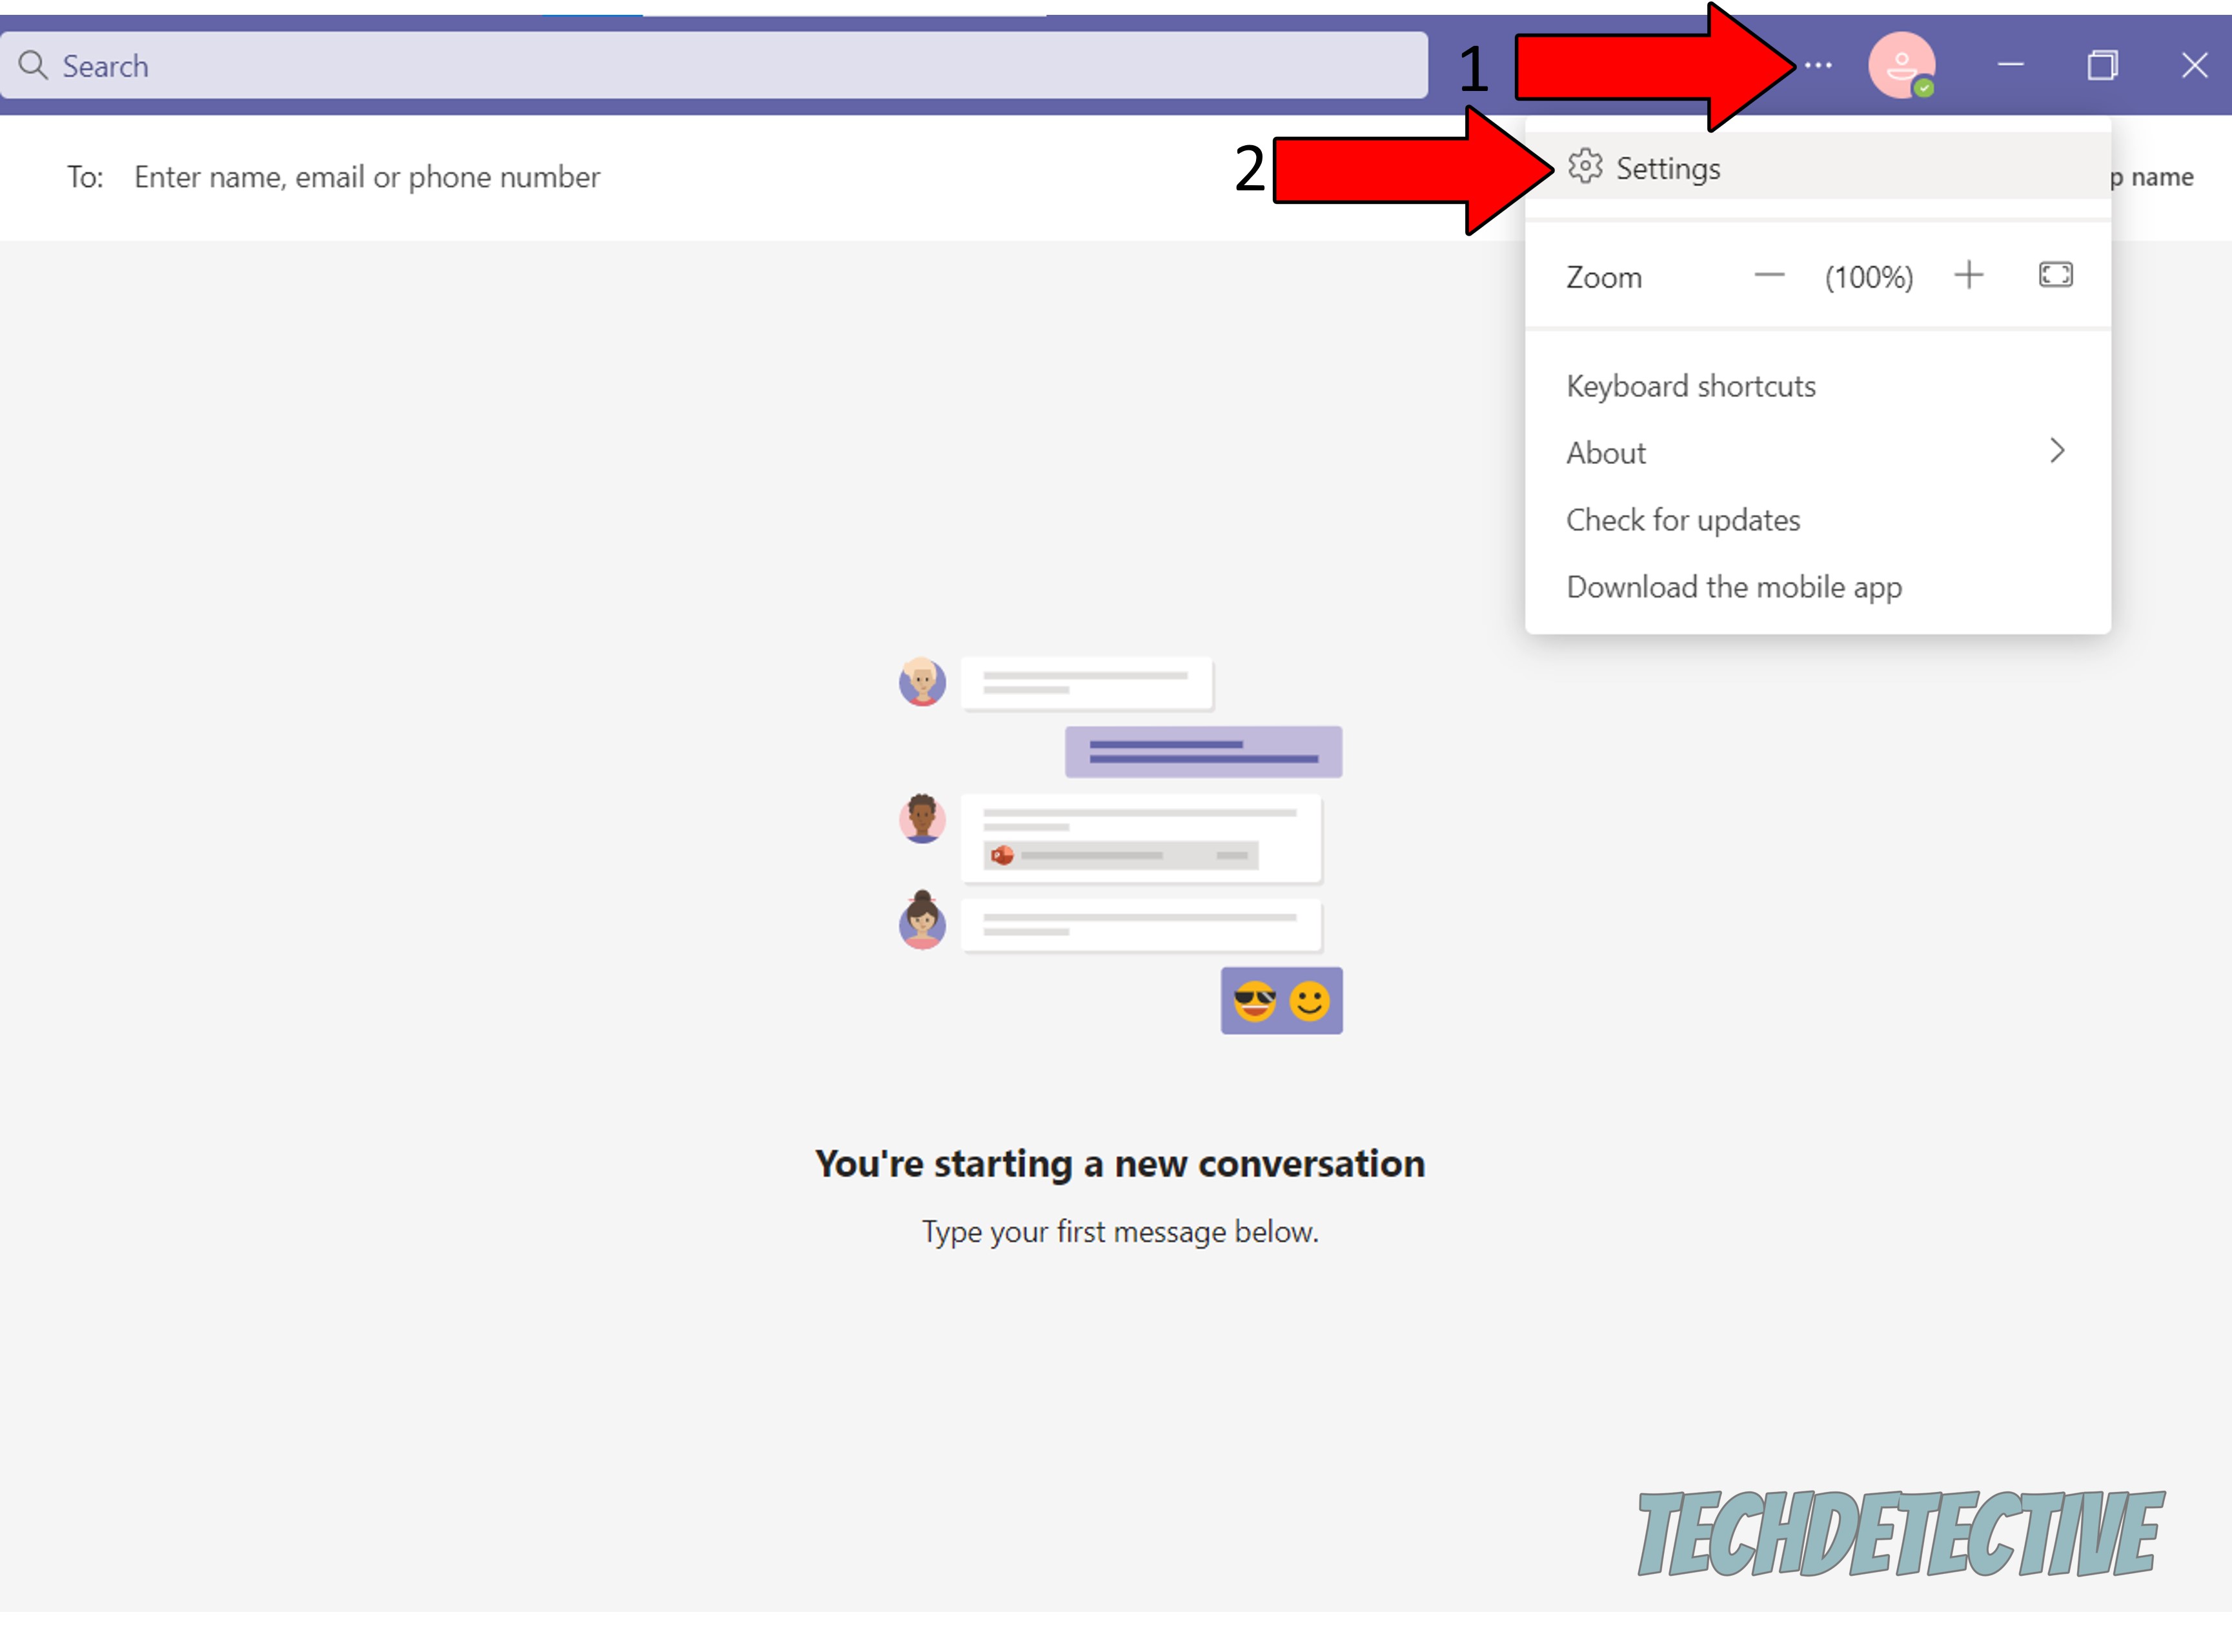
Solution: Here’s how you can do it:
3. On the new window, go to the “General” tab and check “Disable GPU Hardware Acceleration”
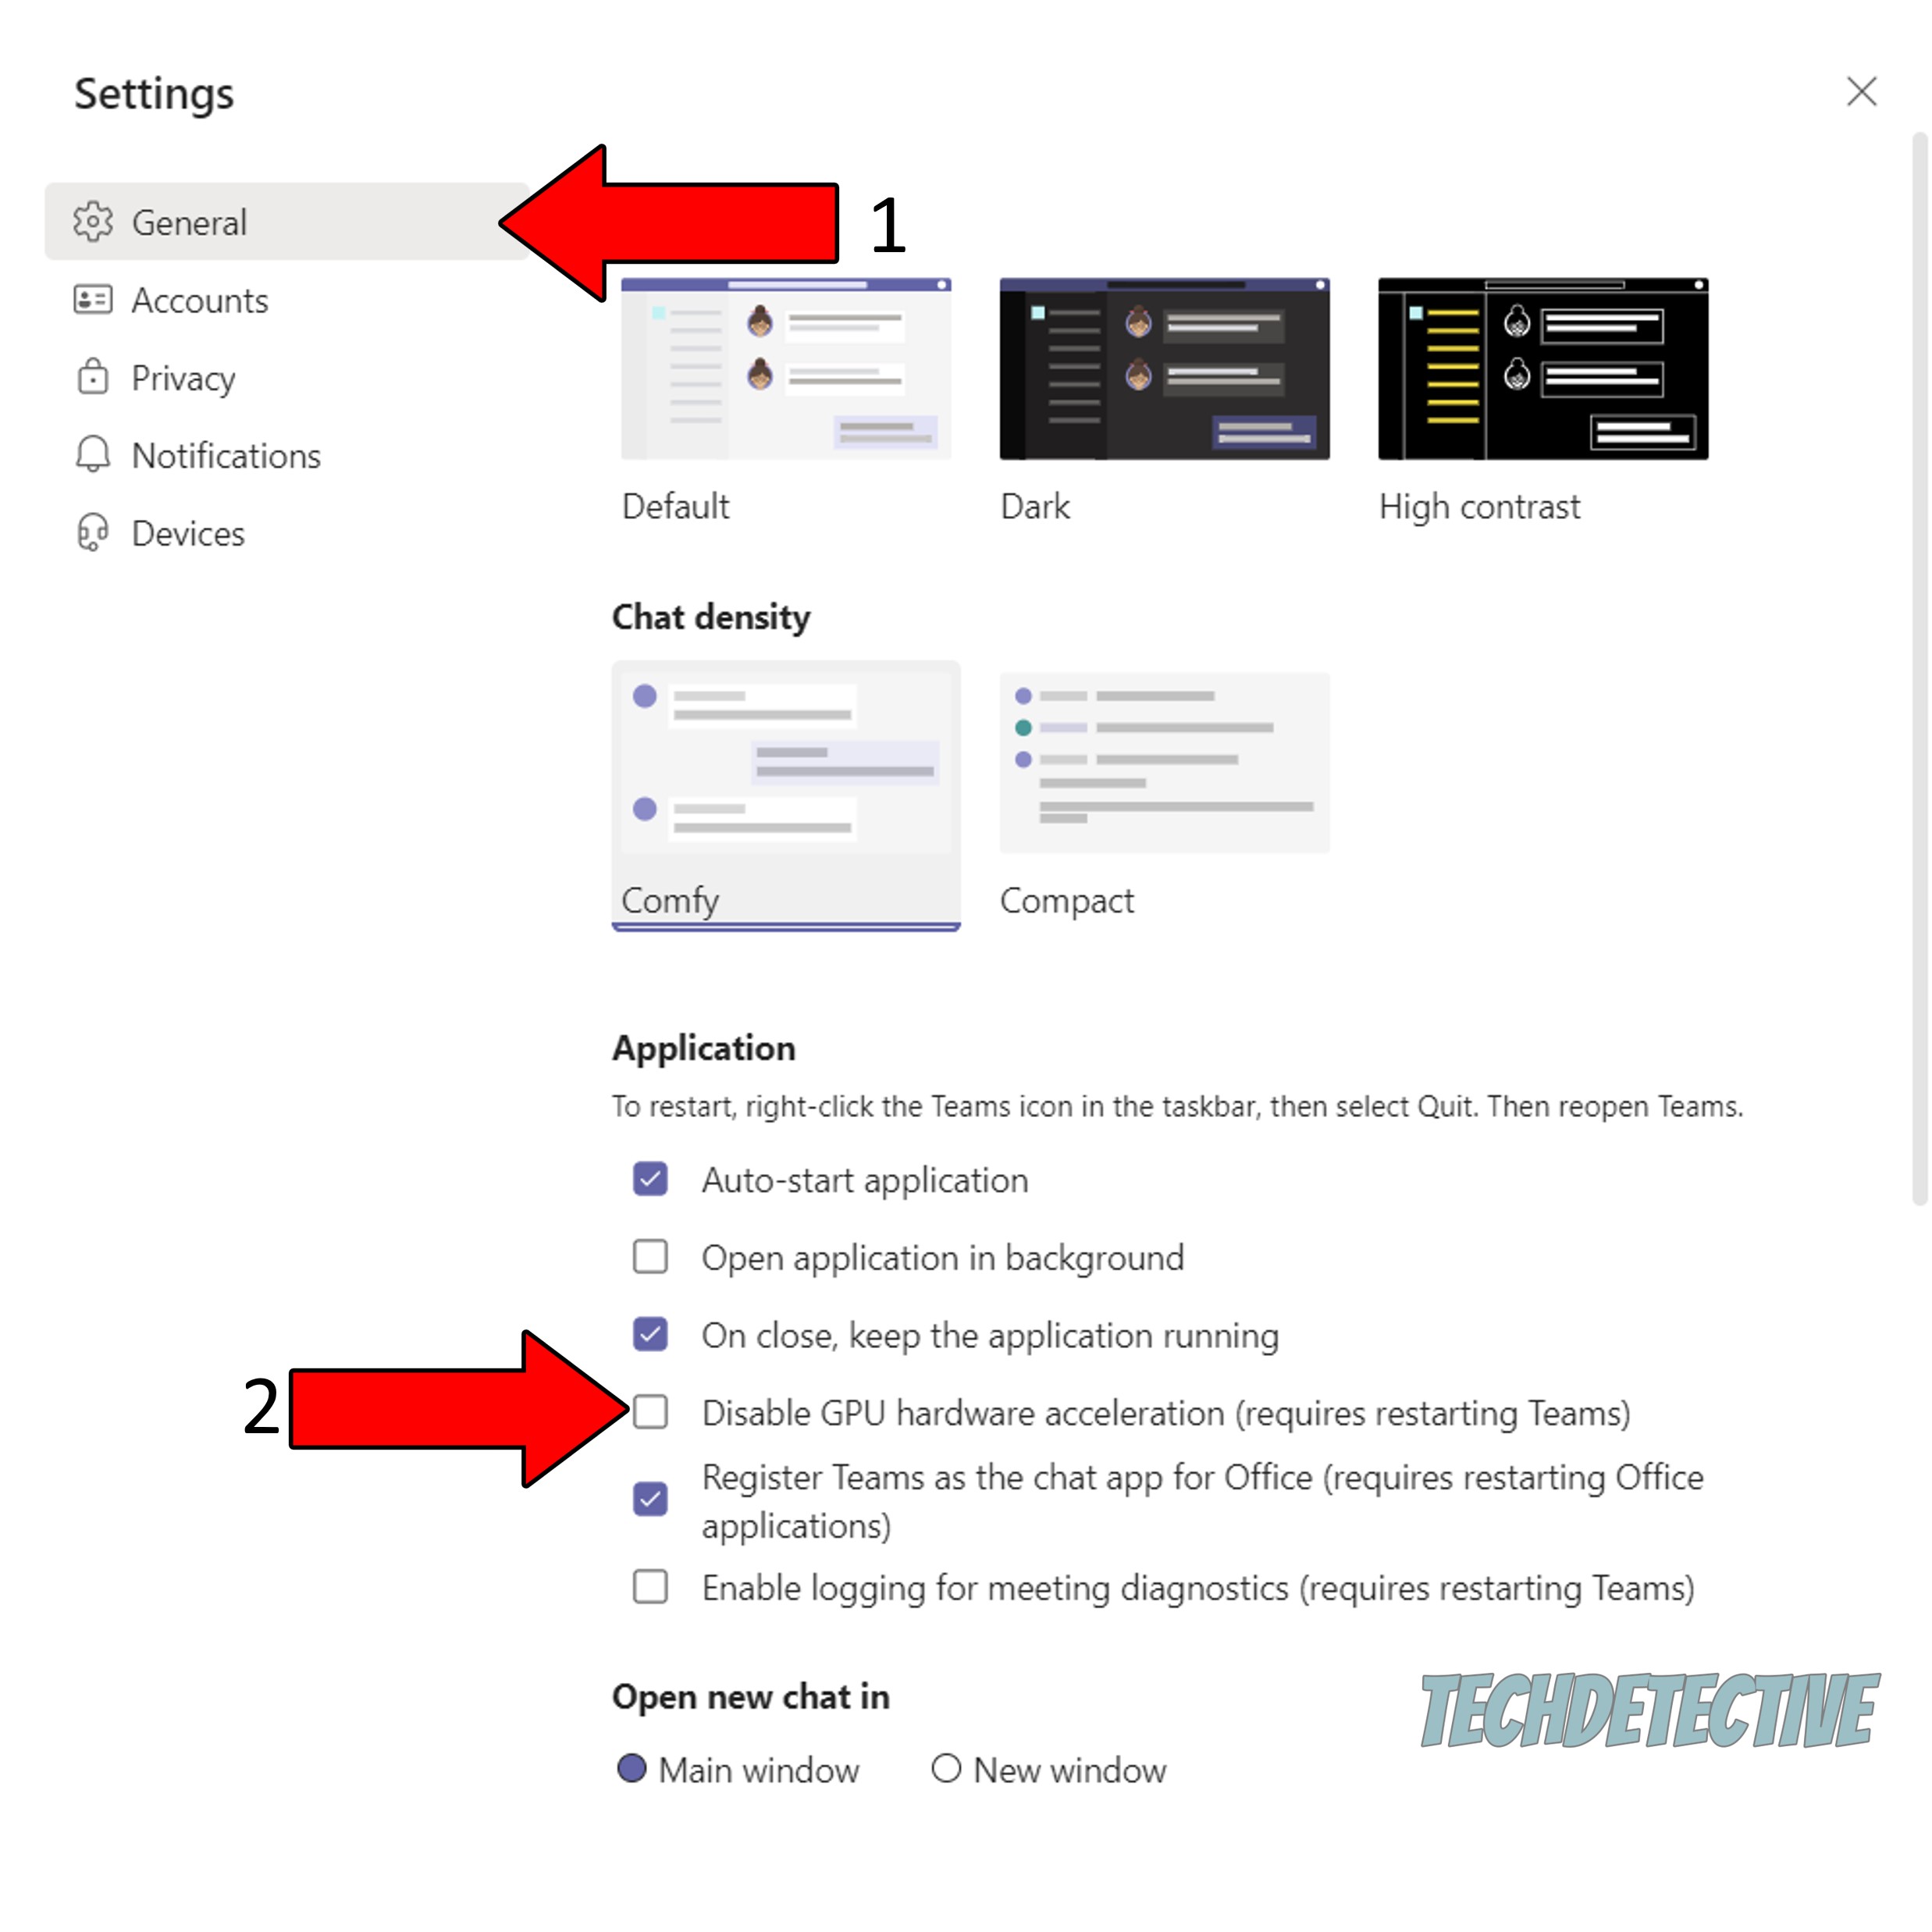
Once you’re done with this process, wait for Microsoft Teams to restart and see if the problem persists
Moving on, let’s rule out your secondary GPU as the culprit.
This will be more of a problem for people who own PCs meant for graphic design, video editing, gaming, and other graphically-demanding activities. Devices capable of undertaking these tasks are usually equipped with a stock GPU, which is usually the same brand as the processor, and a dedicated one, which brings horsepower into the equation.
More often than not, both graphics cards work together well. But now and then, they can have a hard time getting along and put you on the spot.
When this happens, you might want to try disabling your stock card and keep using the dedicated one while on the meeting.
Solution:
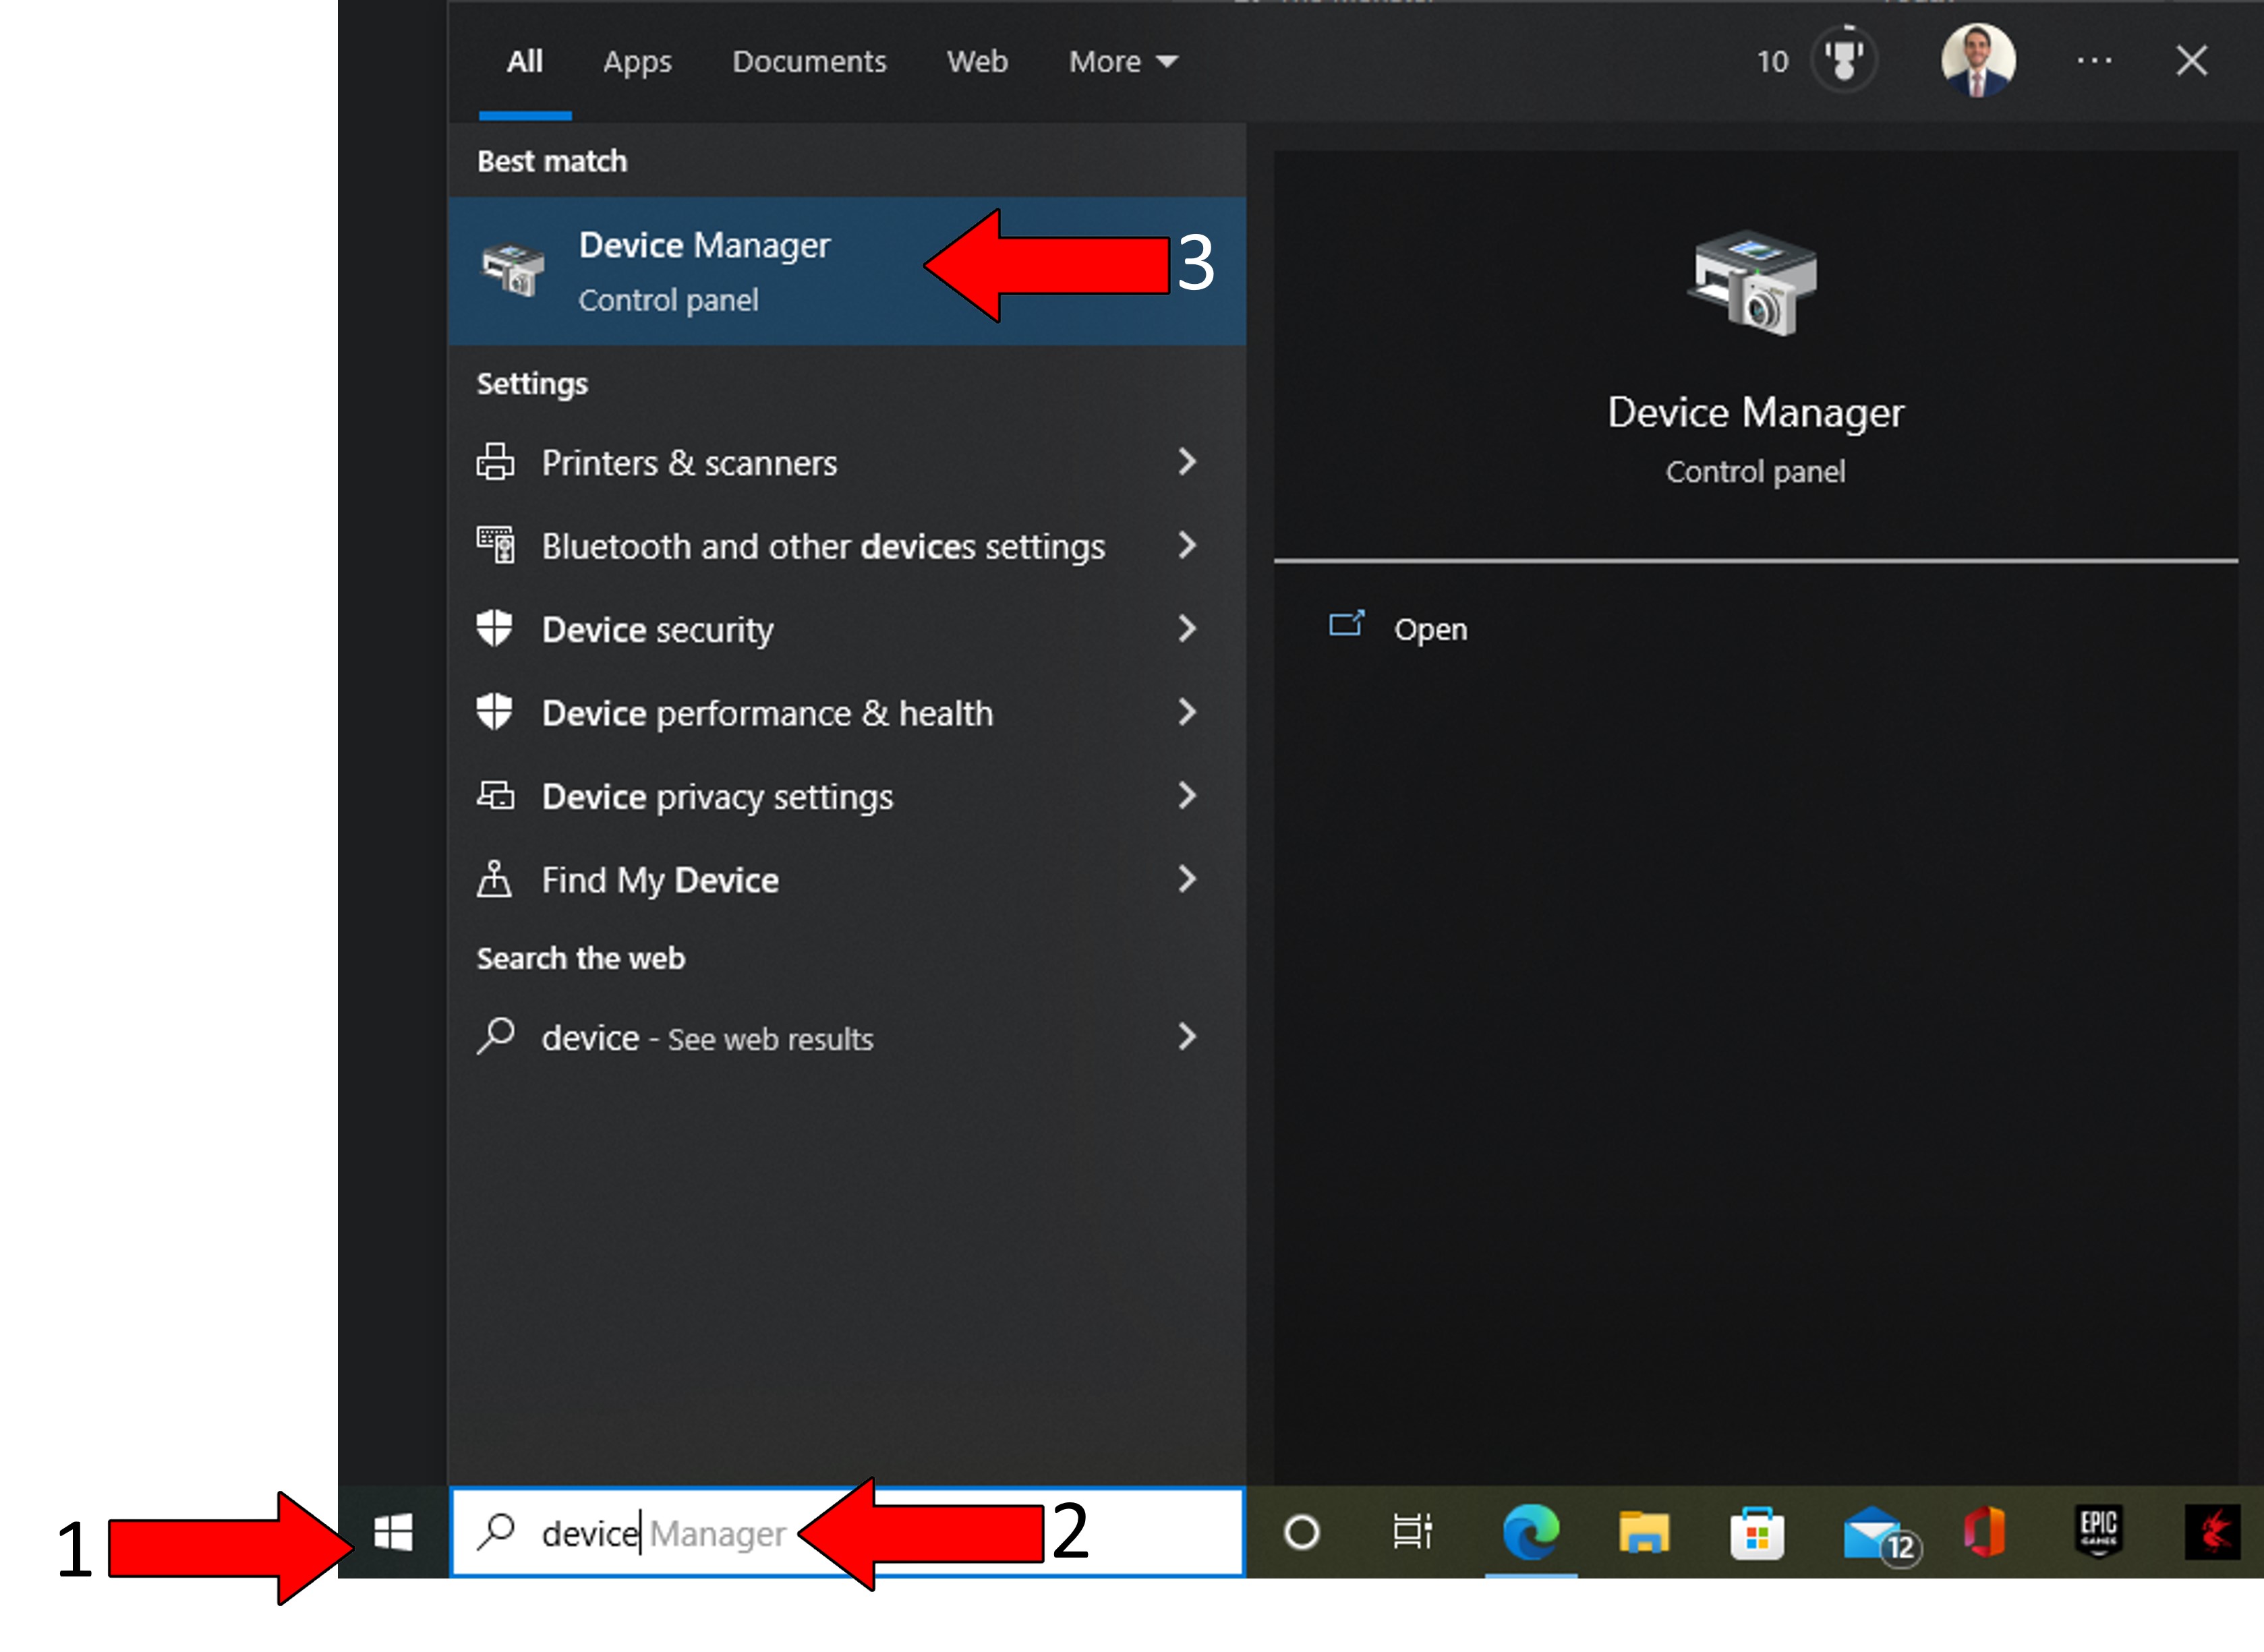
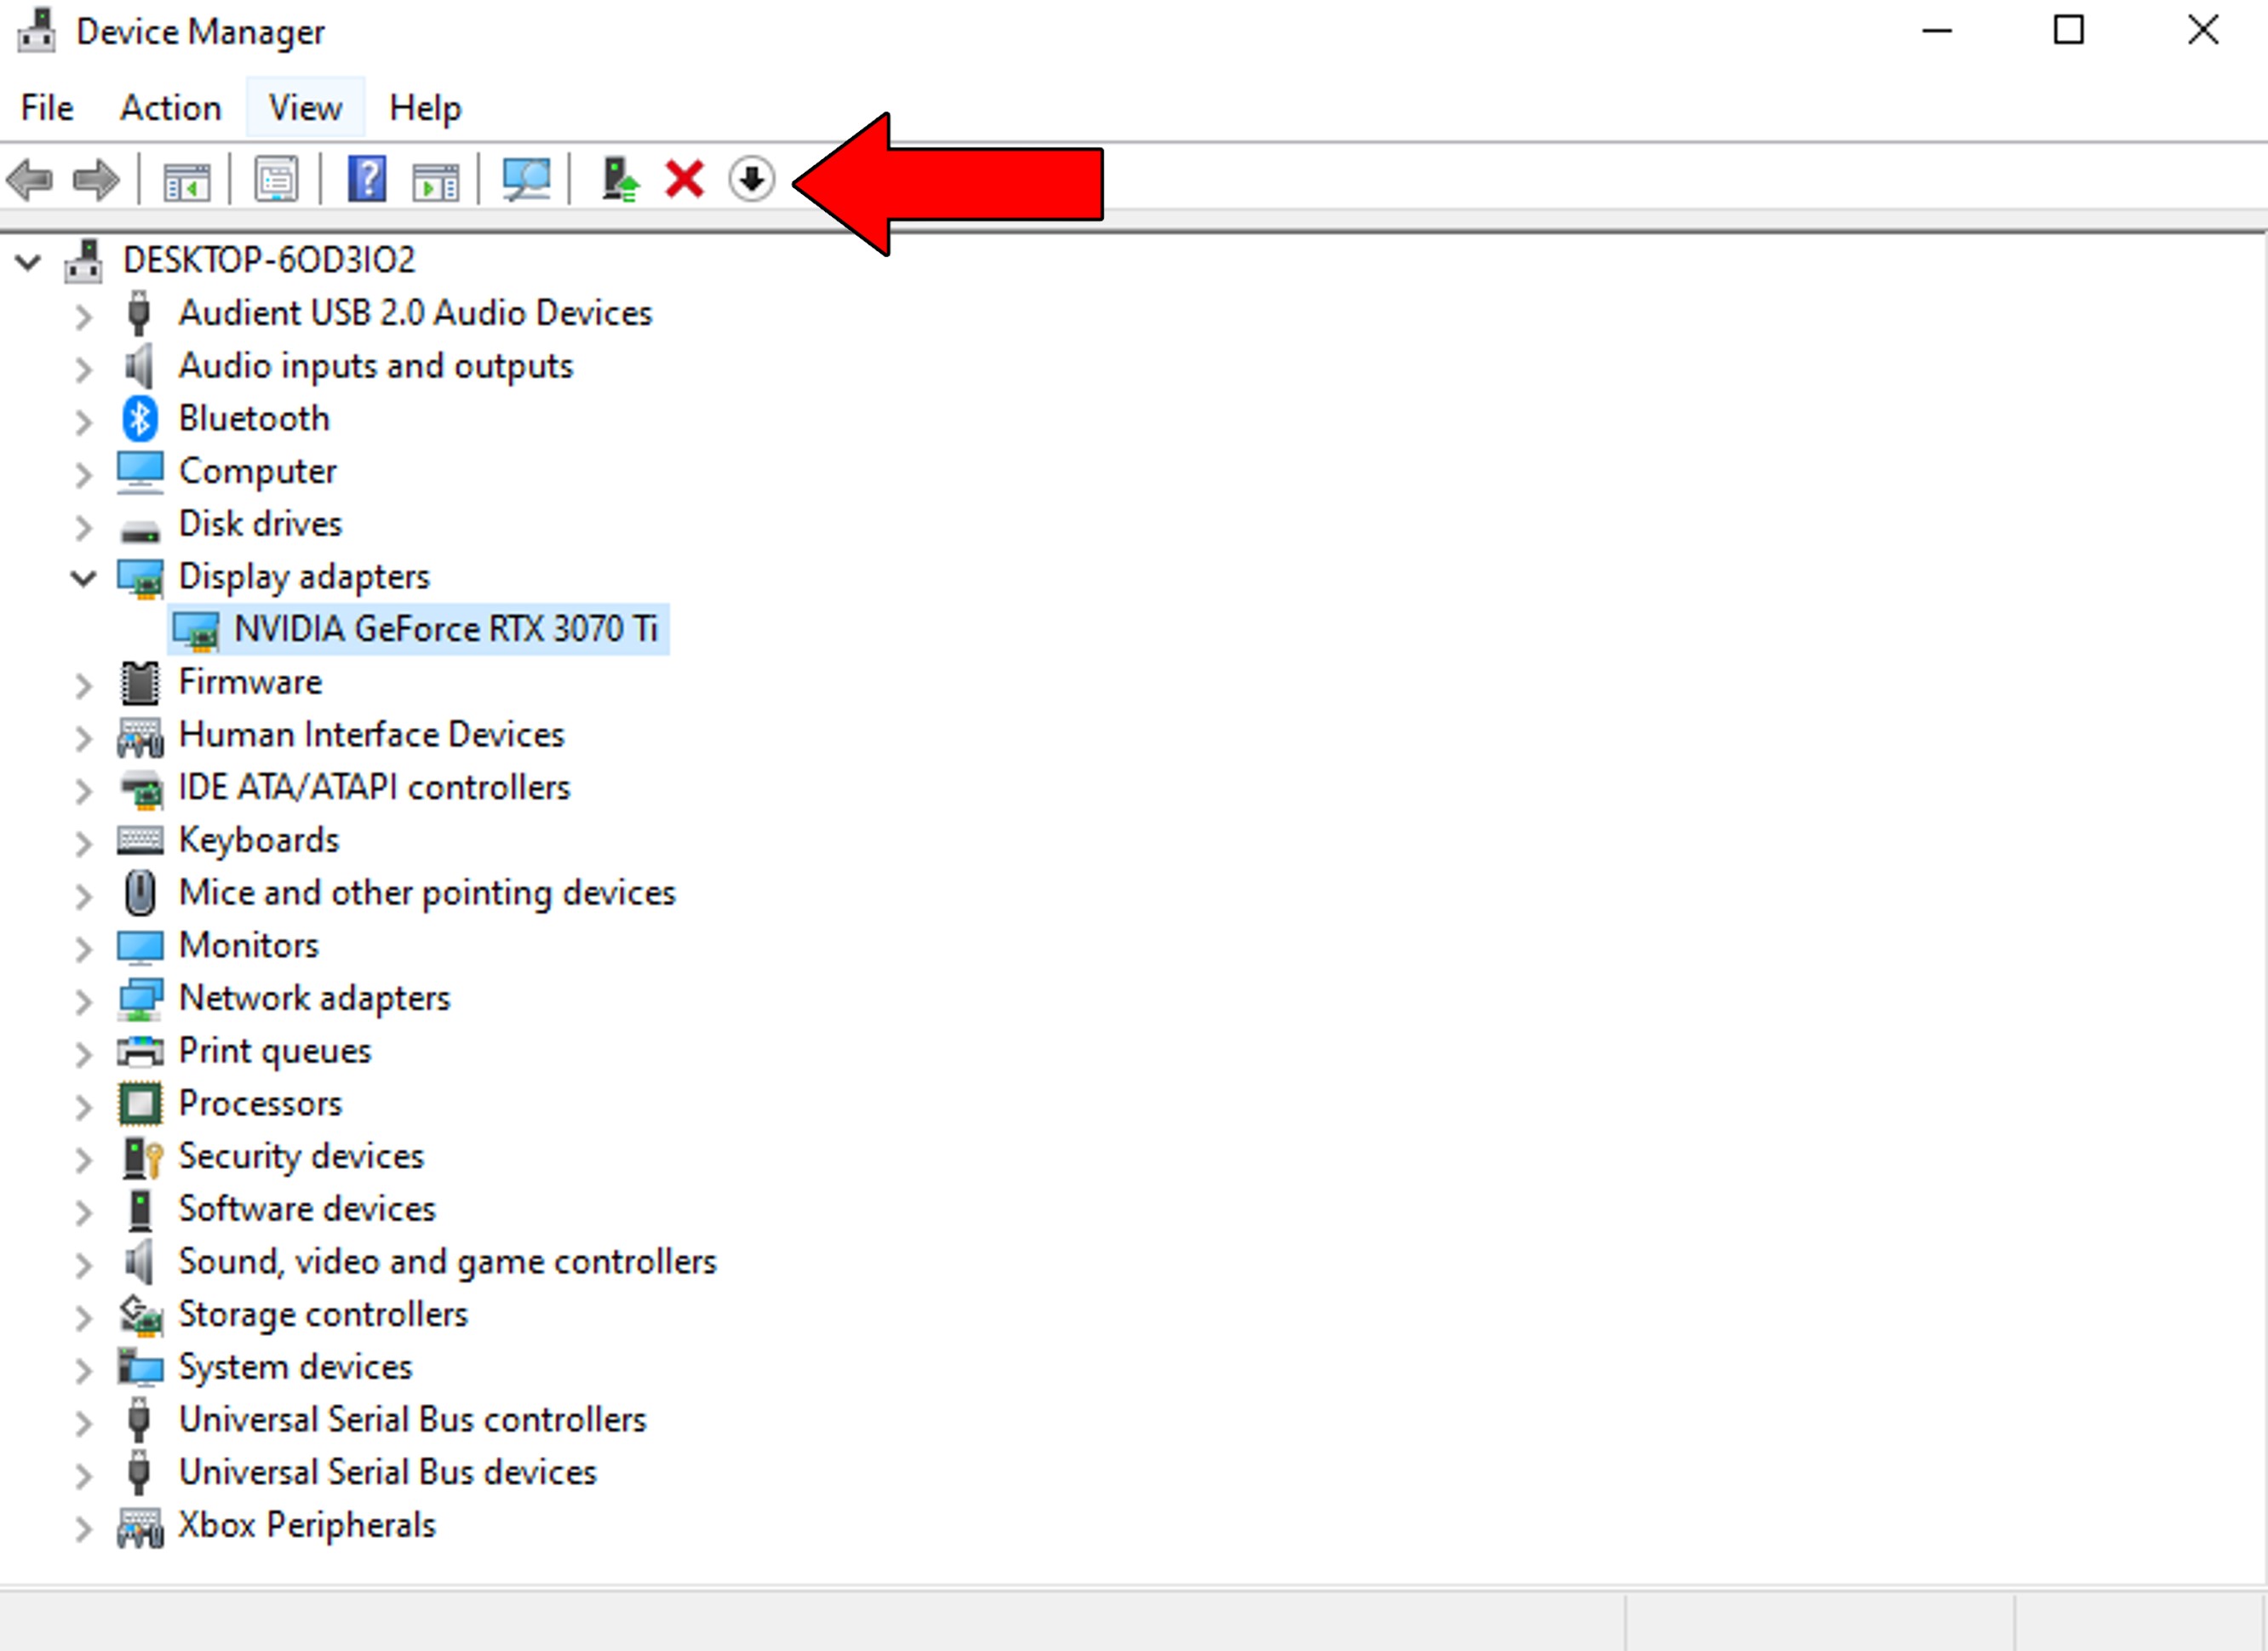
4. Hit Enter, and in the new window, find “Display Adapters”. Click on the arrow pointing to the right, and from the dropdown menu, select your stock graphics driver (it’s normally either Intel or AMD. I don’t have one because I built this PC, so there’s no integrated stock card, but you should have one)
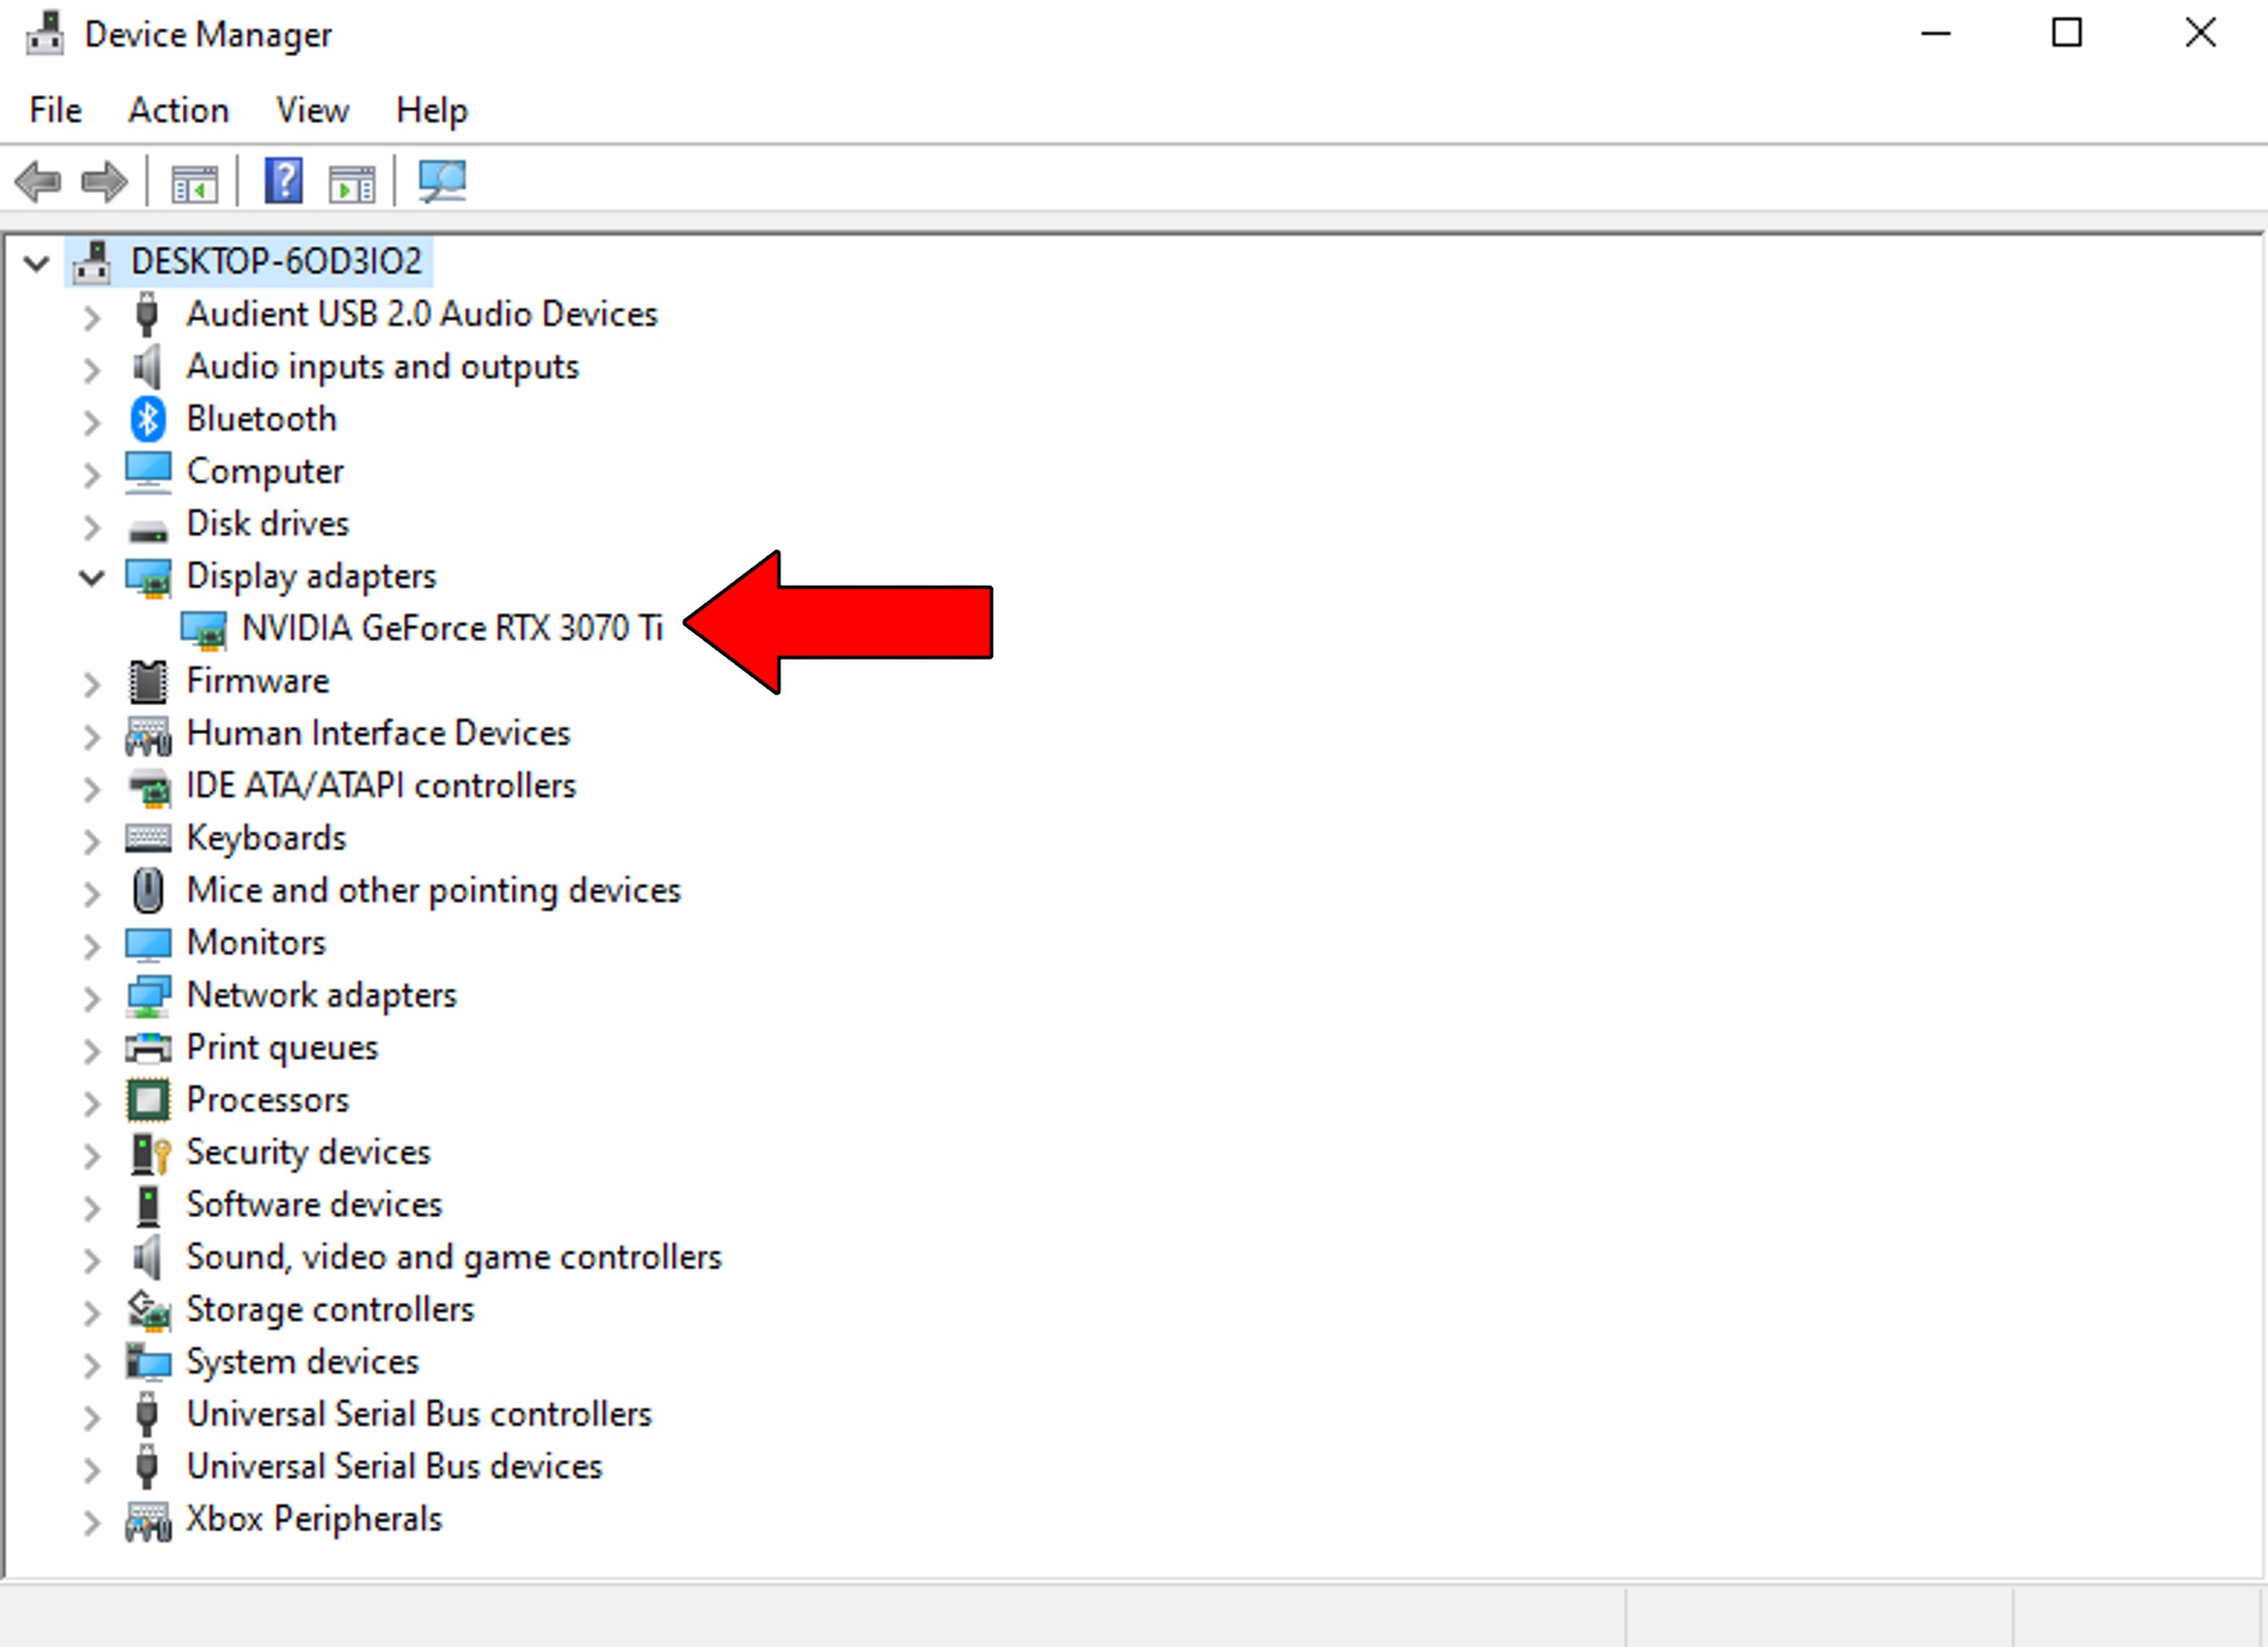
5. Click on the icon with the arrow pointing down and confirm you want to disable the driver. Please make sure you have two graphics cards before doing this, as disabling the only one installed on your system will make your screen go black.
Normally, you only want to disable your stock driver temporarily. I recommend reactivating it once you’re done with your meeting.
Now that we’ve checked the hardware, let’s move on to virtual files on your cache.
In case you don’t know what that is, let me briefly explain. An app’s cache is where key information is stored. Within it, you’ll find images, files, and login credentials. By keeping all this handy, the platform can save your workday countless minutes in reduced loading times and smoother navigation.
As you can imagine, in 99% of cases leaving your cache alone is for the best. But if it has accidentally stored a corrupted file, things can get weird very quickly and could explain why you can’t see the shared screen on Microsoft Teams.
In that scenario, you’ll want to clear it.
Solution: Don’t call your hacker friends yet. This process is very simple:
Windows PC:
Mac:
As you may know, VPN stands for “Virtual Private Network”, and it’s a useful tool if used well. Not only can this software make your browsing secure and private, but also allow you to connect to foreign domains your company might need you to check up on now and then.
I had this friend back in college who would use one to log into foreign meetings at Ford global, and if you work for a multinational, your day to day might involve something similar.
If so, there’s a good chance your VPN is getting in the way.
Solution: Try disabling it and check if you can see what your coworkers are sharing on Microsoft Teams. If your picture is crystal clear, then the platform is likely blocking your VPN connection as a security measure.
In that case, you can always turn it off whenever you’re about to join a meeting, or look for an alternative with obfuscated servers.
Lastly, let’s enable full screen sharing.
This feature allows you to control how much of your display is taken up by someone else’s shared screen. When disabled, Microsoft Teams won’t automatically show your coworkers’ content across your entire screen, but rather a section of it.
This can come in handy when you’re working on a close deadline within Excel or another program while on your meeting as you can have both windows open. But sometimes features can become bugs, and that’s when trouble begins.
If you suspect this to be the reason you can’t see the shared screen on Microsoft Teams, then you’ll want to ask the IT admin of your organization to follow the steps below.
Solution:
That about covers it!
I bet that, when you first got to this piece, you were a little doubtful about being able to solve your own technical issues, but look at you now. Not only did you get everything back to normal, but also learned something valuable in the process.
Remember, it’s better to try and fail than to never try at all.
Thank you so much for sticking with me all the way to the end. If you found this article helpful, it’ll make you very happy to know that we upload new content weekly. While we work on our next masterpiece, why not check out our other resources below to become a Tech Detective yourself?
Best of luck to you.


Detective ‘Gerry’ Molina is one of the most prolific detectives on our TechDetective team. He’s known for his ability to crack down on multitudes of tech crimes on behalf of you – the citizens of the internet. Molina is often the first point of contact for many cases, working to help free victims from the tyranny of tech issues.