Is the dialogue on Netflix too quiet, but the action is extremely loud?
That has got to be super annoying! Streaming is all about an immersive experience and connecting with what’s happening on-screen.
Having a problem like this is no fun, especially considering that you probably have to keep turning the volume up and down as your movie/series progresses.
But don’t worry, you came here for answers, and that’s exactly what you’ll get. Below, I’ve prepared a list including the most common causes behind this, and 6 easy ways to address them.
When Netflix’s dialogue is too quiet, but the action is very loud, you can try tweaking your EQ, changing your sound settings, or using compression. If that fails, you can also try clearing Netflix’s cache & cookies, uninstalling the platform, or upgrading your setup.
Read on to enjoy streaming again!
Let’s start off by making sure that your current EQ settings are not getting in the way. Depending on your sound system, this might or might not be a potential culprit. If your TV or surround sound setup can set different EQ presets or allow you to create your own, then we might be onto something.
But before we entertain that possibility, let’s answer one question – what does “EQ” stand for, and what does it do? If you already know, feel free to move on to the solution, but if not, please read on.
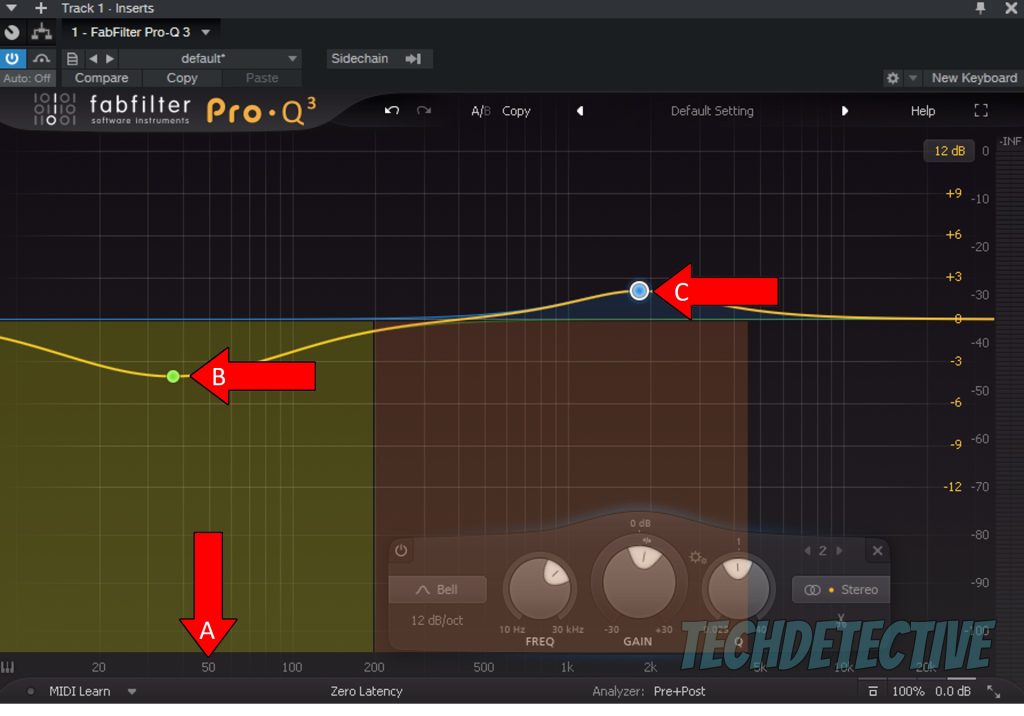
In a nutshell, “EQ” stands for “equalizer”, which is an audio tool that allows us to boost or cut (make louder or quieter) certain frequencies along our hearing range. Human voices are typically found in the middle of this spectrum, whereas effects like explosions or rumbling, tend to be found in the lower ranges.
If your sound system has an equalizer, chances are it’s set to a profile that is making Netflix’s dialogue too quiet, and action sound effects very loud. Something like this could also explain why you’re constantly noticing other volume changes on the platform.
Solution: The best way to deal with this is to enter your sound system’s EQ settings and then follow the steps I’ll go into detail below. Since there are so many device brands and models in the market, I’d recommend reading your user manual to know whether your system has a modifiable EQ curve.
When you’re certain that it does, try going Googling the following query: “How to access EQ settings on <Your Device’s Make And Model Go Here>”. Once you’re in the EQ settings section, try this:
If your sound system doesn’t have an editable EQ curve option, try browsing through the available presets until you find one that makes dialogue clearer.
Next, let’s try something similar to the previous section, but this time, we won’t be messing with equalization. What we want to check now is that you’re using the right sound settings from within Netflix and your devices.
As you may know, these days, there are many audio setups for home entertainment. Some people have nothing except their TV speakers, whereas others own powerful 7.1 surround sound systems.
Sound design has gotten so good in the last few years, that any setup you own will do a great job. But using the wrong option while streaming could explain why Netflix’s dialogue is too quiet, but the action is very loud.
For instance, accidentally selecting 5.1 or 7.1 surround sound options on a regular TV speaker can cause the platform to route audio to the wrong places, messing with the volume levels of your content’s elements.
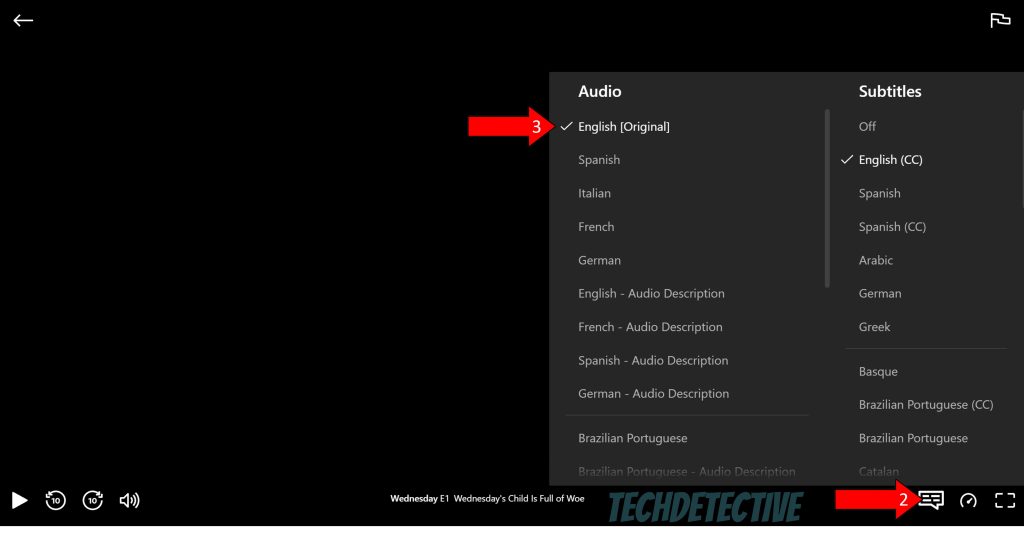
Solution: To see what audio option you have selected within Netflix and change it if necessary, please follow these easy steps:

2. Move your mouse to bring up the control bar and click on the icon that looks like a text message square.
3. If your audio settings are currently in 5.1, try selecting an option that isn’t.
If none of the solutions above have worked for you, you might want to try adding a personal touch to the mix. This is where compression comes in.
Assuming you don’t know what I’m talking about, let me give you a brief explanation. Volume irregularities are nothing new. In fact, ever since 1937, compressors have been used to normalize audio levels and control any spikes or dips in them.
In its most basic form, a compressor squeezes any audio waves so that the loudest points are not so loud, and the quietest sections remain loud enough to be appreciated. Netflix already has a built-in audio normalizer, but sometimes it might fail to load due to corrupted files, coding bugs, or server failure.
And even when it’s working as expected, you might need a little more processing to get the results you want.
Solution: Depending on your sound system, you might already have compression presets loaded onto it. If so, I recommend reading your user manual to determine how to access and edit these options.
Provided your sound system does not offer this feature, and if you don’t mind spending a couple of bucks, looking into an external analog compressor for your TV isn’t the worst idea. That being said, please be careful when choosing this alternative, as you might find compressors worth thousands of dollars, and you really don’t need those.
A good, basic compressor for your home entertainment requirements should start in the range of $100-$150, tops.
Moving on, let’s take a look at your cache and cookies to make sure they’re not to blame for this situation.
Depending on where you stand in Tech terminology, you might already know enough about these concepts to give a lecture. If so, you can safely move on to the solution, but if not, please read on, as I’d like to walk you through them briefly.
Let’s start with the cache.
In its most basic form, it works as a storage unit, where you can find login credentials, user preferences, thumbnails, and video previews. Keeping this data readily available saves Netflix the trouble of having to reload it every time you launch the platform, which in turn saves you precious minutes every day.
Quite handy, huh? Now let’s talk about cookies.
These are developer tools that help make your browsing more efficient and increase the accuracy of targeted ads and show suggestions. It’s thanks to them that you get recommendations for the Hannibal trilogy right after finishing a crime documentary.
Now, although it would seem like leaving both your cache and cookies alone is nothing but an advantage, it’s sadly a little more complicated than that. Occasionally, a file inside them can become corrupted, or a bug can appear out of nowhere, causing the platform’s built-in audio normalizer to fail.
This could explain why Netflix’s dialogue is too quiet, while the action is very loud, as well as other issues, such as a progress bar stuck on your screen.
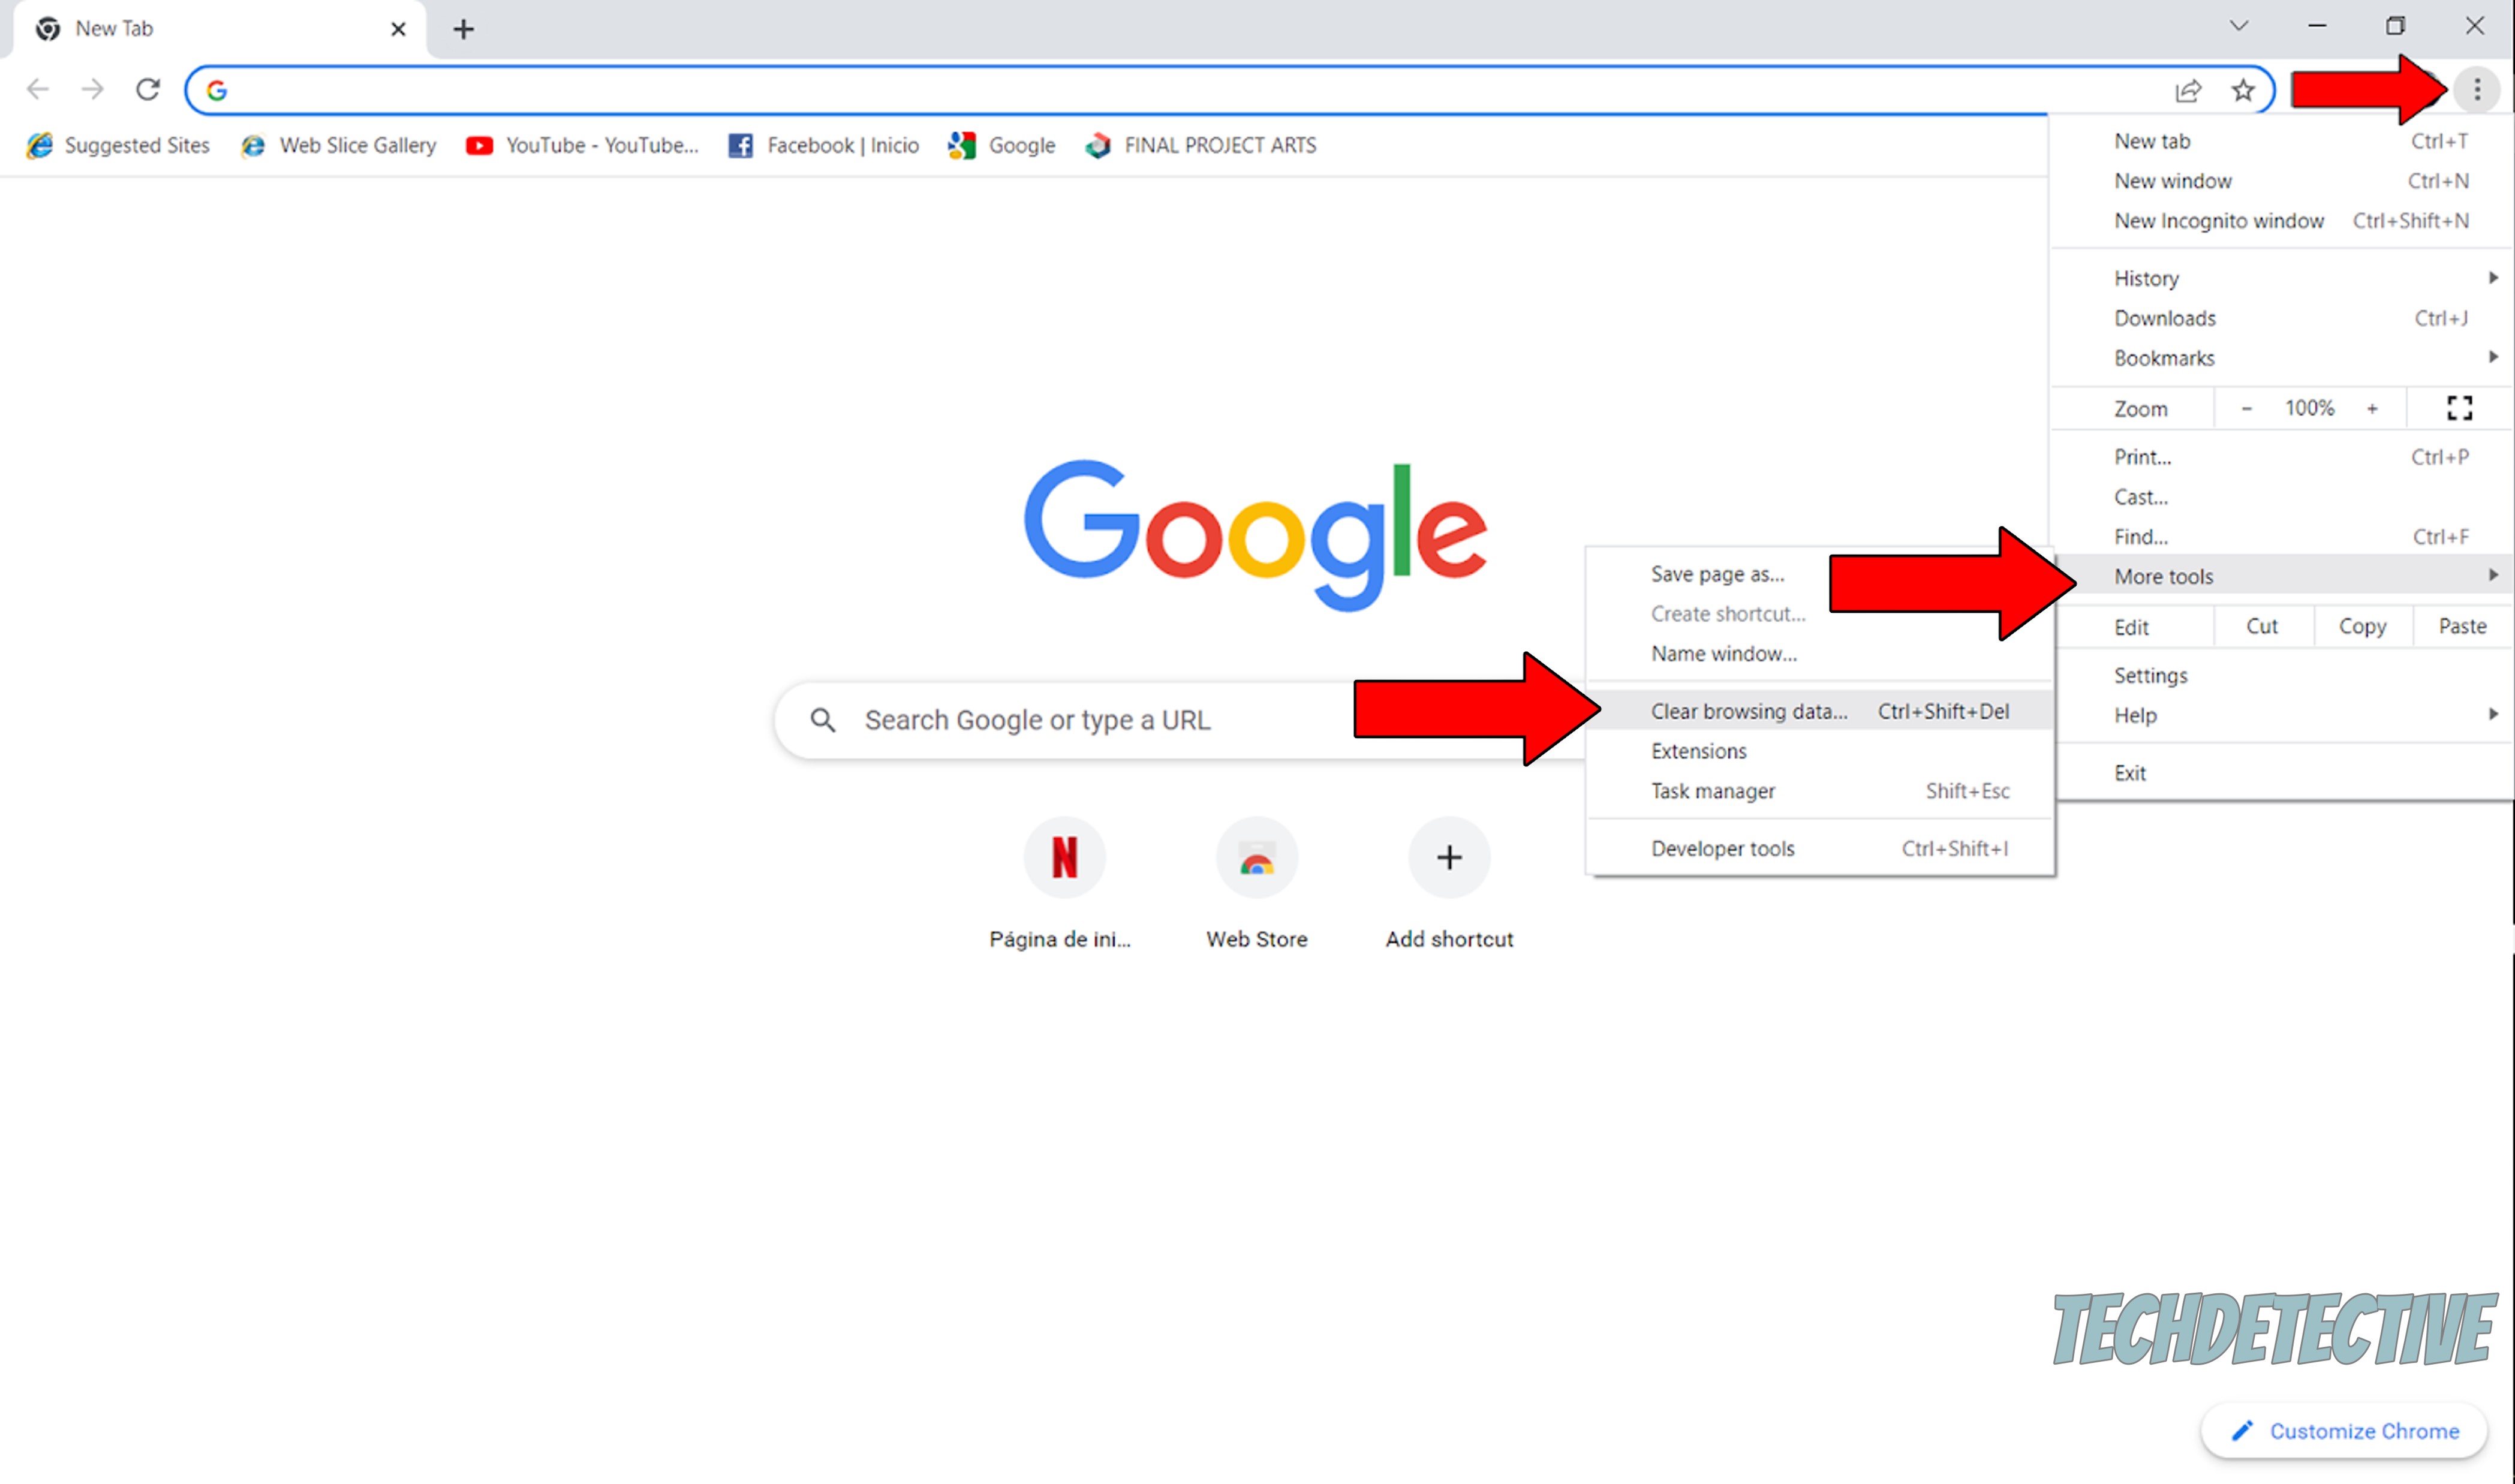
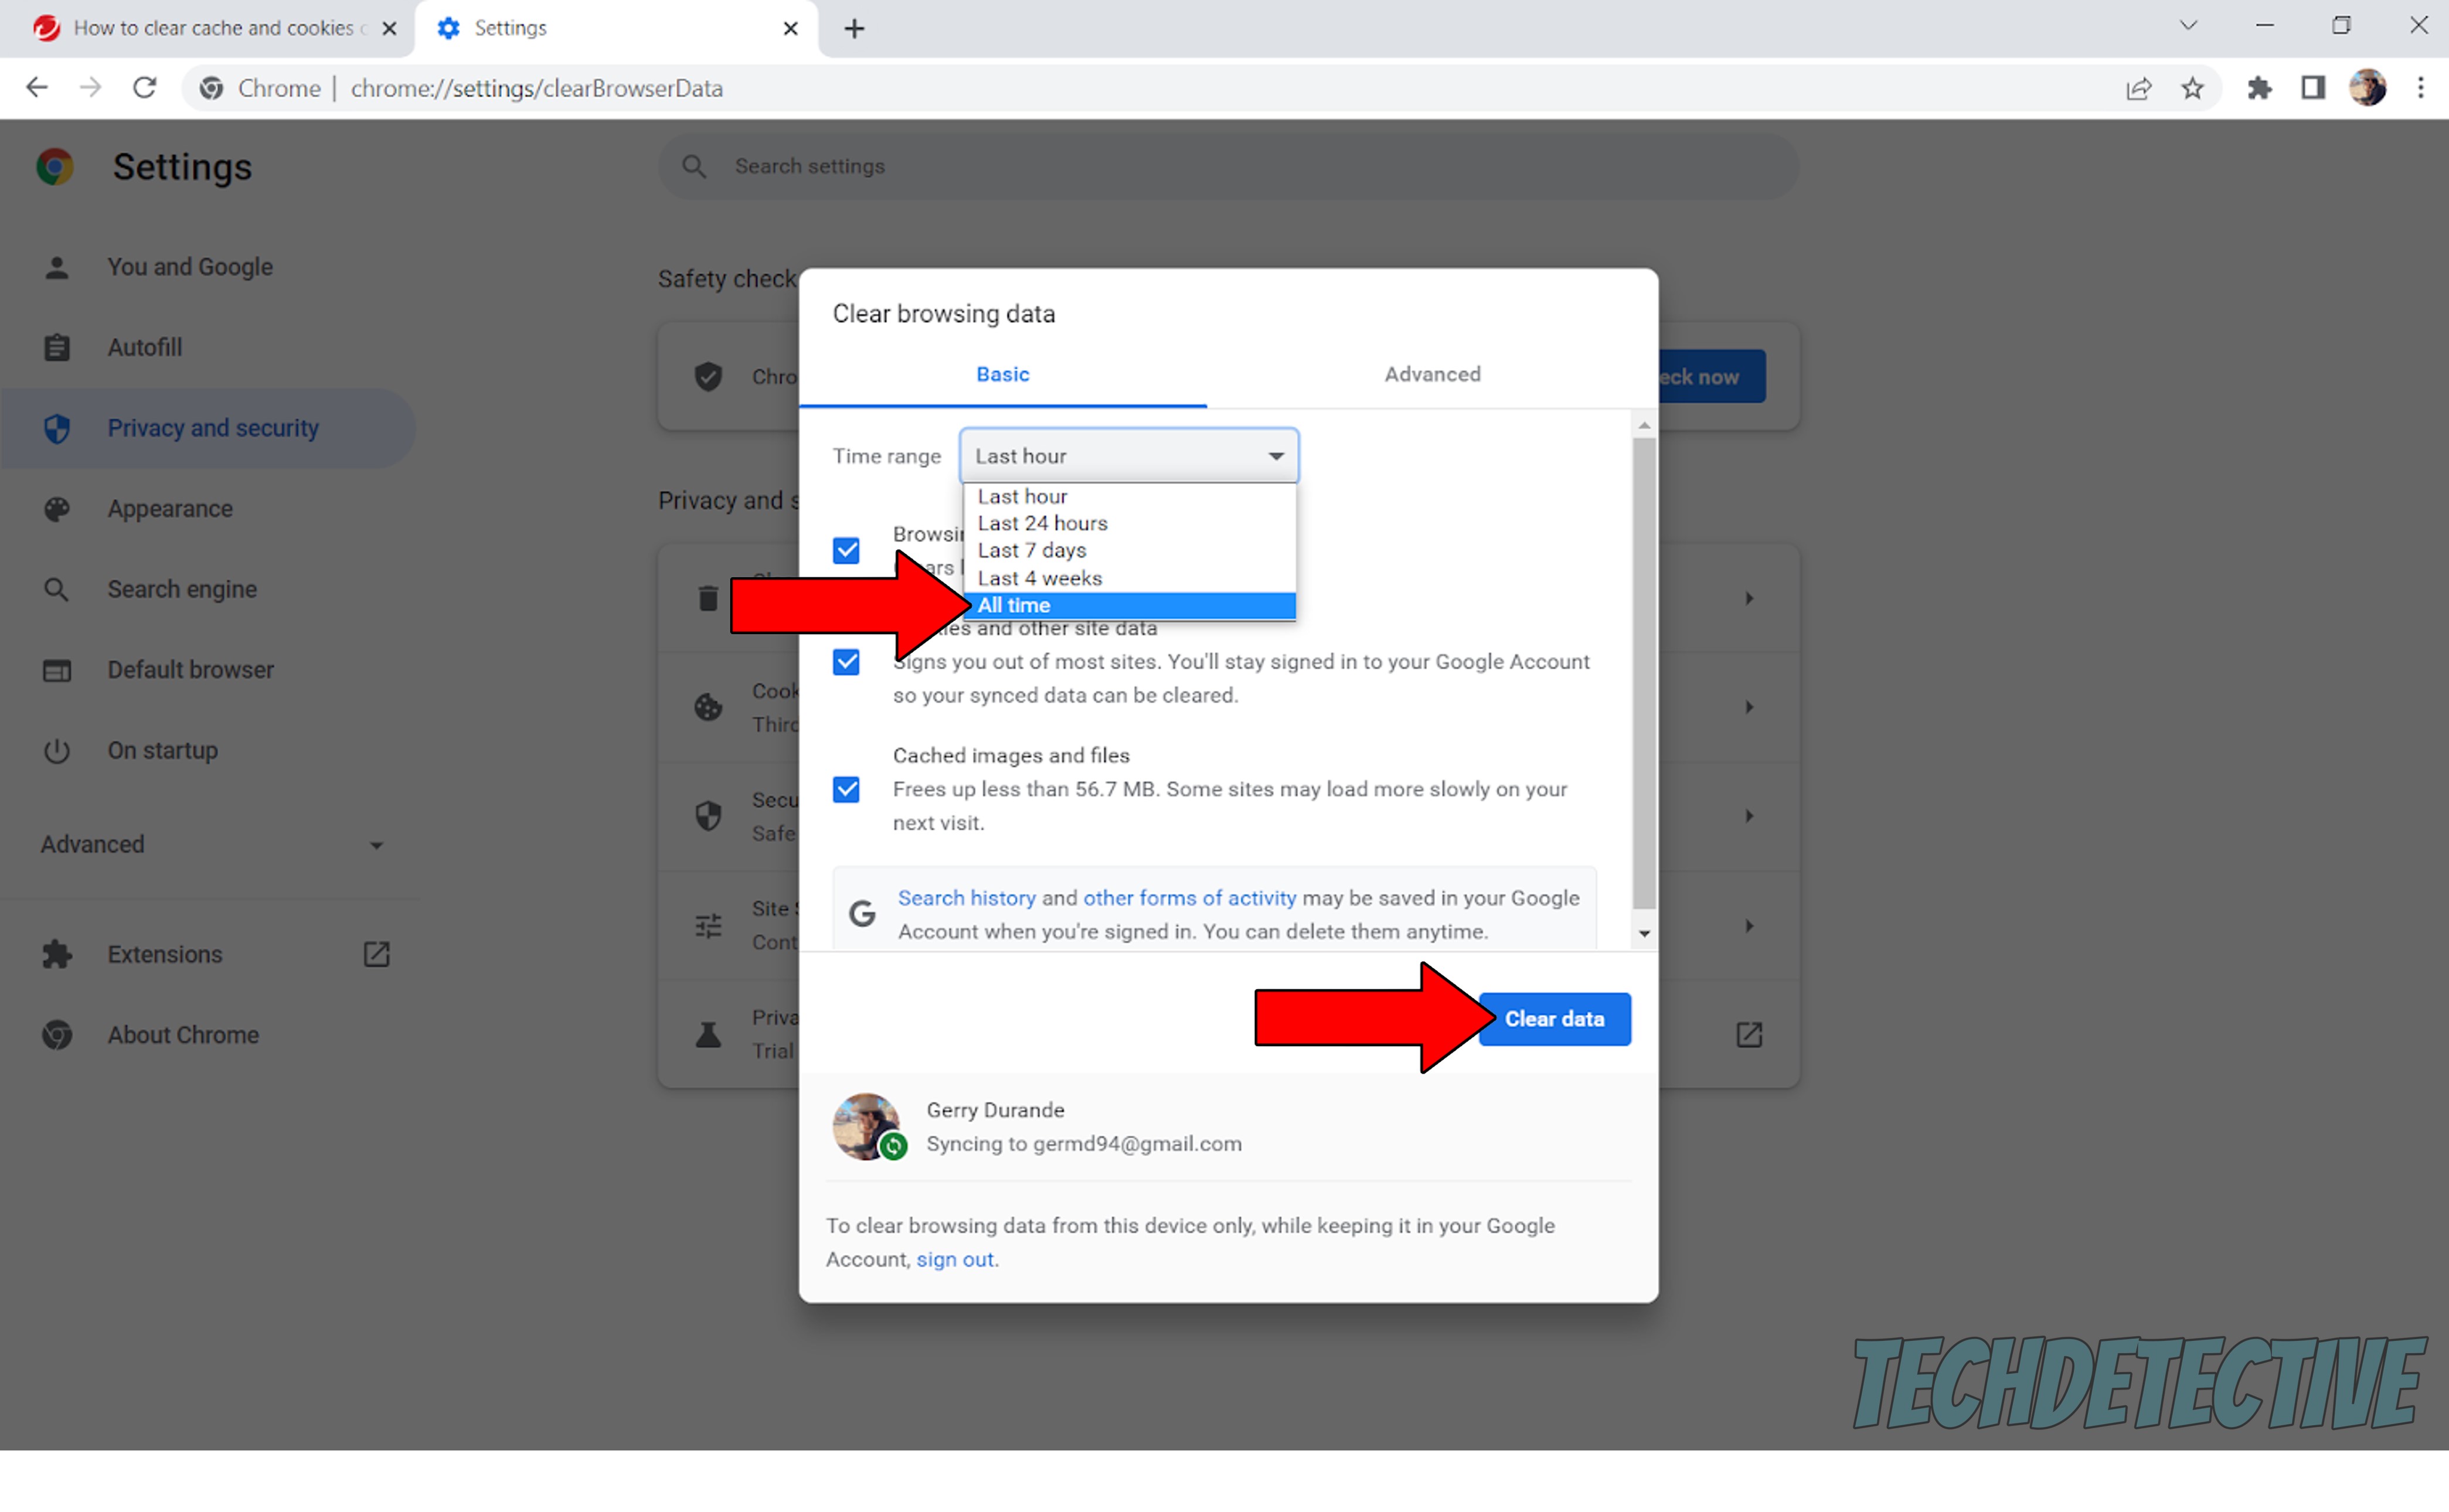
Solution: If you suspect your cache & cookies are “contaminated”, your best bet will be to clear them. The process to do this varies depending on the streaming device you use, so try Google searching for the right instructions for your case.
To give you a general idea, here’s what do to on Google Chrome:
If clearing your cache & cookies failed to do the trick, you might have to try something more aggressive.
There’s a good chance that your current situation is being caused by a bug or a corrupted file that is too deep-rooted to be taken care of by any of the solutions above. In that case, the only thing that will work is wiping all traces of the app from your devices.
This process allows the platform to reload vital resources and patch up anything that’s not in the best shape.
A lot of people put this off out of fear of losing their account forever or having their “Continue Watching” list disappear. But don’t worry, all that information is backed up in the cloud and should be waiting for you once you reinstall and log back into your account.
Solution: Again, the process varies from device to device, so Google is your best friend when it comes to finding the right instructions for you. That being said, here are a couple of examples to give you a general idea of how to do this:
For Roku:
Once you have done this, reinstall the app by following the same steps as the first time you got it.
For Hisense TVs:
Lastly, let’s talk about the elephant in the room. If none of the solutions above worked or failed to deliver the results you wanted, you might want to consider upgrading your setup.
Most people are content with what they get with Netflix’s audio normalization technology. But if you take audio seriously and can’t look past this situation, upgrading your setup might not be a terrible idea. I’d recommend looking online for a surround sound system that offers EQ editing and compression features, so you can tweak your experience to your liking.
All done!
When Netflix’s dialogue is too quiet, but the action is extremely loud, your streaming experience can be greatly affected.
Luckily, I hope this piece has helped you better understand what might be causing this, as well as what you can do to personalize your experience and get the sounds you want. More often than not, simple actions, like taking advantage of your system’s EQ and compression capabilities, as well as clearing your cache & cookies, should do the trick.
Thank you so much for sticking with me all the way to the end. If this article was useful and kept you interested, you’ll be very happy to know that there’s new content to learn from every week. While we solve our latest mystery, please check out our other incredible resources below to become a Tech Detective yourself!
I wish you all the best.


Detective ‘Gerry’ Molina is one of the most prolific detectives on our TechDetective team. He’s known for his ability to crack down on multitudes of tech crimes on behalf of you – the citizens of the internet. Molina is often the first point of contact for many cases, working to help free victims from the tyranny of tech issues.