Does Netflix’s volume keep changing, and it’s driving you crazy?
Welcome to the club! This has sadly been an issue for thousands of people over the years, and it can be very difficult to pinpoint the source of it.
Having this happen is clearly no fun, as a sudden explosion or a monster growling can catch you off guard and give you a proper scare.
But don’t worry, I know you’ve had it with this issue, so I promise you we’ll get to the bottom of it. Below, I’ve prepared a list including some information about why this is happening and 5 easy fixes to address the situation.
When Netflix’s volume keeps changing, you can try checking your sound settings, or relaunching/uninstalling the platform. If that fails, you can also try using compression, checking the app’s servers, or clearing your cache & cookies.
Now, before moving forward, I’d like to point out that sound variation is normal up to a certain point.
Netflix’s sound designers set the audio levels of different elements to be louder or quieter in order to make scenes more immersive. So, unless you’re experiencing drastic volume changes, everything’s working as designed.
Having covered that, read on to get your audio levels in check!
First, let’s make sure you’re using the right sound settings for your home entertainment system. I know this might sound a little confusing, so let me explain it in detail.
When it comes to sound, you can have standard TV speakers, 5.1 and 7.1 surround sound systems, PC speakers, and much more. Each one provides a different experience and unique immersion capabilities, which is great. But choosing incorrectly could explain why Netflix’s volume keeps changing.
How so? Mainly due to sound design.
Behind every show on Netflix (both proprietary and not), there are sound engineers who decide what sound will go on what side and how loud or quiet it should be. Depending on your sound configuration, these elements will be routed differently.
The problem begins when you select the wrong settings for your specific sound system, as audio might be routed somewhere it’s not supposed to be, messing with the volume levels.
Solution: The way to fix this will vary depending on what sound setup you have. If you only have TV speakers, try going into Netflix’s audio options and select one that’s not 5.1 or 7.1 surround.
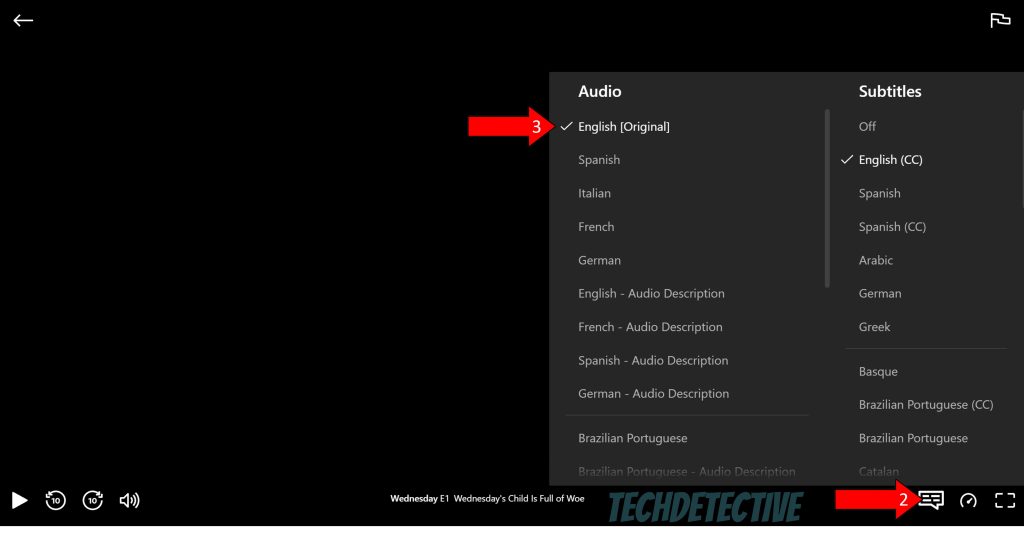
Here’s how you can do it:

2. Move your mouse to bring up the control bar and click on the icon that looks like a text message square.
3. If your audio settings are currently in 5.1, try selecting an option that isn’t.
This should improve your current situation and control volume levels better. But if you’re streaming Netflix through an external device, such as Roku, you’ll want to also change the audio settings from within the device’s interface.
With so many options out there, I’d recommend going to Google and searching for “How to change sound settings on <Your Device’s Make And Model Go Here>”. You’ll find all the information you need for your specific case there.
Sometimes, when this happens, there’s a bug or a corrupted file that’s to blame.
How so? Great question.
You see, in order to work, our favorite devices and apps require thousands of background processes to be running at the same time, all the time. Occasionally, said processes can crash due to the threats mentioned above, which could explain why Netflix’s volume keeps changing, or why the progress bar is stuck on your screen.
By closing and relaunching Netflix, you’ll be giving the app a chance to reload vital resources, including a built-in volume normalization feature intended to make all content play at similar loudness levels.
Solution: Now, assuming relaunching doesn’t work, the culprits might be a little more deep-rooted, and only uninstalling will do the job. This process might vary depending on your device’s brand and model, but the examples below should help give you a general idea:
For Roku:
Once you have done this, reinstall the app by following the same steps as the first time you got it.
For Hisense TVs:
For Xbox One/Series S/X:
If you’re still not happy with the results, you can also try adding your personal touch to the mix. Some TVs and surround sound systems have built-in compression profiles that allow users to have more control over their audio dynamics (the loud and quiet parts).
Compressors narrow the gap between the loudest (such as an explosion) and quietest (such as whispering or normal dialogue) parts of a sound to even everything out.
If you own a device that is capable of using compression profiles, try reading your user manual to find out how to take advantage of them. I can guarantee that your days of experiencing constant volume changes on Netflix will be over.
As our next step, let’s check Netflix’s server status.
You might be wondering why you should keep an eye on this, and the answer is very simple – feature availability. In the previous sections, I mentioned that this platform has a built-in volume normalizer that works wonders, but can be affected by any system failures.
Servers, among their many uses, keep app features working as expected, so having them fail due to bugs or black-hat hackers can trigger a chain reaction including, but not limited to reduced functionality.
Events like this could explain why Netflix’s volume keeps changing, or why Dolby Vision is not working.
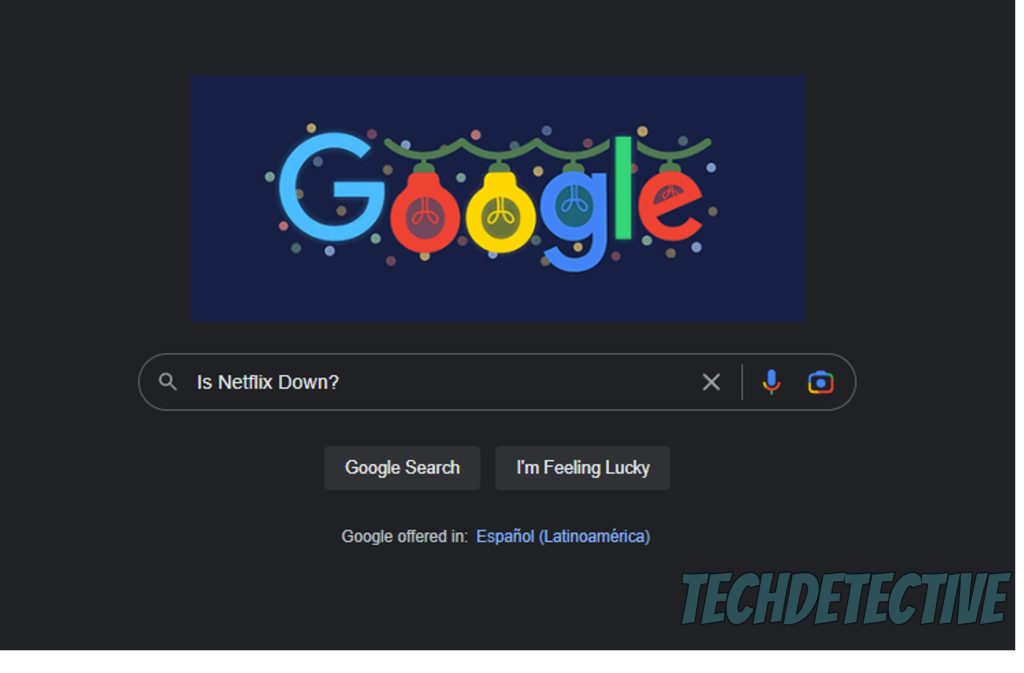
Solution: To see whether this is something that might be causing your current situation, I’d recommend taking a look at the live status of the platform’s servers.
Here’s how you can do that:
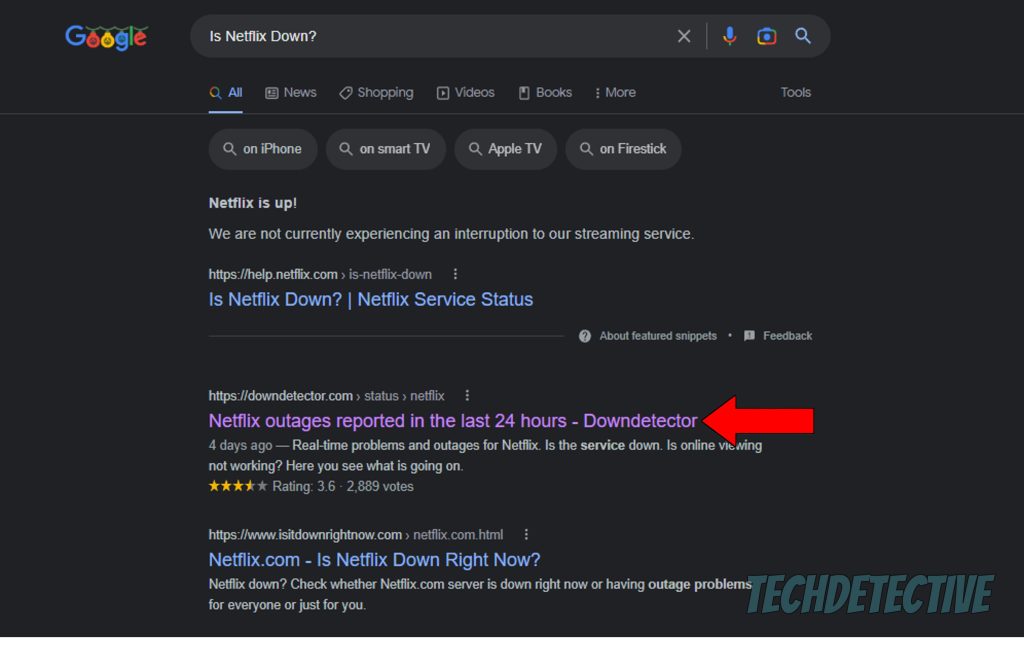
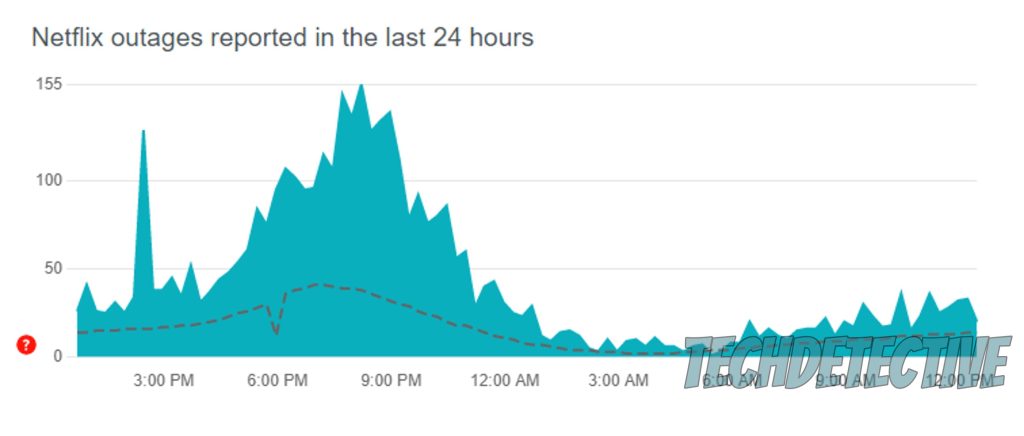
If you see tall spikes, you’re in trouble. This means Netflix is currently having issues, and you’ll have to wait for their IT department to sort things out.
But don’t worry, in these scenarios, things rarely ever take long to get back to normal.
Lastly, let’s check on your cache & cookies. If you’re not sure what these are, that’s ok, here’s a quick walkthrough.
The cache is where your apps store information like user preferences, login credentials, thumbnails, and video previews, whereas cookies are tools that collect information about you and your habits. They help platforms load quicker when launched and make targeted ads and content suggestions more accurate.
Normally, it’s best to leave them both alone to make your experience more streamlined, but if a corrupted file or a bug has “contaminated” them, you’ll want to clear them.
Solution: Here are some examples you might find useful when doing this:
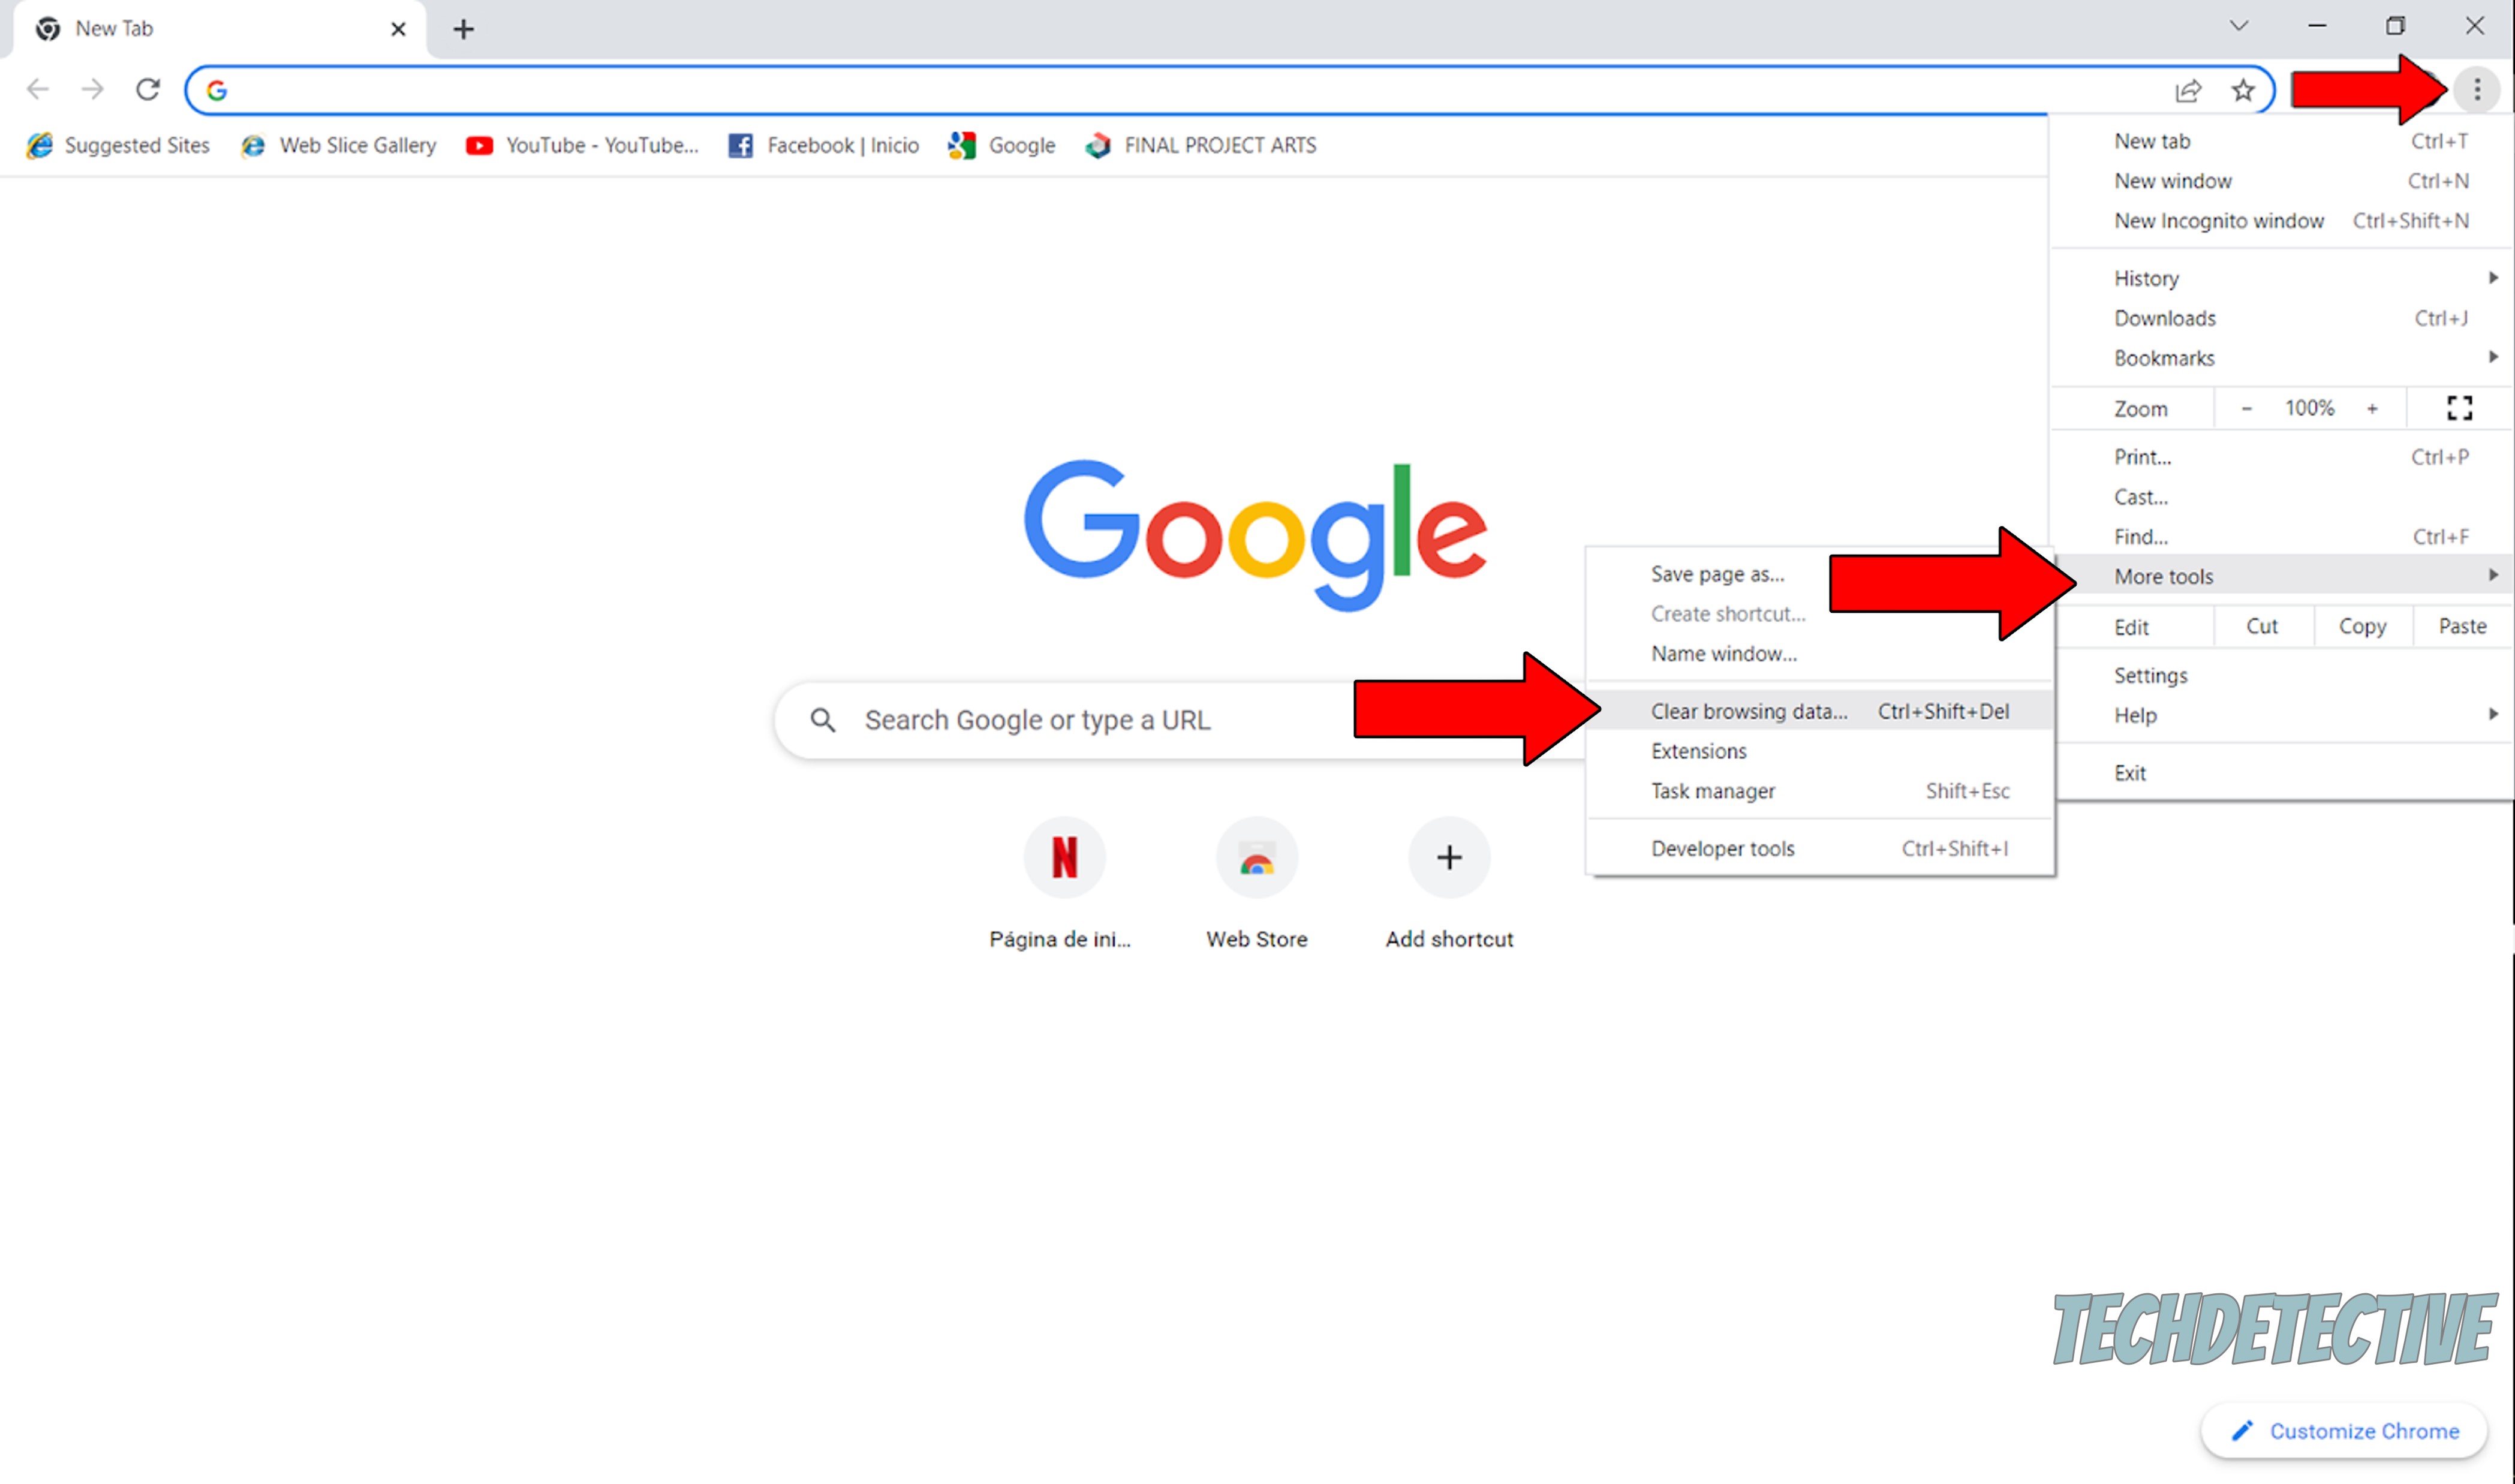
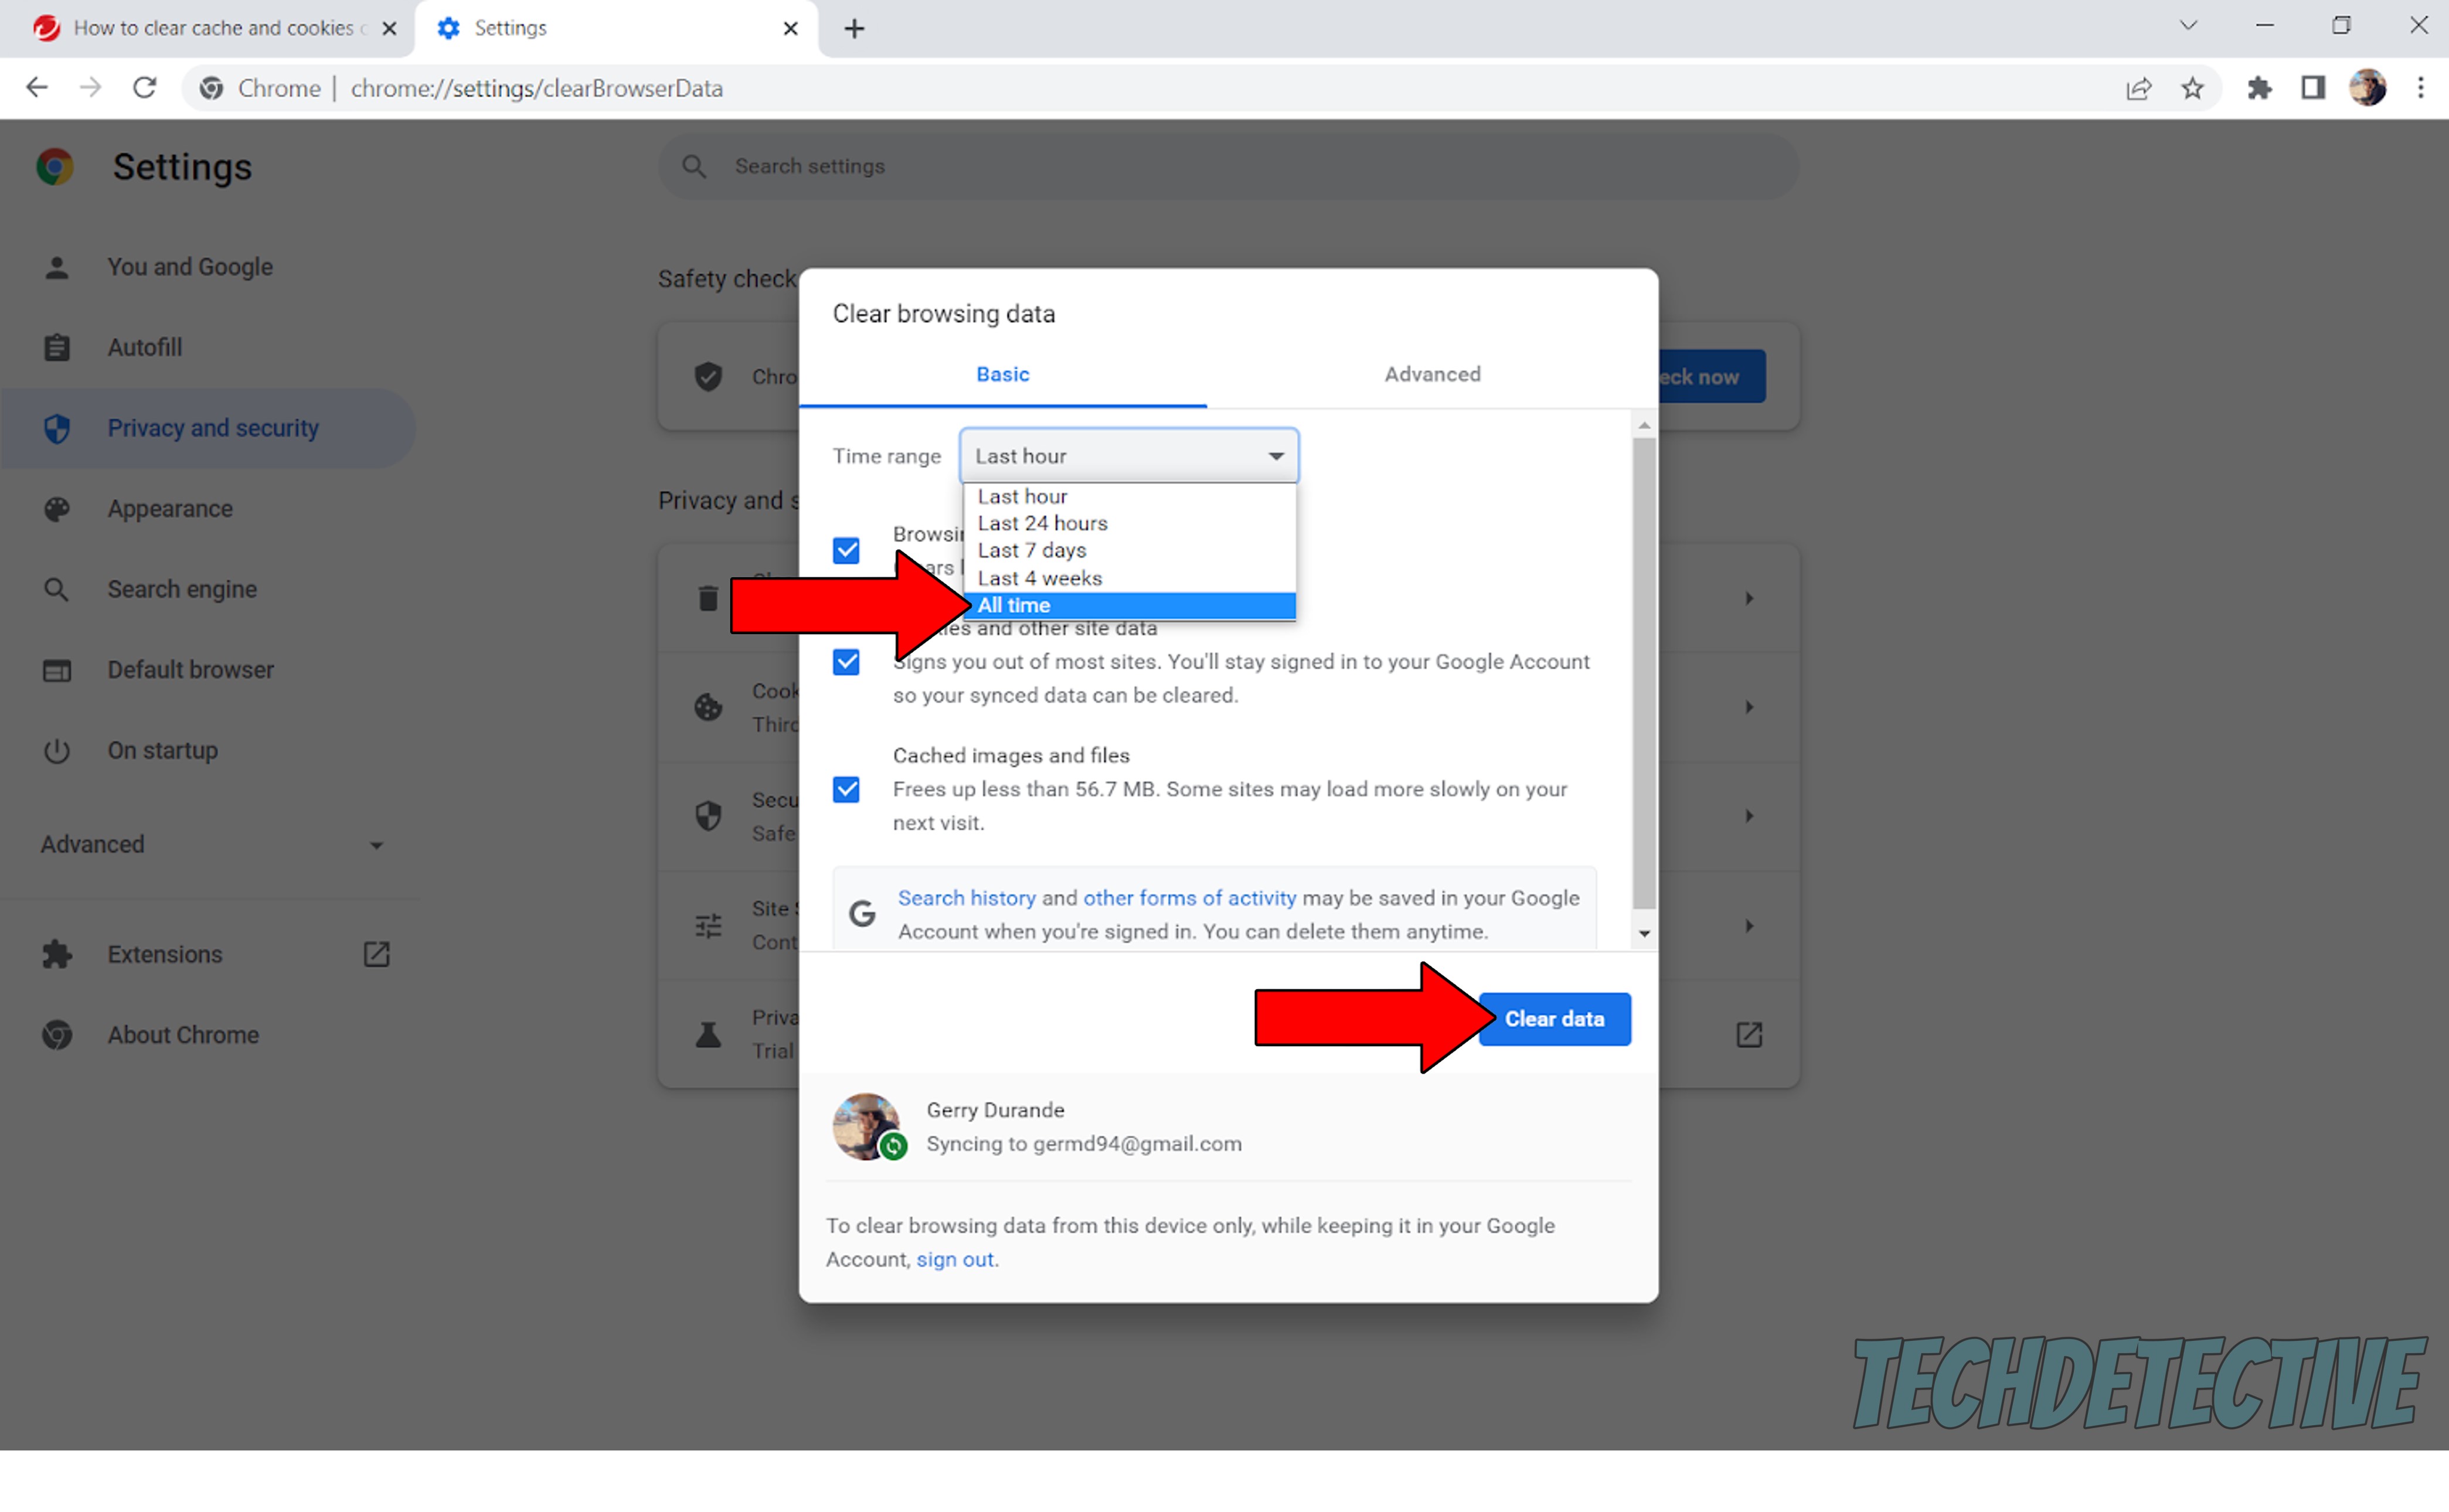
To clear your cache & cookies on Google Chrome:
If this is happening on your Smart TV, you’ll have to do things a little differently. Some TVs keep a cache for the device itself, and another for their apps, I suggest clearing them both for good measure.
The steps to take might vary depending on your make and model, but the broad strokes are fairly similar across most products.
Here’s what this looks like on a Hisense TV to give you an example:
To clear the TV’s cache:
To clear Netflix’s cache on the TV:
That about sums it up!
When Netflix’s volume keeps changing, a nice, relaxing experience can quickly turn into a stressful and frustrating situation.
I hope this piece has helped you better understand why this happens and what you can do to get things back to normal. In most cases, all you need to do is use the right sound settings, clear the app’s cache, and use compression settings to your advantage.
Thank you so much for sticking with me all the way to the end. If this article was useful and kept you interested, please check out our other wonderful resources below to become a Tech Detective yourself!
I wish you all the best.


Detective ‘Gerry’ Molina is one of the most prolific detectives on our TechDetective team. He’s known for his ability to crack down on multitudes of tech crimes on behalf of you – the citizens of the internet. Molina is often the first point of contact for many cases, working to help free victims from the tyranny of tech issues.