
Stuck trying to stop Apple Maps from saying “Server Not Found”?
Unfortunately, I’ve been there too. I know how annoying it can be to have this happen, especially when you’re in a hurry and need to get to a place quickly.
But, don’t worry. With the help of this article, you’ll be able to fix this issue.
If you’re getting a “Server Not Found” message on Apple Maps, try these 6 simple fixes: Relaunch the app, check for any available updates, and reset your connection. I also recommend making sure your location is enabled, reinstalling the app, or checking Apple’s servers.
Keep reading to solve the problem!
You may not know this, but Apple Maps needs to run thousands of processes in the back to get directions, show different routes, estimate travel time, and much more.
Unfortunately, sometimes bugs can make them crash and stop Maps from connecting to Apple’s servers.
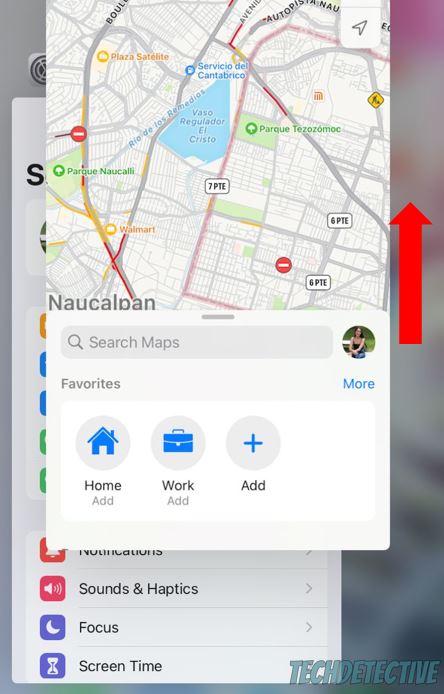
But, don’t worry. You can easily solve the error and give the app a fresh start by fully closing it.
Follow these simple steps to do it:
iPhone and iPad:
Mac:
Once you’ve fully closed Maps, relaunch it and try adding a direction again to see if the issue was solved.
If you’re still getting a “Server Not Found” on Apple Maps, chances are you have outdated software.
Normally, iOS and macOS updates are automatically installed on your device. But sometimes having a low battery percentage or a weak Wi-Fi signal can prevent this from happening.
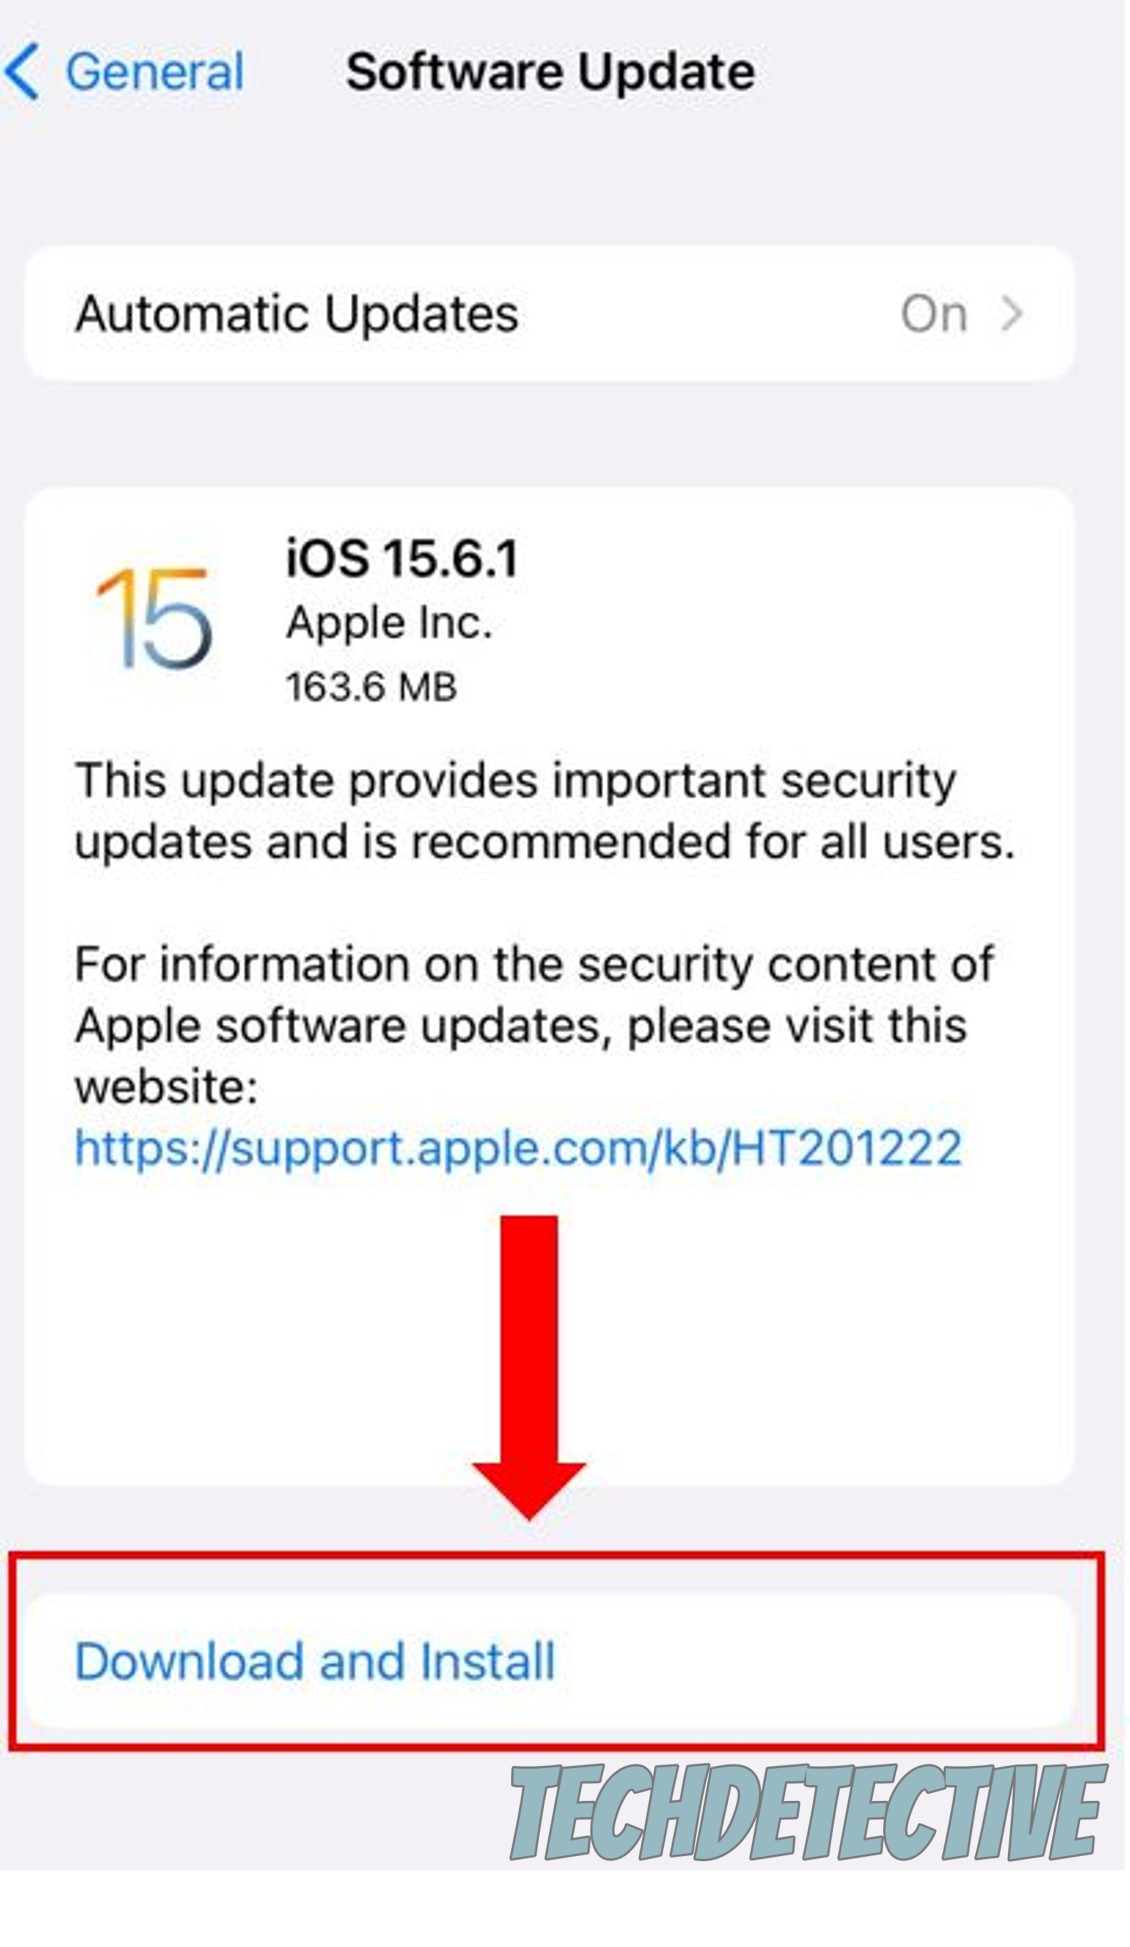
Luckily, you can manually install any available software updates.
By doing this, you’ll be able to enjoy new features and get rid of any bugs or coding errors that were causing the issue.
Follow these quick steps to update your system:
iPhone and iPad:
Mac:
Once you’ve updated your device, please relaunch Apple Maps.
Moving on, I’d like us to refresh your connection.
You see, if there’s a problem with your Wi-Fi signal or mobile data, Apple Maps won’t be able to work and a “Server Not Found” message may pop up.
The easiest way to reset your connection is by enabling airplane mode, waiting for a minute, and turning it off again.
Moreover, if you’re at home, please try connecting to a different network (2.4 or 5.0 GHz) or restarting your modem and router.
But, if you’re not at home, please check if your mobile data is enabled and make sure that Maps has permission to access it.
To do it, you’ll need to:
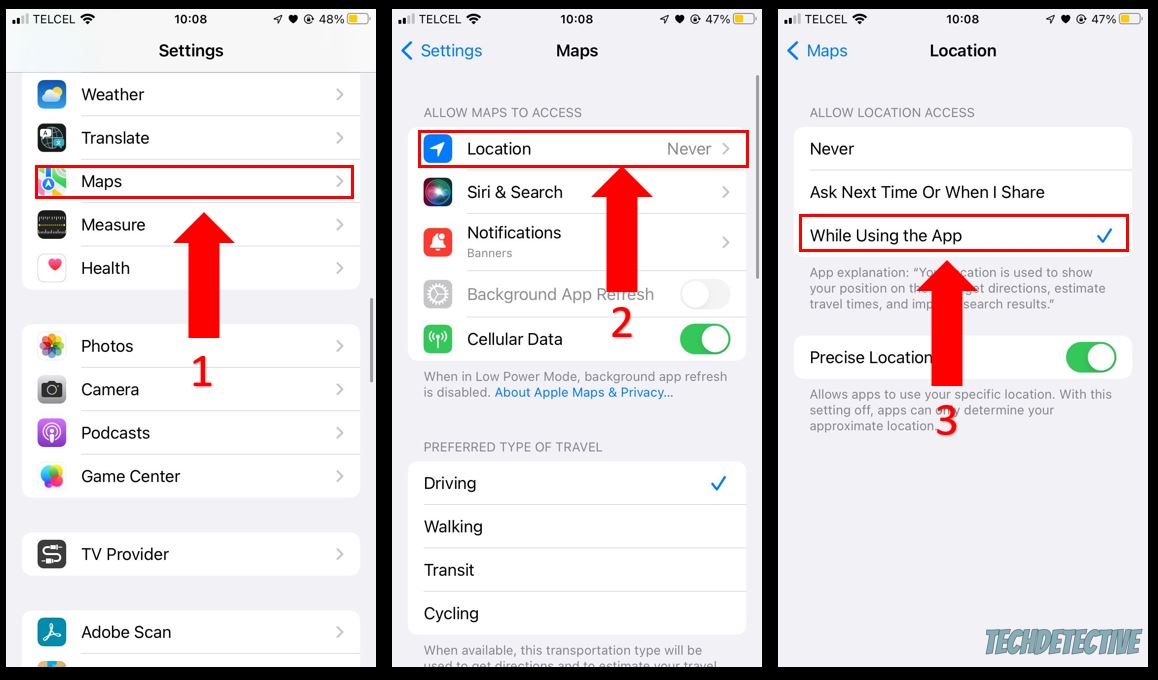
If you’re still getting a “Server Not Found” message on Apple Maps after trying the fixes above, chances are the app isn’t allowed to use your current location.
To check if that’s the case, please follow these simple instructions:
iPhone and iPad:
Mac:
If your location was already enabled, please turn it off and back on.
Unfortunately, sometimes the fixes above may not be enough to get rid of the bugs that are the reason you keep getting a “Server Not Found” on Maps.
But, don’t worry. Reinstalling Apple Maps should restart every file within the app and fix the error.
Follow these simple steps to reinstall Apple Maps:
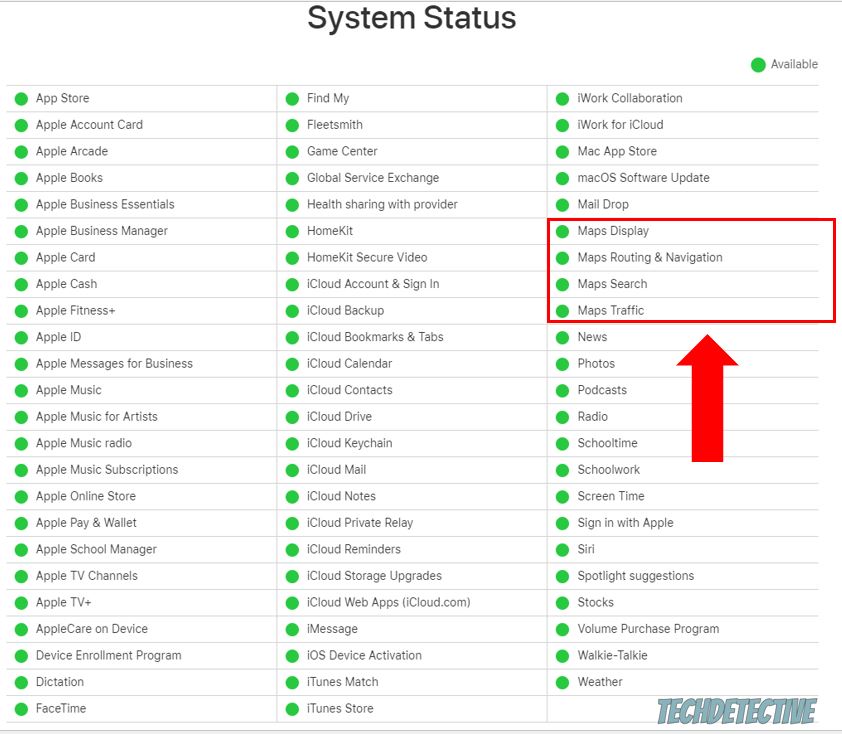
If none of the fixes above did the trick, chances are Apple’s servers might, in fact, be down.
This can happen due to a software or hardware issue, and it usually lasts less than 24 hours.
To confirm if that’s the case, you’ll need to enter apple.com/support/systemstatus/ and check Maps’ status.
That about covers it! Hopefully, with the help of this article, you’ll be able to stop Apple Maps from saying “Server Not Found”
Remember to relaunch the app, install any available updates, and reset your connection. Moreover, don’t forget to check your location settings and Apple’s servers.
Thank you so much for taking the time to read this article. Please check out our site if you ever experience a different issue while using Apple Maps or any other platform.
Good luck!


Detective ‘Monse’ Cancino has been cracking down on tech issues for years. Starting out as a local cop, she’s quickly risen to the full rank of Tech Detective.
Cancino is our resident iPhone specialist. She’s often cracking cases related to iOS errors, streaming malfunctions, and locking up buffering bandits.