
Is Waze using your data like you’re trying to download files from NASA?
That sucks! GPS Navigation platforms are all about efficiency, so having your favorite one consuming your monthly data budget can put a stop to your driving plans.
I know having this happen is no fun. Especially when you can’t avoid using the platform because you need to drive somewhere unknown or require constant road hazard updates. But don’t worry, you came to the right place for answers. Below, you’ll find a list of 4 simple ways in which you can reduce data consumption and navigate safely.
When Waze is using a lot of your data, you can try closing the app in the background or updating the platform. And if you want to take savings to the next level, you can also preload your trip at home, and enable Low Data Mode on your devices.
Read on to save some Gigabytes!
I’d like to start off by showing you how to stop Waze from using a lot of your data while you’re not navigating. You wouldn’t be blamed for thinking that simply switching from Waze to another app closes it. After all, it makes sense.
But sadly, this is not the case. When you reach your destination, the platform will keep using your mobile data in the background unless you close it completely. This can be a little tricky to notice, as newer devices can run several apps without losing performance.
Solution: If you notice that, along with your mobile data, your battery life is also lasting much less than it should, Waze running in the background is likely to blame.
In that case, here’s how you can completely close it:

For Android:
Now that we’ve covered how to keep Waze from using a lot of your data while not in use, let’s move on to how to save precious Megabytes while navigating.
You might be wondering what updating has to do with data efficiency, and I don’t blame you. At a glance, these two concepts don’t seem to have anything to do with each other, but trust me, they go hand in hand.
You see, every time an update for an app is released, it not only comes packed with new features and patches but also with highly optimized settings. In other words, newer app versions are designed to work faster and better while also using fewer resources, such as data and battery life.
Now, usually, you don’t have to worry about accidentally being stuck with an older app version, as the automatic updating feature on your devices takes care of constantly looking for updates. However, occasionally a bug, a weak network, or a corrupted file can prevent this from happening.
Using an older version of this navigation platform on a fully updated iOS or Android operating system could explain why Waze is using a lot of your data, as well as other issues, such as constant restarting.
How so? Because you’re using an optimized device with an unoptimized app, which can sometimes lead to excessive use of resources.
In cases like that, you’ll want to manually look for app updates and install them if found.
Solution: To do this, please follow the simple steps below:
For iOS:

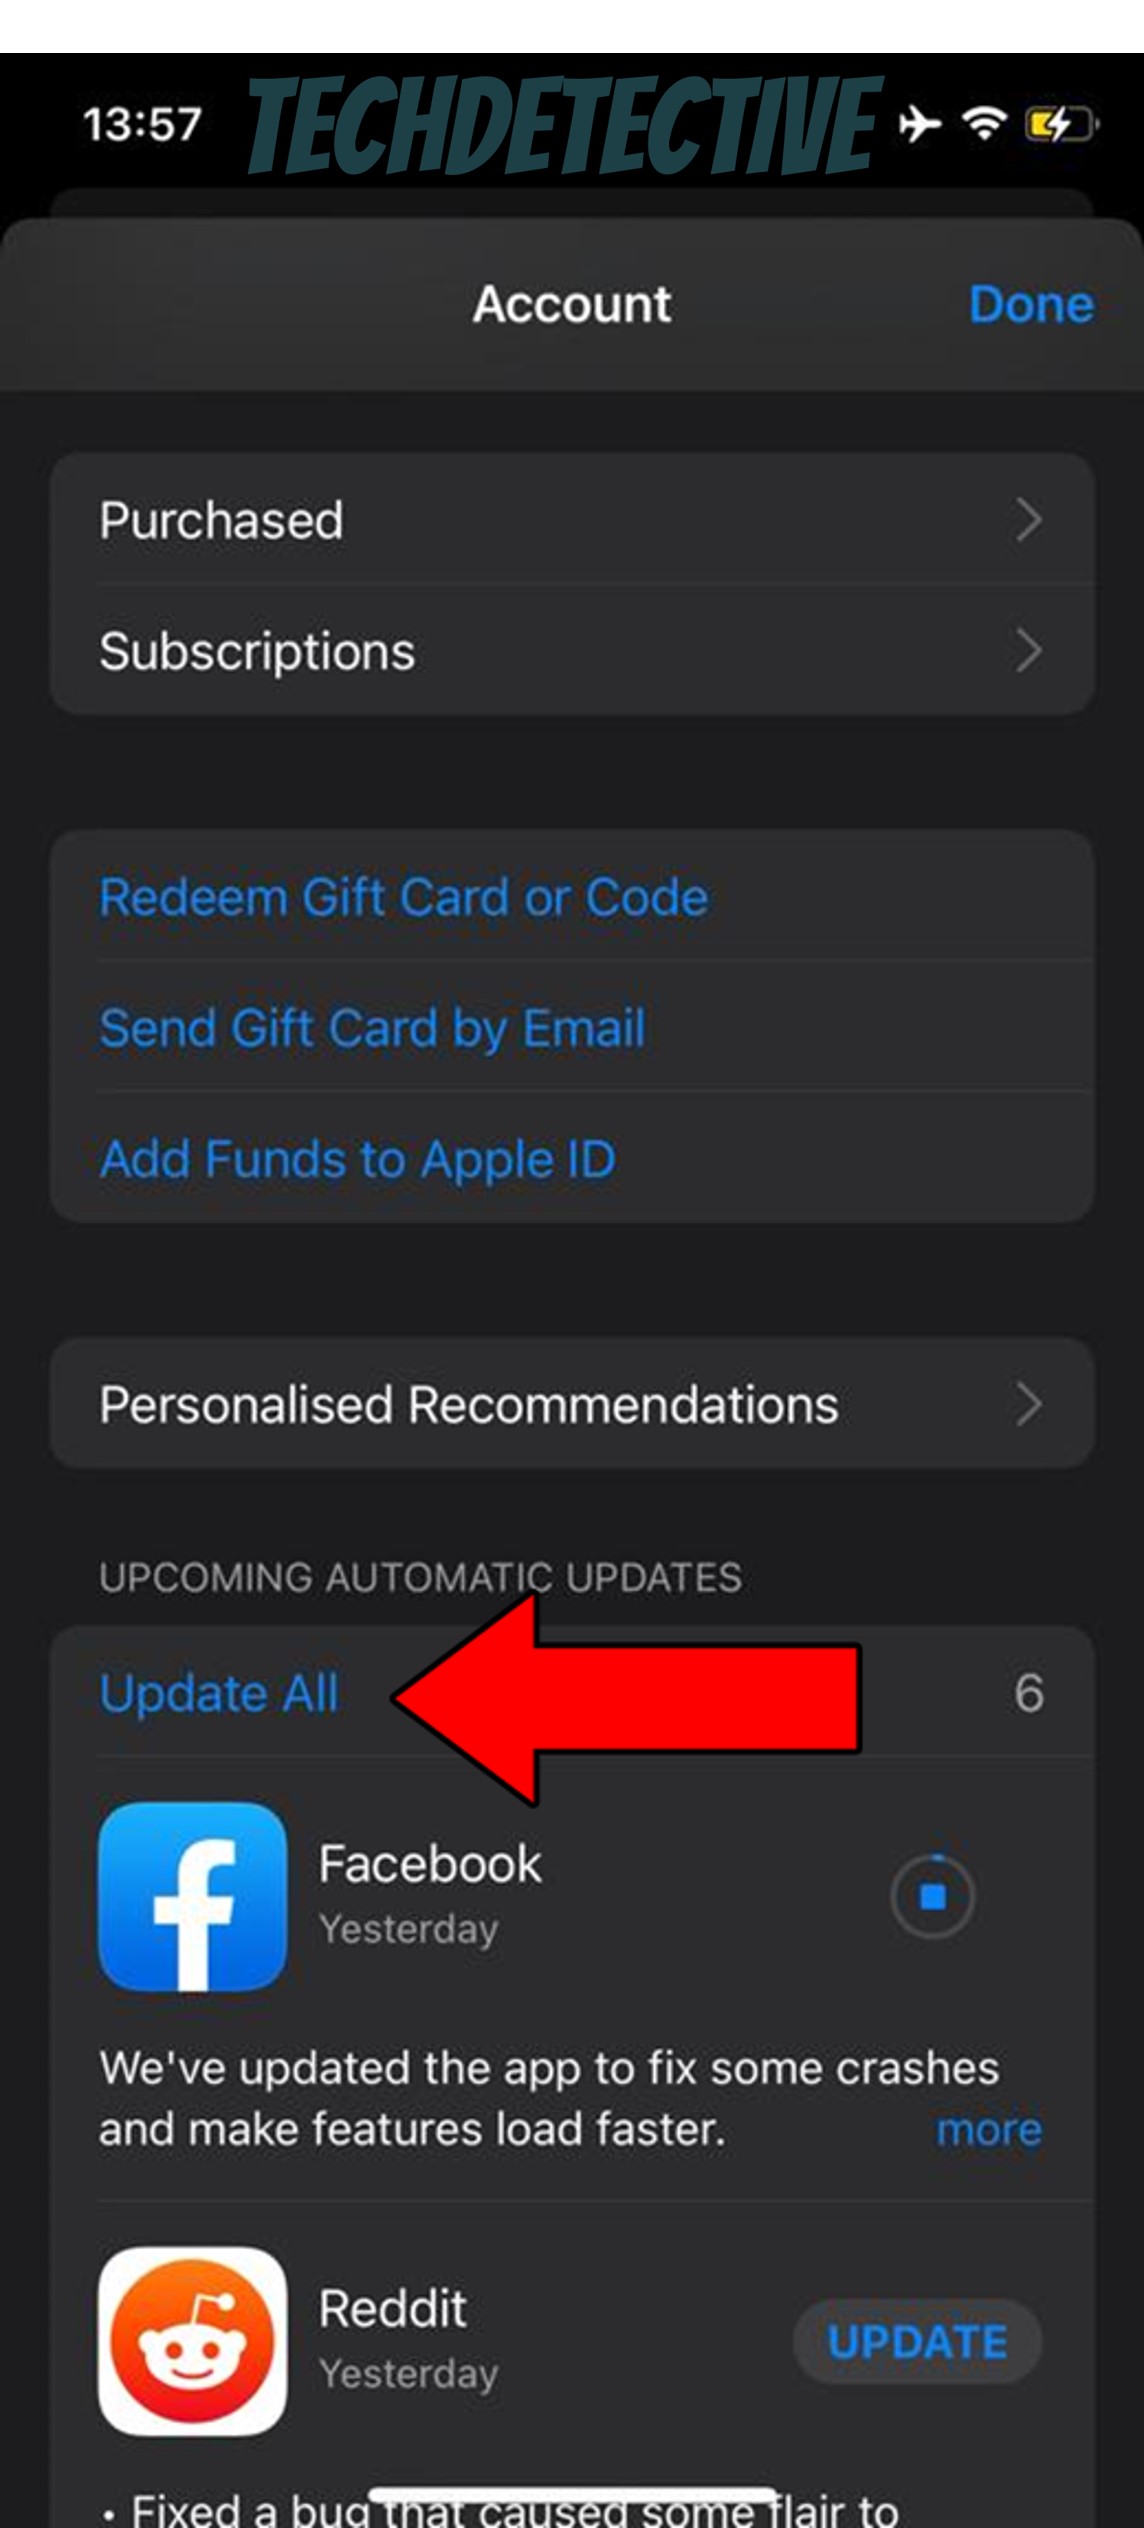
For Android:
The next thing you’ll want to try is looking up your destination while you’re still connected to your Wi-Fi network.
Believe it or not, you can navigate using Waze while offline, all you need to do is make some arrangements before driving. By selecting your destination while at home, you can then disable mobile data and still get directions from point A to point B. This should stop Waze from using a lot of your data and give you a great experience.
That being said, as you can imagine, this is not without its flaws.
Although Waze allows you to get directions while offline, you won’t receive live updates or notifications about road hazards, as these do require an active internet connection. You’ll have to weigh your options and decide what matters most to you – saving your precious Gigabytes, or staying in the loop while driving.
Lastly, let’s take advantage of one of your devices’ most useful features – Low Data Mode. Although this name is exclusive to iOS systems, Android has its own version called “Data Saver”. Both features do the same thing, adjust certain settings and background processes to consume less data.
Ideally, you want to try this last. Not because it’s not effective, but because you want to tackle all other elements that are draining your monthly data budget before activating your device’s features. After all, we’re looking for maximum efficiency here, right?
Enabling this option should not impact performance or browsing speed too much, so feel free to leave it on while using other apps as well. But if you notice things are slower than normal, try to only activate it while using Waze.
Solution: To enable “Low Data Mode” or “Data Saver” on your favorite devices, please follow the simple steps below.
For iOS:
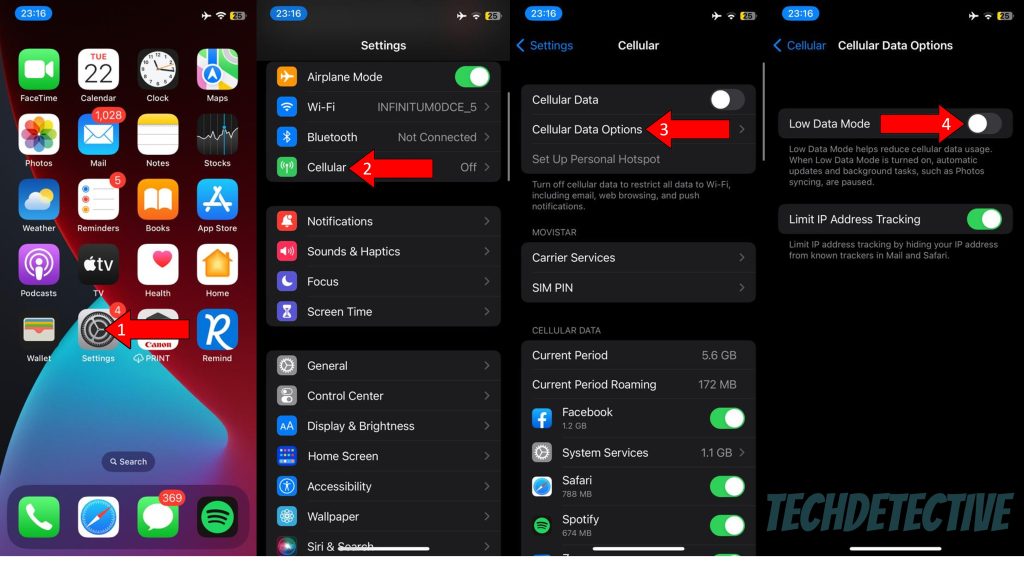
If you can’t find the option this way, you can also use the magnifier icon at the top-right section of the Settings window and look for “Data Saver”.
That about covers it!
When Waze is using a lot of your data, convenience can quickly turn into an obstacle in your daily life. Especially when you want to preserve your monthly budget but also have to get directions to an unknown destination.
Luckily, I hope this piece has helped you see that, more often than not, addressing the most common causes behind this excessive consumption is easy and quick. In many cases, keeping Waze updated, closing the platform in the background, and enabling Low Data Mode, should do the trick.
Thank you so much for sticking with me all the way to the end. If this article piqued your interest, you’ll be happy to know that we upload new content every week. While we put the finishing touches to our latest work, why not check out our other incredible resources below to become a Tech Detective yourself?
I wish you nothing but the best!


Detective ‘Gerry’ Molina is one of the most prolific detectives on our TechDetective team. He’s known for his ability to crack down on multitudes of tech crimes on behalf of you – the citizens of the internet. Molina is often the first point of contact for many cases, working to help free victims from the tyranny of tech issues.