Is your Zoom camera bright enough to replace the Sun?
That’s terrible! This is one of those things we didn’t know was an issue until work from home became a thing. But now that we’ve noticed it, making it go away is a must.
You wouldn’t believe how many times I’ve been in a meeting talking to someone and have left with a headache just from looking at their overly bright window.
If you’re that person on the other end or know someone who is, it’s time we do something about it. Below, you’ll find a list of many easy steps that will help you bring down your camera’s brightness and solve the issue.
The 6 simple steps that can stop your camera from being too bright on Zoom are finding the right room, adjusting your low light settings, disabling HDR, and updating Zoom. If that doesn’t work, you can always try uninstalling the platform from your devices or tweaking your webcam’s settings from its software.
Read on to dim the lights!
More than a fix, this is a recommendation.
Sometimes, when your camera is too bright on Zoom, no matter how much you adjust the settings, the problem will still be there. This is why always using the right room for videoconferencing is essential.
Now, I know not everyone uses laptops to join meetings, and some people prefer desktops, which are much harder to relocate than other devices. If that’s your case, don’t worry, there are many things you can do about this.
Solution: First, let’s identify what elements of your room could be contributing to making things overly bright.
White walls and areas with direct sunlight are a disastrous combination if you want to dim your Zoom camera, since, during the day, light enters through the window, and bounces all over the place.
If relocating to a different room is not an option, you can always try putting blankets over your windows, or buying blackout shades. Naturally, the latter is a more permanent solution, but it can be very expensive, so you might want to stick with the former.
I’d recommend trying this after you’ve finished this article, as the other solutions below might work. This is more of a last resort.
Next, let’s try making one of Zoom’s features work to our advantage.
“Low Light Settings” are video configurations that help people who are having the opposite problem to yours, a webcam that’s too dark. By adjusting this, the brightness of your video is increased to counteract the effects of rooms that are not well lit.
Normally, it’s set to “Auto”, and for most people, it works wonders. But sometimes, the platform’s algorithm might detect your room’s lighting wrong, causing your camera to be too bright on Zoom.
If you suspect this to be the source of the issue, you’ll have to manually adjust your desired brightness level.
Solution: Doing this is very easy, all you have to do is follow these steps:
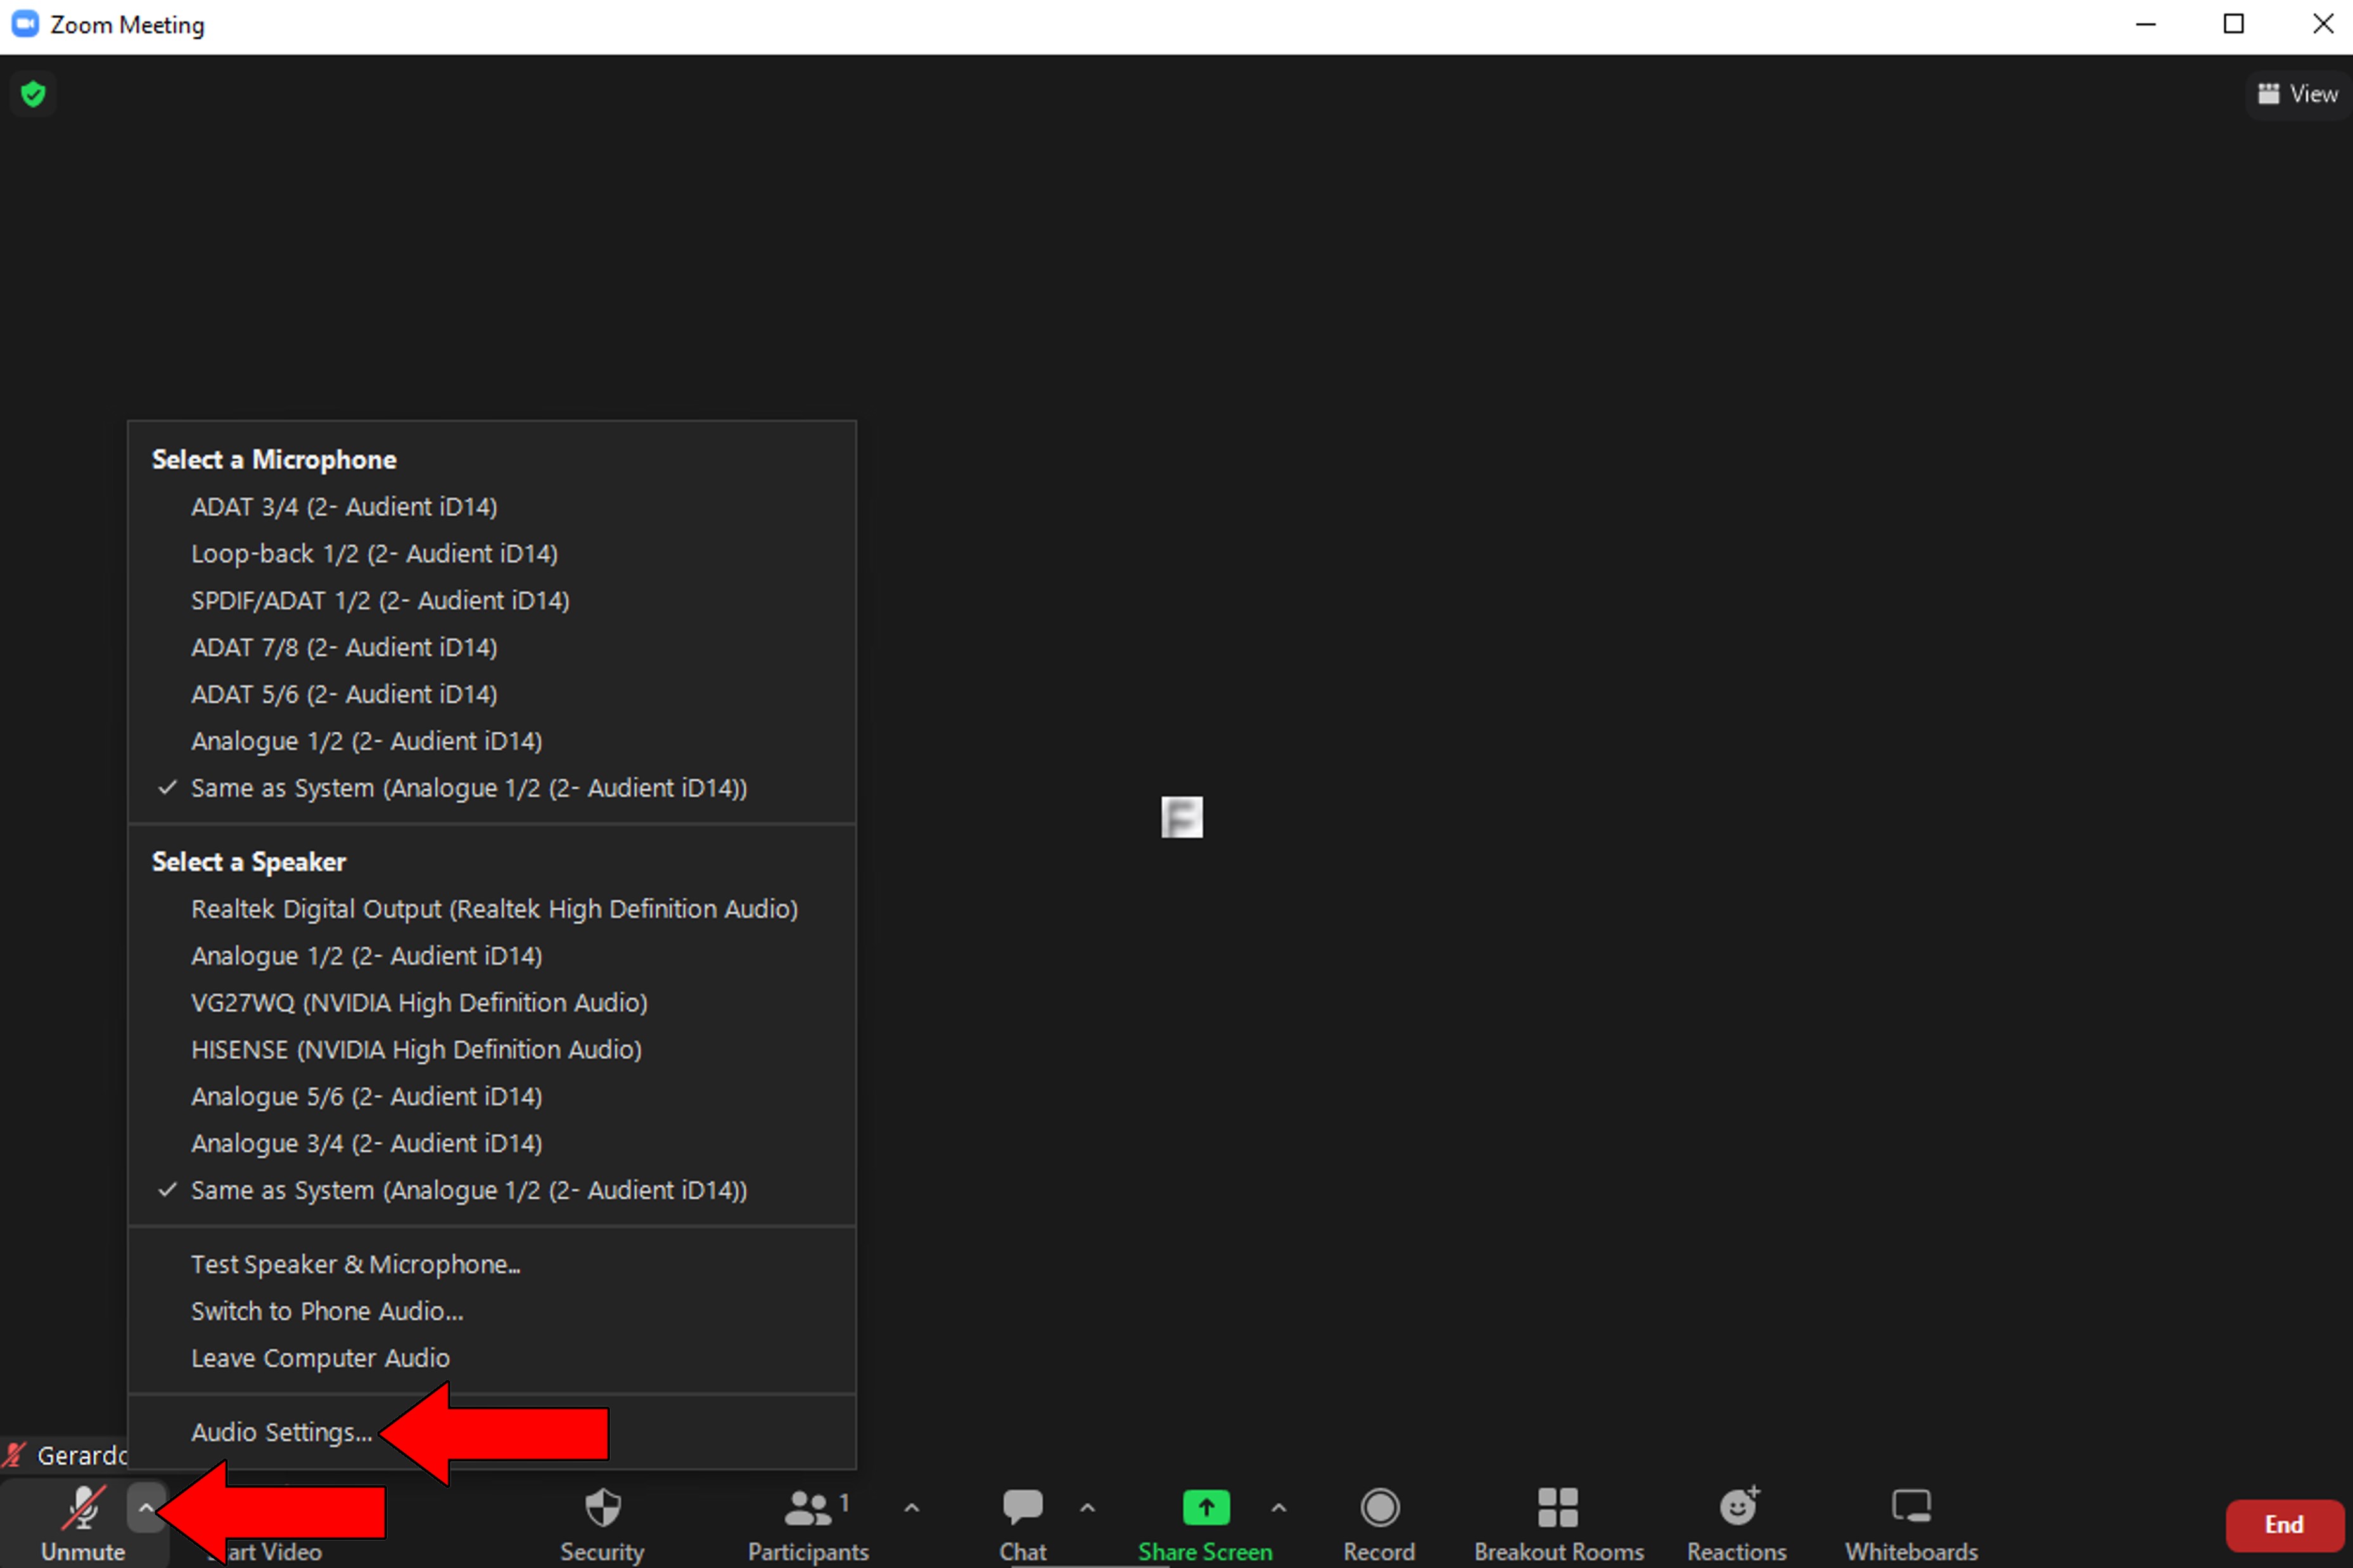
2. On the new window, go to the “Video” tab. Then, select “Adjust for low light”, and switch it from Auto to Manual
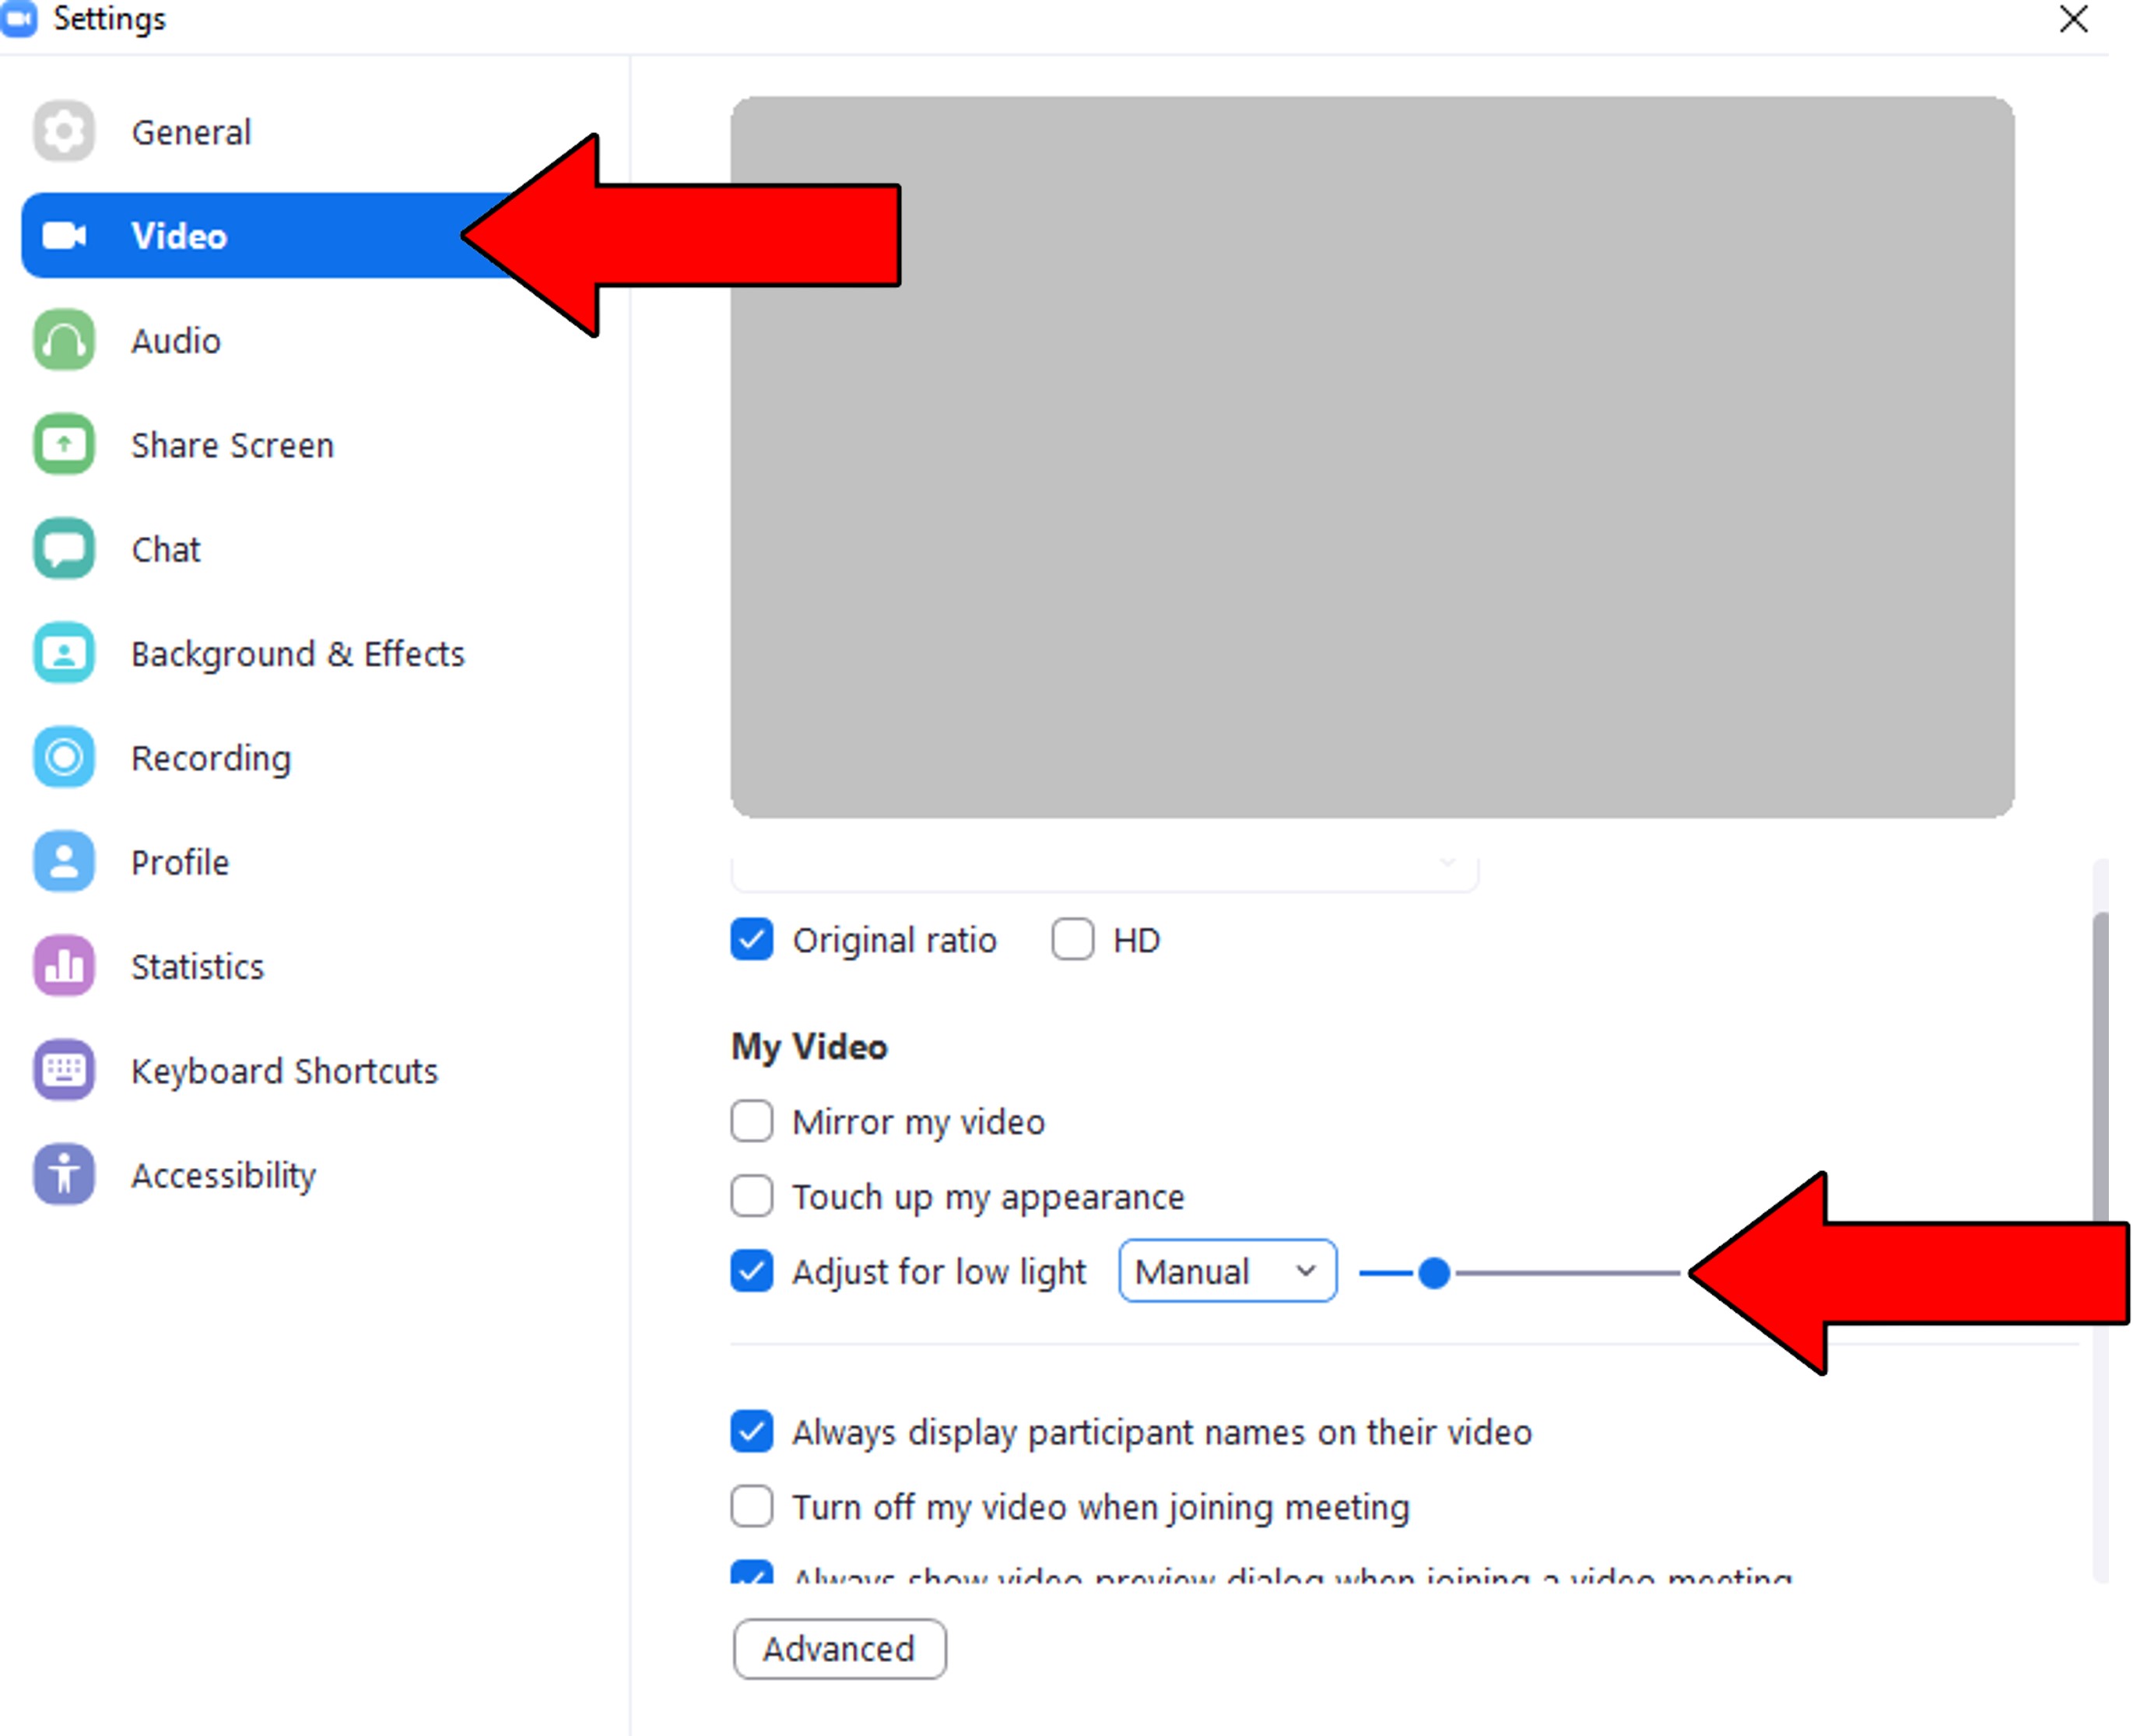
3. Adjust the slider until your camera’s brightness is normal
Moving on, let’s try disabling HDR.
This technology stands for “High Dynamic Range”, and it works by increasing the contrast between the light and dark tones in your TV/Monitor. Normally, it’s best used while watching movies or playing video games, as it makes the colors look much more vivid.
But sometimes, it can also accidentally cause your screenshots and camera image to be overly bright.
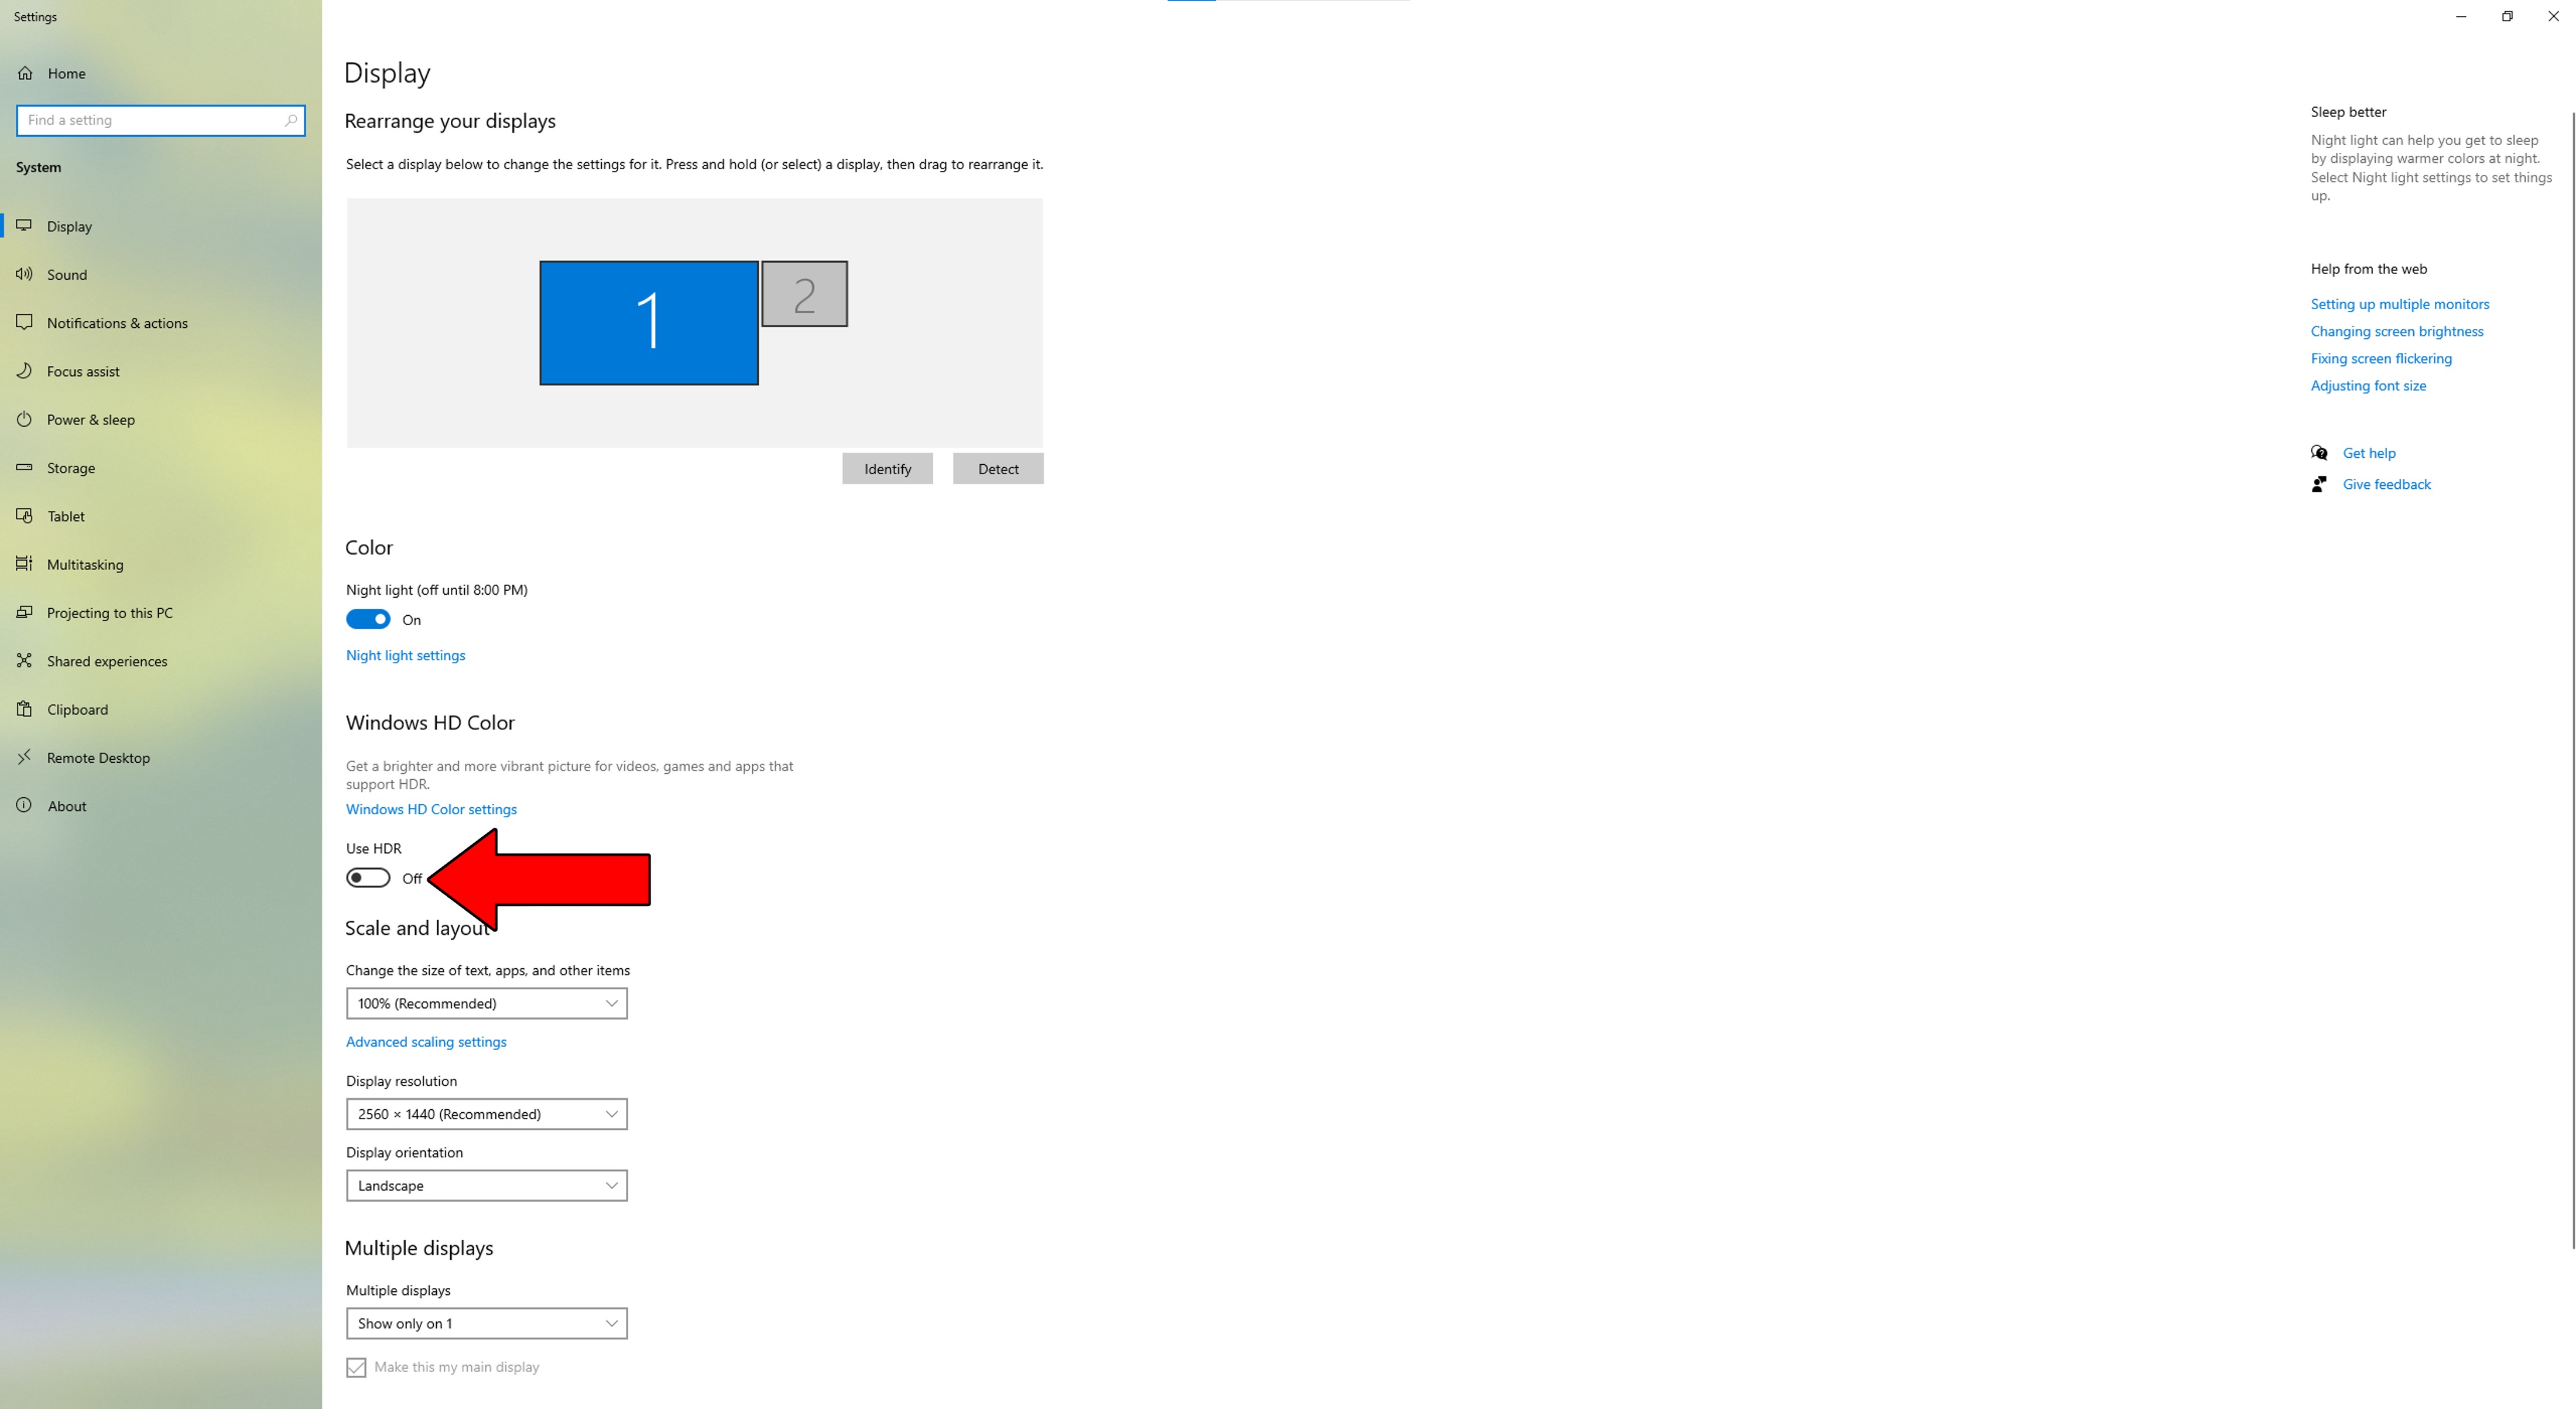
This is not very common, but it’s been known to happen. So, if you suspect it to be the source of your current problem, you’ll have to disable this feature on your PC.
Solution: Doing this is very easy. Try to write down these steps to enable it again once your meeting is finished:
I know that keeping your favorite apps updated isn’t the most exciting thing in the world, but it must be done to guarantee everything works as expected.
And there’s a good reason for that.
With every update, app developers include improvements over existing features, as well as new ones. Not to mention the countless bugs they fix. That alone should convince you of the importance of updating, but if you’re not quite there yet, keep reading!
A newer version of Zoom being released to the public automatically means that the oldest one will stop being supported. This is not a general rule, but it’s a popular practice by developers.
Using an outdated version of this platform could explain why your camera is too bright on Zoom, why your screen is flickering, and why other annoying issues are bothering you.
That being said, in most cases, automatic updating takes care of everything. But if you have a weak network, or there’s a corrupted file on your devices, either one could get in the way.
Solution: Manually downloading and installing the latest Zoom version to your devices is a very straightforward process. PCs don’t need much assistance, as they have a reputation for forcing updates on users, even in the most inconvenient of situations.
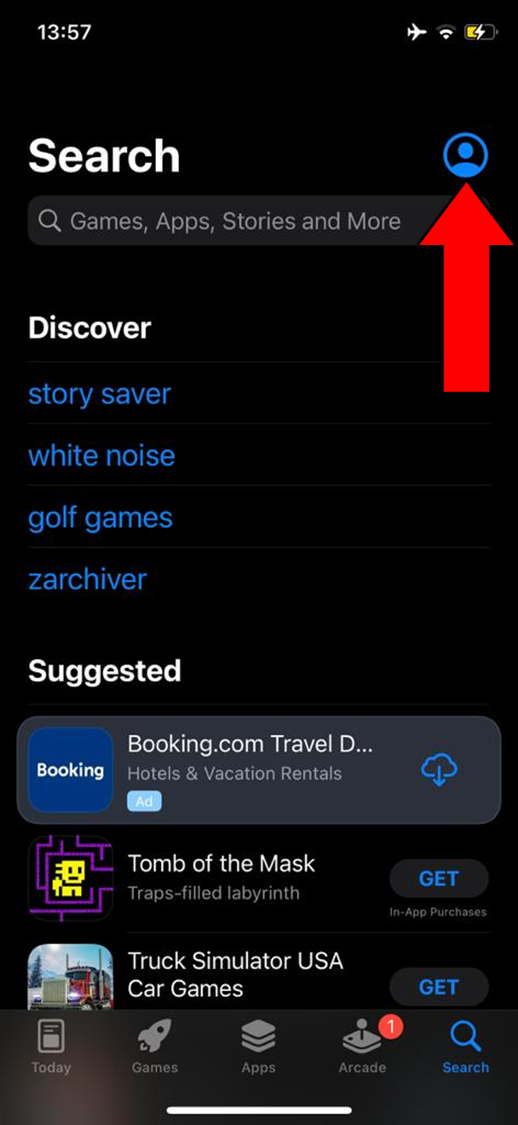
For other systems, like iOS and Android devices, this goes as follows:
For iOS:
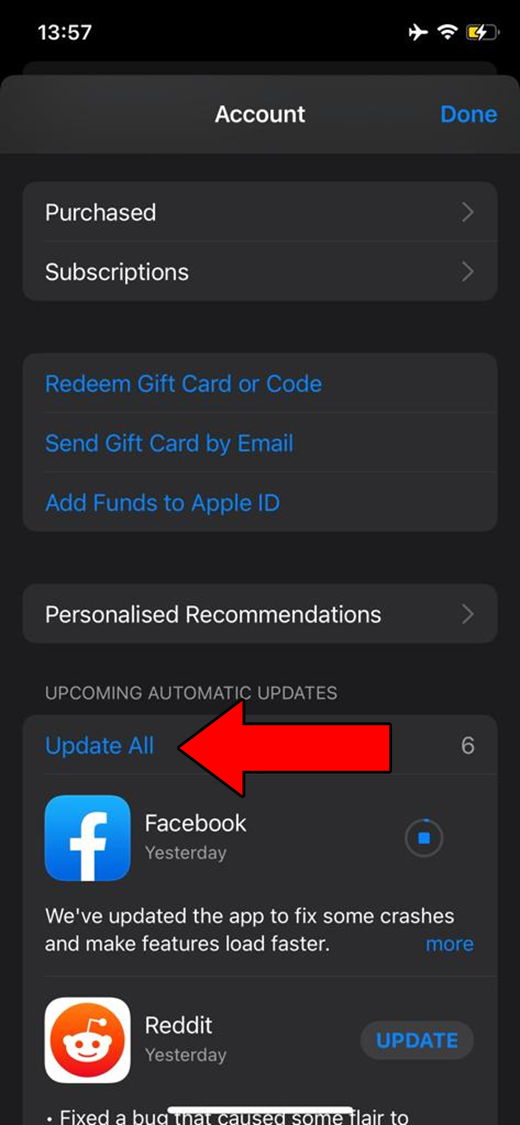
For Android:
If nothing has worked so far, the issue might be deep-rooted into your devices. In that case, no amount of restarting, updating, or relaunching will work. You’ll have to uninstall the platform altogether.
This process will wipe your device’s memory clean of the service’s files, giving it a chance to start from scratch once it’s reinstalled.
Most of the time, this should stop your camera from being too bright on Zoom, as well as fix other issues you might be having.
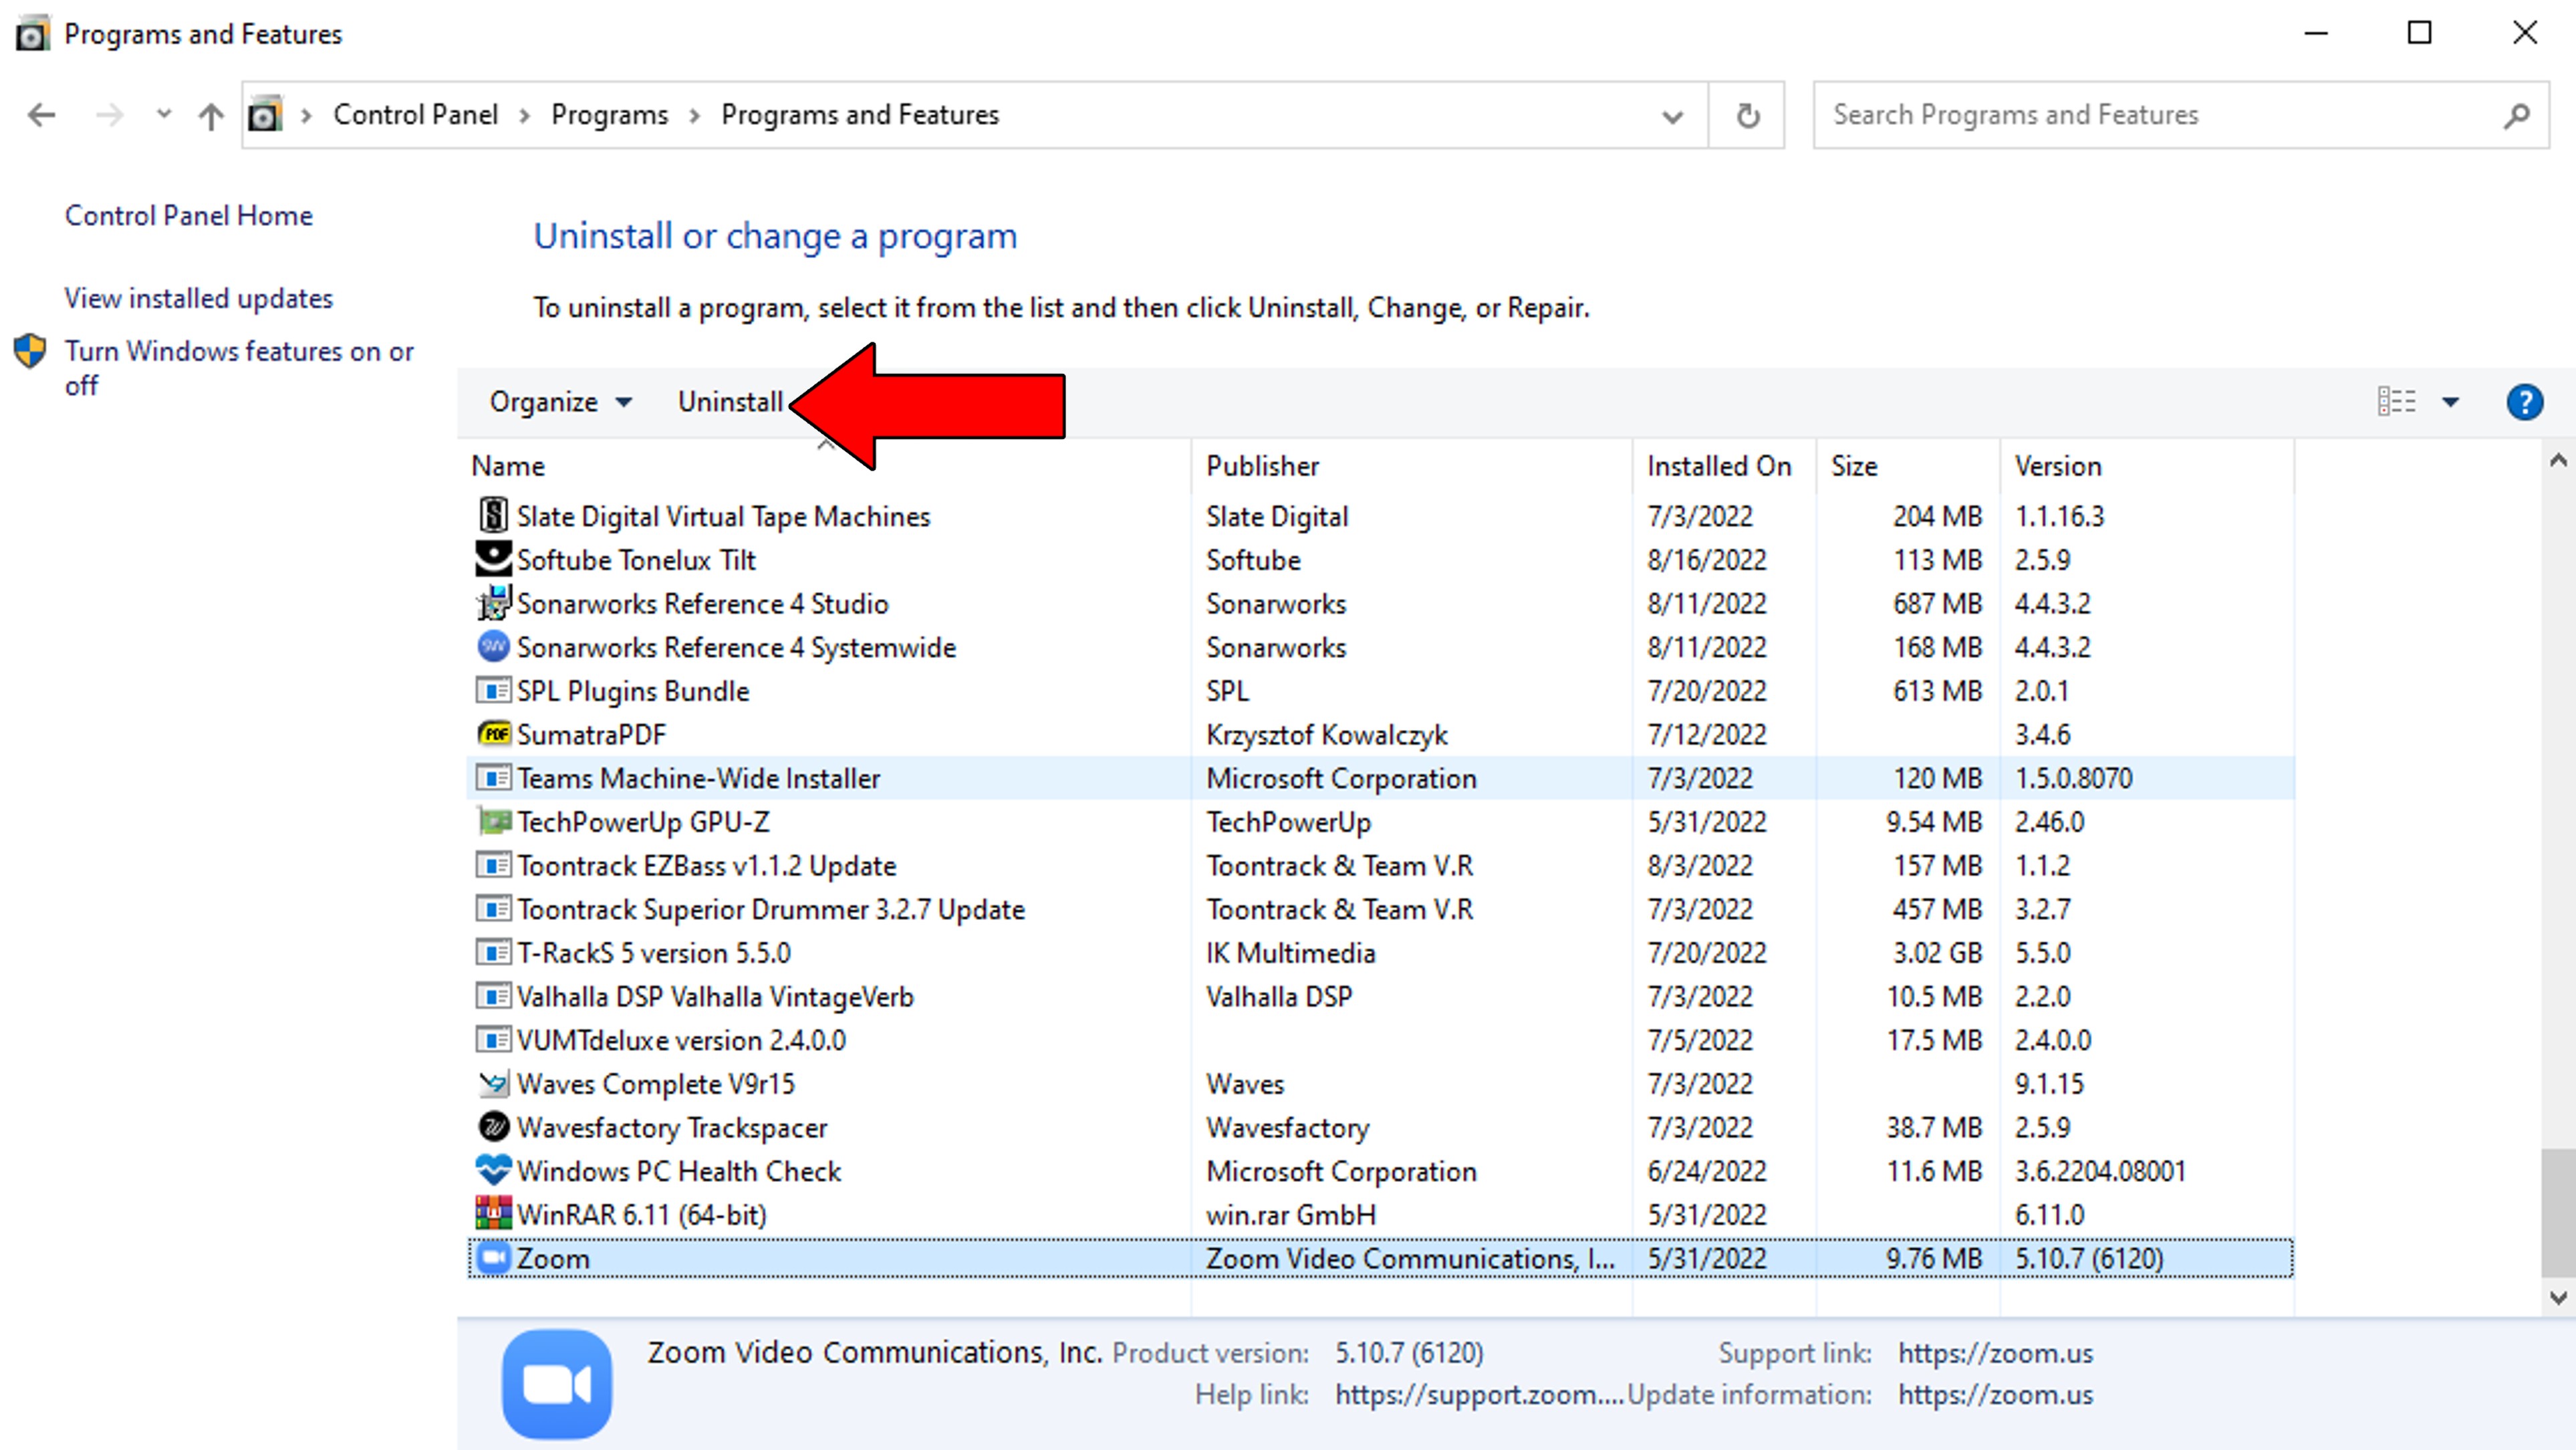
Solution: Put your hacker cap on and follow these simple steps:
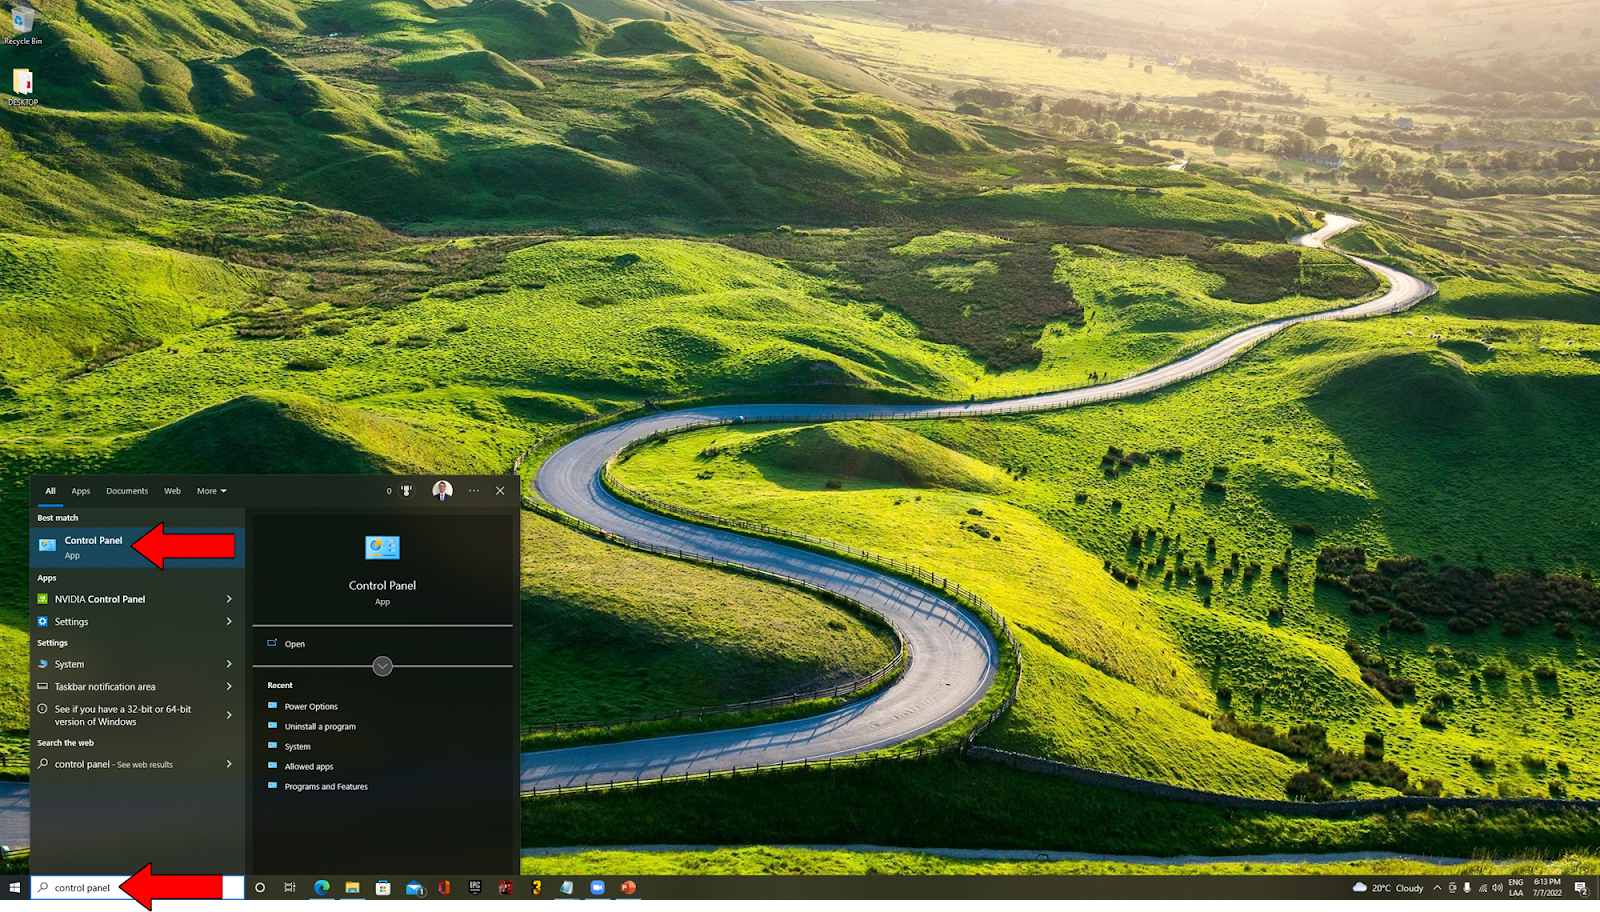
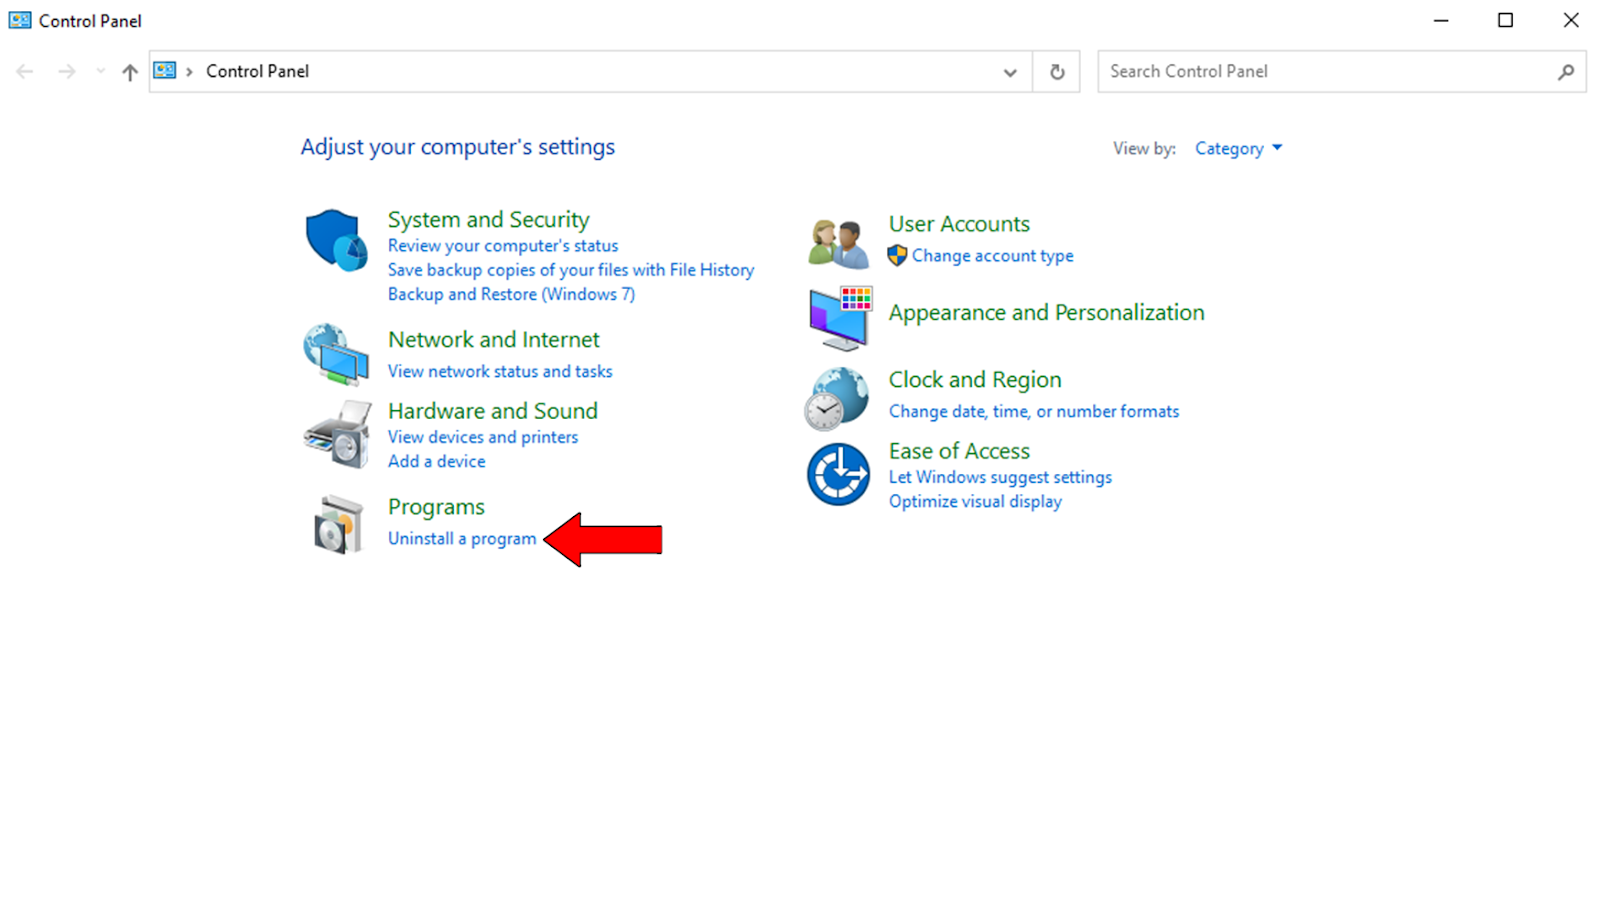
For PC:
For iOS devices:
Finally, let’s try tweaking your webcam’s settings from its proprietary interface.
This won’t be an option for everyone, as not all webcams come with options to control their settings from your computer. Years ago, this would have been a matter of how much you paid for the accessory, but these days, even cheaper models include their own interface, so it’ll be a matter of testing.
Assuming that you’re lucky, and your webcam does include its own software, try launching it and tweak the brightness settings from there. There should be an option to increase or decrease it. Combining that with manually setting Zoom’s low light feature, should dim your image significantly.
Solution: Your webcam should have come with an instruction manual to download its software and control it. If you threw away the box it came in, you can always go to Google and search for “<Your Webcam’s Make And Model Go Here> drivers and instruction manual”.
That about covers it!
I hope this piece has helped you better understand how your camera and Zoom work together, and how easy it is to solve the most common problems when you have the right tools.
Remember, it’s always better to try, even if you fail than to never have tried at all.
I cannot thank you enough for sticking with me all the way to the end. If you found this article to be of any help, you might be happy to learn that we write and upload new content weekly. Please check out our other resources below to become a Tech Detective yourself!
I wish you all the best.


Detective ‘Gerry’ Molina is one of the most prolific detectives on our TechDetective team. He’s known for his ability to crack down on multitudes of tech crimes on behalf of you – the citizens of the internet. Molina is often the first point of contact for many cases, working to help free victims from the tyranny of tech issues.