Are you desperately trying to stop Microsoft Teams from always reinstalling?
You’re not alone! This might be hard to believe, but thousands of the platform’s users face the same issue daily and are left terribly confused.
I know how annoying it can be to have an app reappear, even when you already got rid of it. It’s one of those unpleasant surprises that can ruin your afternoon.
But don’t worry, you’ve come to the right place for answers. Below, you’ll find a list including a few simple steps you can follow to solve this issue for good.
The 2 easy steps to take in order to stop Microsoft Teams from always reinstalling are:
Keep reading to forget all about the platform!
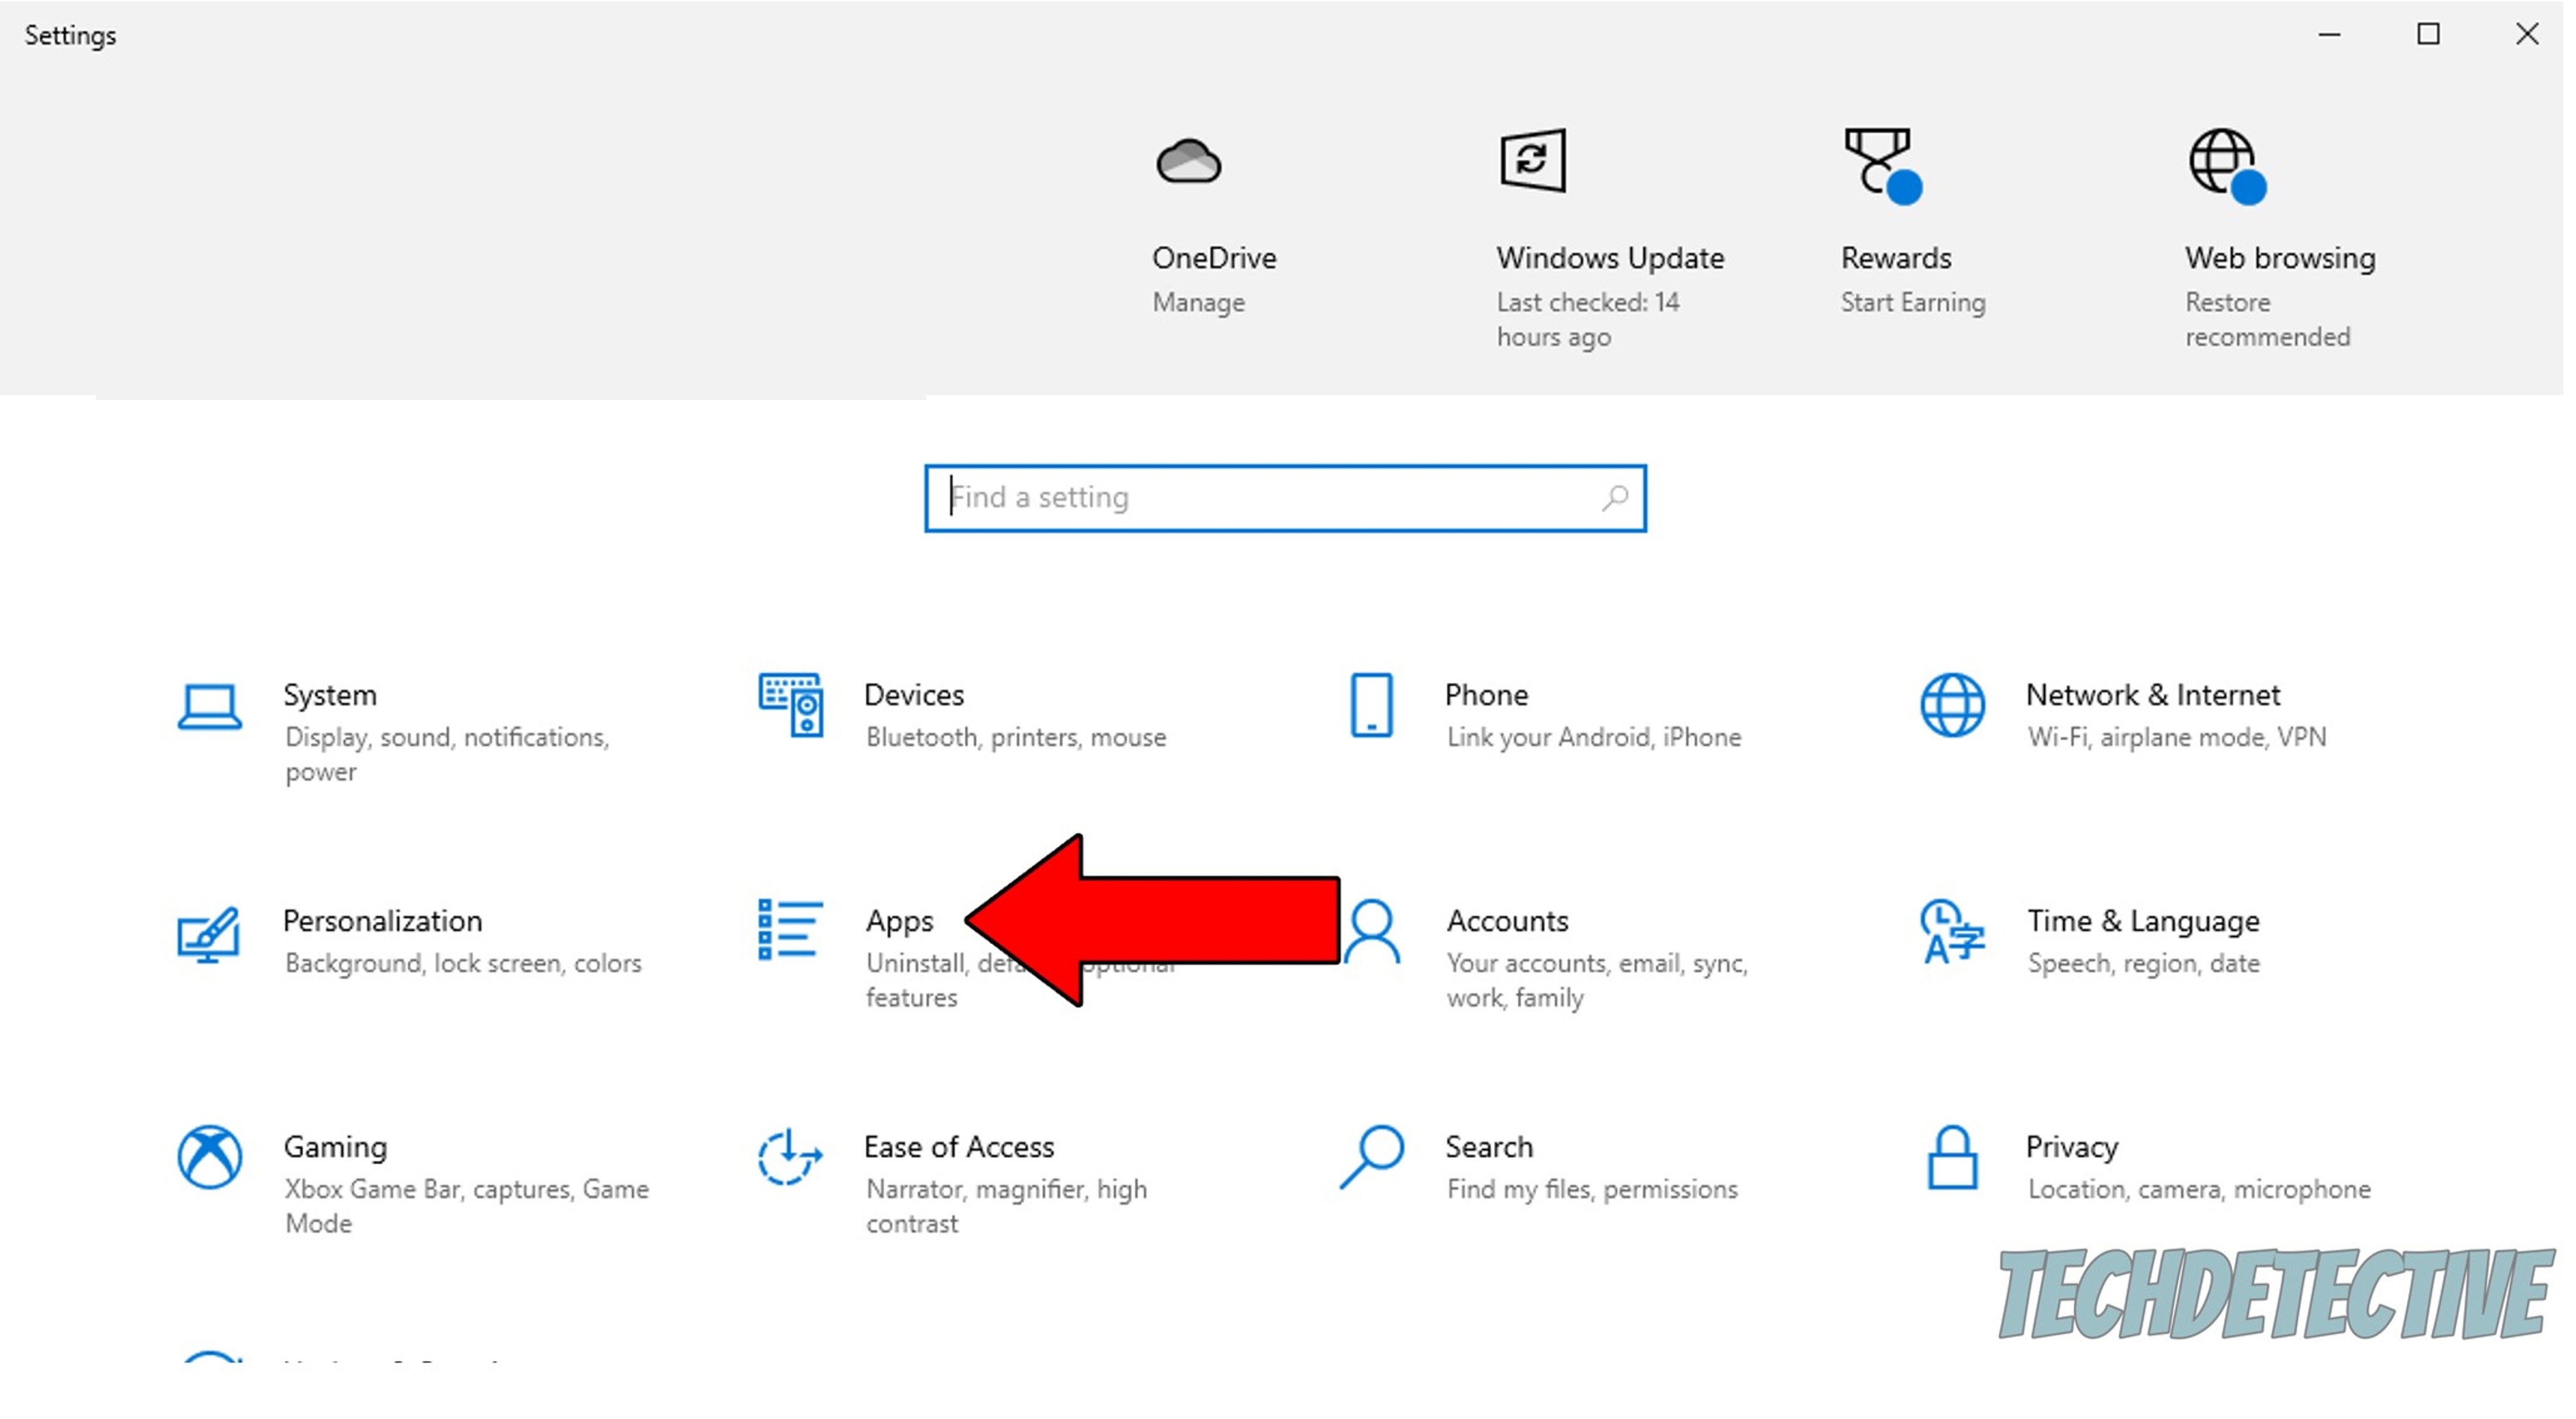
The first method I’d like you to try is very simple. All you have to do is access Windows’ configurations and get rid of a couple of files. A lot of people think that by uninstalling the platform alone, they’ll be getting rid of the problem. But it turns out that you ALSO have to get rid of another backup software to keep Microsoft Teams from always reinstalling.
By accessing the platform and this backup file through your operating system’s settings, you’ll be able to uninstall them for good. And the best part is that, if you ever want to return to Teams and you encounter issues, like being unable to close the app, or missing the dial pad, this process can help.
Solution: Please follow these simple instructions to complete this successfully:
3. On the new window, type in “Teams” in the search bar. You’ll get two results, one will be Microsoft Teams, and the other will be “Teams Machine-Wide Installer”. Click on both of them and uninstall
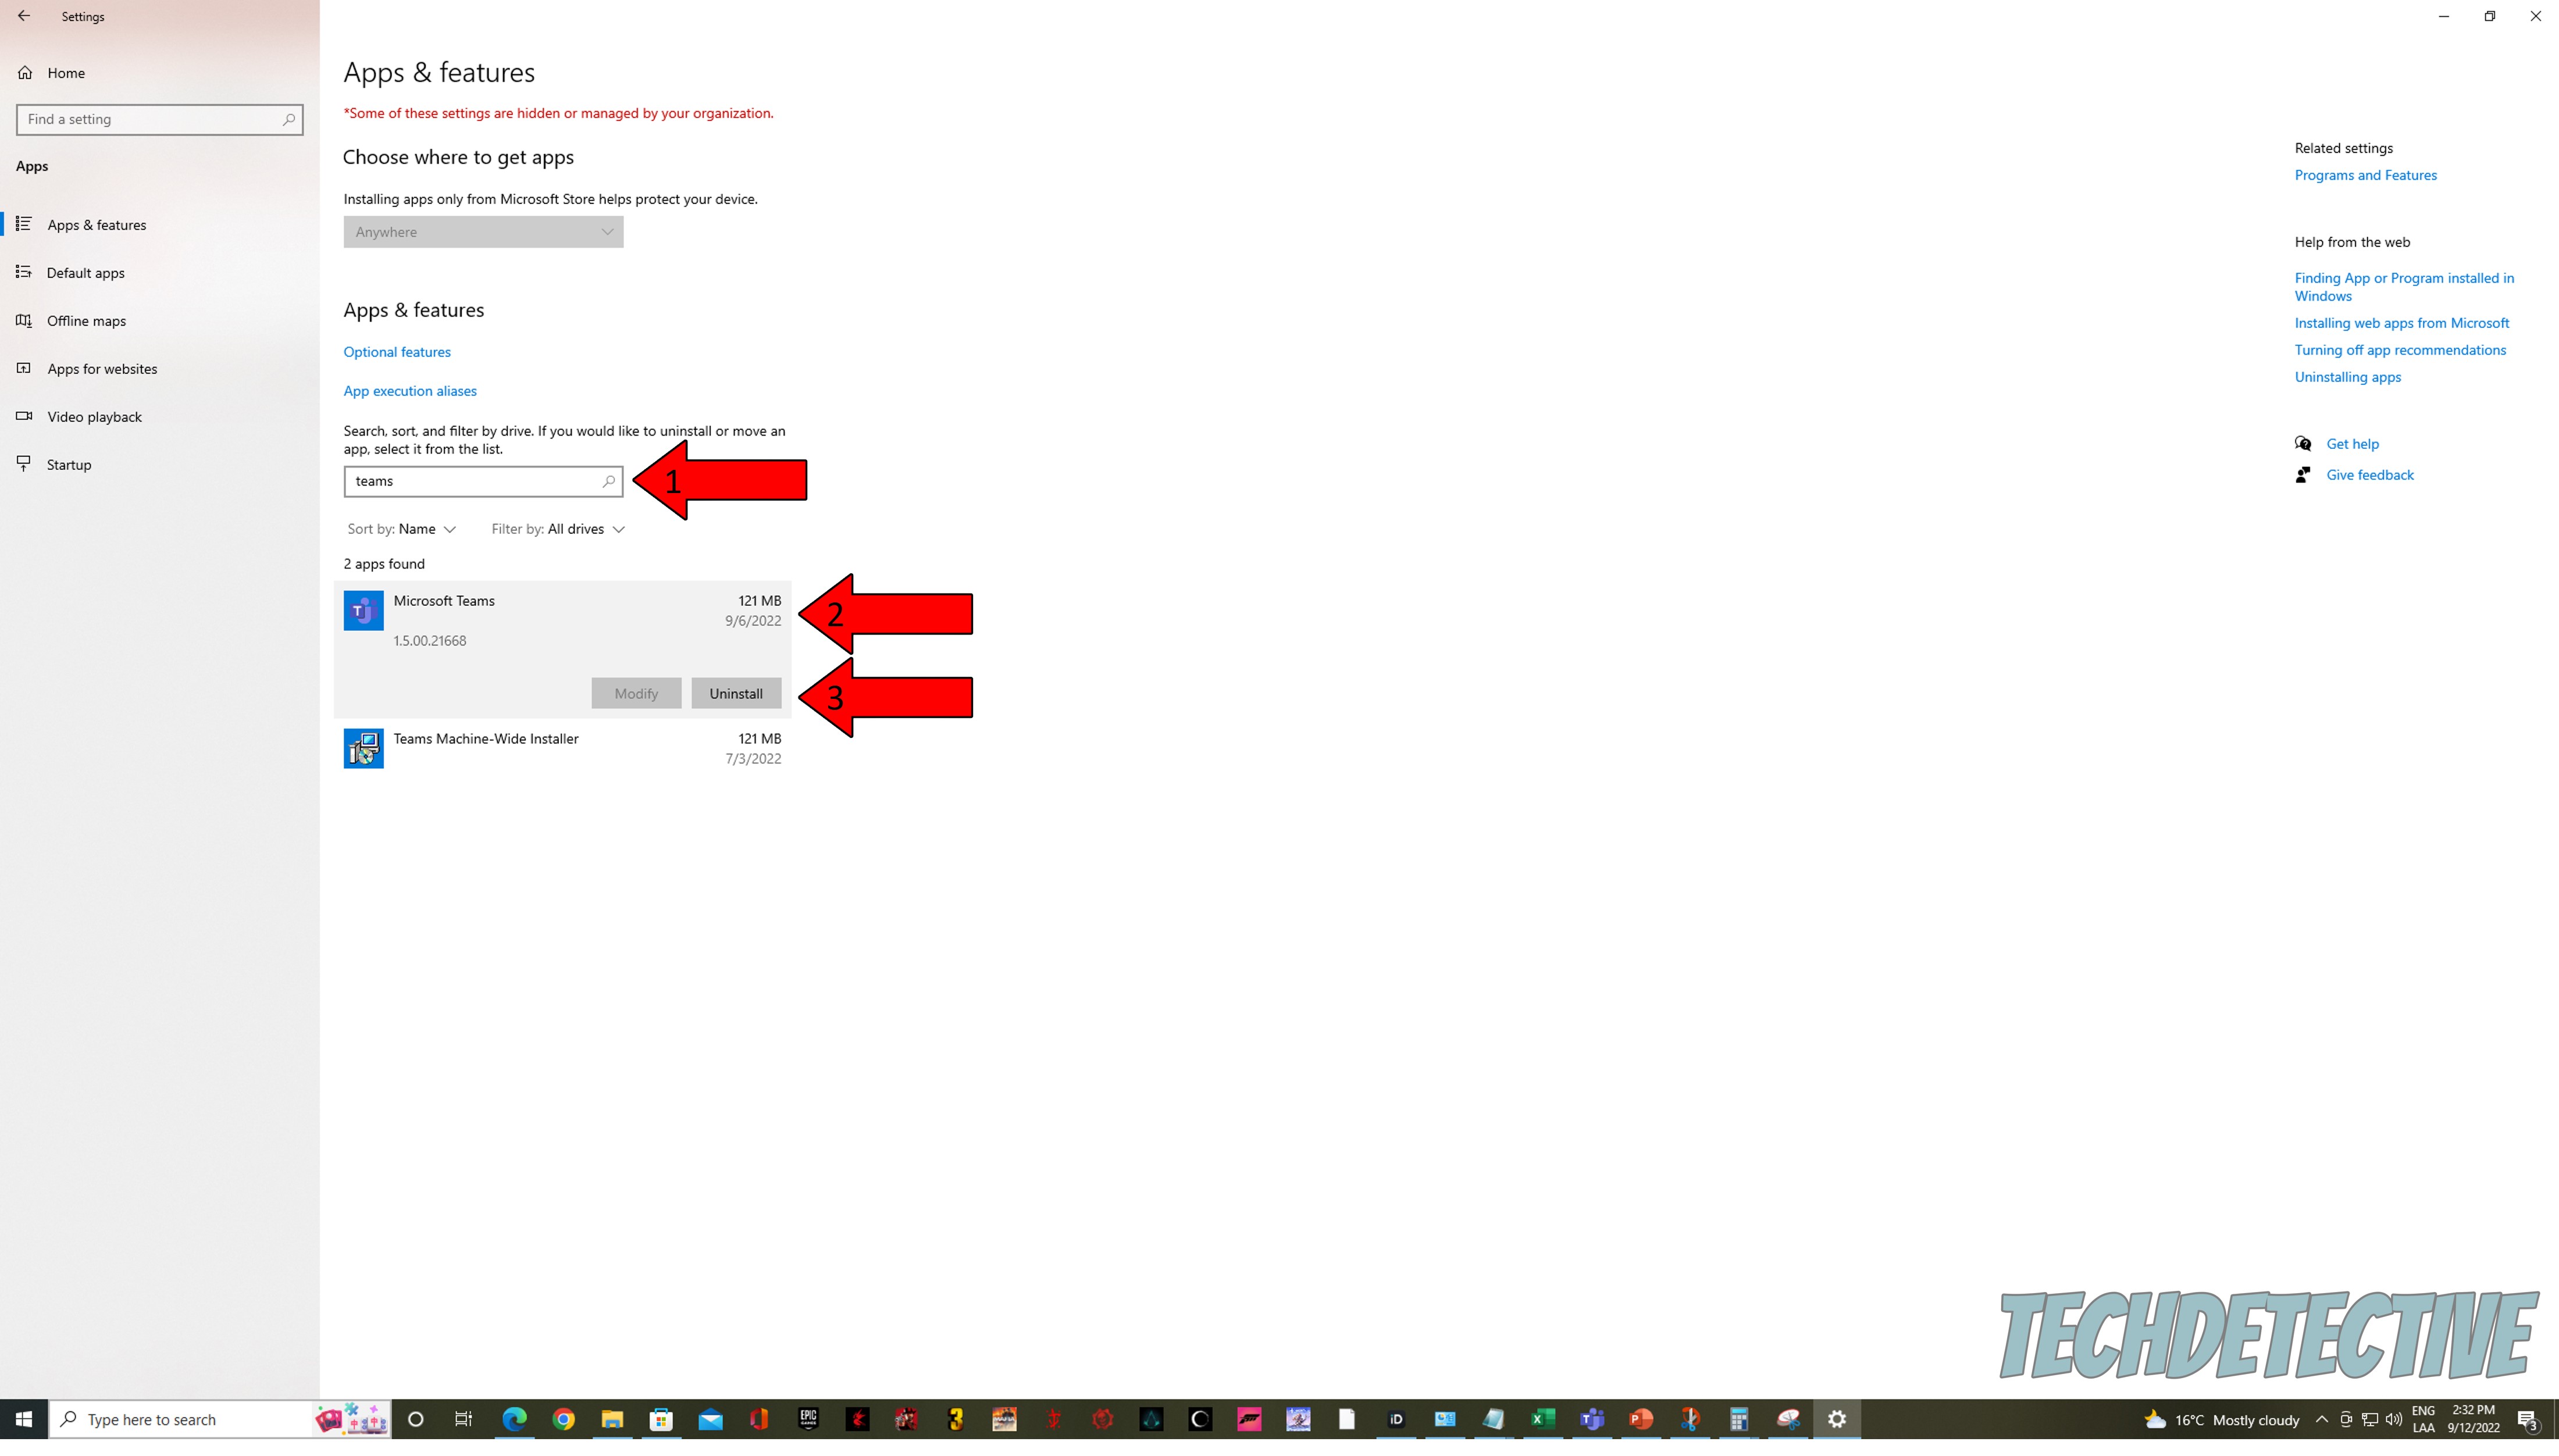
By removing both the app and the Machine-Wide installer, Microsoft Teams should no longer keep reinstalling.
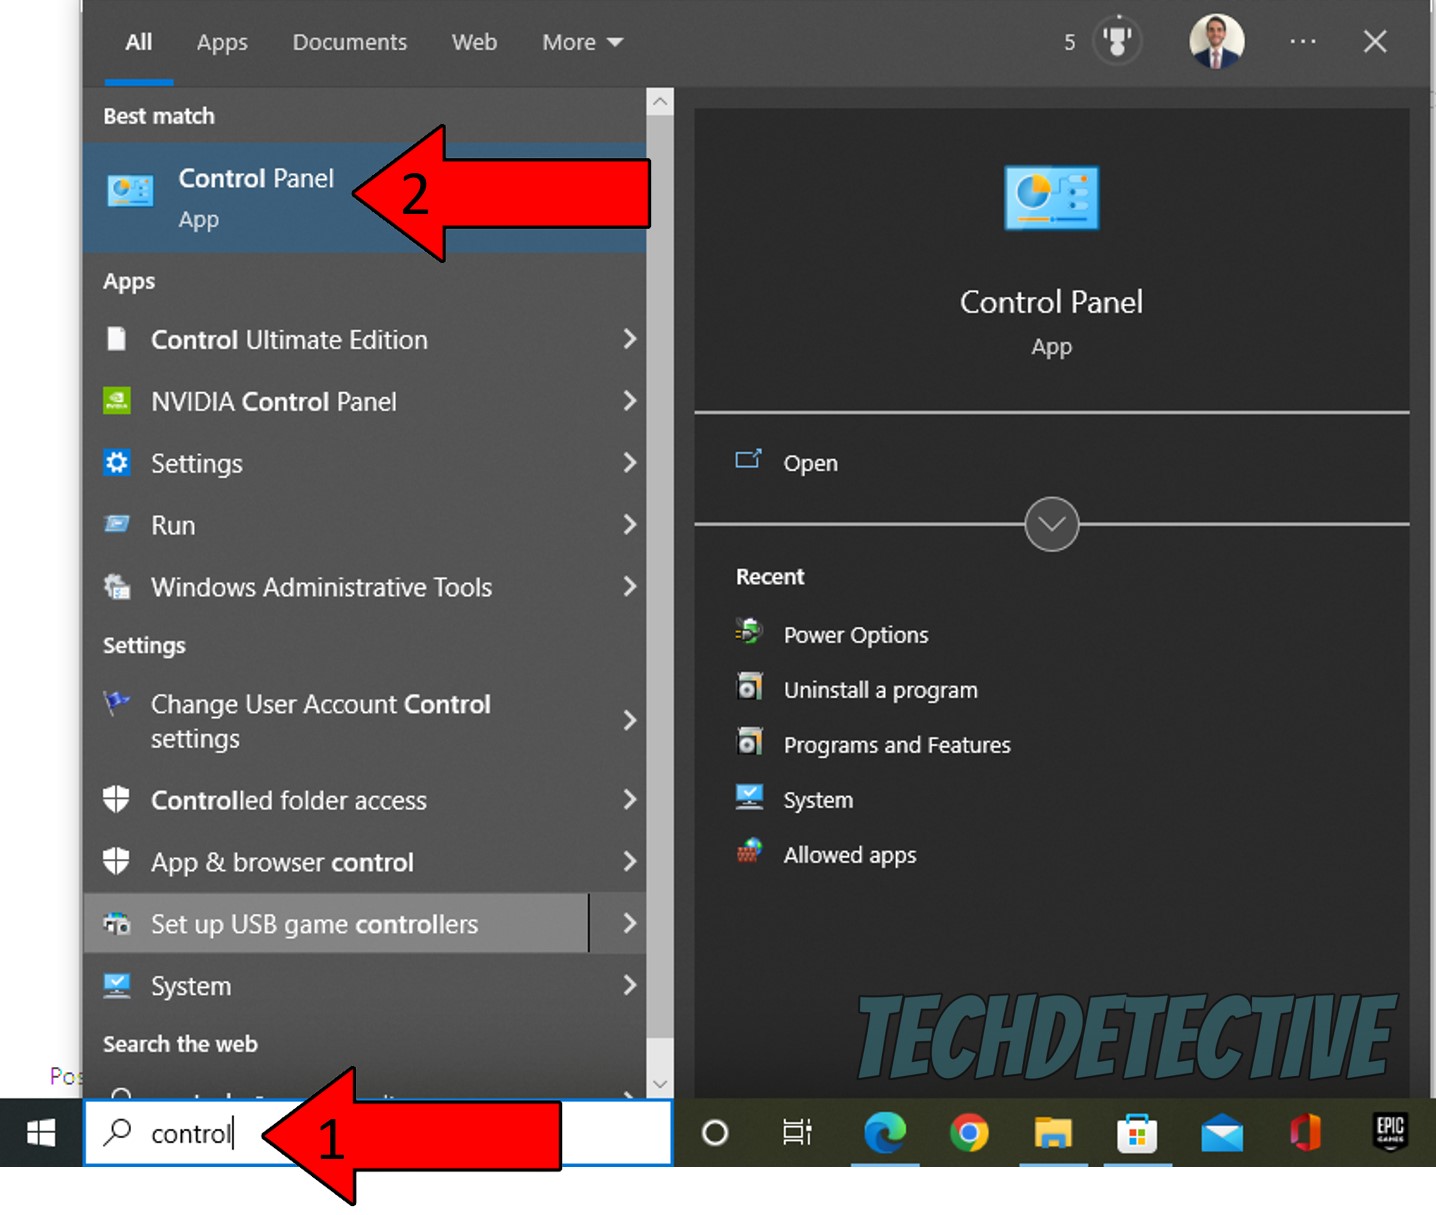
The second way you can go about this is by repeating the process via the Control Panel. This works just as well as doing it through Windows’ app settings, so either one is fine. But if for any reason, the previous method didn’t work, this one might.
Solution: Here’s what you have to do:
3. In the new window, click on “Uninstall a Program” beneath “Programs”
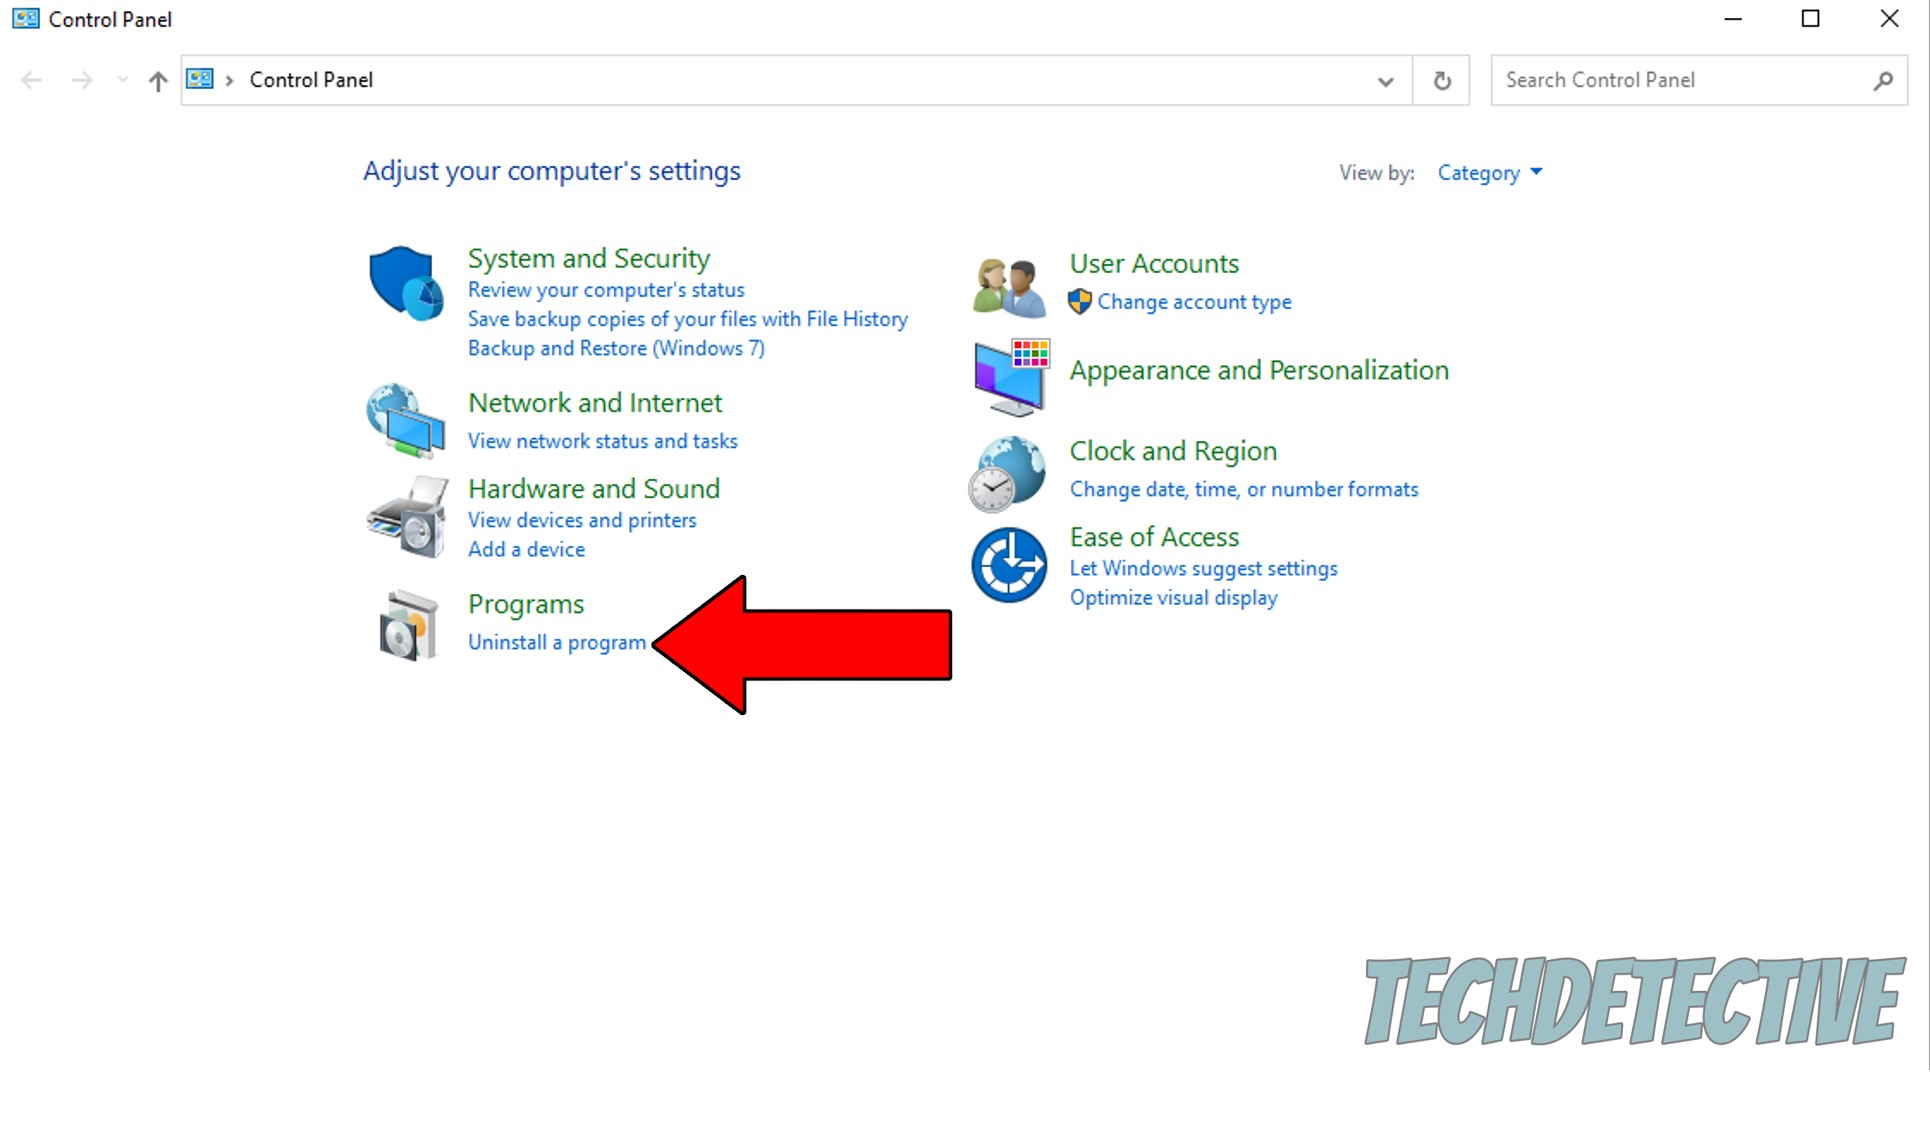
4. Type “Teams” on the search bar, and uninstall both Microsoft Teams and “Teams Machine-Wide Installer”

That about covers it!
I know it can be really intimidating to try to address your own technical difficulties, but I hope this piece has helped you learn that it’s very simple.
More often than not, when Microsoft Teams is always reinstalling, it’s due to a file you forgot to uninstall. Keeping a close eye on the process and double-checking that you left no traces of the app on your devices, should do the trick.
Thank you so much for sticking with me all the way to the end. If this article proved valuable to you, you’ll be very happy to learn that we upload new content every week. While we work on our latest masterpiece, why not check out our other incredible resources below and become a Tech Detective yourself?
Best of luck to you!


Detective ‘Gerry’ Molina is one of the most prolific detectives on our TechDetective team. He’s known for his ability to crack down on multitudes of tech crimes on behalf of you – the citizens of the internet. Molina is often the first point of contact for many cases, working to help free victims from the tyranny of tech issues.