
Does Waze keep saying something went wrong, and it’s making you late?
It’s never fun to have an issue like this. Especially when time is of the essence while driving to a business meeting or a midterm exam.
GPS navigation apps have made our lives much easier in the past few years, but events like this can quickly tempt us to return to the trusty Road Atlas.
But before you pick that heavy book up, let’s take a breather. You came here for answers, and that’s exactly what you’ll get. Below, you’ll find a list of many easy steps you can take to solve this problem definitely.
The 6 simple steps to follow when Waze is saying something went wrong are:
Keep reading to reach your destination safely!
Let’s start off by making sure you’re using the right network.
This might be hard for you to believe, but some users have reported having this issue after starting their journey at home, using Wi-Fi, and then turning on their mobile network to go on the road. Apparently, this confuses Waze and prompts it to crash right after you step out of the house.
Now, this is not a very common issue to have, as many people do this every day and are fine. But since we’re trying to cover all bases, I’d recommend keeping an eye on this.
Solution: Here are some steps you can try to keep a stable Waze connection:
By keeping the service running on the same network from the start, Waze should no longer keep saying something went wrong.
Next, let’s make sure your mobile device is running on the latest operating system version available. I know keeping an eye on this doesn’t sound like the most exciting thing in the world, but it’s key to ensure everything runs like clockwork.
There are many reasons why staying fully updated is in your best interest. From new features to developer support, there’s really no downside to always using the latest software version for your devices.
Now, normally, this is not something you have to check constantly, as the automatic updating feature on your devices takes care of it. However, occasionally a weak network, a corrupted file, or a coding bug can get in the way and stop this process from happening, leaving you stuck with outdated software.
A situation like that could easily explain why Waze keeps saying something went wrong, or why the platform keeps crashing on your iPhone or Android device.
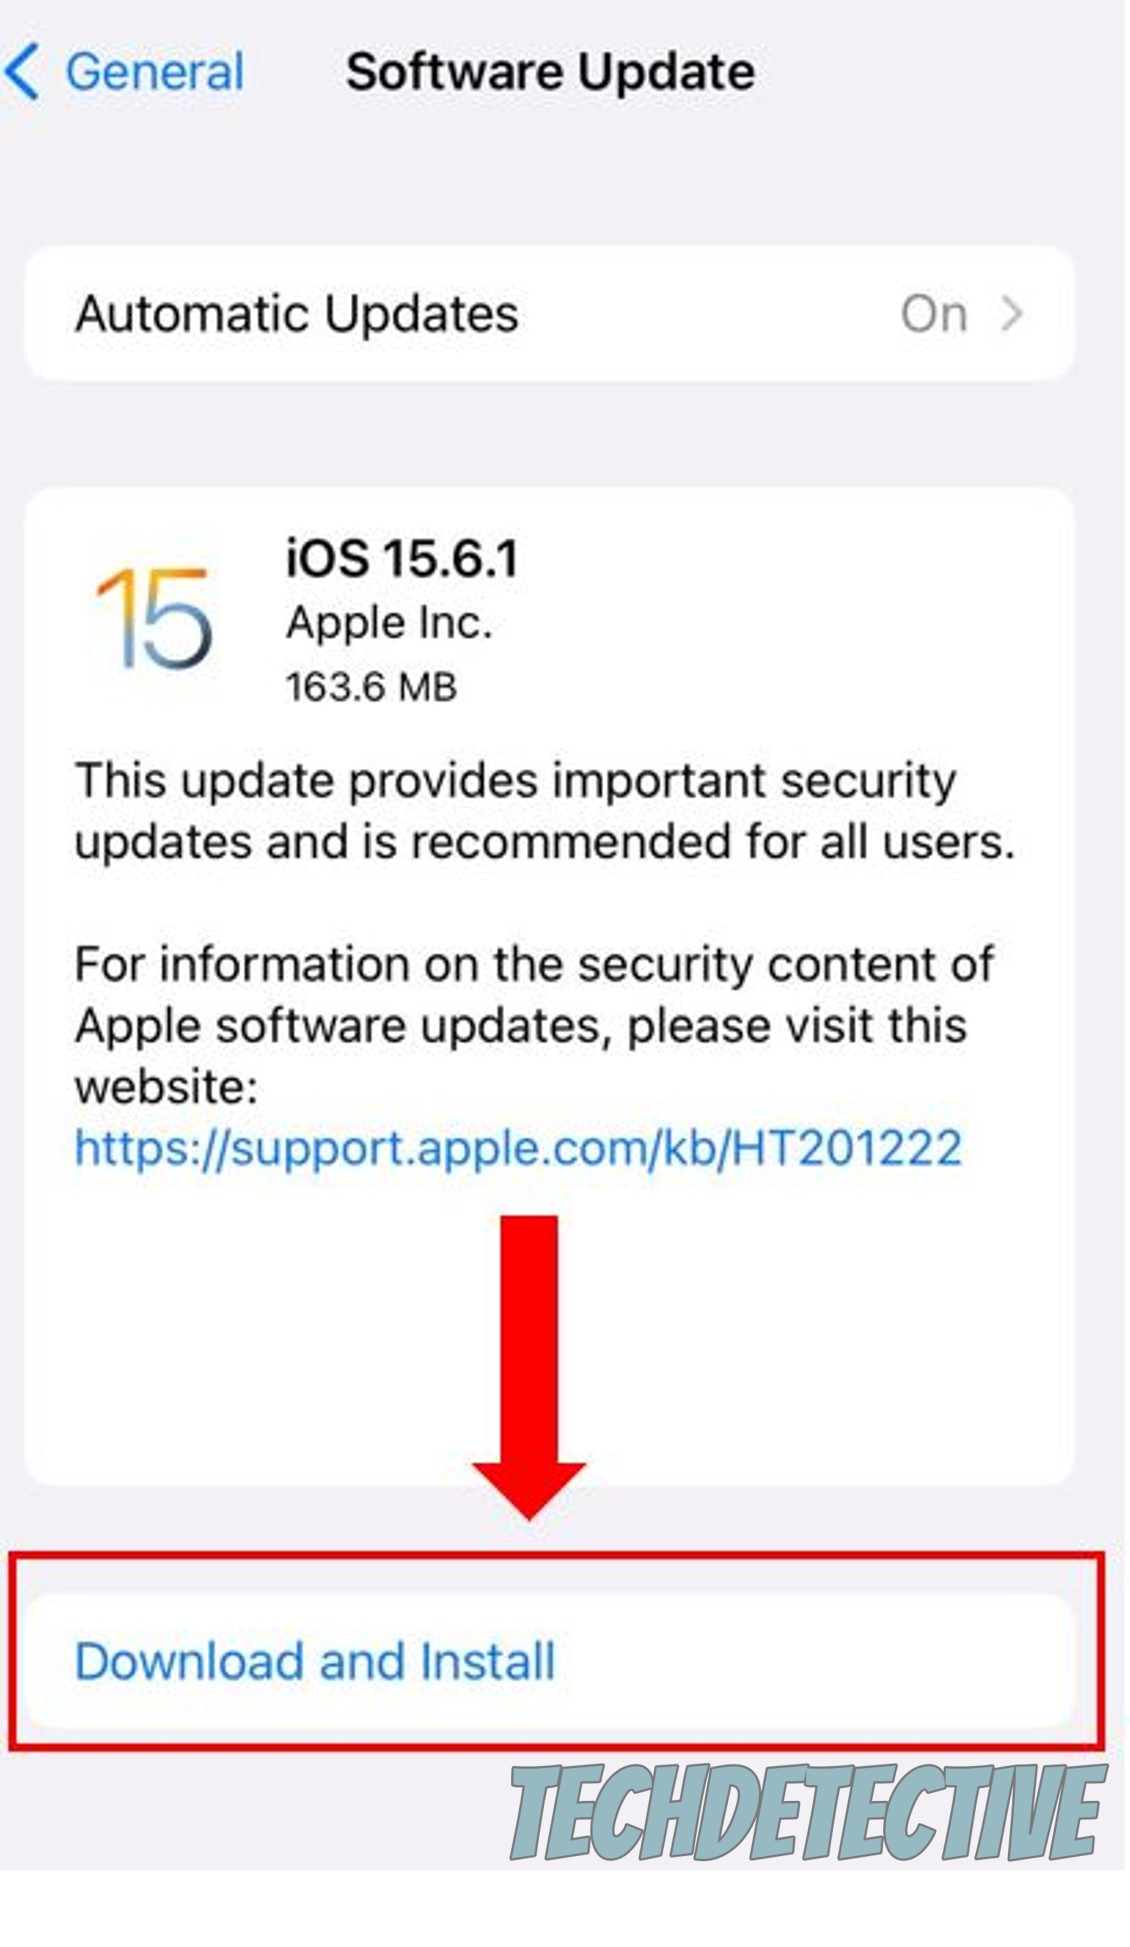
Solution: If you suspect this to be the source of your issue, your best bet will be to manually download and install the latest operating system version to your devices.
Here’s a little guide on how to do it:
For Android:
Now that your devices are fully updated, it’s essential to make sure that your Waze app is as well.
In most cases, app and software versions are designed to work best together, so it stands to reason that using an outdated app with a fully updated device, or vice versa, can bring about some problems.
Now, don’t worry. Not unlike your operating system, apps are designed to constantly look for available updates and install them when found, so chances are you’re good to go. However, as you learned in the previous section, things don’t always go as planned.
If you suspect Waze keeps saying something went wrong due to an old app version being installed on your devices, try updating manually again and see if that does the trick.
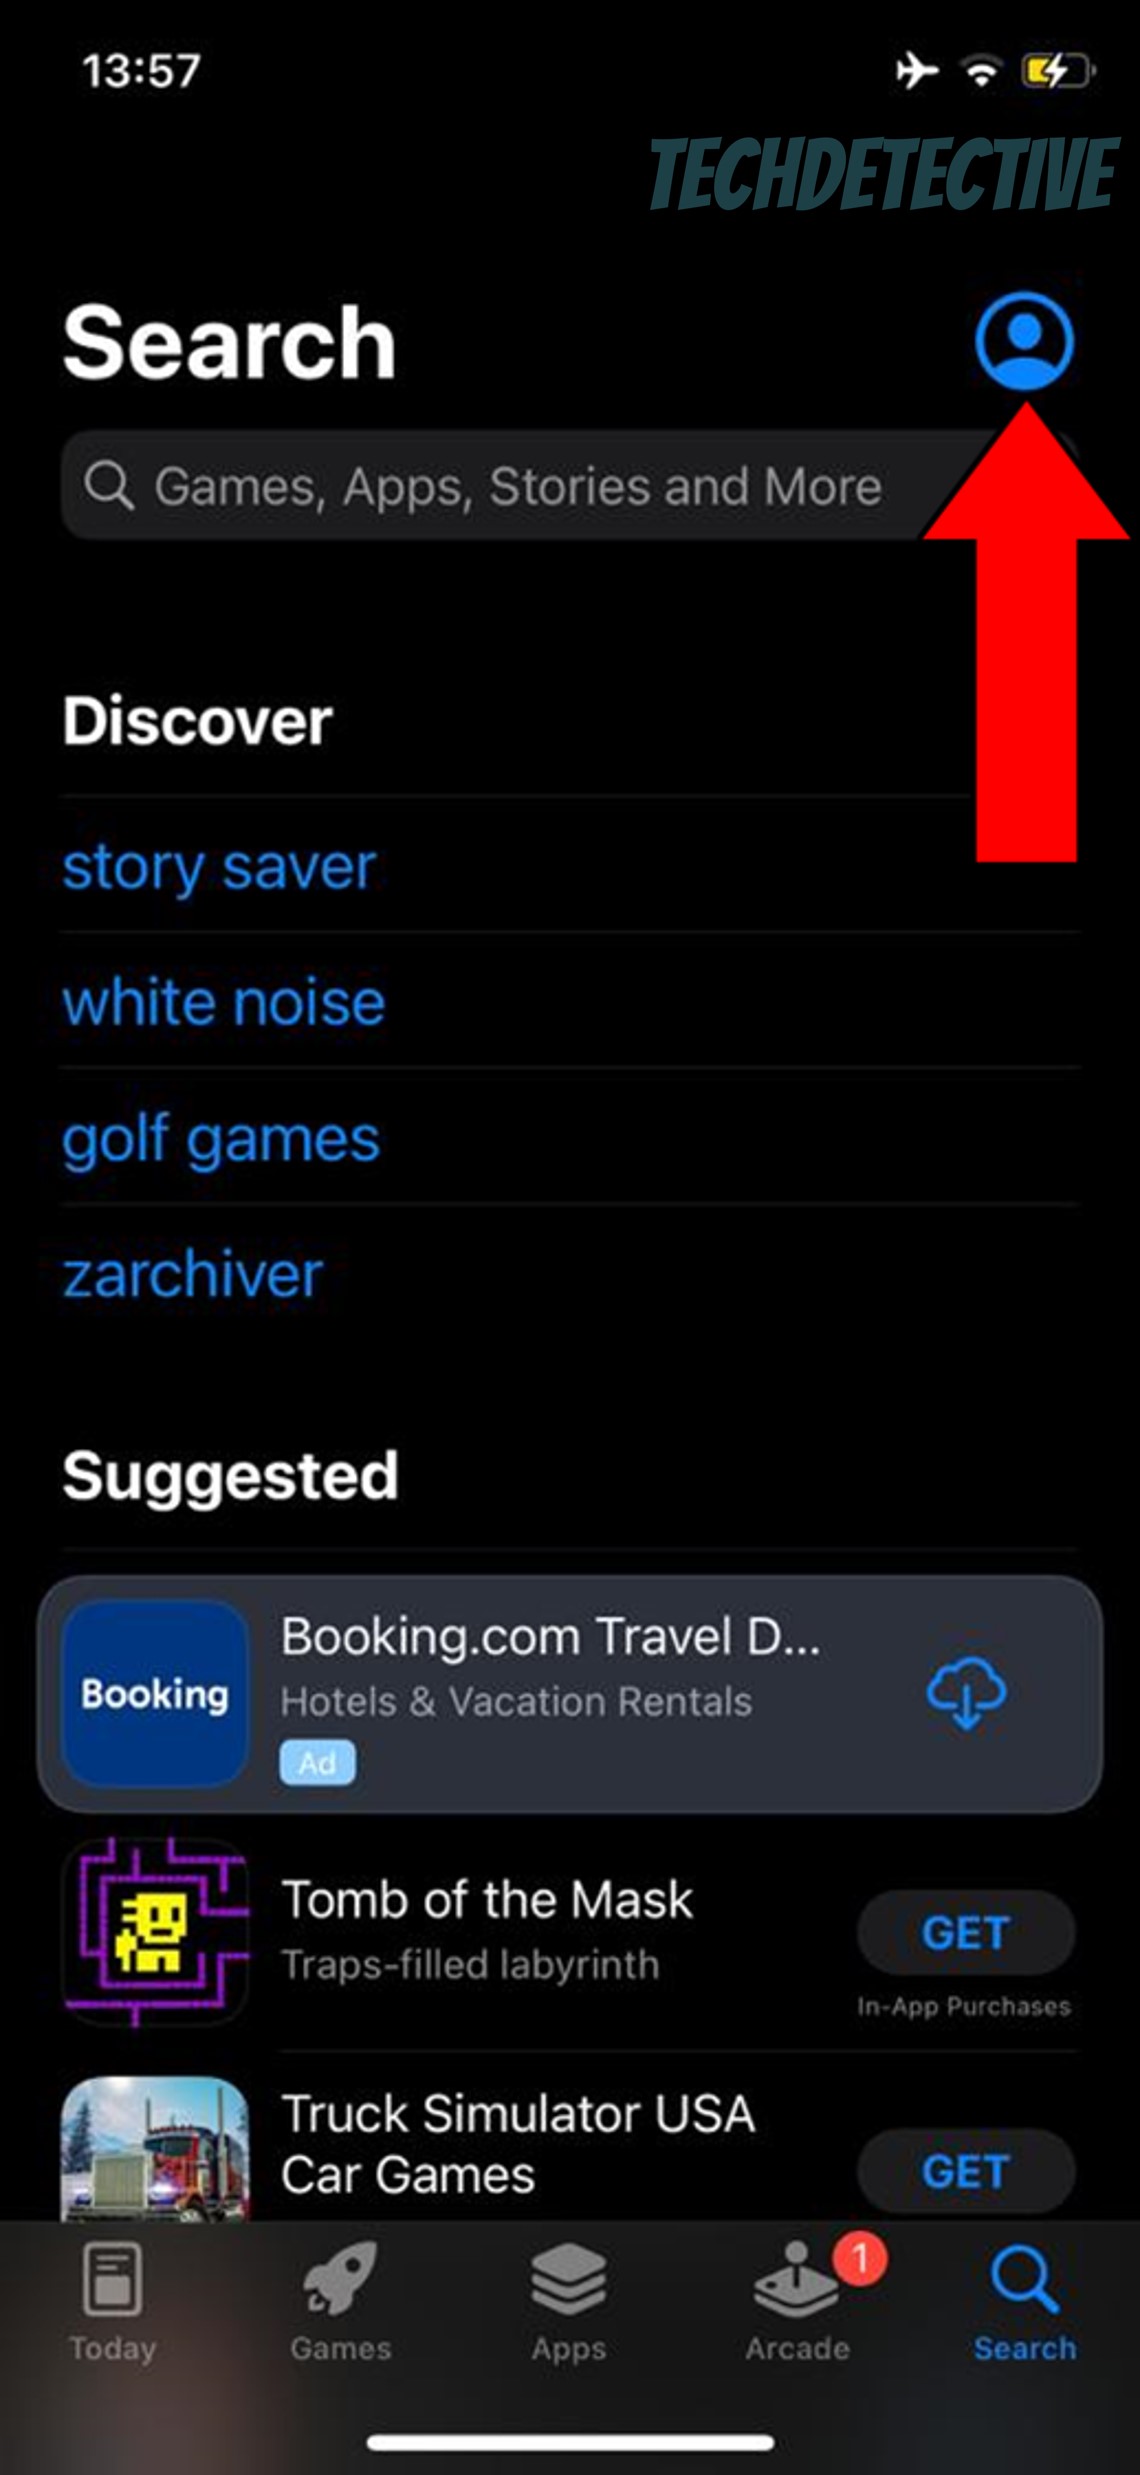
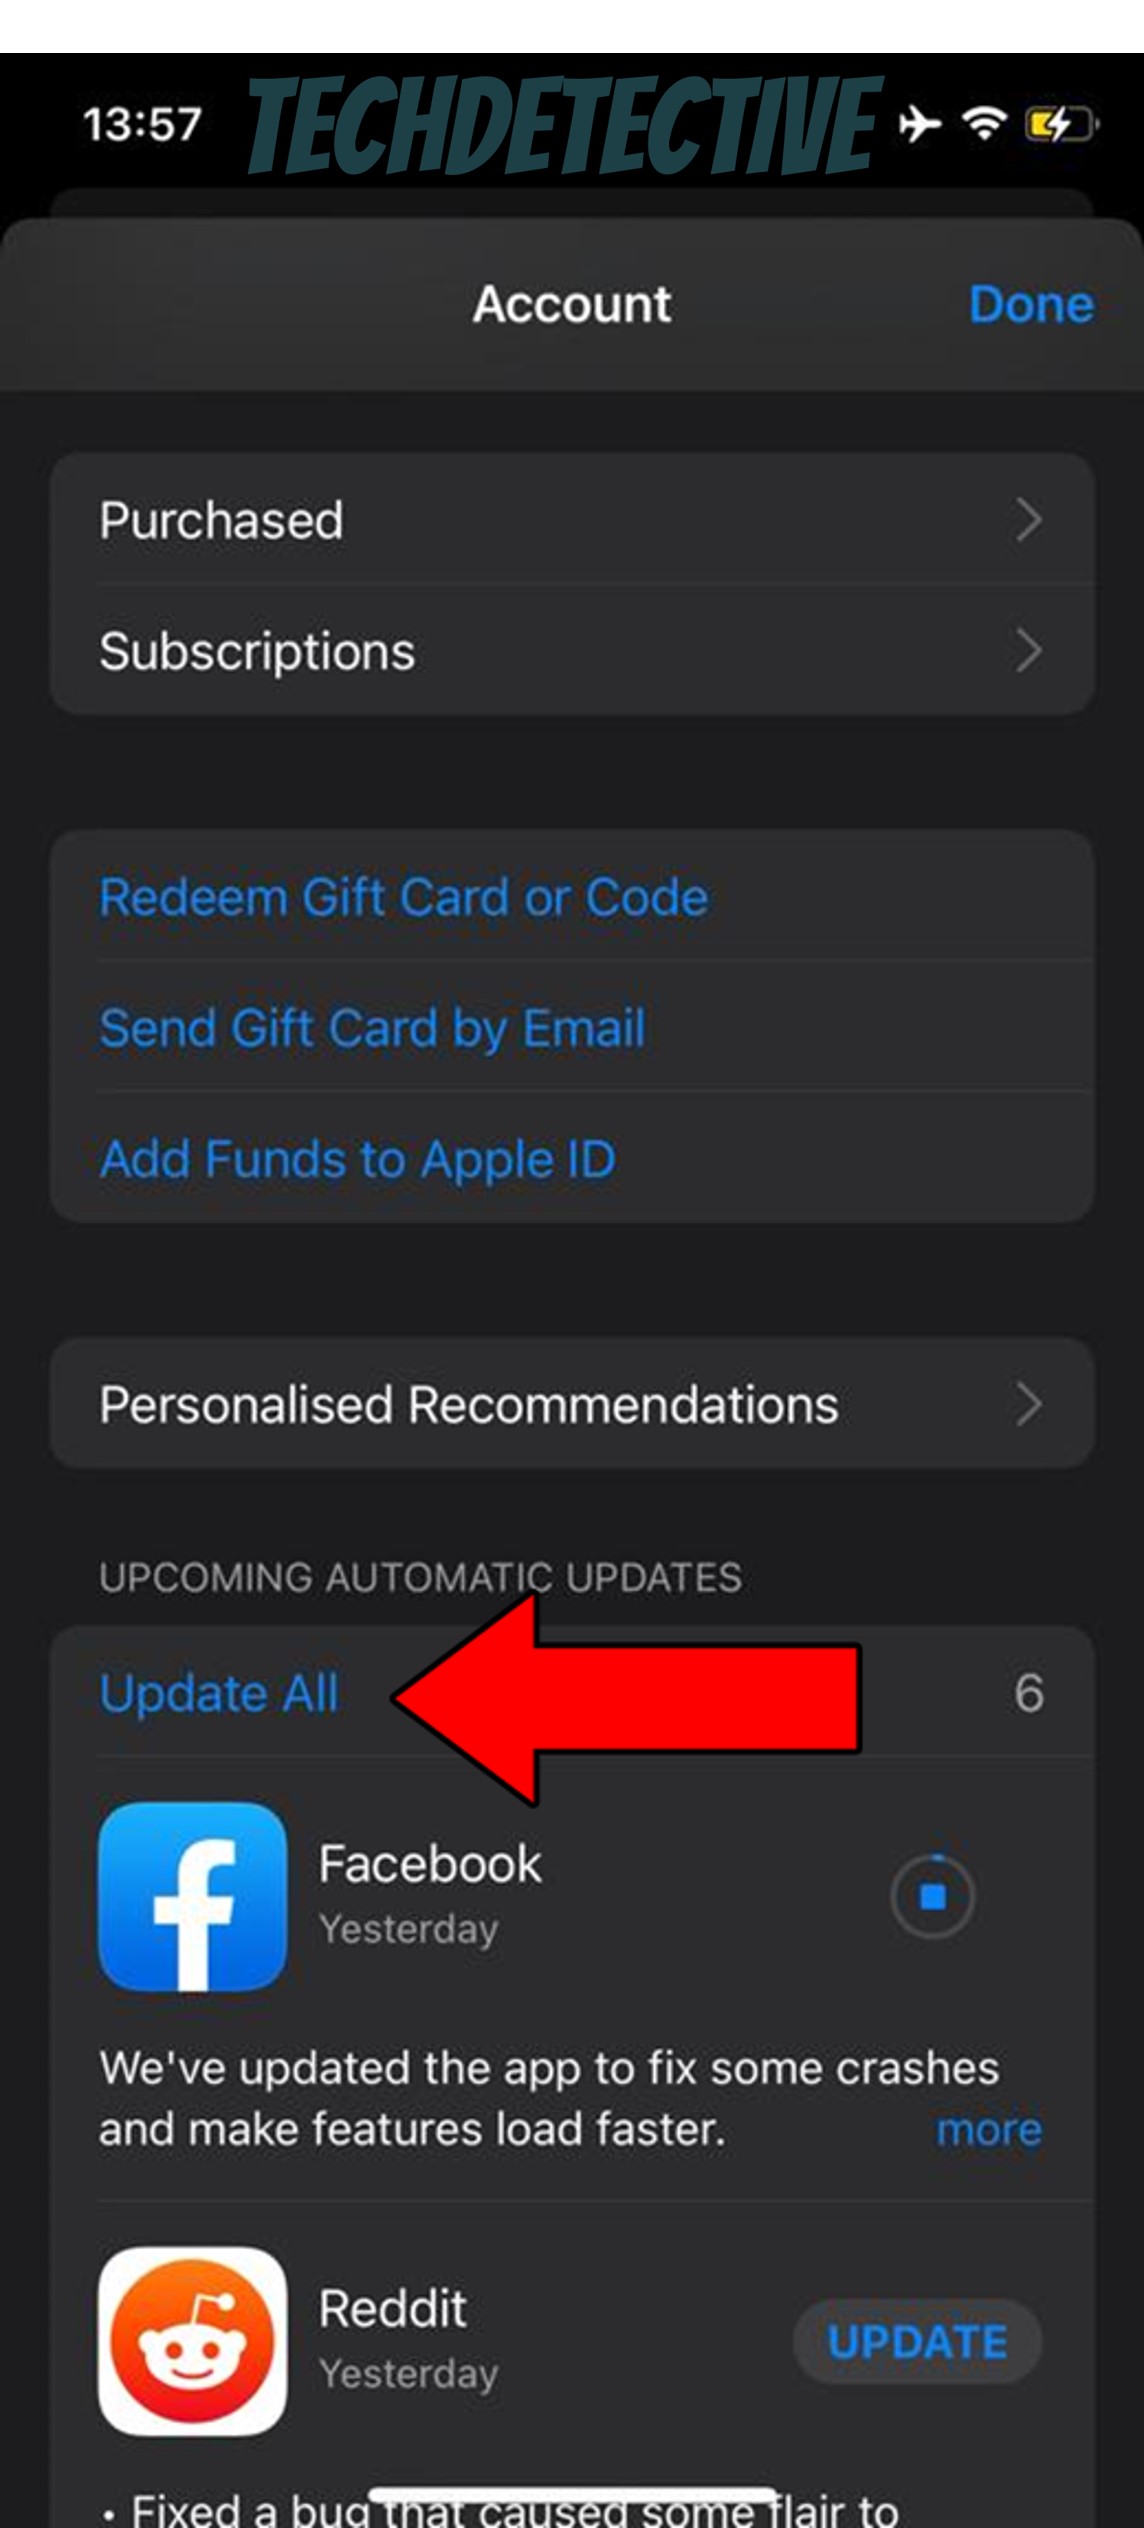
Solution: Now sure how to do it? No problem, here are some simple steps you can follow:
For iOS:
For Android:
We’re making significant progress, but there’s still a long way to go. If nothing has worked so far, restarting your device might do the trick.
Why? I’m glad you asked.
For our favorite apps/devices to work, there must be thousands of background processes running at the same time. In most cases, this happens automatically, and we don’t even notice it. But now and then one or more can crash either due to bugs or corrupted files, which would explain why Waze keeps saying something went wrong.
By restarting your device, you’ll be giving it and the app a chance to reload vital resources from scratch and remove any bugs that might be causing trouble.
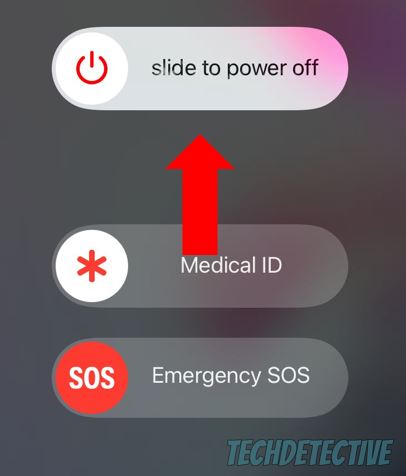
Solution: Depending on the platform you use, the restarting process will go a little differently. Here’s how to do it on iOS and Android systems:
Android:
Next, let’s make sure Waze’s cache is not acting up.
If you already know what this is, feel free to move on to the solution. But if this is your first time hearing the term, please read on, as you’re about to acquire useful knowledge.
In a nutshell, an app’s cache is where you can find critical information, such as user preferences, login credentials, and in the case of GPS navigation platforms like Waze, routes and estimated drive times.
By keeping this data readily available on your devices, the app can load much quicker when launched, which is a great advantage to have when time is of the essence. However, in some cases, a corrupted file can be accidentally stored within the cache, causing a world of trouble.
In fact, events like this could easily explain why Waze keeps saying something went wrong.
Solution: Provided that you suspect your cache to be damaged, you’ll be better off clearing it. Don’t call your hacker friends just yet, I promise this process is super easy and quick.
Here’s all you have to do:
For Android:
Clearing the cache on iOS devices is a little trickier, and you’re better off simply uninstalling the app altogether. This should both solve your current issue and any others that are causing you problems.
Finally, let’s try a more permanent solution.
As you learned in the section about restarting your devices, every phone, PC, tablet, and app needs thousands of background processes to be running at the same time. Without them, nothing would work the way you’re used to.
The problem is that sometimes bugs or corrupted files are too deep-rooted and won’t go away after a simple restart, so you’ll need to go deeper.
By wiping all traces of the platform from your devices’ memory, you’ll be giving them both a chance to set things right and get a fresh start. You might be putting this off out of fear of losing your account, but trust me, all your data is backed up in the cloud, so it should be waiting for you once you re-download the app and log back in.
Solution: Here are some easy steps to remove Waze from the most popular mobile operating systems out there:
For iOS:
For Android:
That about sums it up!
I know how annoying it can be to have Waze keep saying something went wrong. Especially when you’re already driving and fighting against the clock.
Luckily, I hope this piece has helped you see that, in many cases, fixing the most common causes behind this issue is really easy and quick. More often than not, simple habits, like keeping the app and your devices updated, as well as clearing the cache now and then, should do the trick.
Thank you very much for sticking with me all the way to the end. If this article piqued your interest, you’ll be very happy to know that we upload new content every week. While we put the finishing touches to our latest resource, why not check out those already available on the site? After all, the only way to become a Tech Detective is through preparation!
Have a great week.


Detective ‘Gerry’ Molina is one of the most prolific detectives on our TechDetective team. He’s known for his ability to crack down on multitudes of tech crimes on behalf of you – the citizens of the internet. Molina is often the first point of contact for many cases, working to help free victims from the tyranny of tech issues.