Is Microsoft Teams being lazy and not loading on startup?
That sucks! I can only imagine how annoying it must be to be scolded by your boss because you weren’t online on time, even when you were.
It can be very easy to overlook this, as we’ve become very accustomed to using our devices to make our lives simpler. What a disaster.
But don’t worry, you came here for answers, and I promise you’ll get them. Below, you’ll find a list of several causes that might be responsible for this.
The 5 possible causes that could explain why Microsoft Teams is not loading on startup are:
Keep reading to solve this problem once and for all!
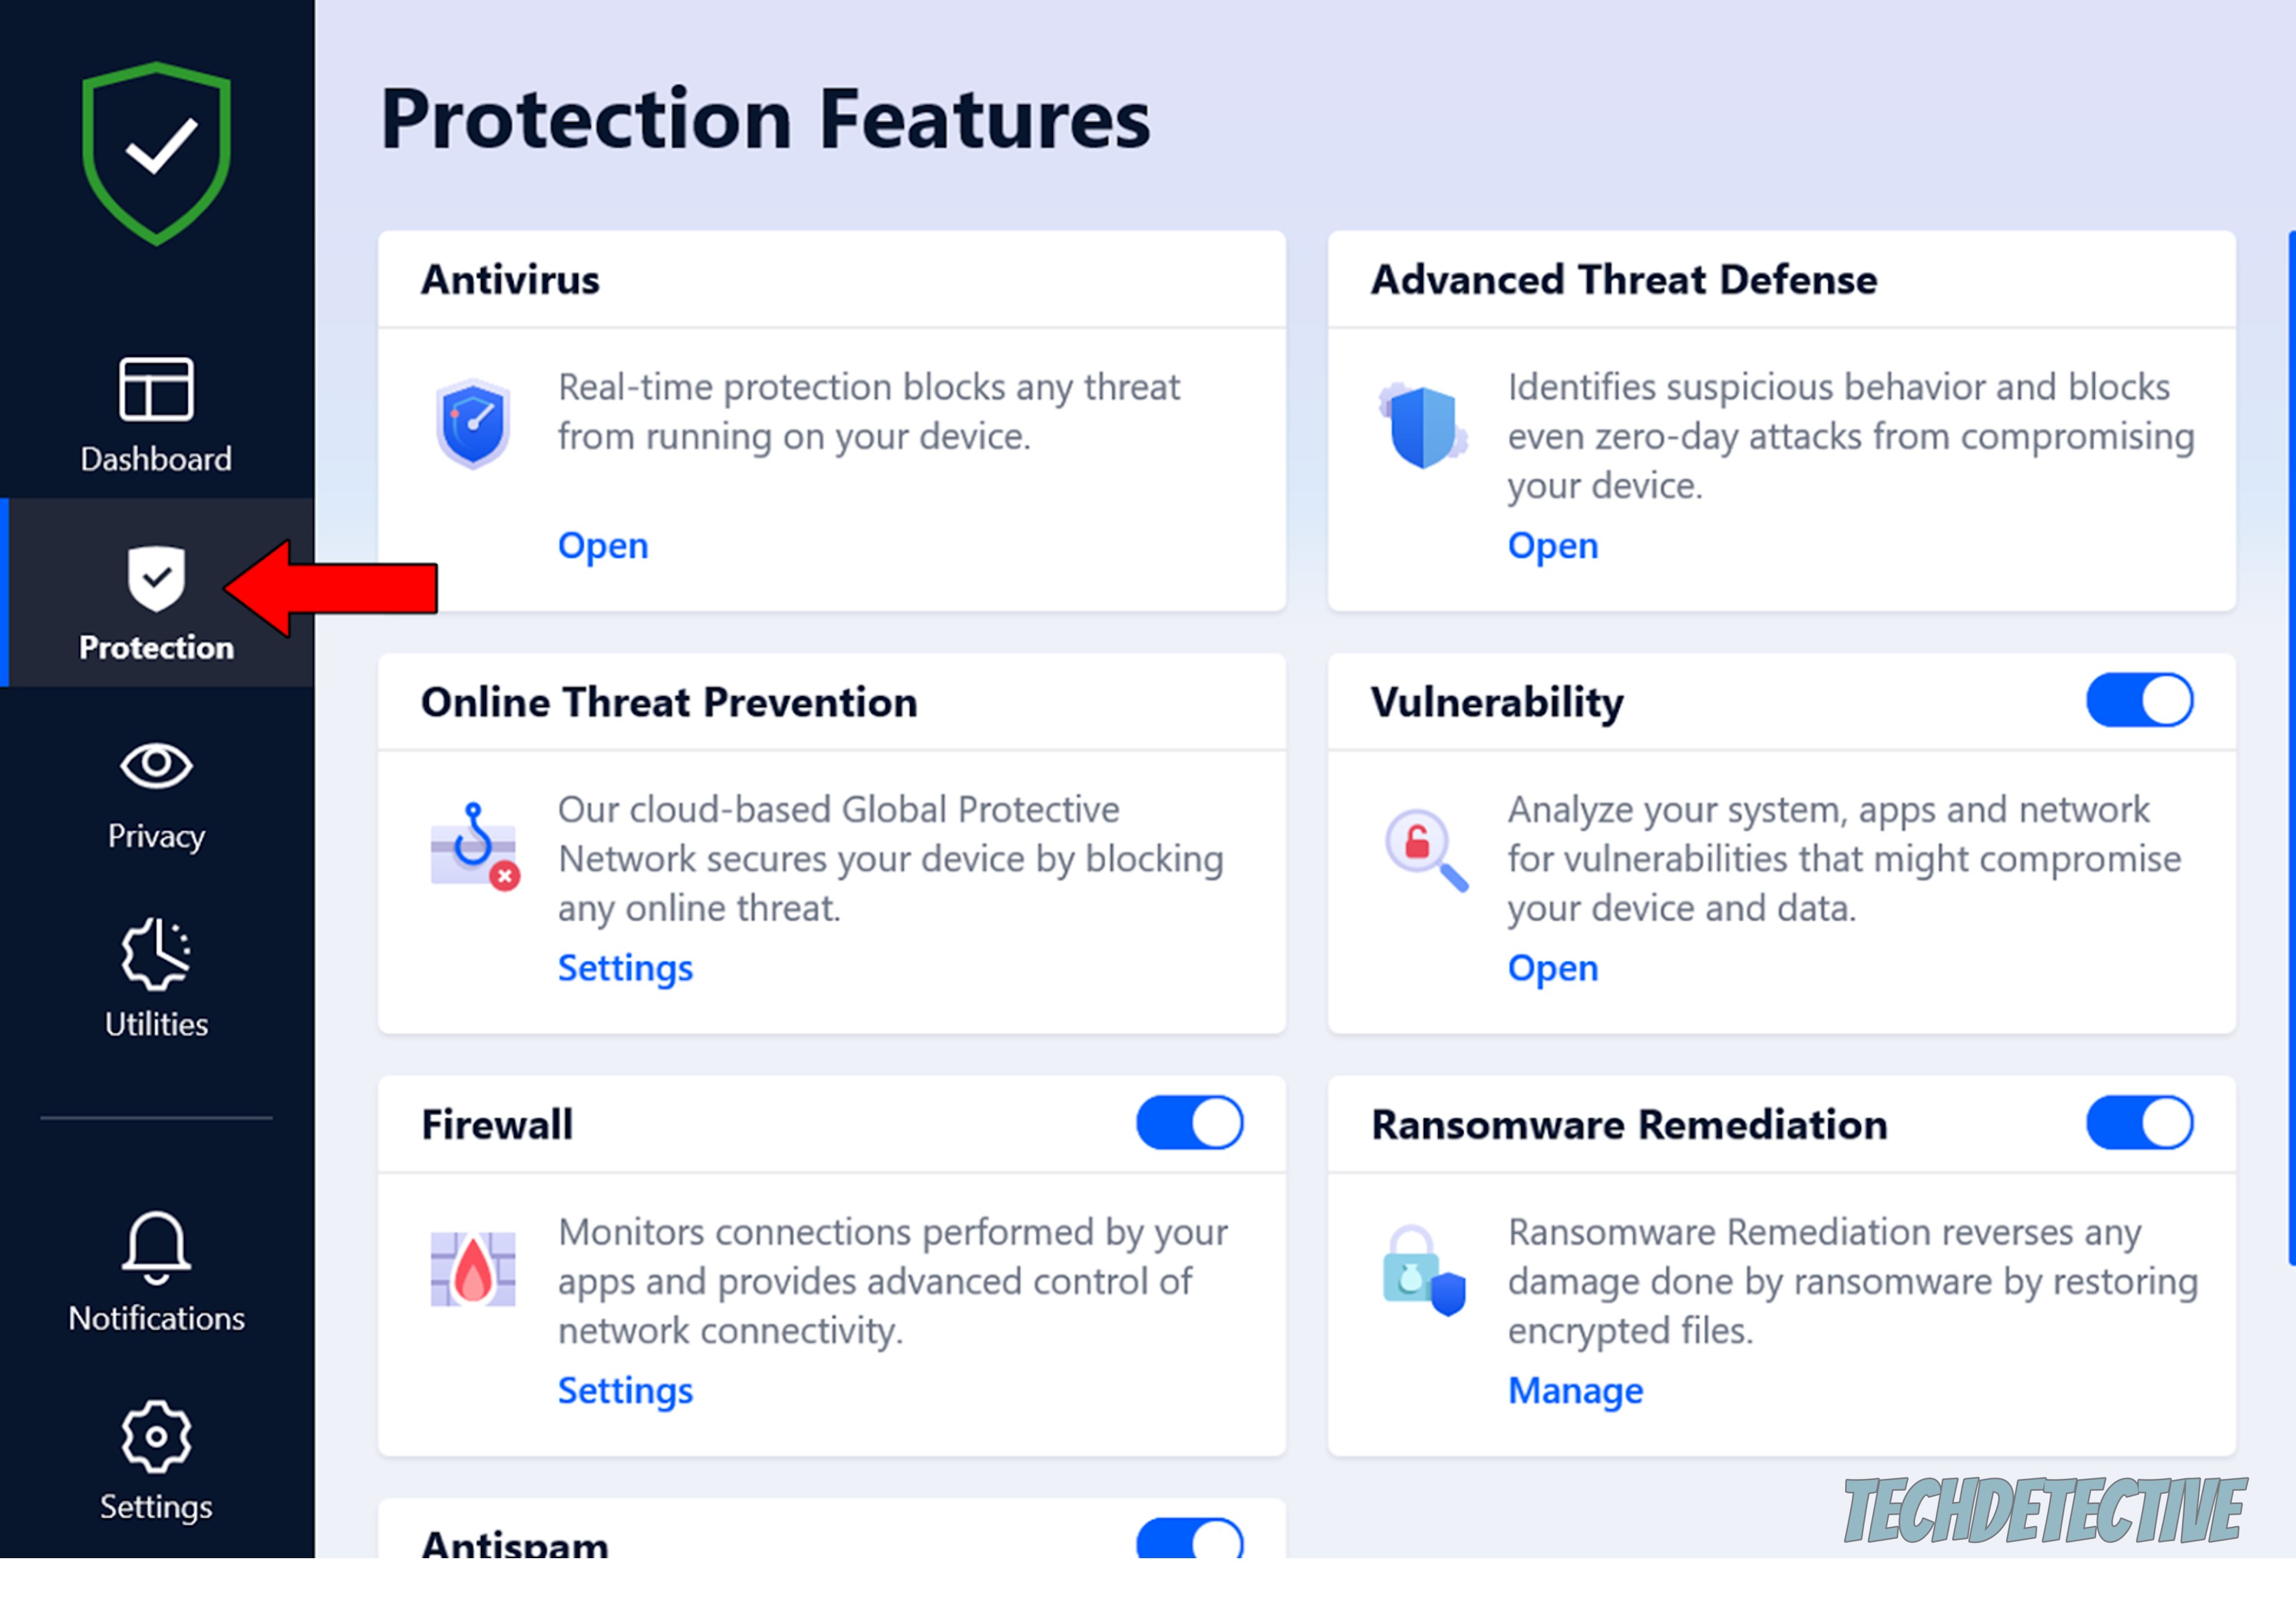
First, I want us to check if either your Firewall or Antivirus software is blocking the platform.
As you may know, these days accidentally downloading viruses and other Malware is very easy, as even the most innocent online files can contain vicious threats. Modern security software developers are quite aware of this, which is why they try very hard to always be a couple of steps ahead of cybercriminals.
However, this comes at a cost.
Security software is programmed to be very careful about communications platforms and their access to the internet. And even though Teams is published and managed by Microsoft, one of the safest companies out there, these programs prefer to err on the side of caution.
This means that your protection software might be blocking the platform’s processes, which would explain why Microsoft Teams is not loading on startup.
Now, this doesn’t mean you’re stuck in an either-or situation. You can enjoy the benefits of being protected, while also addressing this problem.
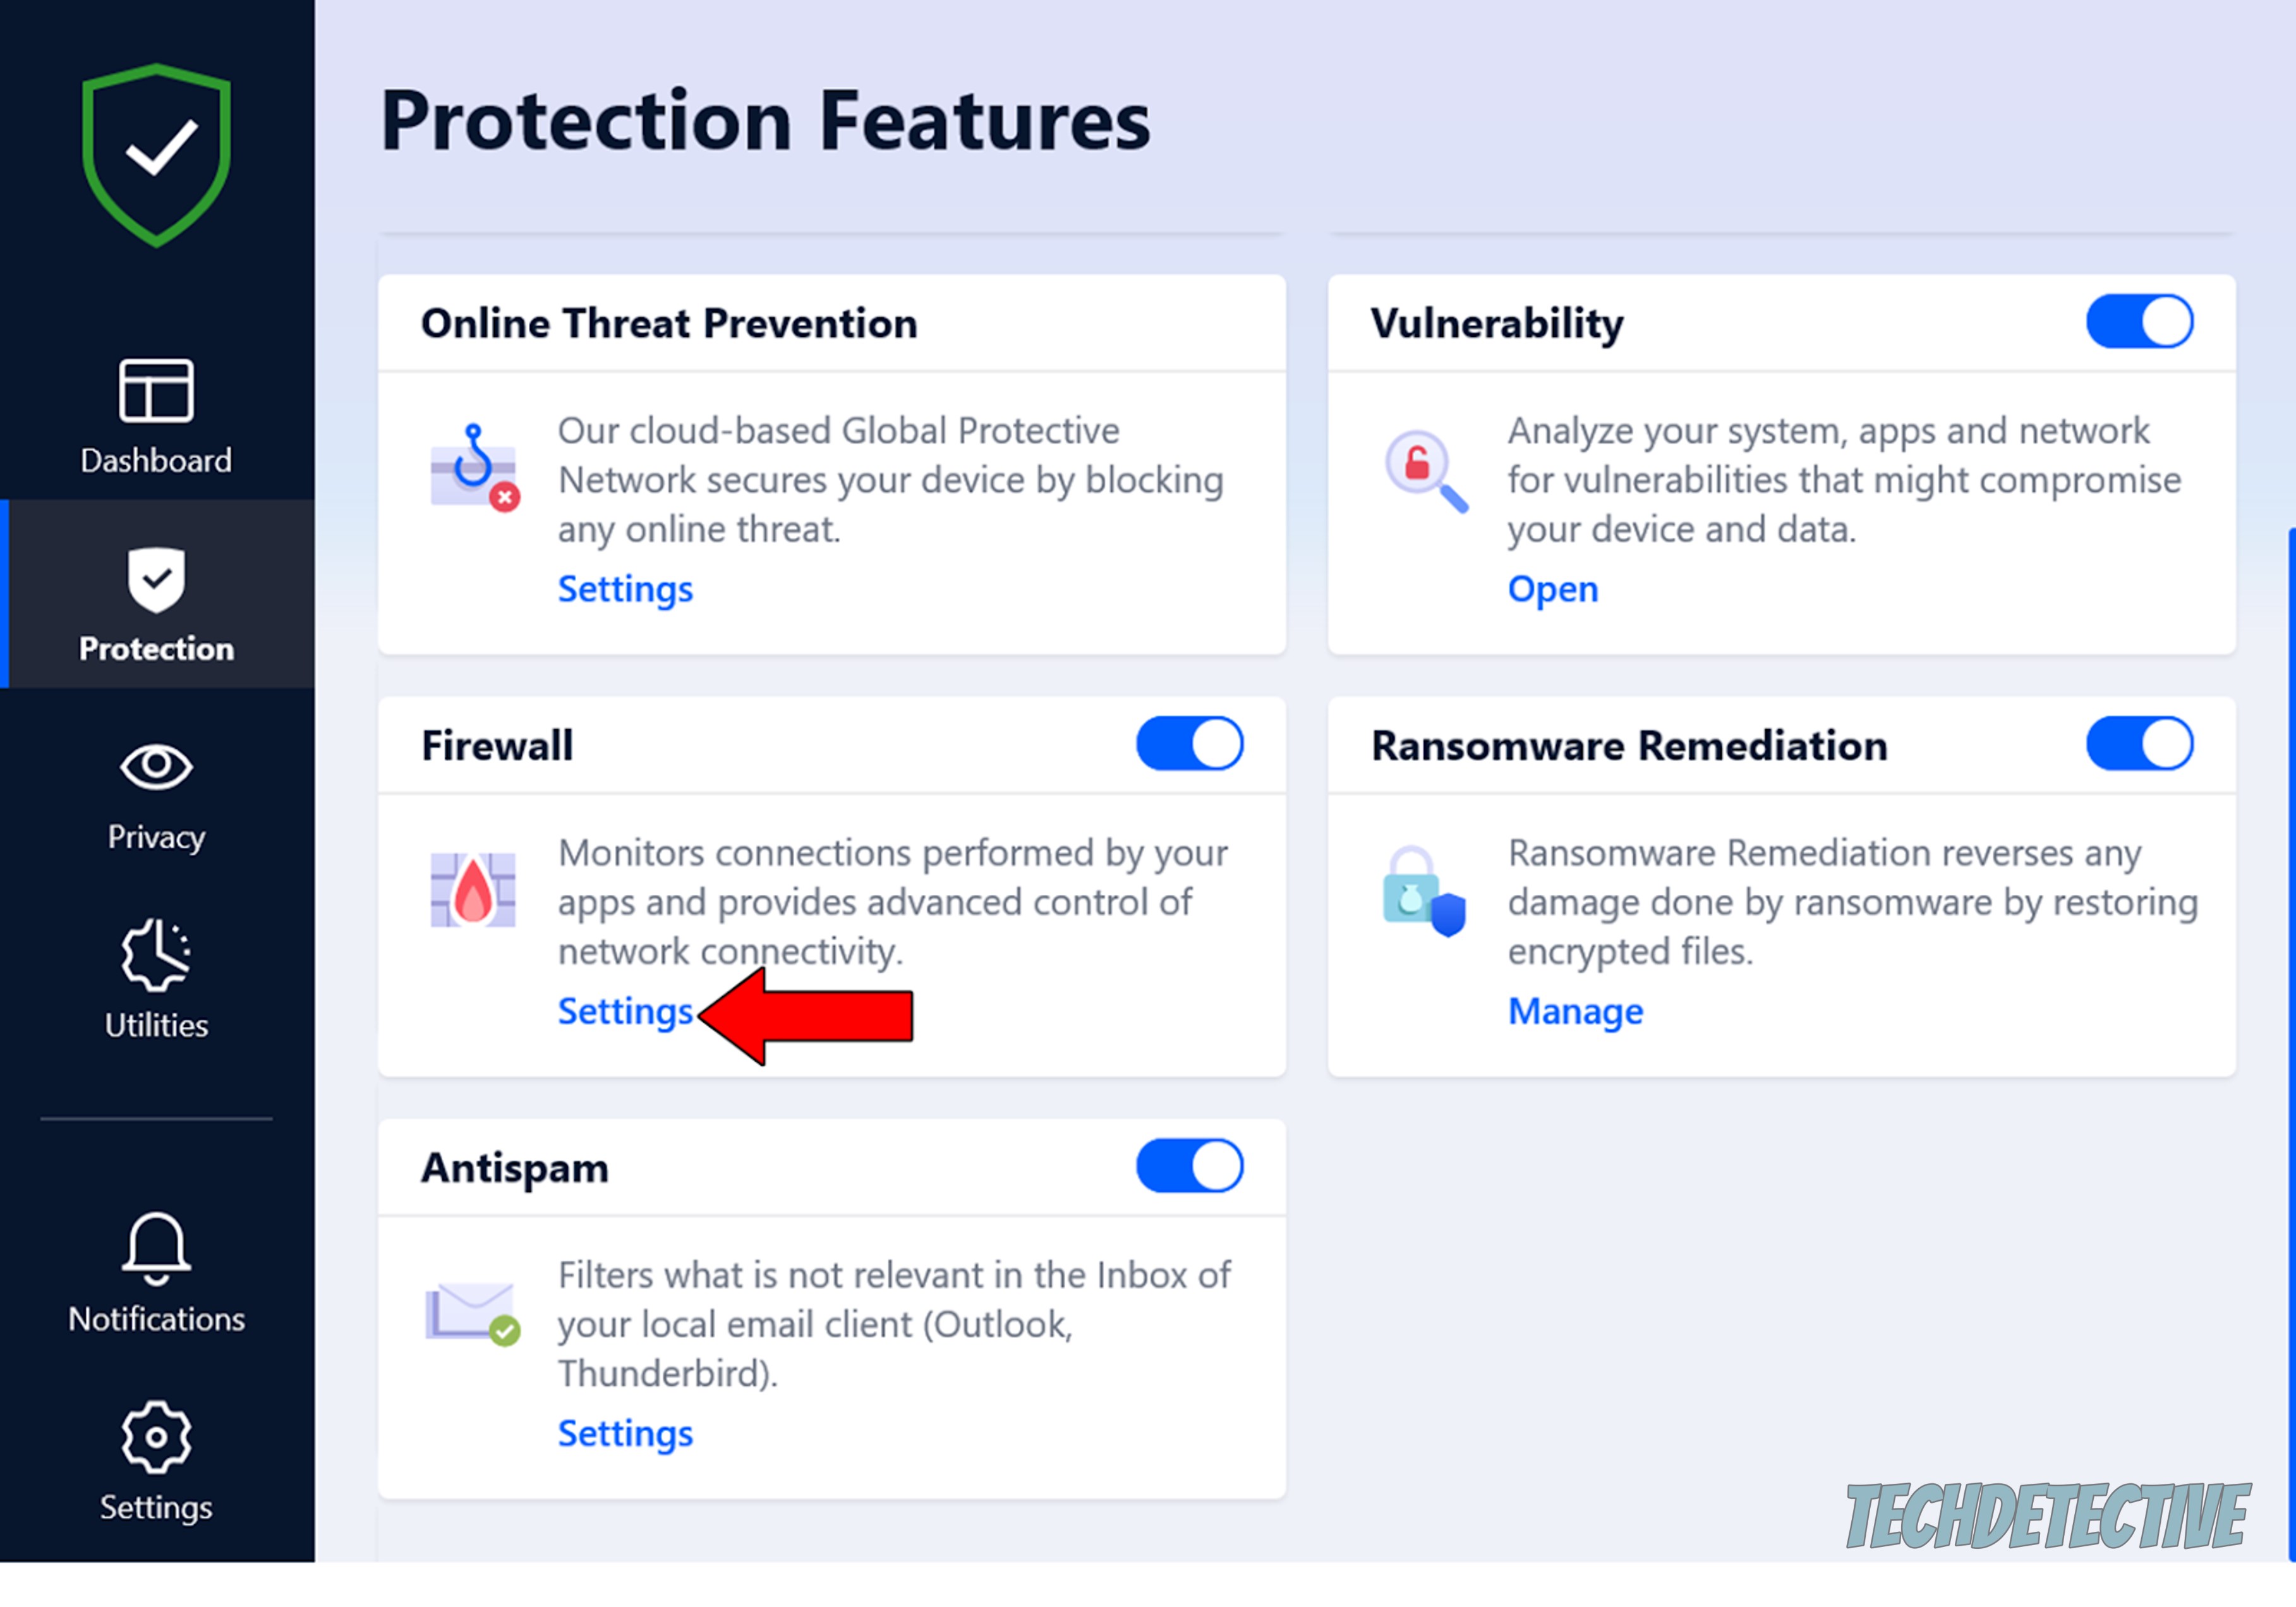
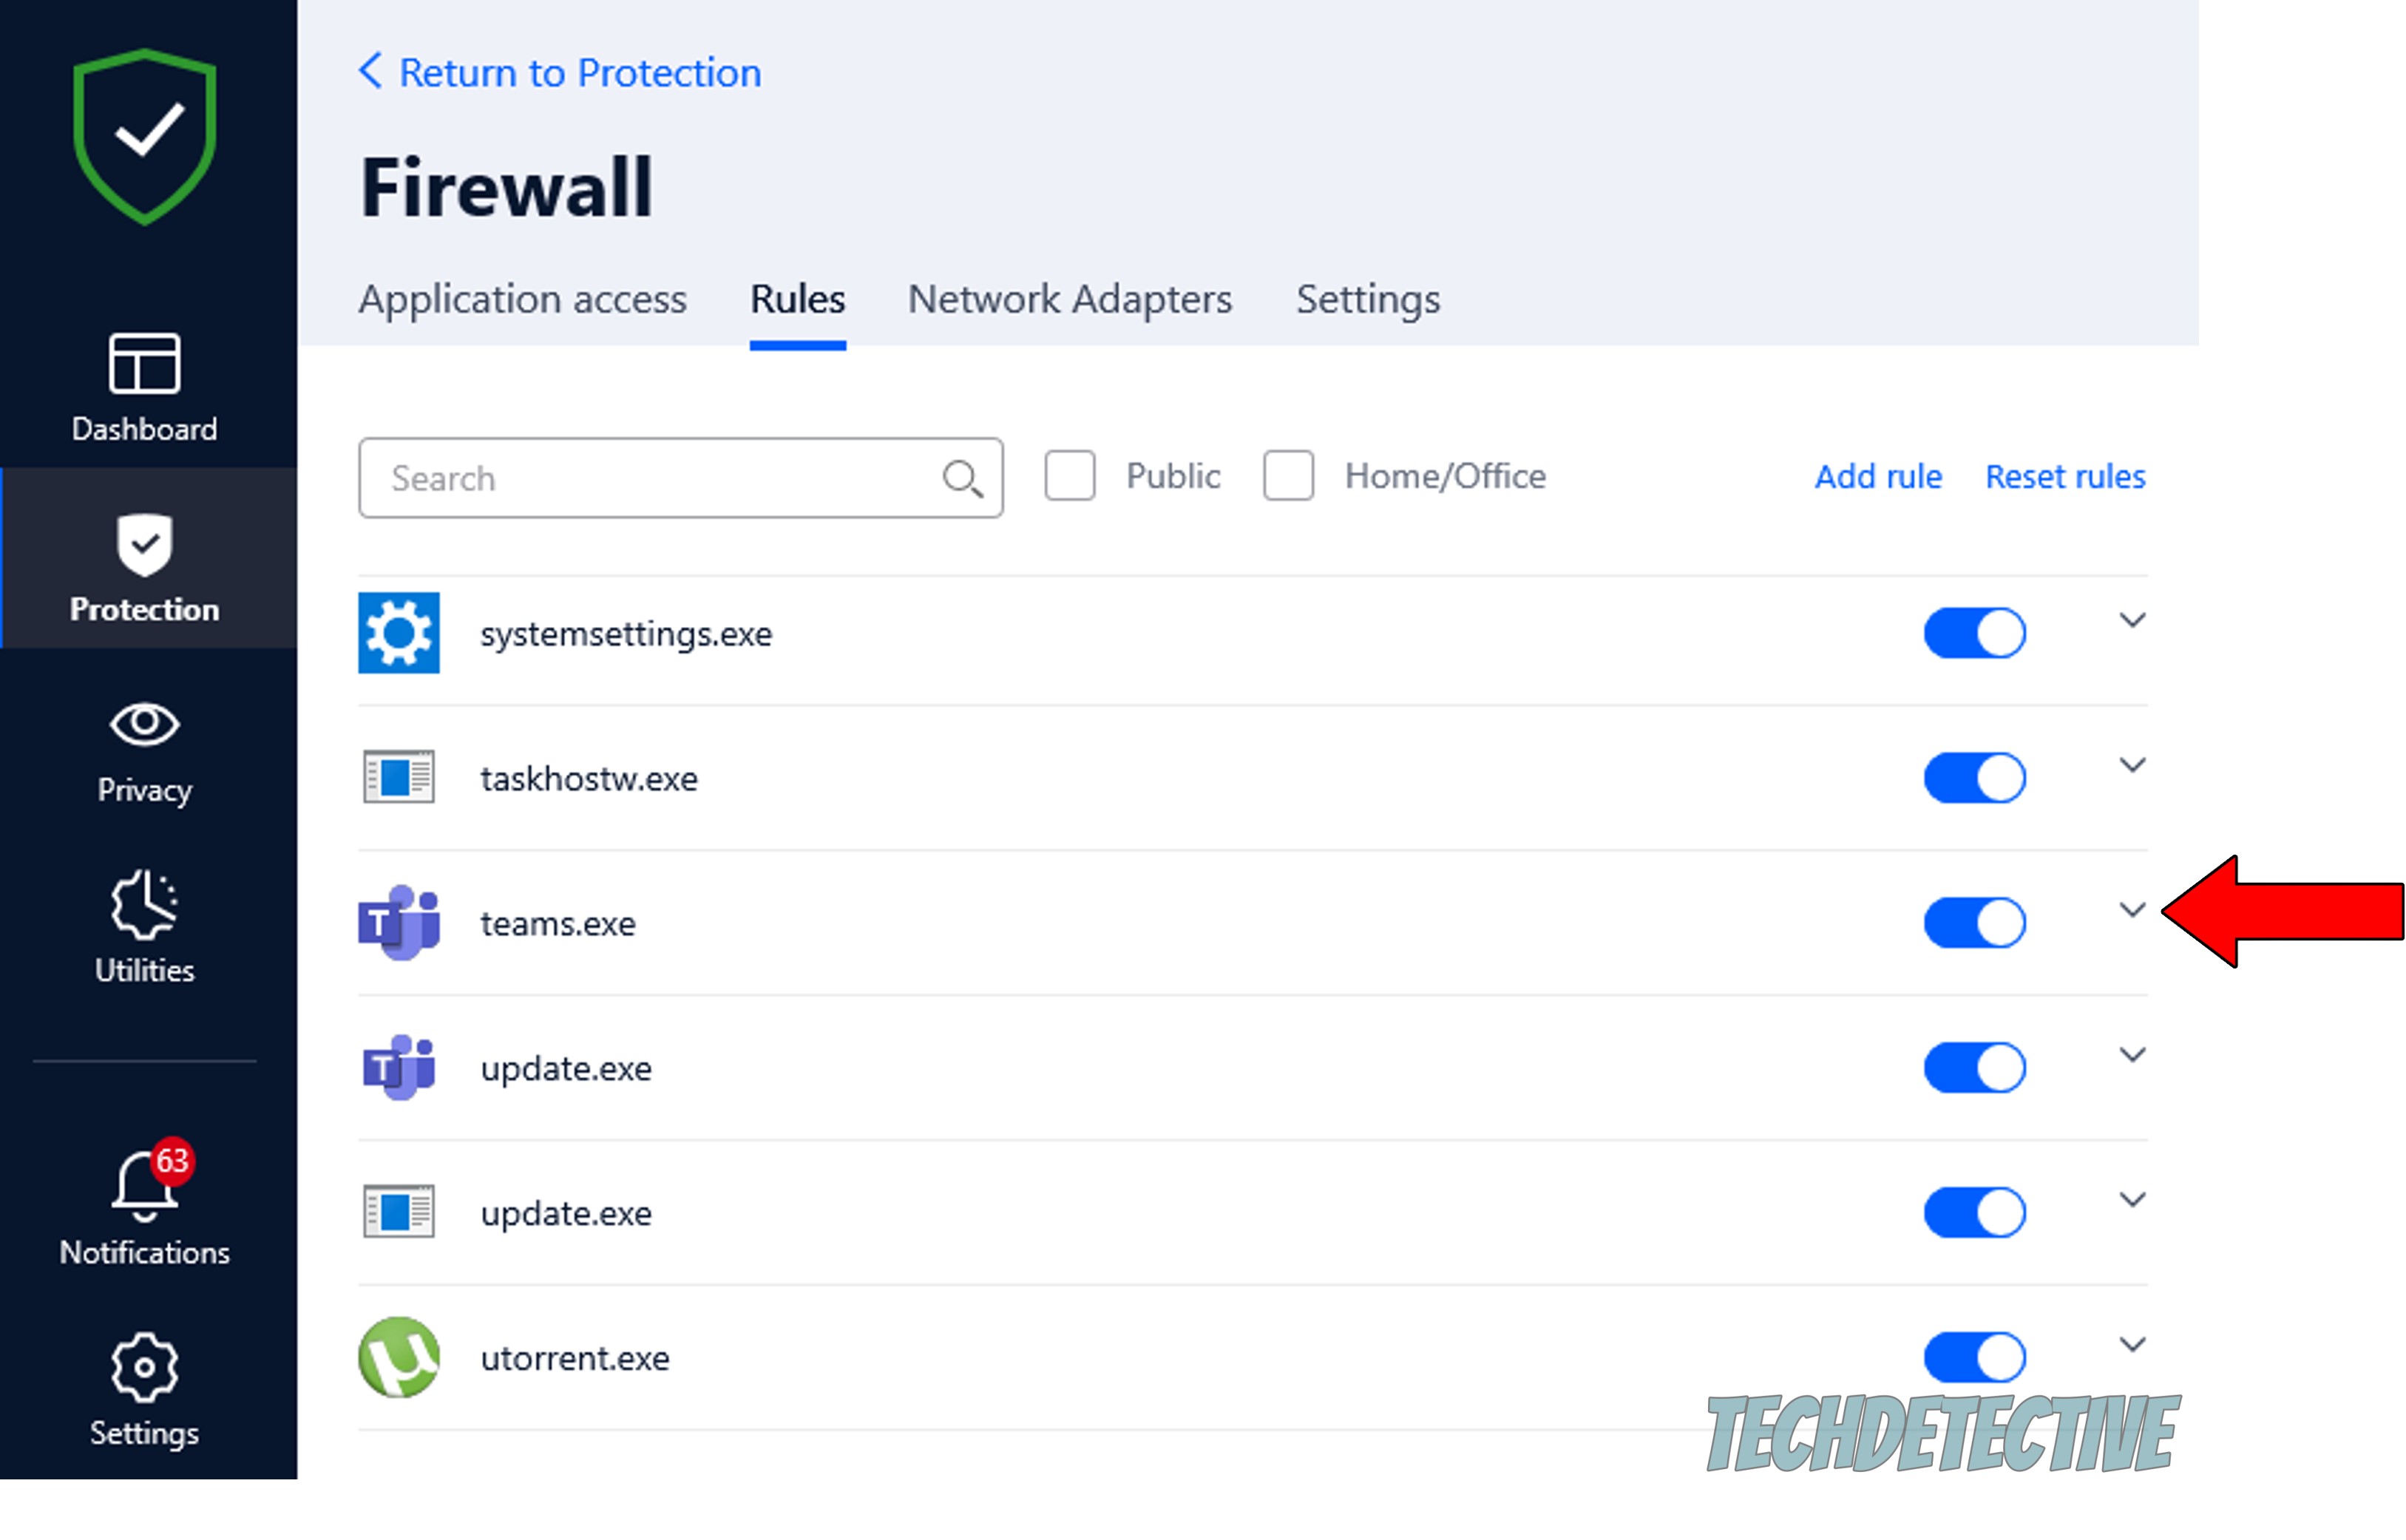
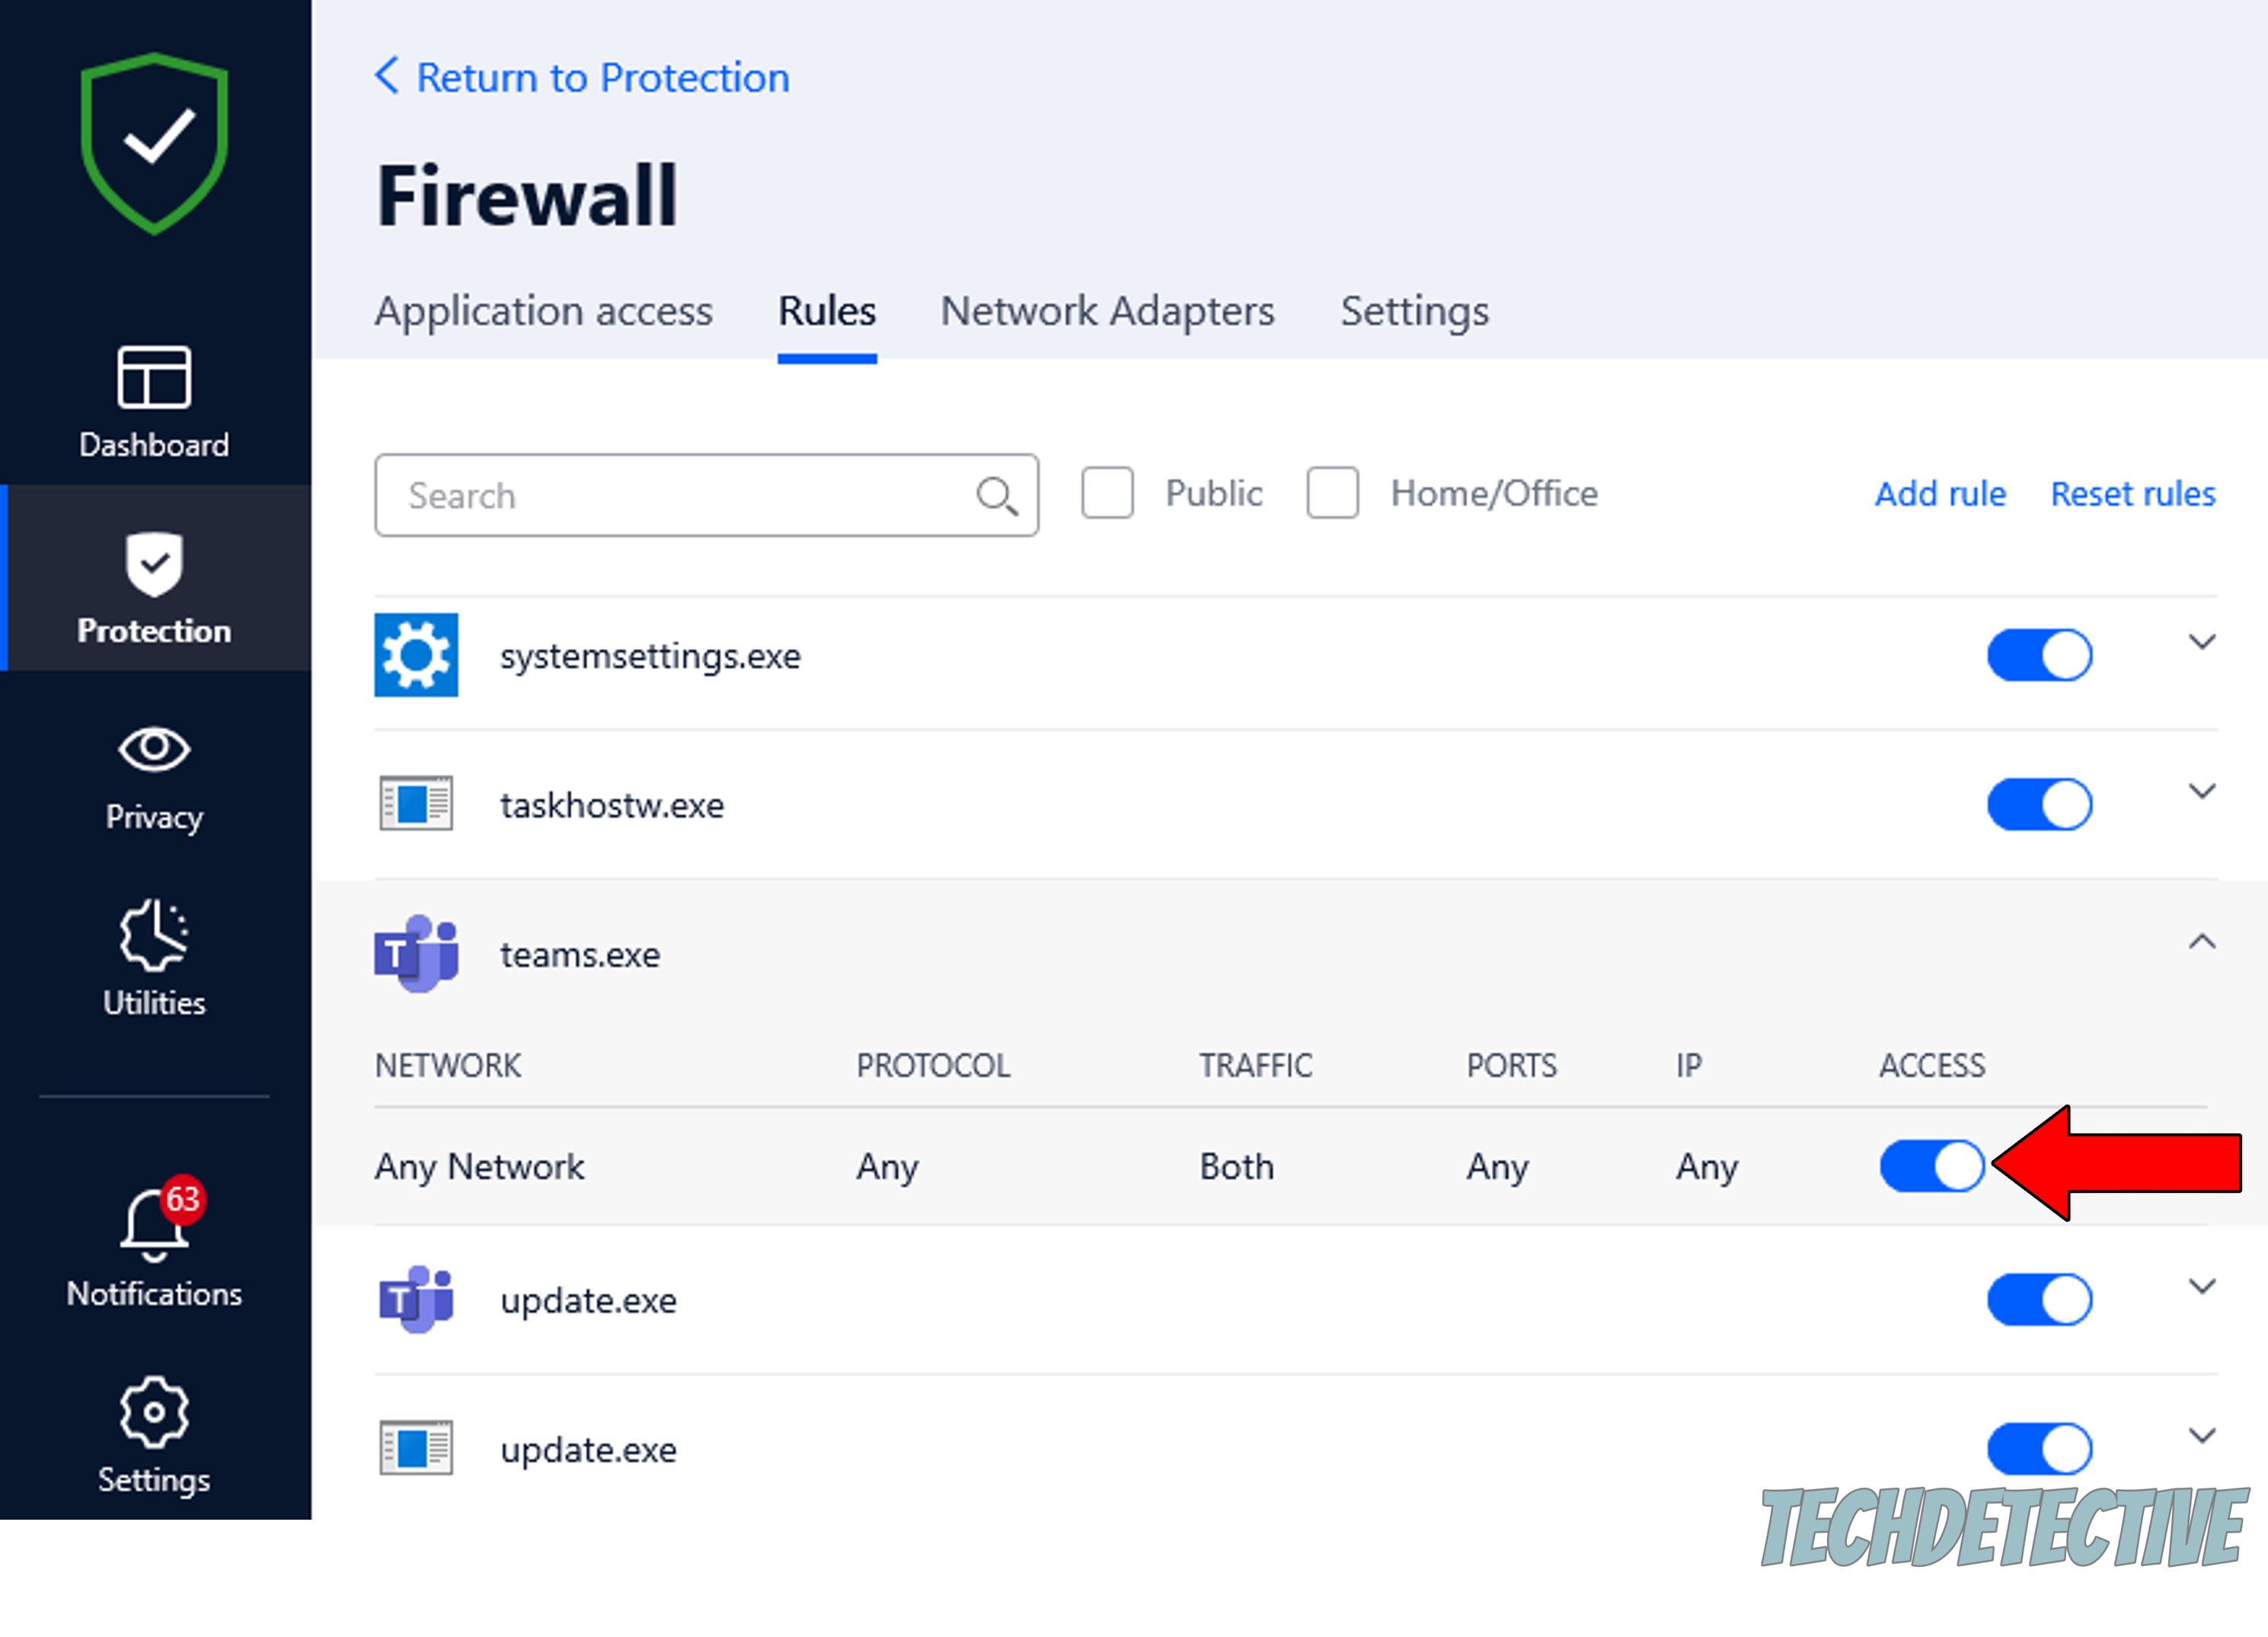
Solution: To do this, you’ll have to create a Firewall exception for Microsoft Teams. The process should be very similar across all products from different developers. For this example, I’ll show you how I do it in Bitdefender.
If creating an exception for the platform didn’t work, let’s consider the possibility of there being a deep-rooted corrupted file on your Teams folder.
That can quickly cause issues like this, and others, such as having the program keep going offline, a flickering screen, and much more.
In any of these cases, wiping all traces of the communications platform from your devices’ memory should work wonders and help fix the issue once you re-download it.
Solution: Here’s what you have to do:
Windows PC:

Mac:
I know that keeping your apps fully updated can feel like an unnecessary chore. But believe it or not, it can make a night and day difference.
Updates are something you don’t want to miss out on since they include new features and fixes to old bugs. Not to mention that if you wait too long, your currently installed version will stop being supported eventually.
Having this happen would easily explain why Microsoft Teams is not loading on startup, as well as why you’re experiencing other technical difficulties.
Now, in reality, this isn’t something most people will have to worry about because there’s automatic updating. But now and then, weak networks or glitches can get in the way. In scenarios like that, your best bet is to manually download and install the latest version of the platform to your systems.
Solution: PCs are known for being extremely persistent when it comes to updating. I bet you can remember more than one instance in which your computer went into “work mode” before an important presentation or an urgent online discussion.
So… yeah, you’re covered there.
Now, mobile devices, on the other hand are not nearly as reliable in that area, so here’s how you can manually update Microsoft Teams within iOS and Android systems.


For Android:
Now, let’s take a look at your Startup settings.
You see, it’s one thing to have Microsoft Teams added to the list of apps that start when your PC does, and a very different one to have it enabled. Normally, when you open this list in the Task Manager, you can change these settings to test which programs make your startup slower.
Let’s see the status of Teams and tweak a couple of things accordingly.
Solution: Here’s what you have to do:
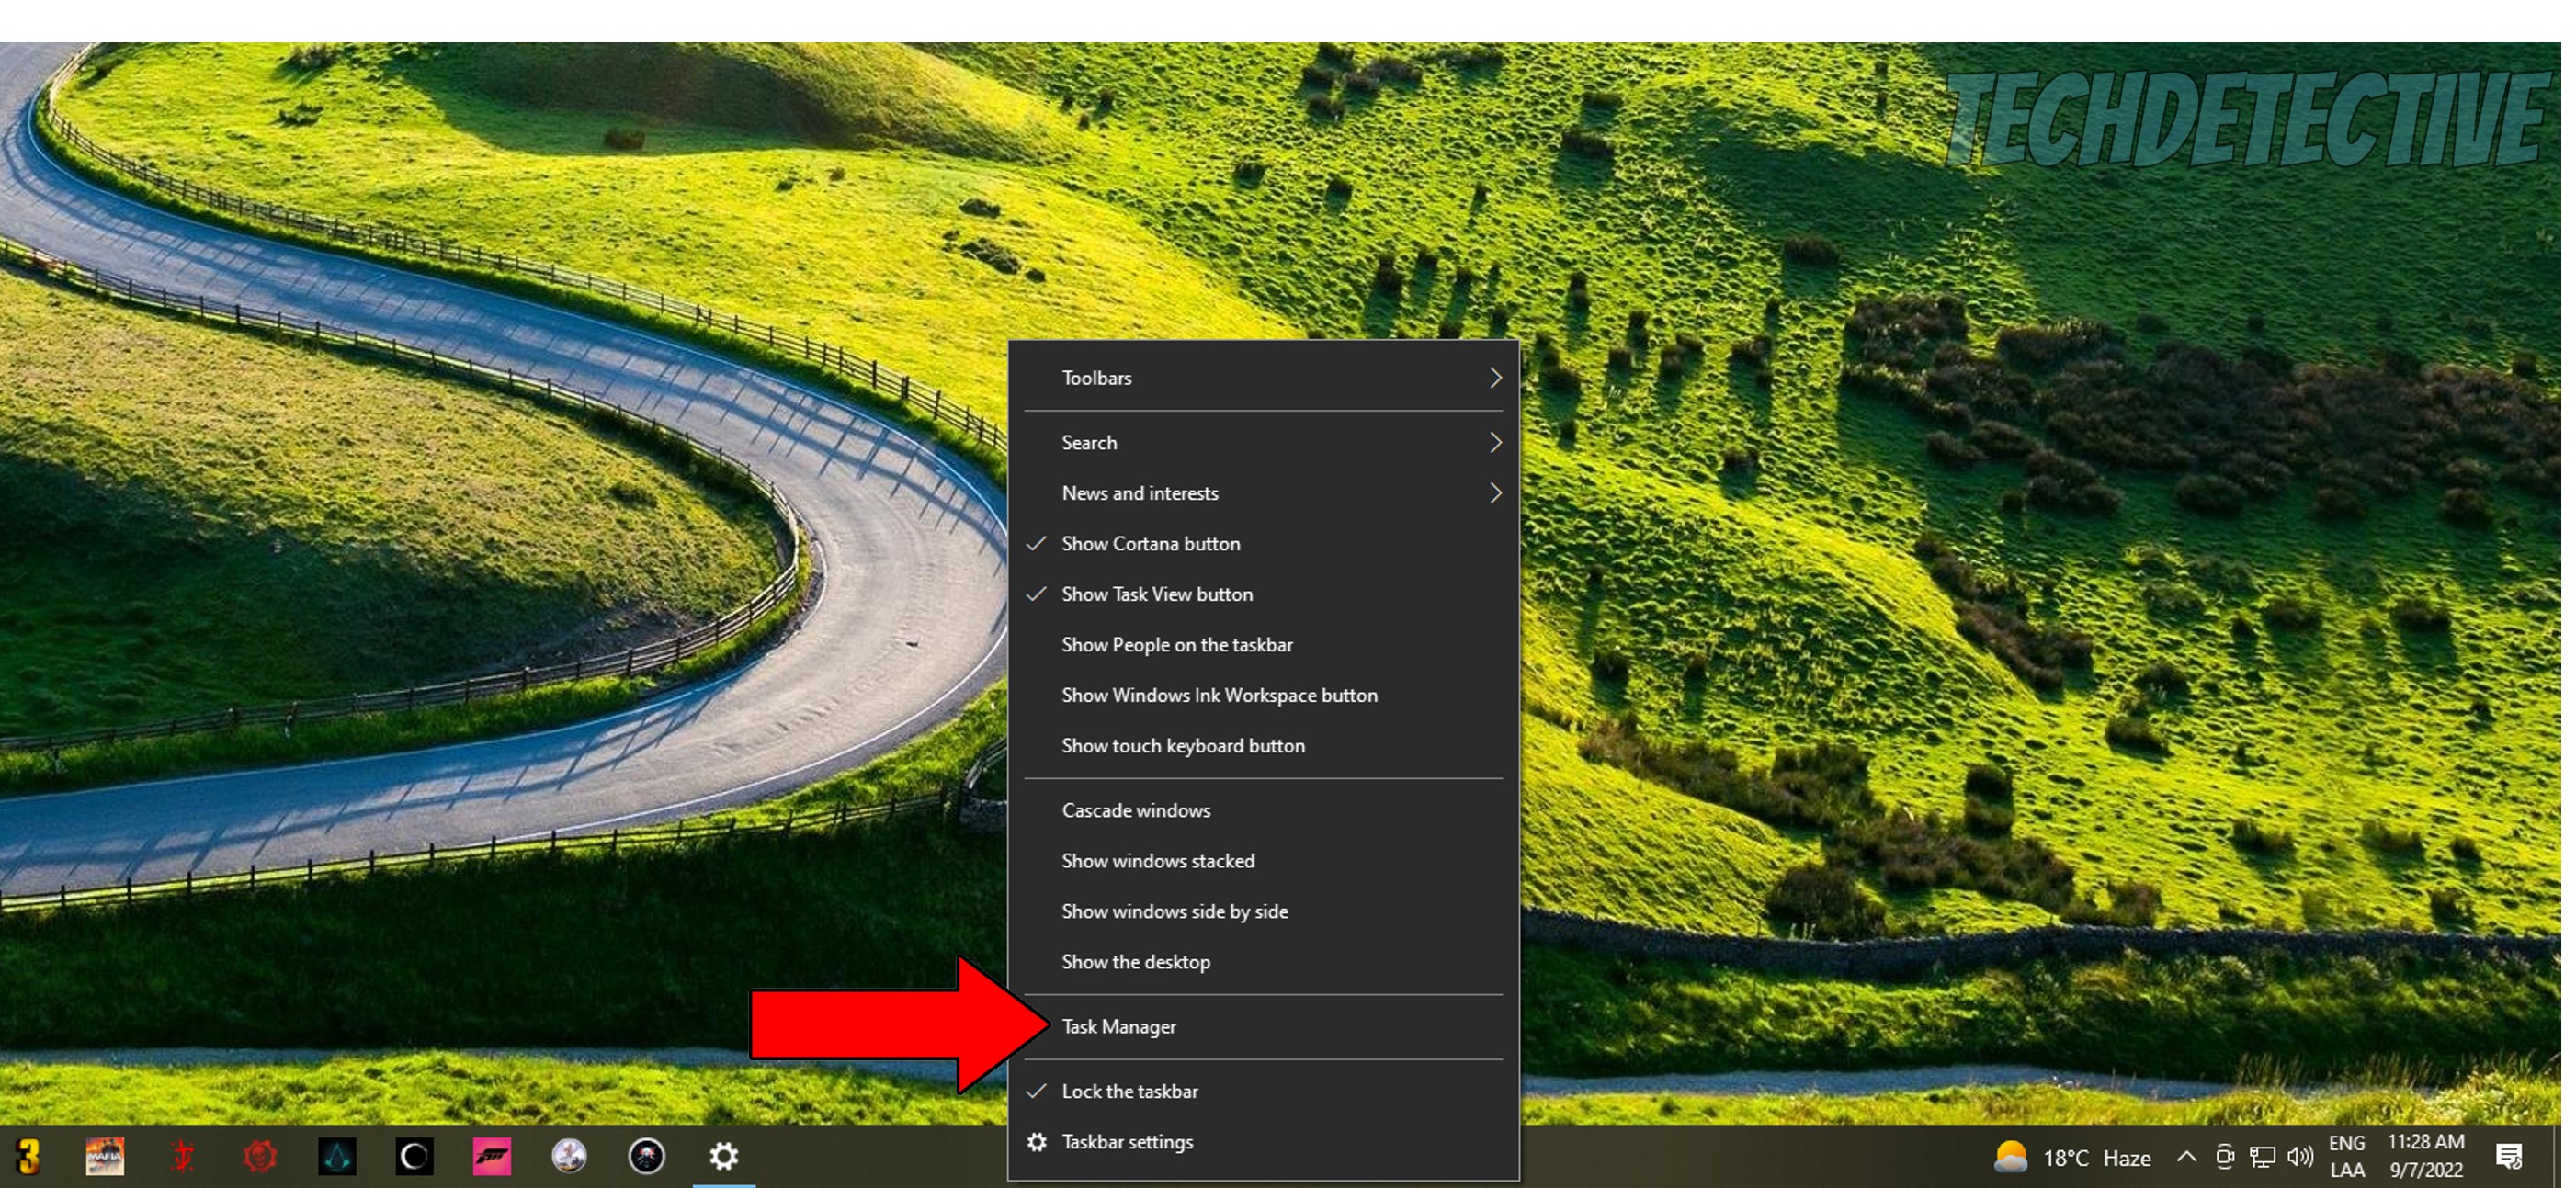
2. Once you are in the Task Manager, go to the “Startup” tab, find Teams, and if it’s disabled, please enable it

Lastly, let’s make sure nothing’s wrong with your cache.
In case you’ve never heard the term before or just want to know more about it, I’m more than happy to walk you through it.
An app’s cache is where essential information, such as files, login credentials and user preferences are stored. Keeping this data readily available helps Teams (and any other platform for that matter) give you a smoother experience and the ability to load quicker when launched.
Now, more often than not, leaving your cache alone is actually a good thing. But sometimes, it can accidentally store a corrupted file, which can quickly cause a world of trouble.
In cases like that, you’re better off clearing it.
Solution: I know this probably sounds like a job for a hacker, but trust me, it’s one of the simplest tech processes out there.
Here’s what you have to do:
Windows PC:
Mac:
Android:
That’s it!
I bet you didn’t think fixing this issue would be that fast. Sometimes, the idea of addressing our own technical difficulties can be a little intimidating. But I hope this piece has helped you see that, more often than not, things will go smoothly and won’t test your patience too much.
Remember to always look at a problem from all angles to discover as many solutions as possible. This will greatly increase your chances of success every time.
Thank you so much for sticking with me all the way to the end. If this article proved to be helpful to you, you’ll be very happy to know that we upload new content every week. While we’re hard at work, why not become a Tech Detective yourself by checking out our other interesting resources below?
Best of luck to you!


Detective ‘Gerry’ Molina is one of the most prolific detectives on our TechDetective team. He’s known for his ability to crack down on multitudes of tech crimes on behalf of you – the citizens of the internet. Molina is often the first point of contact for many cases, working to help free victims from the tyranny of tech issues.