Is Dolby Vision not working on your Netflix, and it’s making everything look lifeless?
That sucks! Ever since this technology was invented, it has improved the way in which we enjoy visual content, creating contrast between bright and dark elements.
I know having this happen is no fun, especially when you own a TV capable of taking full advantage of the high dynamic range this tool has to offer.
But don’t worry, you came to the right place for answers. Below, I’ve prepared some useful information regarding why this is happening, as well as 6 simple fixes you can try to address the situation.
When Dolby Vision is not working on your Netflix, you can try disconnecting your TV, turning off Test Participation, or reloading the platform. If that fails, you can also try updating the app/your TV, or checking the servers.
Keep reading to surprise your eyes!
Let’s start off by allowing your TV to take a breather. I know this sounds weird, but here’s why I’m suggesting it.
Believe it or not, for our favorite apps/devices to work, there need to be thousands of background processes running at the same time, all the time. More often than not, this happens without us noticing, and there’s nothing else to it. But occasionally, one or more of said processes can be caused to crash by bugs or corrupted files.
In these events, your Smart TV and the apps within it can start acting strange, which would explain why Dolby Vision is not working on your Netflix, or why the progress bar is stuck on your screen.
Solution: If you suspect this to be to blame for your current situation, try unplugging your TV from the wall socket and waiting about 10-15 minutes before plugging it back in.
Next, let’s try disabling a feature that, while useful, might be interfering with your experience.
Netflix’s “Test Participation” is an option that users can enable to get early access to certain shows, platform features, and other content. It usually comes activated by default, and most people don’t even bother to turn it off, as it seems to do no harm.
You’re probably wondering why you’d want to be one of the few people to pass on this opportunity, and I get it – it apparently makes no sense. But it turns out that keeping it on might be the reason Dolby Vision is not working on your Netflix.
The reason this feature interferes with Dolby Vision is currently unknown, at least to anyone who doesn’t work at Netflix. But there’s evidence that deactivating “Test Participation” has helped several people solve this issue permanently, so it’s worth a shot, isn’t it?
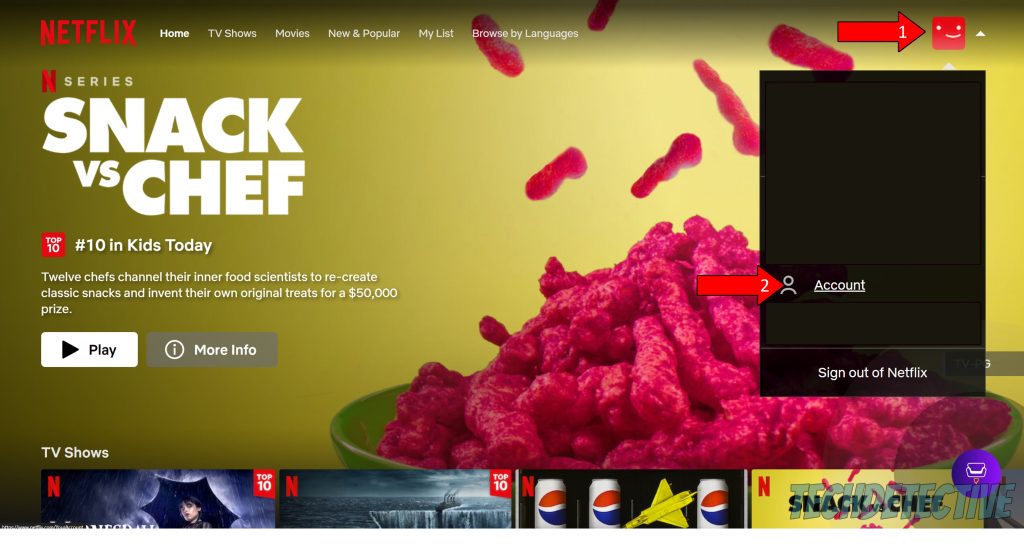
Solution: To toggle this feature off, you’ll have to log into your Netflix profile from your PC, as the app version on most devices doesn’t have the option to access these settings.
Once you’re on your computer, please follow these simple steps:
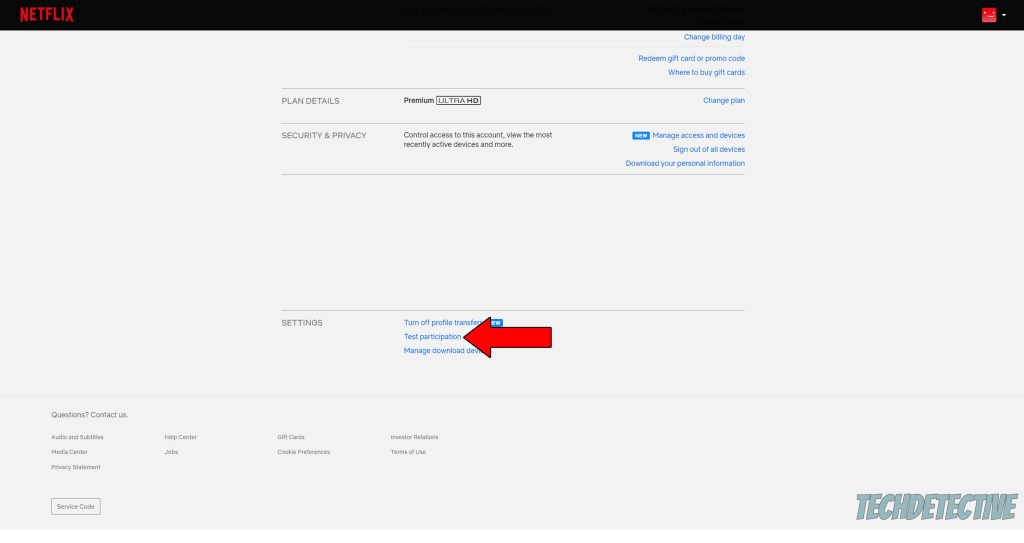
3. On the new window, scroll to the bottom of the page and find “Test Participation”
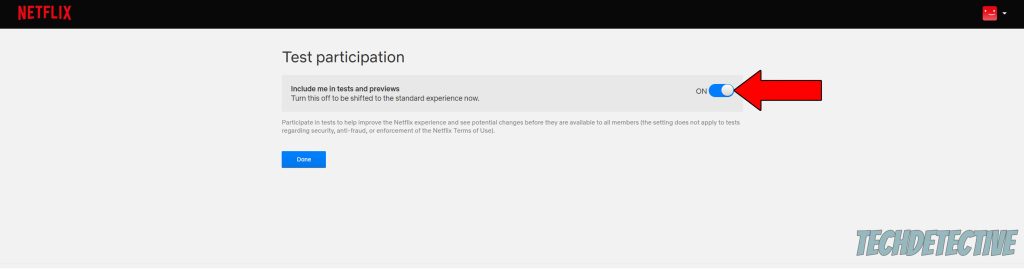
4. Find the button to activate/deactivate the feature and toggle it off. Then, click on “Save”.
If you’re still struggling, let’s try reloading the platform, but not in the traditional way.
Normally, I’d ask you to close the app or “force stop” it and then relaunch it to test this fix. But in this case, there appears to be a different method that might prove to be more effective.
Some of the service’s users have reported that reloading the app from within the help section has worked wonders to get everything back to normal.
Solution: The following steps were tested out on a Sony Bravia Smart TV, so the process might vary depending on your make and model. Sadly, I can’t guarantee that you will get this option if you use a different brand, but it’s worth a shot:
Assuming that you can’t find these options, you can always close and relaunch the app the traditional way. Here’s an example of how this goes on a Hisense TV:
Assuming that relaunching didn’t work, let’s move on to making sure that you’re using the latest software available. I know this sounds unimportant, but trust me when I say that it’s one of the easiest ways to keep things running like clockwork, not to mention that it’s in your best interest.
Why? Simple.
Typically, app updates come packed with new and improved features, patches for bugs, and optimized settings that work faster with fewer resources. Besides, while it’s not a rule, most Tech companies stop supporting older versions of an app when a new one is released.
This is mainly done for safety purposes, and it’s one of the reasons they insist so much that you install them as soon as possible.
That being said, in most cases, you have nothing to worry about, as the automatic updating feature on your devices normally looks for available updates and installs them. But now and then, weak networks, corrupted files, or coding bugs get in the way and keep this from happening.
Solution: If you suspect that outdated software is the reason Dolby Vision is not working on your Netflix, manually updating the app might do the trick.
Here are some examples of how this process goes on a couple of different streaming devices:
On a Hisense Smart TV:
If you don’t own either of these devices, that’s ok. You can always go to Google and search for: “How to update Netflix on <Your Device’s Make And Model Go Here>”. This should bring up detailed instructions for your specific case.
Now that you know how important it is to keep Netflix updated, I’d like to mention that keeping your streaming devices in the same condition is also critical.
App and device operating system versions are typically designed hand in hand, so it stands to reason that they’ll be the most efficient when used together. If you’re currently using an outdated operating system version with a fully updated Netflix app or vice versa, it could explain why Dolby Vision is not working on your Netflix, or why the platform keeps logging you out.
Now, as I mentioned earlier, you normally don’t have to worry about this thanks to the automatic updating feature on your devices. But as you’ve seen thus far, things don’t always go as originally planned.
Solution: Just as it happens with the app updating process, some steps might vary depending on your devices’ make and model, but here’s an example using Hisense and Samsung Smart TVs to give you a general idea:
Hisense TV:
Samsung TV:
Lastly, let’s make sure Netflix’s servers are not failing.
If you’re not sure what these are, that’s ok – I’m happy to give you a brief explanation. Servers are Tech equipment that back up data in the cloud and manage user traffic. It’s thanks to them that we can play online games or watch our favorite content without messing with other people’s experiences.
Servers are the backbone of many companies’ daily operations, and as such, any failure can be disastrous to them, and their end users. In fact, failing servers could be why Dolby Vision and other features are not working on your Netflix.
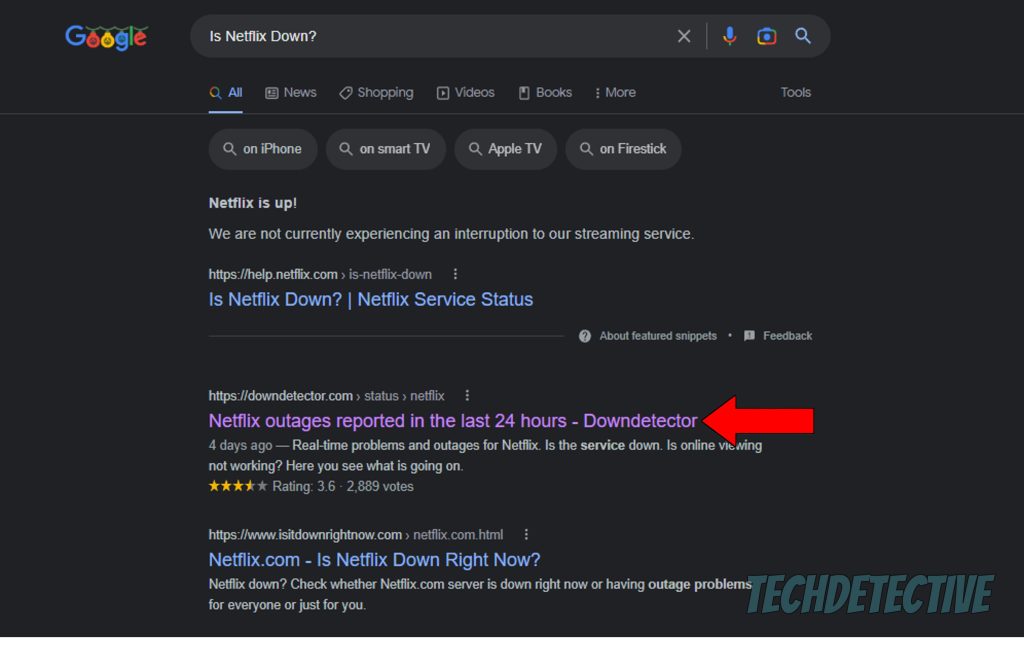
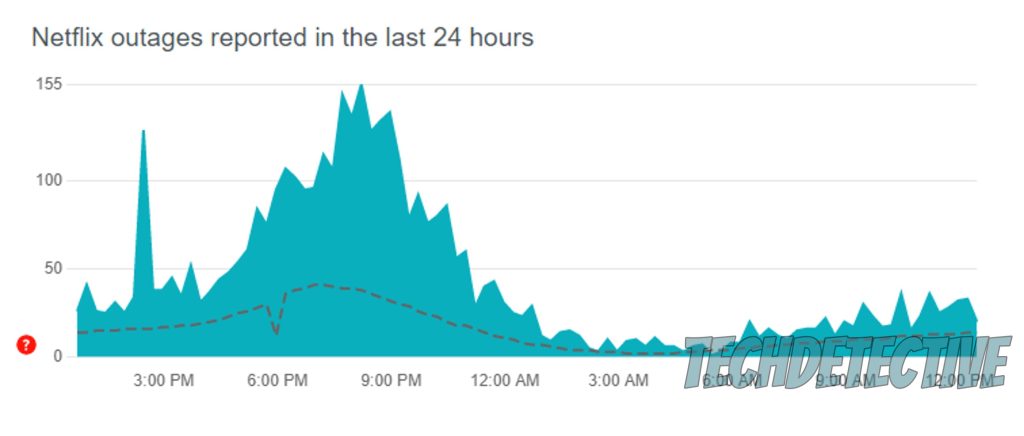
Solution: To confirm this as the source of the problem, please try checking their live status online. It’s a very easy and quick process:
Here’s how you can do it on your main browser:
That about covers it.
When Dolby Vision is not working on your Netflix, it can seem pointless to own a streaming device capable of using this technology.
However, I hope this piece has shed a light on the matter and helped you see that, in most cases, something as simple as updating the app or disabling “Test Participation”, can get everything back to normal.
I really appreciate you sticking with me all the way to the end. If this article piqued your interest and answered all your questions, please check out our other wonderful resources below to become a Tech Detective yourself!
Best of luck to you.


Detective ‘Gerry’ Molina is one of the most prolific detectives on our TechDetective team. He’s known for his ability to crack down on multitudes of tech crimes on behalf of you – the citizens of the internet. Molina is often the first point of contact for many cases, working to help free victims from the tyranny of tech issues.