
Are you having trouble with Apple Music skipping songs?
Apple Music is a great streaming service that offers millions of songs; but, just like any other platform, it can have performance problems.
I know, there’s nothing more frustrating than feeling inspired by your favorite playlist and then be suddenly interrupted because Apple Music keeps skipping your songs.
This is a problem that a lot of users experience, but don’t worry, it can be easily fixed, you’ll be listening to your favorite tracks again in no time.
These are my 8 tips to stop your Apple Music from skipping songs:
Keep reading to fix the problem and sing along to your favorite playlists!
As simple as it seems, sometimes an app that isn’t working at its best just needs to be fully closed and re-opened. To fully close Apple Music on your phone, follow these steps:
For iPhone X and later:
For iPhone SE, 8, and earlier:
For Android:
If this didn’t do the trick, don’t worry. The following tips should.
If a few tracks on a playlist don’t sync successfully to your iCloud account, your Apple Music may keep skipping the songs. To re-sync your playlist on your iOS devices, you’ll just need to:
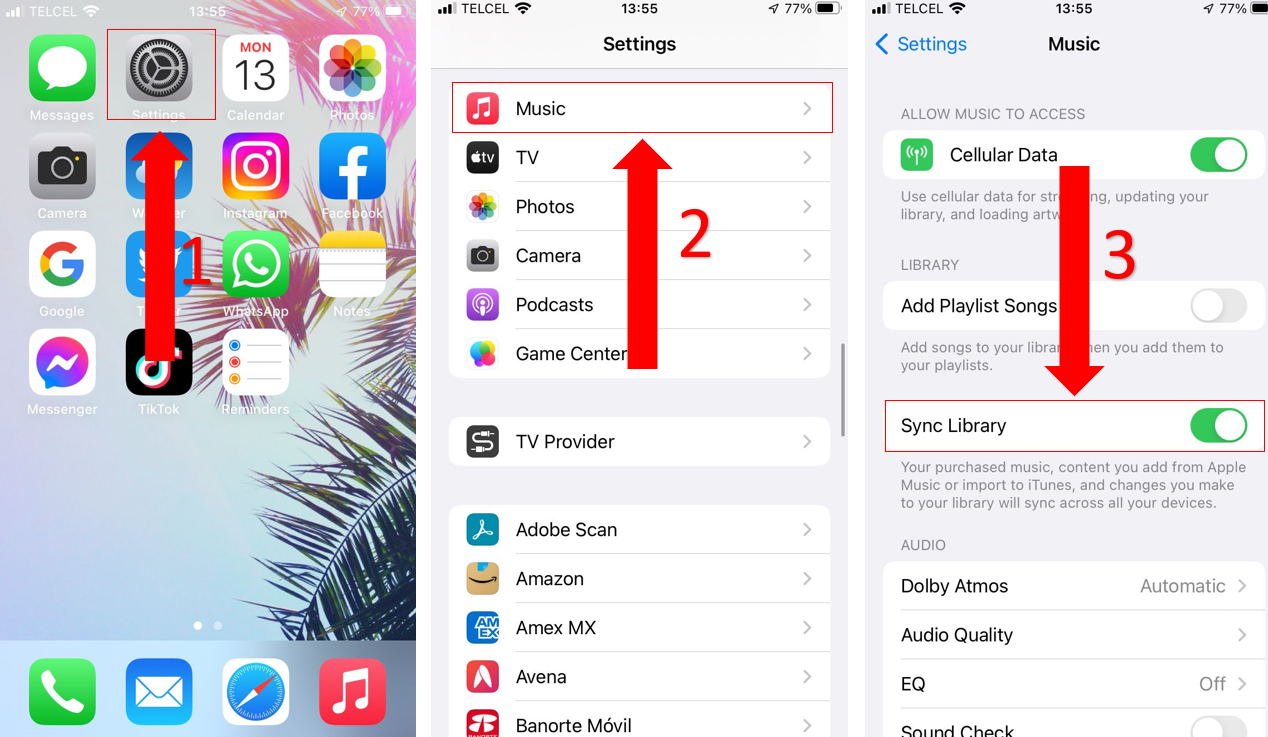
I recommend having the “Sync Library” button always on, this way you can access your music library without interruptions.
Think of the cache as your devices’ scrapbook. This is where an app or browser stores essential information.
Apple Music, for example, stores lyrics, images, fonts, videos and other types of content in there. The cache helps your app run faster because you’ll avoid re-downloading tons of information every time you enter Apple Music or any other app.
Now, if cached data makes your browsing experience faster, why should clearing it frequently be a good idea?
Simple. Because it can help get rid of corrupted files.
Sometimes, when an app stores information in the cache, certain elements can become damaged, resulting in glitches and other performance issues. When you clear your cache, these get a chance to restart from scratch unaffected.
Clear your Apple Music cache with these simple steps:
For iPhone, iPad, or iPod:
For Android devices:
Apple recently launched Apple Music Web that allows users to listen to music in their PC’s browser without the need to download the iTunes app. If you’re using Apple Music Web, you can clear your browser’s cache in 5 simple steps:
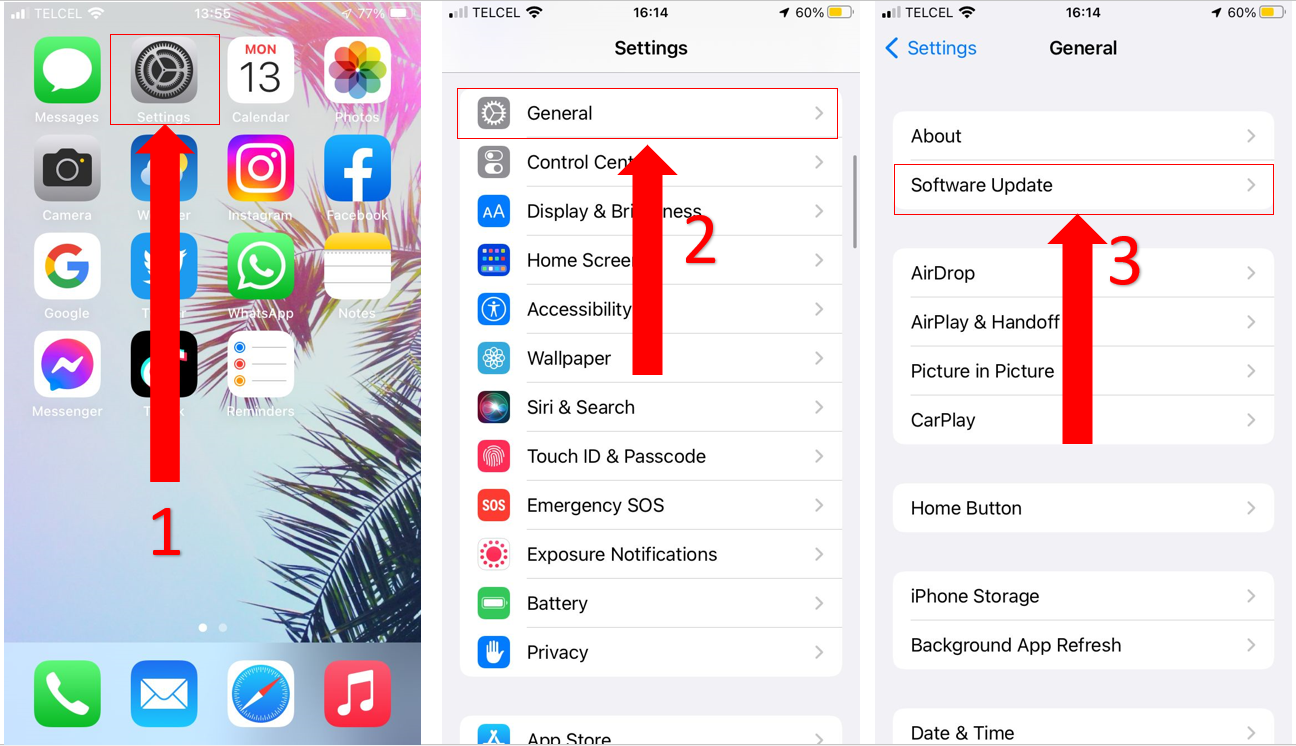
Like any other app out there, Apple Music often releases new features, and these are included in iOS updates. Updating your device might stop Apple Music from skipping your songs.
To check if there are any available iOS updates:
Do you have an Android device? Great! Updating Apple Music in Google Play won’t take more than 3 minutes! You’ll just have to:
Some people say that having a smartphone feels like a superpower, and I agree! Nowadays, phones offer thousands of options to help make our lives easier. We can browse freely, listen to music, and even go grocery shopping.
However, one thing a lot of people are not familiar with, is restarting their phones. If you’re one of them, you might want to learn how.
Giving your device a quick reset can help fix glitches and unload your RAM memory.
To restart your iPhone X, 11, 12, or 13:
For iPhone SE, 8, 7 or 6:
For Android phones:
If the fixes above didn’t do the trick, the problem might not be on your end! Although it doesn’t happen very often, sometimes Apple’s servers may fail, and there is no shortage of reasons.
Luckily, Apple has a webpage that tells you if their servers are having trouble.
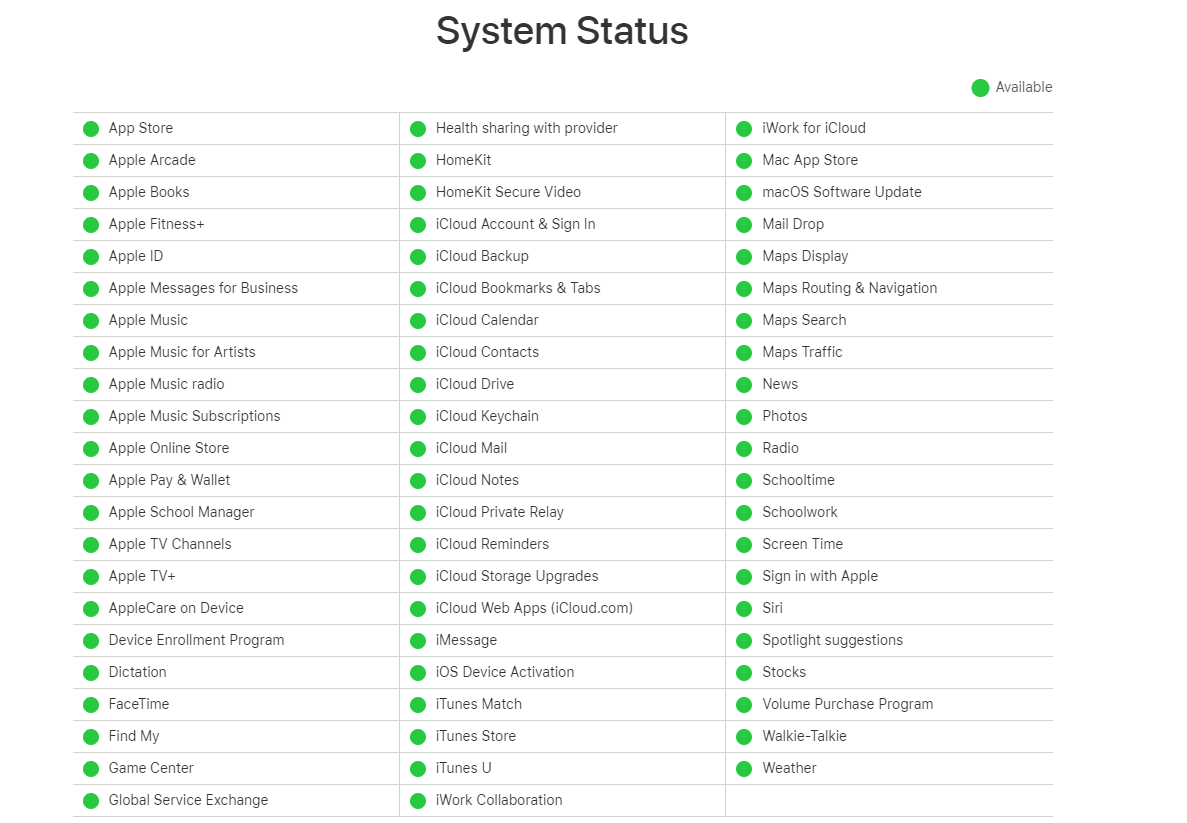
Sadly, if the website shows that Apple Music is down, the only thing you can do is wait until the problem is resolved.
But don’t worry, these issues never last long.
Although it’s rare to encounter corrupted songs, sometimes these may be the cause of Apple Music skipping your songs.
Songs may get corrupted due to several reasons. Luckily, solving this won’t take more than 5 minutes.
You’ll just need to delete the songs in Apple Music that usually skip after playing for a while.
Follow these steps to fix it:
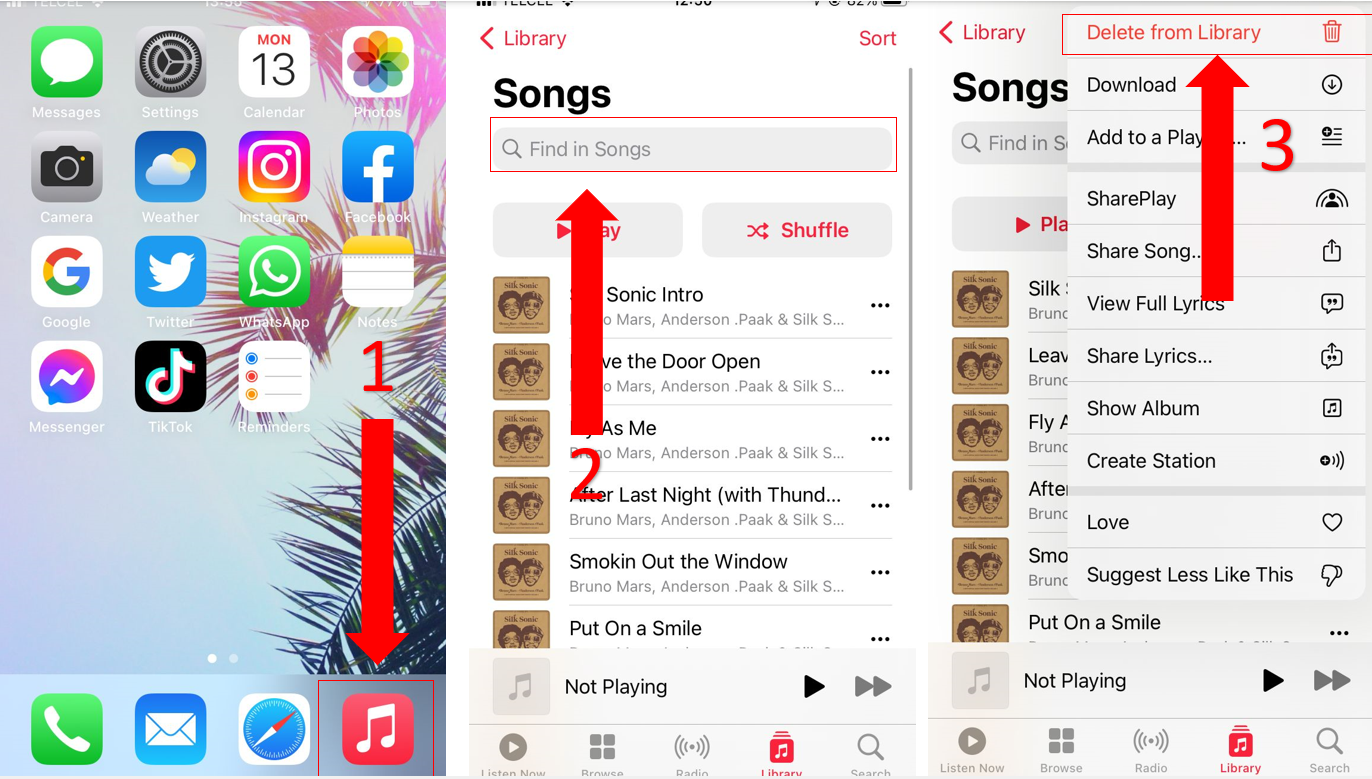
You can download them again by following these steps:
If you’re like me and love listening to your favorite music on Bluetooth devices like earphones or speakers, you might want to take into consideration the area of coverage.
Normally, the coverage range of a Bluetooth connection is 33 feet (10 meters). If you’re further away from your phone while cooking, working out, or doing something else… you might want to get closer until you’re within range.
If you’re constantly in and out of the Bluetooth range, Apple Music will pair and unpair with your devices intermittently. This, in turn, may cause the app to keep skipping over the current song you’re trying to play.
Needing some me-time with your favorite songs, only to find that Apple Music has other plans, can be frustrating.
Hopefully, now that we’ve covered everything, you’ll be able to enjoy your playlists uninterrupted.
Remember to check if your songs are synced to iCloud, make sure your phone has the latest updates installed, and, if you’re using any Bluetooth devices, do your best to stay within range!
Thanks for taking the time to read this article! Here at Tech Detective, we love coming up with solutions to everyday problems. If you found this information helpful, make sure to read our other articles below.
Enjoy your jam sessions!


Detective ‘Monse’ Cancino has been cracking down on tech issues for years. Starting out as a local cop, she’s quickly risen to the full rank of Tech Detective.
Cancino is our resident iPhone specialist. She’s often cracking cases related to iOS errors, streaming malfunctions, and locking up buffering bandits.